> ## Documentation Index
> Fetch the complete documentation index at: https://docs.comfy.org/llms.txt
> Use this file to discover all available pages before exploring further.
# Getting Started
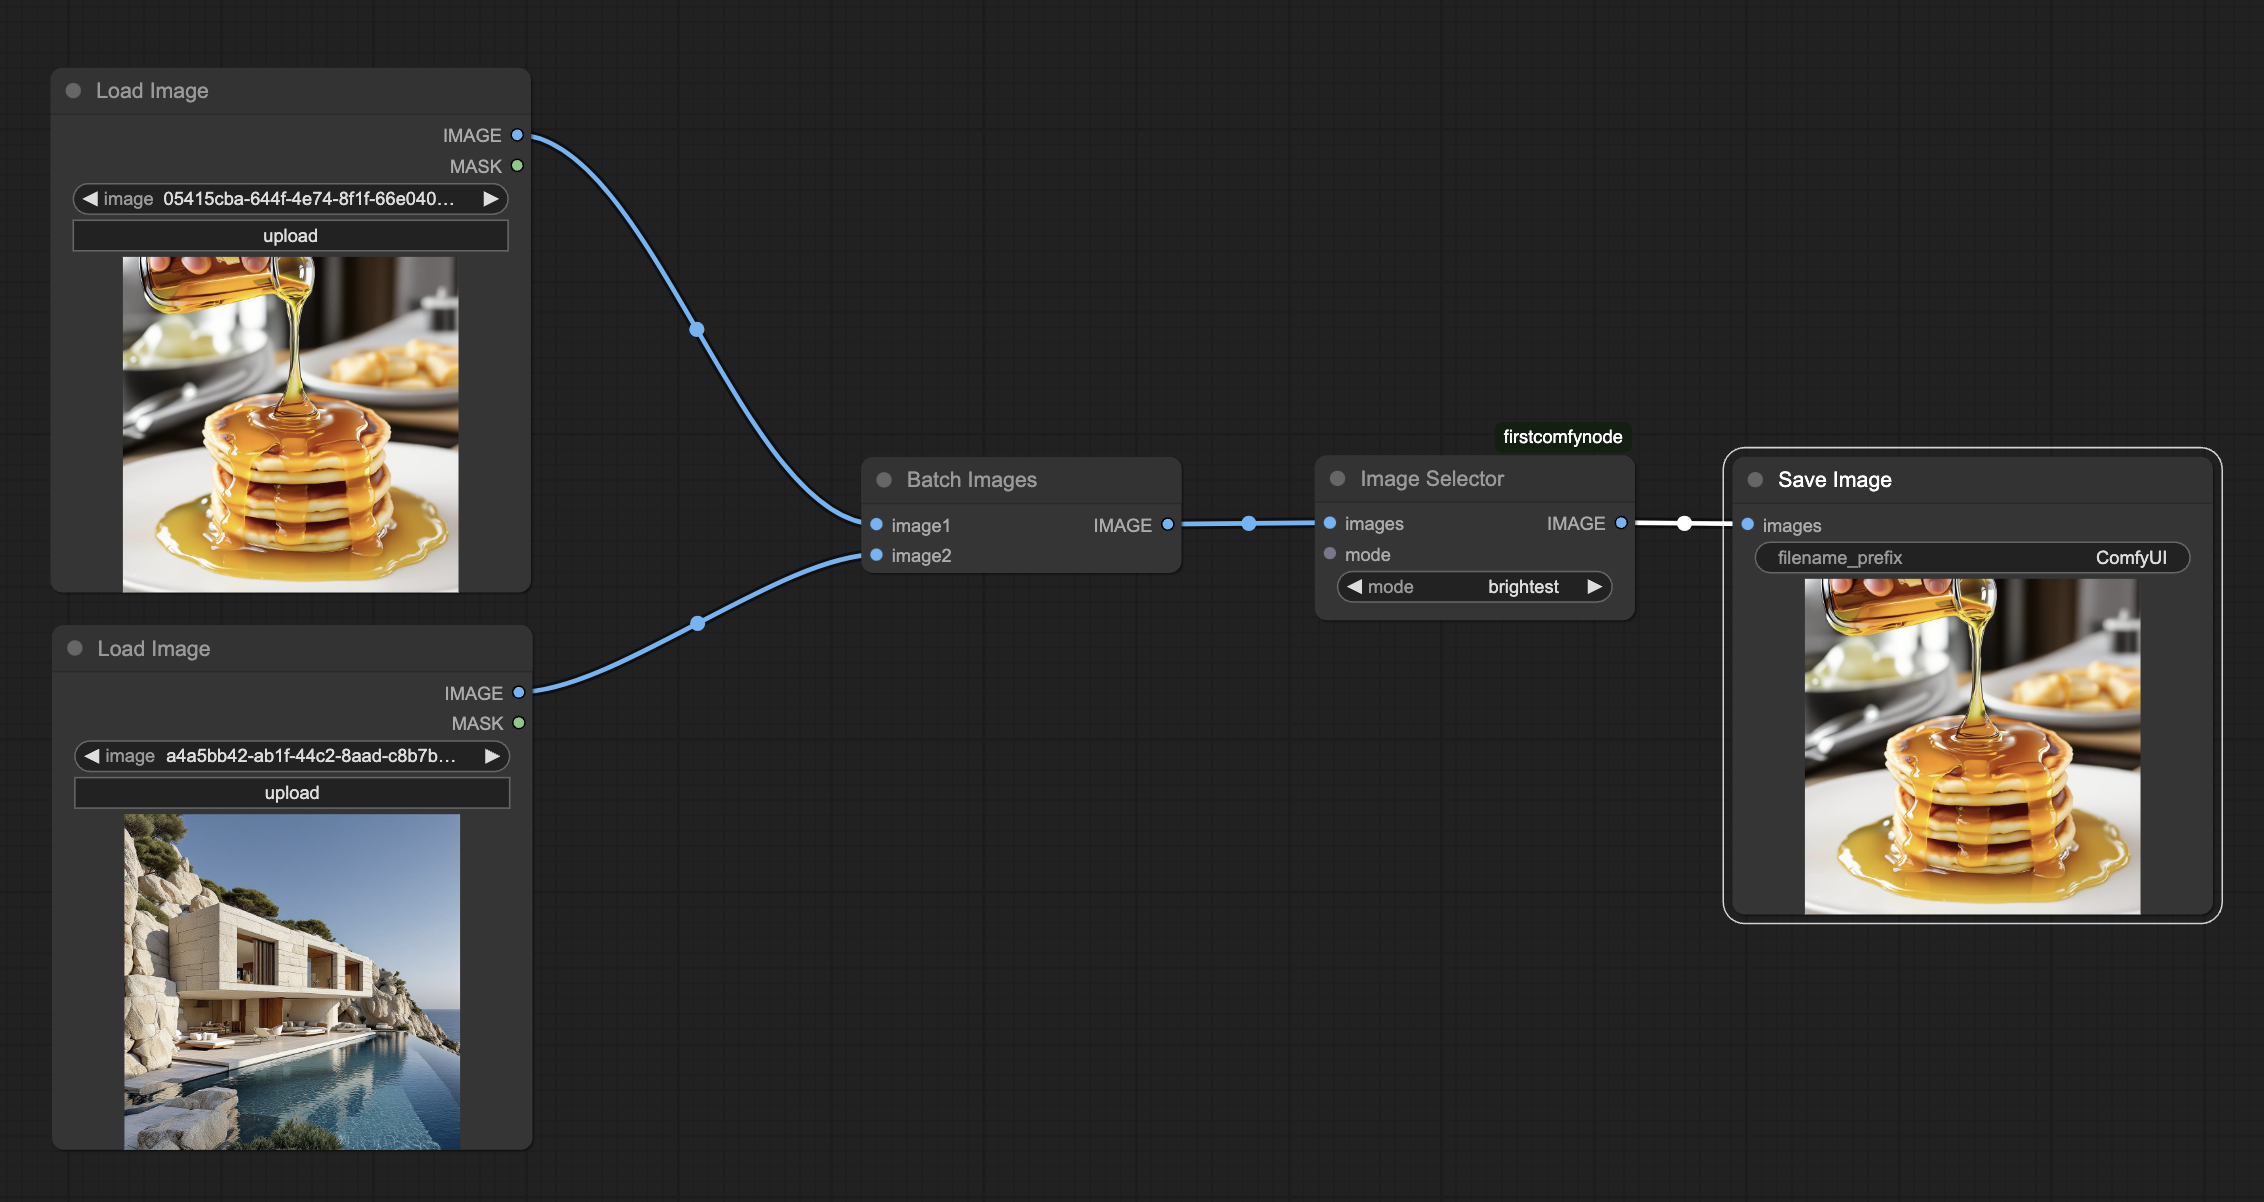
This page will take you step-by-step through the process of creating a custom node.
Our example will take a batch of images, and return one of the images. Initially, the node
will return the image which is, on average, the lightest in color; we'll then extend
it to have a range of selection criteria, and then finally add some client side code.
This page assumes very little knowledge of Python or Javascript.
After this walkthrough, dive into the details of [backend code](./backend/server_overview), and
[frontend code](./backend/server_overview).
## Write a basic node
### Prerequisites
* A working ComfyUI [installation](/installation/manual_install). For development, we recommend installing ComfyUI manually.
* A working comfy-cli [installation](/comfy-cli/getting-started).
### Setting up
```bash theme={null}
cd ComfyUI/custom_nodes
comfy node scaffold
```
After answering a few questions, you'll have a new directory set up.
```bash theme={null}
~ % comfy node scaffold
You've downloaded .cookiecutters/cookiecutter-comfy-extension before. Is it okay to delete and re-download it? [y/n] (y): y
[1/9] full_name (): Comfy
[2/9] email (you@gmail.com): me@comfy.org
[3/9] github_username (your_github_username): comfy
[4/9] project_name (My Custom Nodepack): FirstComfyNode
[5/9] project_slug (firstcomfynode):
[6/9] project_short_description (A collection of custom nodes for ComfyUI):
[7/9] version (0.0.1):
[8/9] Select open_source_license
1 - GNU General Public License v3
2 - MIT license
3 - BSD license
4 - ISC license
5 - Apache Software License 2.0
6 - Not open source
Choose from [1/2/3/4/5/6] (1): 1
[9/9] include_web_directory_for_custom_javascript [y/n] (n): y
Initialized empty Git repository in firstcomfynode/.git/
✓ Custom node project created successfully!
```
### Defining the node
Add the following code to the end of `src/nodes.py`:
```Python src/nodes.py theme={null}
class ImageSelector:
CATEGORY = "example"
@classmethod
def INPUT_TYPES(s):
return { "required": { "images": ("IMAGE",), } }
RETURN_TYPES = ("IMAGE",)
FUNCTION = "choose_image"
```
The basic structure of a custom node is described in detail [here](/custom-nodes/backend/server_overview).
A custom node is defined using a Python class, which must include these four things: `CATEGORY`,
which specifies where in the add new node menu the custom node will be located,
`INPUT_TYPES`, which is a class method defining what inputs the node will take
(see [later](/custom-nodes/backend/server_overview#input-types) for details of the dictionary returned),
`RETURN_TYPES`, which defines what outputs the node will produce, and `FUNCTION`, the name
of the function that will be called when the node is executed.
Notice that the data type for input and output is `IMAGE` (singular) even though
we expect to receive a batch of images, and return just one. In Comfy, `IMAGE` means
image batch, and a single image is treated as a batch of size 1.
### The main function
The main function, `choose_image`, receives named arguments as defined in `INPUT_TYPES`, and
returns a `tuple` as defined in `RETURN_TYPES`. Since we're dealing with images, which are internally
stored as `torch.Tensor`,
```Python theme={null}
import torch
```
Then add the function to your class. The datatype for image is `torch.Tensor` with shape `[B,H,W,C]`,
where `B` is the batch size and `C` is the number of channels - 3, for RGB. If we iterate over such
a tensor, we will get a series of `B` tensors of shape `[H,W,C]`. The `.flatten()` method turns
this into a one dimensional tensor, of length `H*W*C`, `torch.mean()` takes the mean, and `.item()`
turns a single value tensor into a Python float.
```Python theme={null}
def choose_image(self, images):
brightness = list(torch.mean(image.flatten()).item() for image in images)
brightest = brightness.index(max(brightness))
result = images[brightest].unsqueeze(0)
return (result,)
```
Notes on those last two lines:
* `images[brightest]` will return a Tensor of shape `[H,W,C]`. `unsqueeze` is used to insert a (length 1) dimension at, in this case, dimension zero, to give
us `[B,H,W,C]` with `B=1`: a single image.
* in `return (result,)`, the trailing comma is essential to ensure you return a tuple.
### Register the node
To make Comfy recognize the new node, it must be available at the package level. Modify the `NODE_CLASS_MAPPINGS` variable at the end of `src/nodes.py`. You must restart ComfyUI to see any changes.
```Python src/nodes.py theme={null}
NODE_CLASS_MAPPINGS = {
"Example" : Example,
"Image Selector" : ImageSelector,
}
# Optionally, you can rename the node in the `NODE_DISPLAY_NAME_MAPPINGS` dictionary.
NODE_DISPLAY_NAME_MAPPINGS = {
"Example": "Example Node",
"Image Selector": "Image Selector",
}
```
For a detailed explanation of how ComfyUI discovers and loads custom nodes, see the [node lifecycle documentation](/custom-nodes/backend/lifecycle).
## Add some options
That node is maybe a bit boring, so we might add some options; a widget that allows you to
choose the brightest image, or the reddest, bluest, or greenest. Edit your `INPUT_TYPES` to look like:
```Python theme={null}
@classmethod
def INPUT_TYPES(s):
return { "required": { "images": ("IMAGE",),
"mode": (["brightest", "reddest", "greenest", "bluest"],)} }
```
Then update the main function. We'll use a fairly naive definition of 'reddest' as being the average
`R` value of the pixels divided by the average of all three colors. So:
```Python theme={null}
def choose_image(self, images, mode):
batch_size = images.shape[0]
brightness = list(torch.mean(image.flatten()).item() for image in images)
if (mode=="brightest"):
scores = brightness
else:
channel = 0 if mode=="reddest" else (1 if mode=="greenest" else 2)
absolute = list(torch.mean(image[:,:,channel].flatten()).item() for image in images)
scores = list( absolute[i]/(brightness[i]+1e-8) for i in range(batch_size) )
best = scores.index(max(scores))
result = images[best].unsqueeze(0)
return (result,)
```
## Tweak the UI
Maybe we'd like a bit of visual feedback, so let's send a little text message to be displayed.
### Send a message from server
This requires two lines to be added to the Python code:
```Python theme={null}
from server import PromptServer
```
and, at the end of the `choose_image` method, add a line to send a message to the front end (`send_sync` takes a message
type, which should be unique, and a dictionary)
```Python theme={null}
PromptServer.instance.send_sync("example.imageselector.textmessage", {"message":f"Picked image {best+1}"})
return (result,)
```
### Write a client extension
To add some Javascript to the client, create a subdirectory, `web/js` in your custom node directory, and modify the end of `__init__.py`
to tell Comfy about it by exporting `WEB_DIRECTORY`:
```Python theme={null}
WEB_DIRECTORY = "./web/js"
__all__ = ['NODE_CLASS_MAPPINGS', 'WEB_DIRECTORY']
```
The client extension is saved as a `.js` file in the `web/js` subdirectory, so create `image_selector/web/js/imageSelector.js` with the
code below. (For more, see [client side coding](./js/javascript_overview)).
```Javascript theme={null}
import { app } from "../../scripts/app.js";
app.registerExtension({
name: "example.imageselector",
async setup() {
function messageHandler(event) { alert(event.detail.message); }
app.api.addEventListener("example.imageselector.textmessage", messageHandler);
},
})
```
All we've done is register an extension and add a listener for the message type we are sending in the `setup()` method. This reads the dictionary we sent (which is stored in `event.detail`).
Stop the Comfy server, start it again, reload the webpage, and run your workflow.
### The complete example
The complete example is available [here](https://gist.github.com/robinjhuang/fbf54b7715091c7b478724fc4dffbd03). You can download the example workflow [JSON file](https://github.com/Comfy-Org/docs/blob/main/public/workflow.json) or view it below: