> ## Documentation Index
> Fetch the complete documentation index at: https://docs.comfy.org/llms.txt
> Use this file to discover all available pages before exploring further.
# Other Ways to Create a Comfy API Build
> Create a Comfy API Build from a Comfy Desktop snapshot, a ComfyUI workflow, or a saved workflow JSON.
Already have a Desktop snapshot or workflow? Use the matching path below to start a Build, then review its contents before you release it.
## Comfy Desktop snapshot
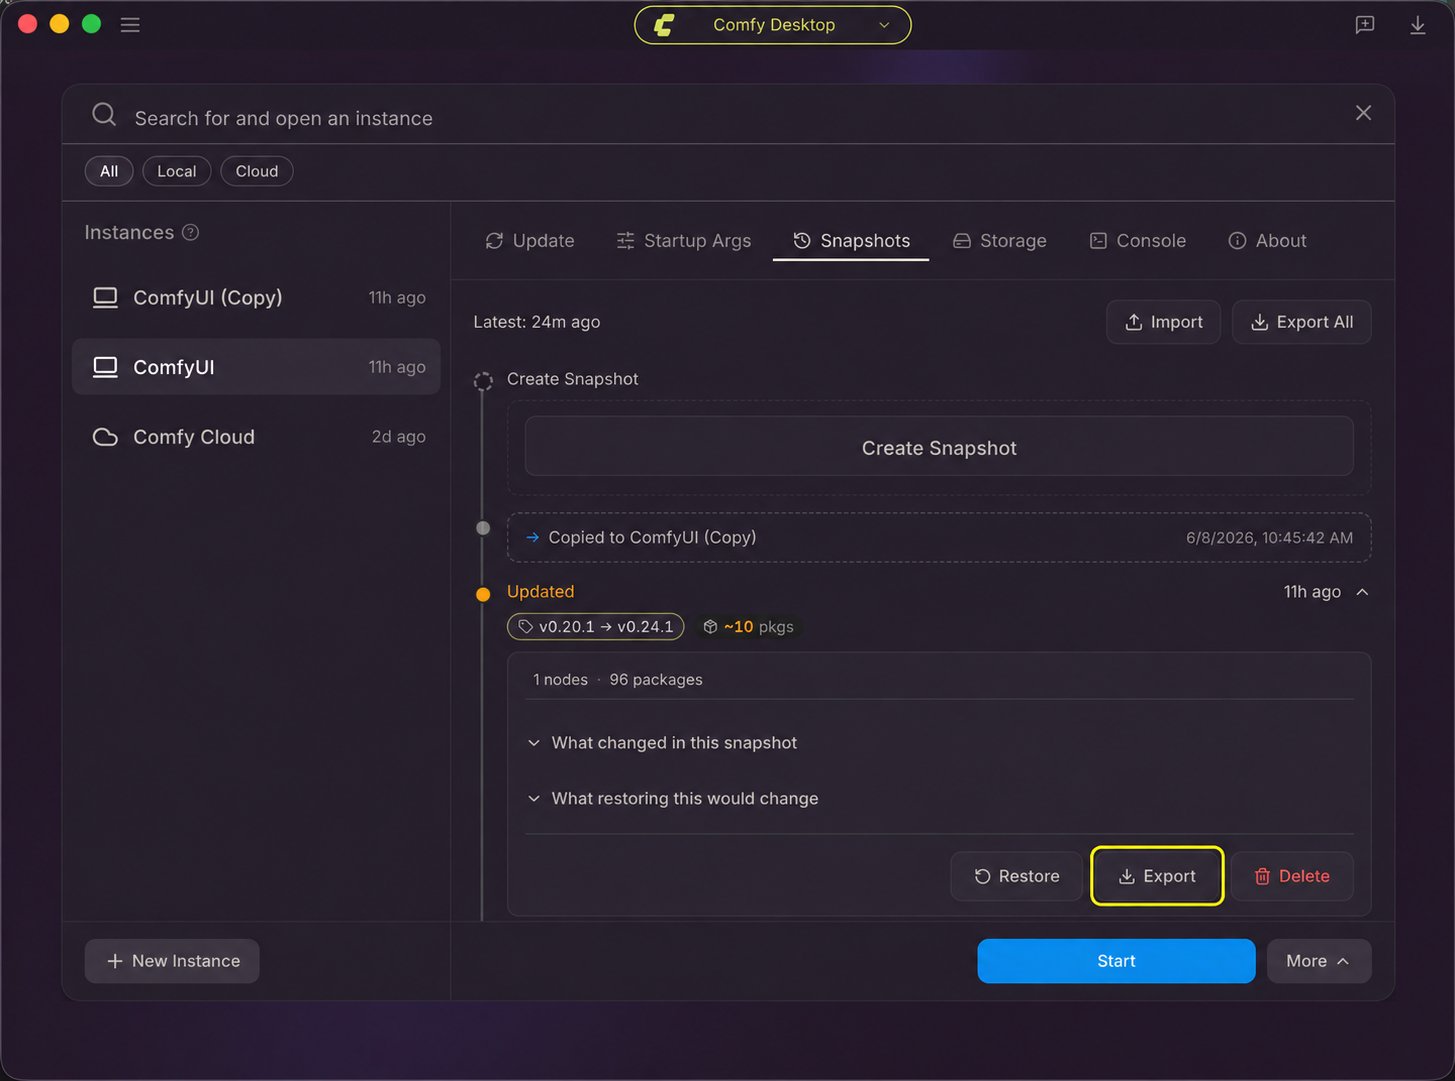
Use a snapshot to carry a Desktop instance's ComfyUI version, custom nodes, and Python packages into a Build.
1. In Comfy Desktop, open the instance's **Manage** panel and select **Snapshots**. Choose the snapshot for the environment you want to build and click its **Export** button. If the current state is not listed, create a manual snapshot first. See [Desktop snapshot steps](/installation/desktop/usage/snapshots#snapshots-tab-overview).
2. Open the [Comfy API Build Wizard](https://platform.comfy.org/?onboarding=comfyapi) and import the snapshot file.
3. Review the Build contents and add or correct any missing models or dependencies before creating a release.
 ## ComfyUI graph menu
When the **Deploy to Comfy API** action is available for your account, you can send the open workflow from ComfyUI to the Build Wizard:
1. Open the workflow you want to deploy.
2. Open the graph menu and choose **Deploy to Comfy API**.
3. Choose **Deploy on Platform** to continue in the Build Wizard with the workflow, or **Build with your agent** to copy an agent brief.
4. Review the Build contents and add or correct any missing models or dependencies.
## ComfyUI graph menu
When the **Deploy to Comfy API** action is available for your account, you can send the open workflow from ComfyUI to the Build Wizard:
1. Open the workflow you want to deploy.
2. Open the graph menu and choose **Deploy to Comfy API**.
3. Choose **Deploy on Platform** to continue in the Build Wizard with the workflow, or **Build with your agent** to copy an agent brief.
4. Review the Build contents and add or correct any missing models or dependencies.
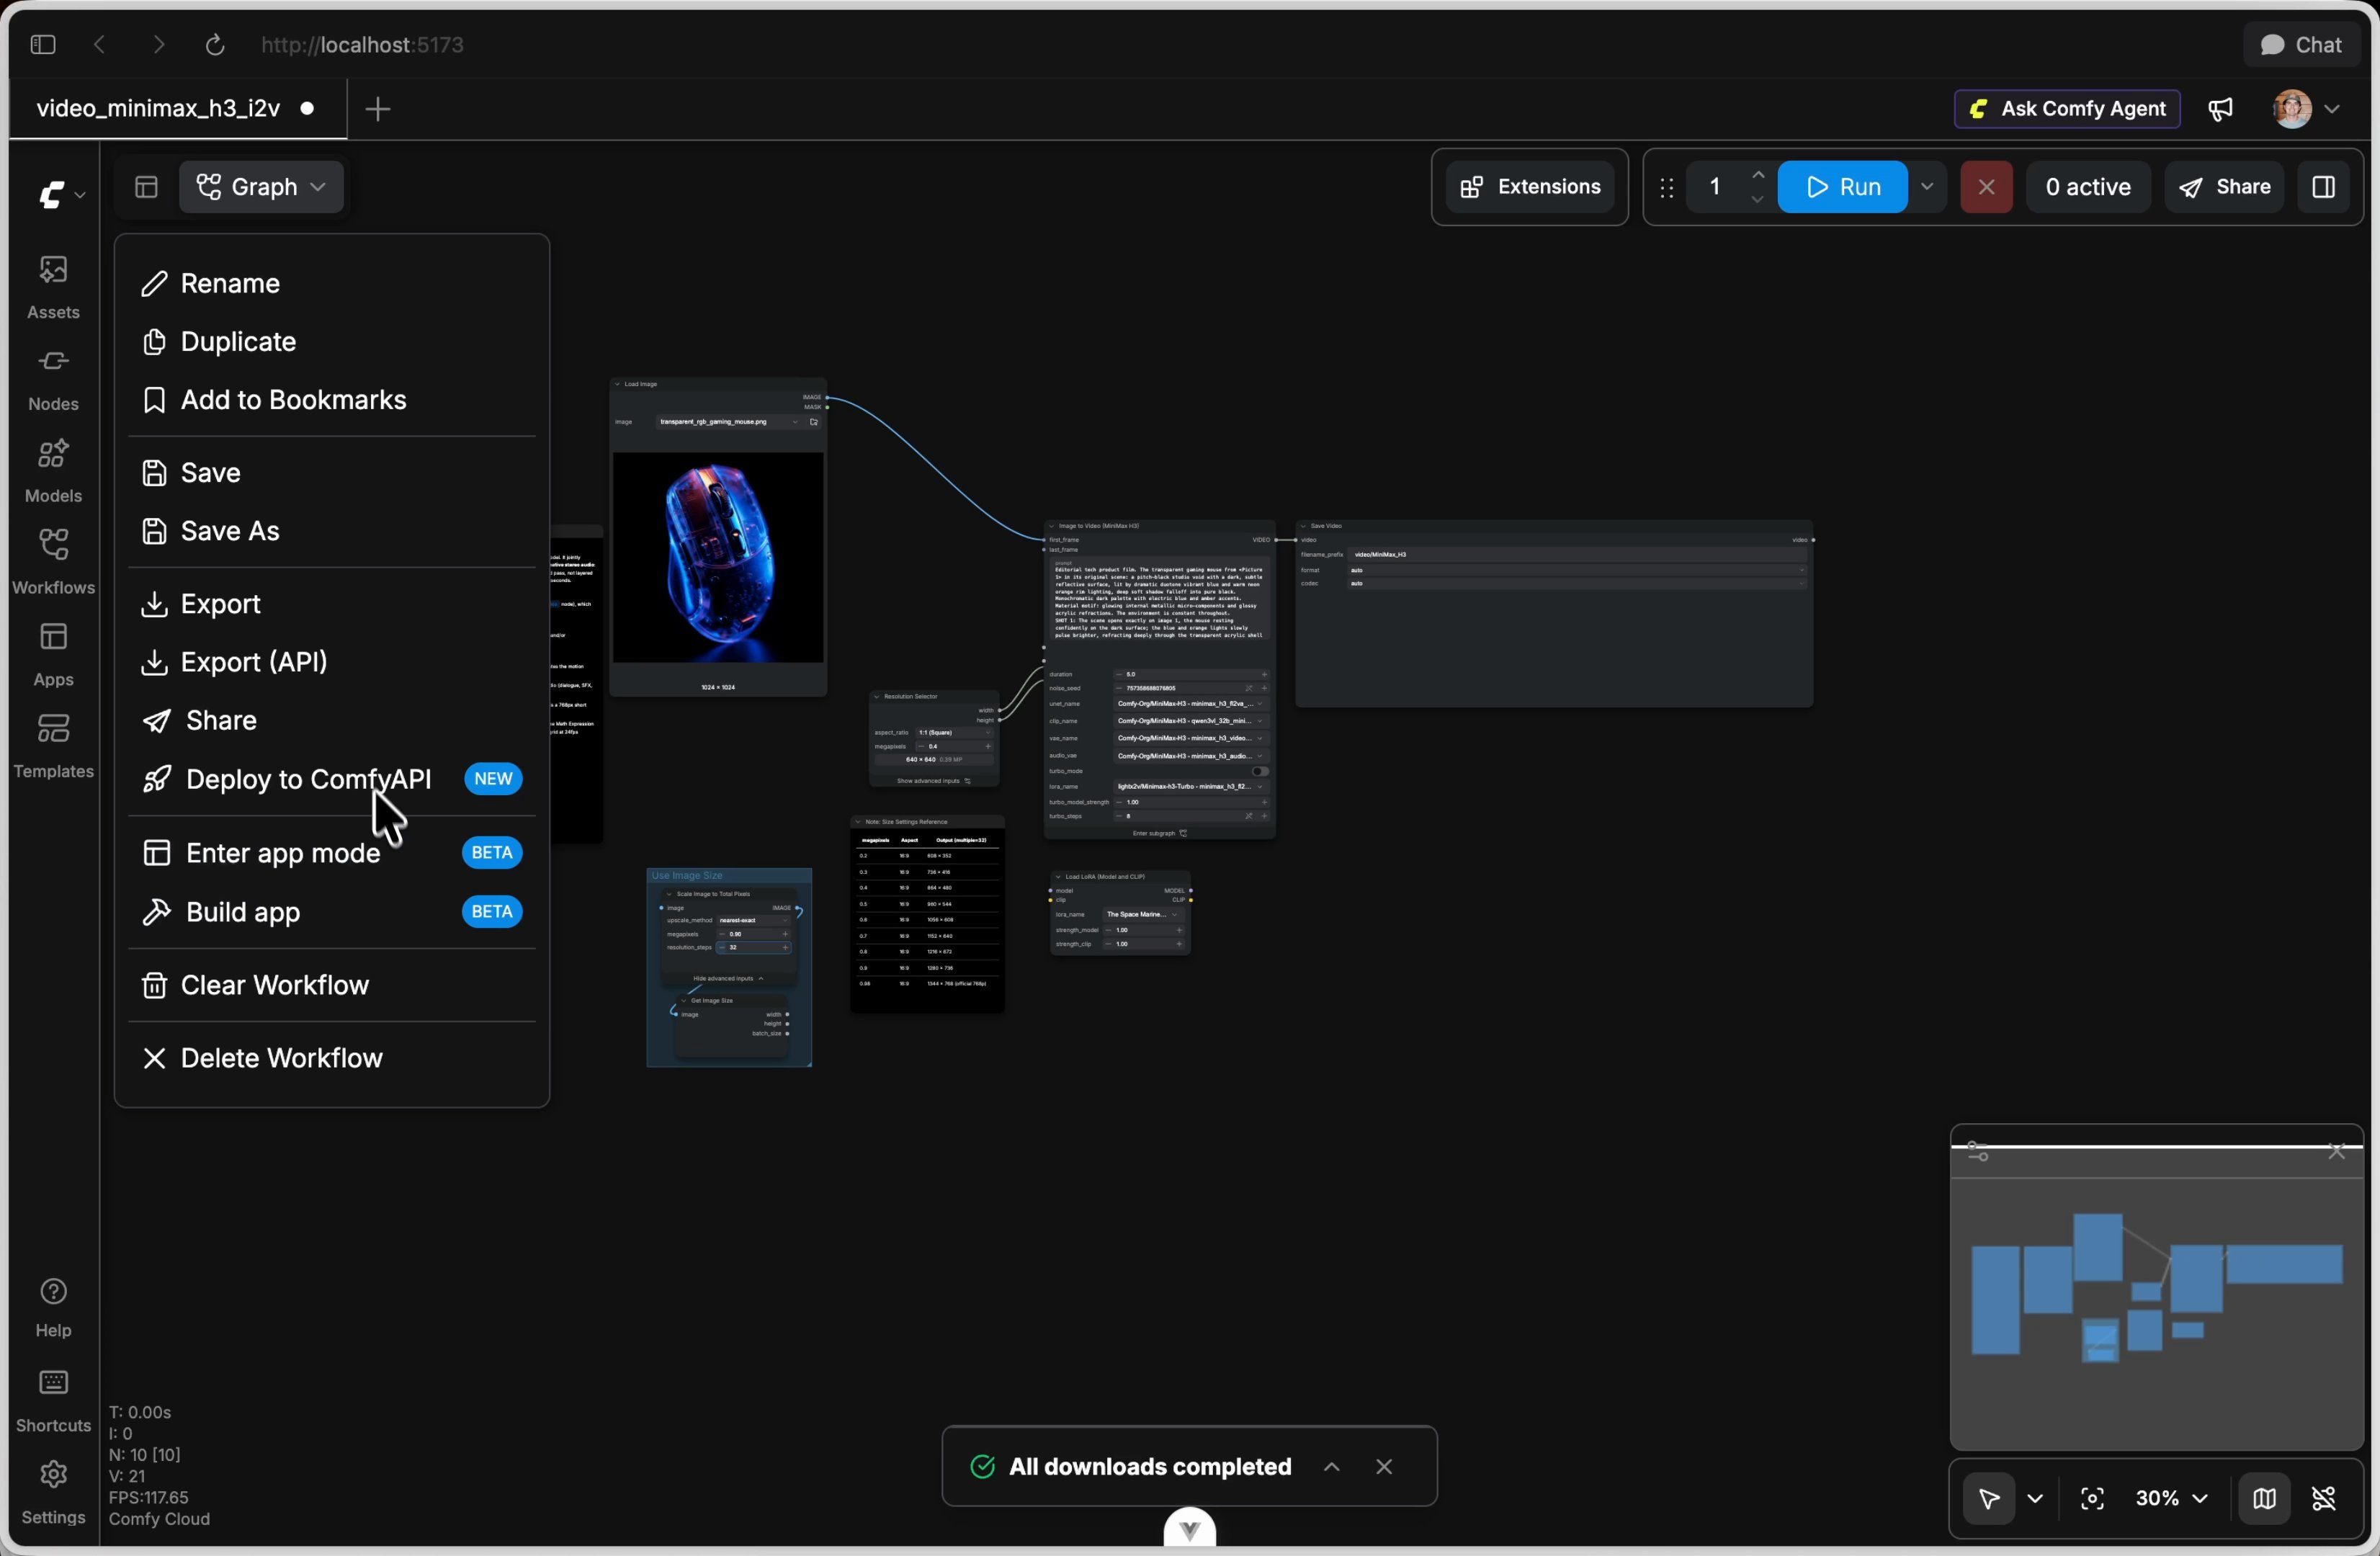 If you do not see this menu action, open the Build Wizard directly at [platform.comfy.org](https://platform.comfy.org/?onboarding=comfyapi).
Watch [Developer Platform 101: Building with the New Comfy API](https://www.youtube.com/watch?v=69slO15ovL8) for a walkthrough from the ComfyUI canvas to a deployed endpoint.
## Workflow JSON
Use a saved workflow file to configure a Build in the Build Wizard:
1. Open the [Comfy API Build Wizard](https://platform.comfy.org/?onboarding=comfyapi).
2. Drag the workflow JSON into the import step.
3. Review the Build contents and add or correct any missing models or dependencies before creating a release.
If you do not see this menu action, open the Build Wizard directly at [platform.comfy.org](https://platform.comfy.org/?onboarding=comfyapi).
Watch [Developer Platform 101: Building with the New Comfy API](https://www.youtube.com/watch?v=69slO15ovL8) for a walkthrough from the ComfyUI canvas to a deployed endpoint.
## Workflow JSON
Use a saved workflow file to configure a Build in the Build Wizard:
1. Open the [Comfy API Build Wizard](https://platform.comfy.org/?onboarding=comfyapi).
2. Drag the workflow JSON into the import step.
3. Review the Build contents and add or correct any missing models or dependencies before creating a release.
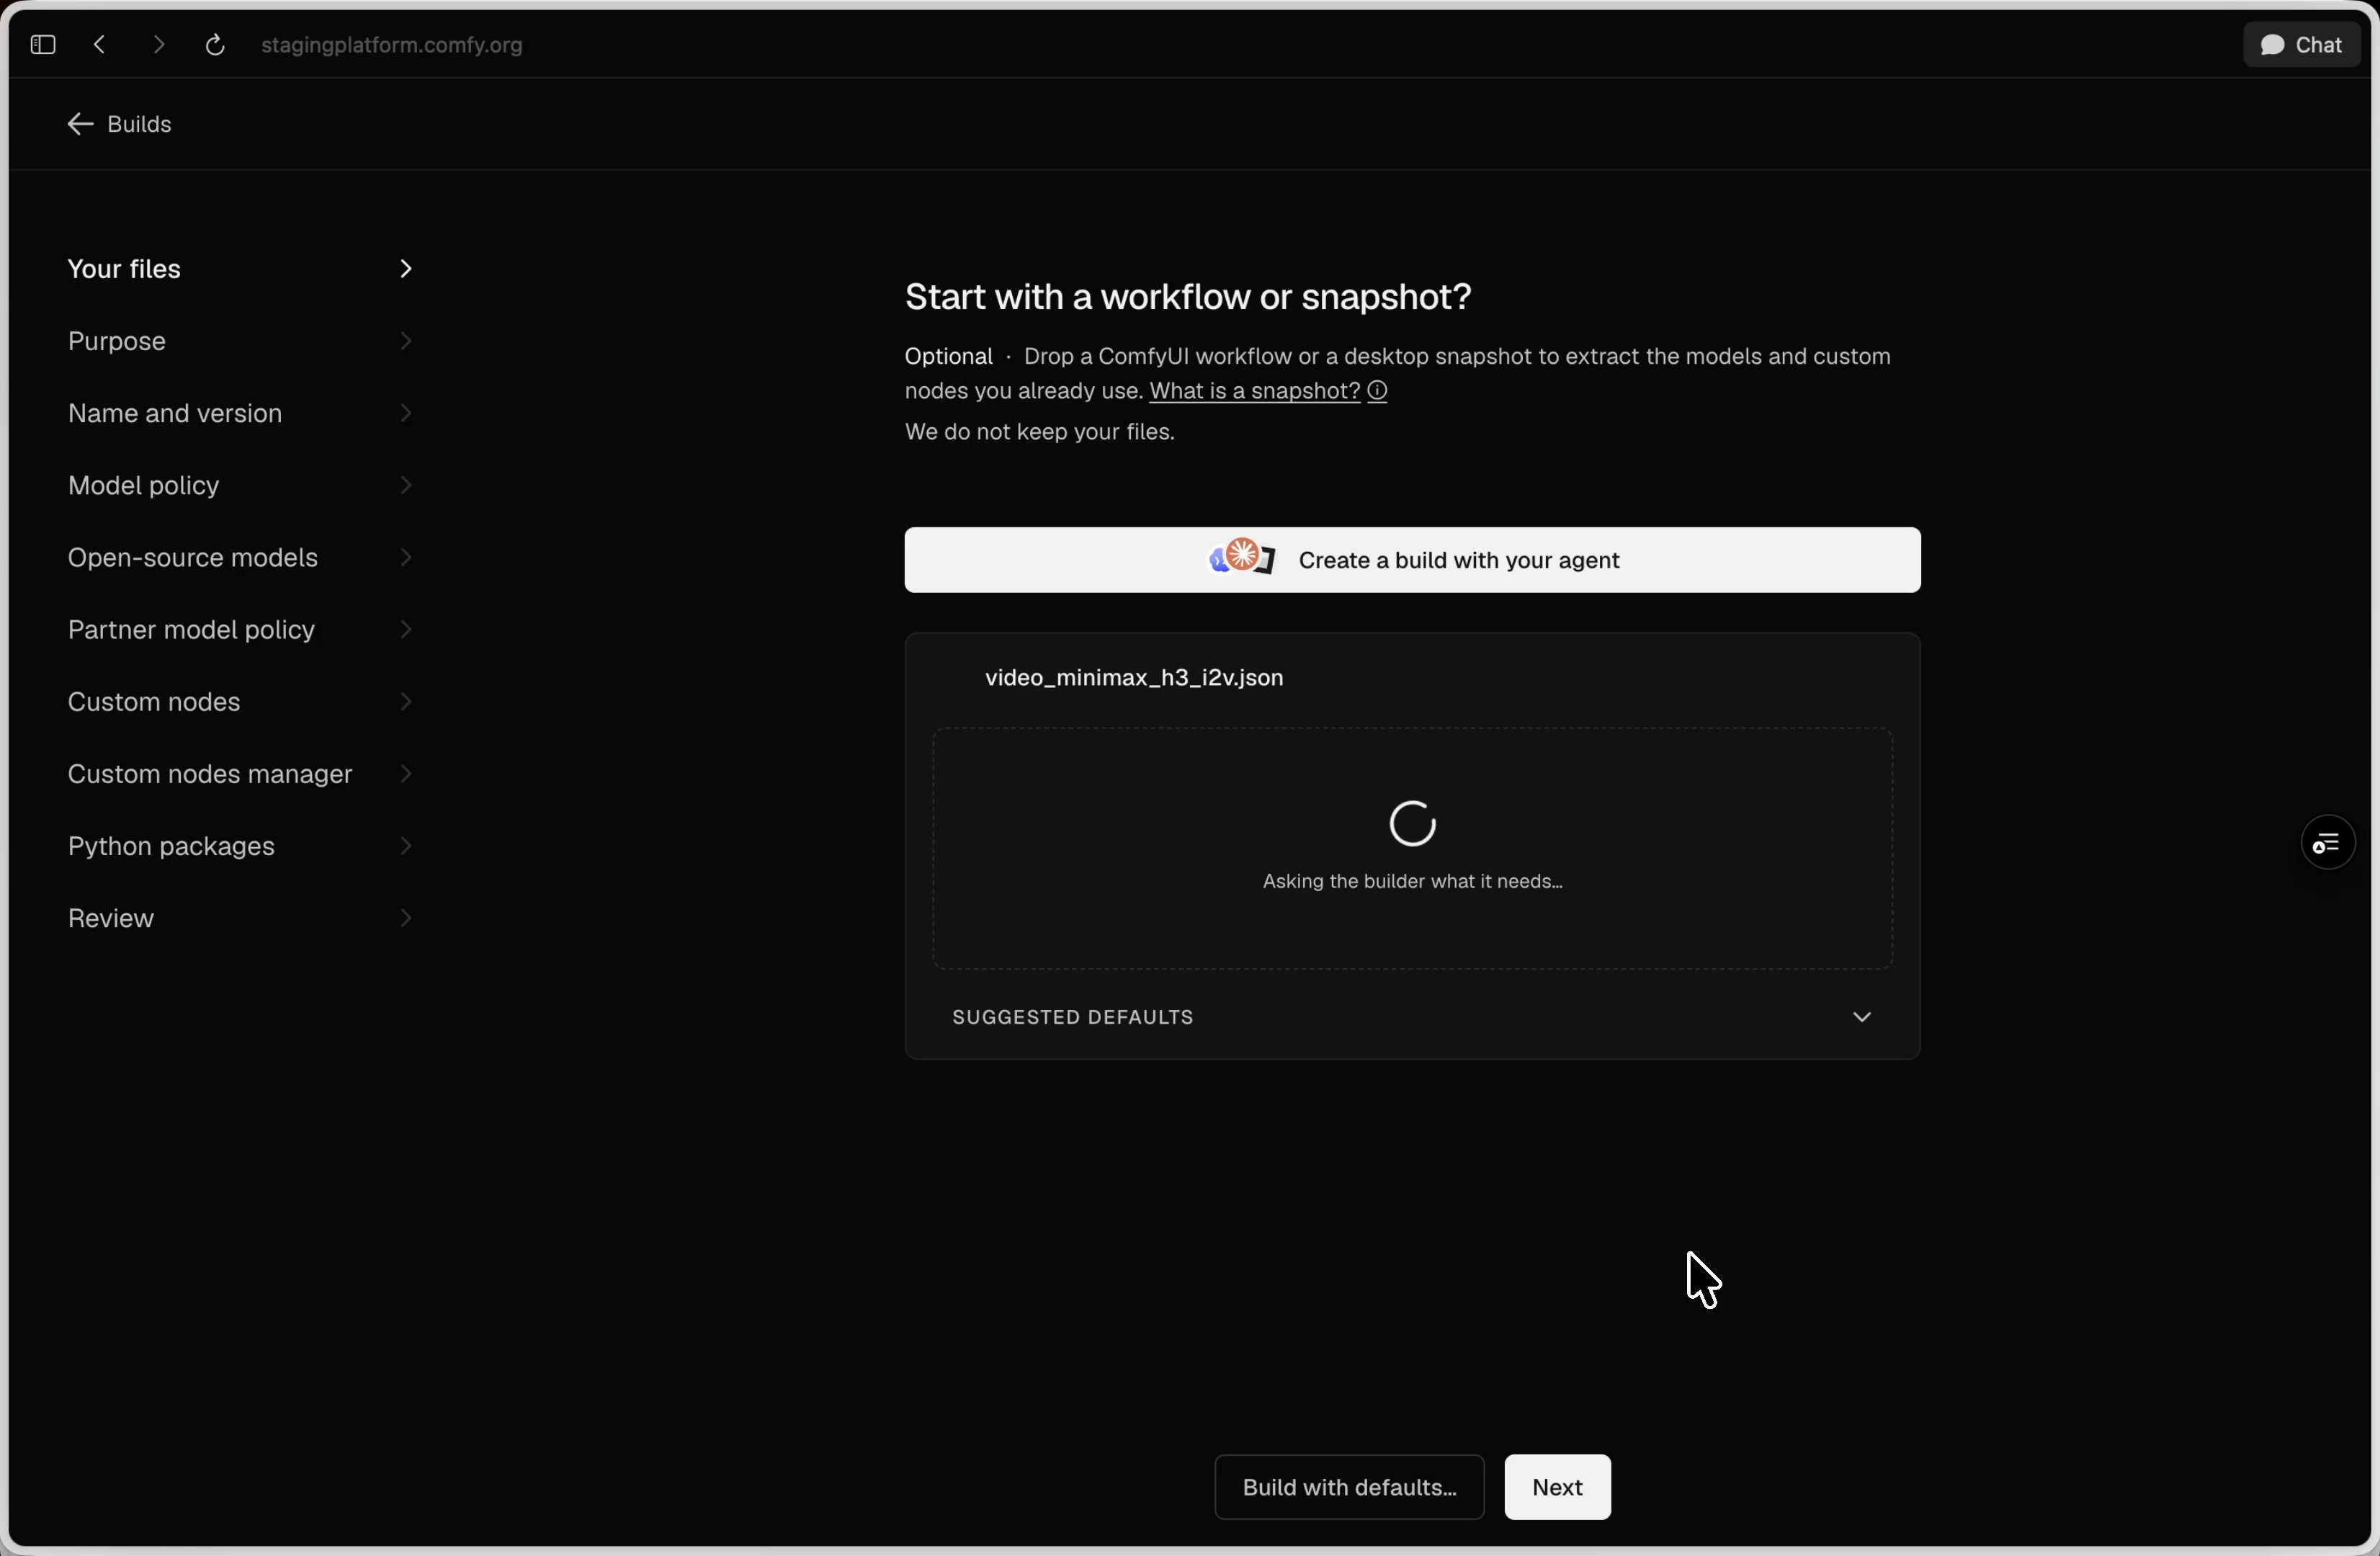 The wizard inspects the workflow and suggests Build settings before you continue.
## Next steps
Create a release, deploy it, and run a workflow with an agent or the CLI.
Manage Build files, updates, releases, scaling, billing, and troubleshooting.
The wizard inspects the workflow and suggests Build settings before you continue.
## Next steps
Create a release, deploy it, and run a workflow with an agent or the CLI.
Manage Build files, updates, releases, scaling, billing, and troubleshooting.