> ## Documentation Index
> Fetch the complete documentation index at: https://docs.comfy.org/llms.txt
> Use this file to discover all available pages before exploring further.
# Pixal3D 이미지 기반 3D 모델 생성 ComfyUI 워크플로 예제
> Tencent ARC의 픽셀 정렬 이미지 기반 3D 생성 모델인 Pixal3D를 사용해 단일 이미지에서 전체 PBR 텍스처가 포함된 고충실도 3D 모델을 생성하세요.
**Pixal3D**는 SIGGRAPH 2026에서 발표된 Tencent ARC의 오픈소스 이미지 기반 3D 생성 모델입니다. 단일 이미지를 전체 PBR 재질을 갖춘 고품질 3D 에셋으로 변환합니다.
대부분의 3D 네이티브 생성기는 형태를 캐노니컬 공간에서 합성하고 어텐션을 통해 이미지 신호를 주입하므로 픽셀-3D 연관성이 모호해집니다. 반면 Pixal3D는 픽셀 정렬 생성(pixel-aligned generation) 방식을 사용합니다. 역투영(back-projection)을 통해 픽셀-3D 대응 관계를 직접 설정하므로, 생성된 모델의 전면이 입력 이미지와 1:1로 일치하며 텍스처가 왜곡되거나 정렬이 어긋나지 않습니다.
Pixal3D: 이미지를 3D 모델로
단일 이미지를 업로드하세요. 입력 뷰에 정렬된 전체 PBR 텍스처를 갖춘 고품질 3D 모델을 생성합니다.
이 워크플로에는 TRELLIS.2 파이프라인도 포함되어 있습니다. `Boolean (Switch to Trellis2)` 노드는 기본값이 `false`이며, 여기서 설명하는 Pixal3D 파이프라인이 실행되고 Pixal3D 모델도 자동으로 로드됩니다.
 ComfyUI가 최신 버전으로 업데이트되었는지 확인하세요.
* [ComfyUI 다운로드](https://www.comfy.org/download)
* [업데이트 가이드](/ko/installation/update_comfyui)
이 가이드의 워크플로는 [워크플로 템플릿](/ko/interface/features/template)에서 확인할 수 있습니다.
템플릿에서 찾을 수 없다면, 귀하의 ComfyUI가 오래된 버전일 수 있습니다.
워크플로를 로드할 때 노드가 누락되는 경우, 가능한 원인:
1. 최신 ComfyUI 버전(최신 테스트 버전(nightly))을 사용하고 있지 않음
2. 일부 노드가 시작 시 가져오기에 실패함
* [클라우드](https://cloud.comfy.org)는 ComfyUI 안정판 출시 후 업데이트됩니다.
따라서 이 문서에서 핵심 노드가 누락된 것을 발견했다면, 그 이유는 새로운 핵심 노드가 아직 최신 안정판에 공개되지 않았기 때문일 수 있습니다. 다음 안정판 출시를 기다려 주세요.
이 워크플로를 Comfy Cloud에서 즉시 실행하세요
JSON을 다운로드하거나 템플릿 라이브러리에서 "Pixal3D & TRELLIS.2: Image to Model"을 검색하세요
**입력 파일**
이 파일을 `LoadImage` 노드에 업로드하세요:
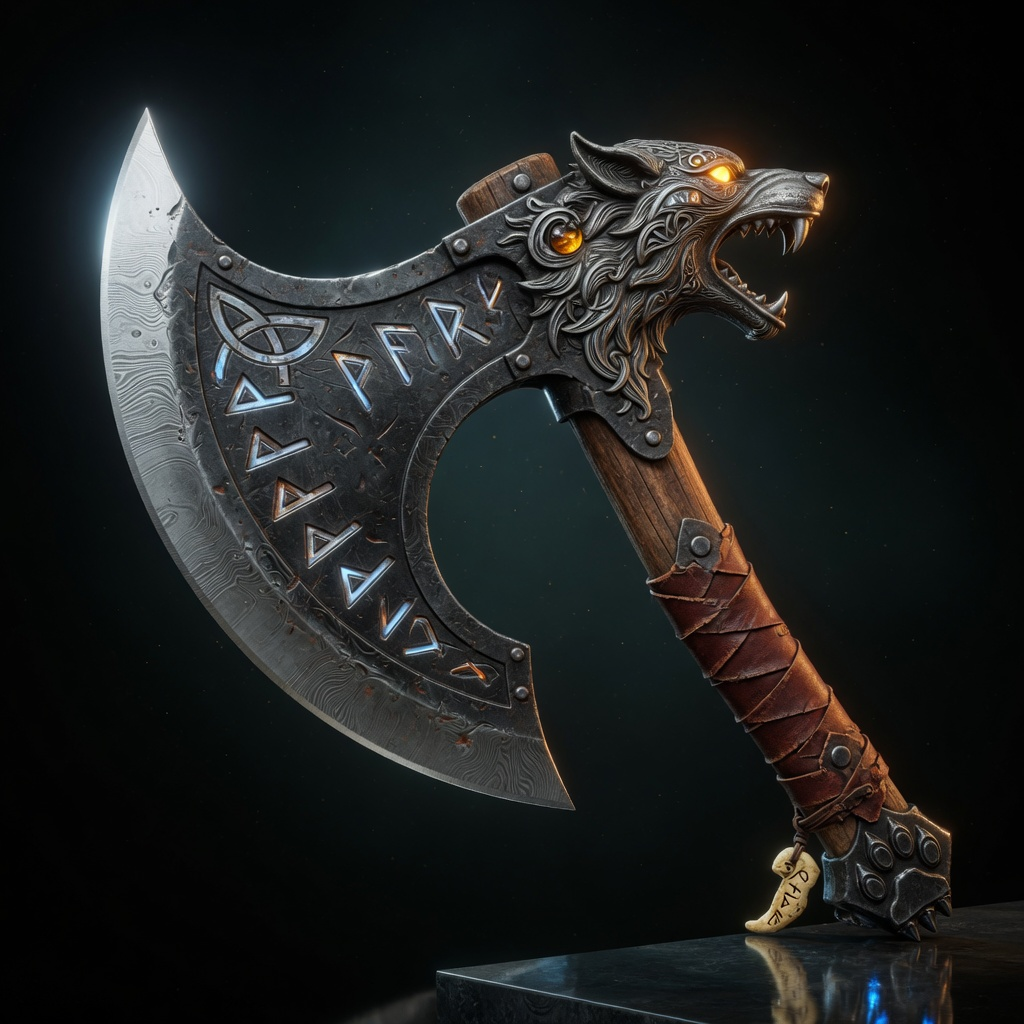
`LoadImage` 노드 122 · `viking_wolf_rune_axe.png`
## 작동 방식
Pixal3D는 카메라 인식, 픽셀 정렬 생성과 완전한 메시 후처리 파이프라인을 결합합니다:
1. **배경 제거**: BiRefNet이 입력 이미지에서 배경을 제거하고, 워크플로가 피사체를 중앙 정렬된 1024×1024 캔버스로 크롭합니다. 전환을 사용하면 배경 제거를 건너뛸 수 있습니다
2. **카메라 추정**: MoGe는 이미지에서 기하학과 카메라 시야각을 추정합니다. 시야각(FOV)은 픽셀 정렬 조건화를 구동합니다
3. **구조 생성**: 희소 구조 잠재 데이터가 샘플링되어 복셀로 디코딩된 다음 대략적인 메시로 변환됩니다
4. **형태 정제**: 형태 단계와 업샘플링 단계가 메시를 목표 해상도(1536)까지 정제합니다
5. **텍스처 생성**: 텍스처 확산 단계가 PBR 재질 복셀(기본 색상, 금속성, 거칠기)을 생성합니다
6. **후처리**: DC 리메시, QEM 디시메이션, UV 언랩핑, 그리고 기본 색상, 노멀(normal), 앰비언트 오클루전 맵을 최종 텍스처 메시에 베이킹합니다
## 실행 단계
1. **이미지 로드**: `LoadImage` 노드를 사용하여 객체의 단일 이미지를 로드합니다
2. **워크플로 실행 대기열에 추가**: Ctrl(macOS: Cmd) + Enter를 누릅니다
3. **파이프라인 대기**: 구조, 형태, 텍스처 단계가 순서대로 실행된 후 후처리가 진행됩니다.
4. **결과 확인**: `Preview3DAdvanced` 노드에서 메시를 확인합니다. GLB 파일은 `ComfyUI/output/3d/ComfyUI/`에 저장됩니다
## 모델 다운로드
이 워크플로에서 사용하는 모델을 다운로드합니다. 두 확산 모델이 모두 필요합니다. 스위치가 어떤 모델을 실행할지 선택합니다. 해당 `models/` 하위 디렉터리에 배치합니다.
pixal3d\_int8\_convrot.safetensors: Pixal3D 확산 모델 (기본으로 로드)
trellis\_2\_int8\_convrot.safetensors: TRELLIS.2 확산 모델 (스위치가 `true`일 때 로드)
trellis\_2\_shape\_vae\_bf16.safetensors: 구조 및 셰이프 디코딩용 VAE
trellis\_2\_texture\_vae\_bf16.safetensors: 텍스처 디코딩용 VAE
dino\_v3\_L\_naf\_fp32.safetensors: 이미지 컨디셔닝용 CLIP 비전 인코더
moge\_2\_vitl\_normal\_fp16.safetensors: 픽셀 정렬 컨디셔닝용 깊이 및 카메라 추정
birefnet.safetensors: 전처리용 배경 제거 모델
### 모델 저장 위치
```
📂 ComfyUI/
├── 📂 models/
│ ├── 📂 diffusion_models/
│ │ ├── trellis_2_int8_convrot.safetensors
│ │ └── pixal3d_int8_convrot.safetensors
│ ├── 📂 vae/
│ │ ├── trellis_2_shape_vae_bf16.safetensors
│ │ └── trellis_2_texture_vae_bf16.safetensors
│ ├── 📂 clip_vision/
│ │ └── dino_v3_L_naf_fp32.safetensors
│ ├── 📂 geometry_estimation/
│ │ └── moge_2_vitl_normal_fp16.safetensors
│ └── 📂 background_removal/
│ └── birefnet.safetensors
```
ComfyUI가 최신 버전으로 업데이트되었는지 확인하세요.
* [ComfyUI 다운로드](https://www.comfy.org/download)
* [업데이트 가이드](/ko/installation/update_comfyui)
이 가이드의 워크플로는 [워크플로 템플릿](/ko/interface/features/template)에서 확인할 수 있습니다.
템플릿에서 찾을 수 없다면, 귀하의 ComfyUI가 오래된 버전일 수 있습니다.
워크플로를 로드할 때 노드가 누락되는 경우, 가능한 원인:
1. 최신 ComfyUI 버전(최신 테스트 버전(nightly))을 사용하고 있지 않음
2. 일부 노드가 시작 시 가져오기에 실패함
* [클라우드](https://cloud.comfy.org)는 ComfyUI 안정판 출시 후 업데이트됩니다.
따라서 이 문서에서 핵심 노드가 누락된 것을 발견했다면, 그 이유는 새로운 핵심 노드가 아직 최신 안정판에 공개되지 않았기 때문일 수 있습니다. 다음 안정판 출시를 기다려 주세요.
이 워크플로를 Comfy Cloud에서 즉시 실행하세요
JSON을 다운로드하거나 템플릿 라이브러리에서 "Pixal3D & TRELLIS.2: Image to Model"을 검색하세요
**입력 파일**
이 파일을 `LoadImage` 노드에 업로드하세요:
`LoadImage` 노드 122 · `viking_wolf_rune_axe.png`
## 작동 방식
Pixal3D는 카메라 인식, 픽셀 정렬 생성과 완전한 메시 후처리 파이프라인을 결합합니다:
1. **배경 제거**: BiRefNet이 입력 이미지에서 배경을 제거하고, 워크플로가 피사체를 중앙 정렬된 1024×1024 캔버스로 크롭합니다. 전환을 사용하면 배경 제거를 건너뛸 수 있습니다
2. **카메라 추정**: MoGe는 이미지에서 기하학과 카메라 시야각을 추정합니다. 시야각(FOV)은 픽셀 정렬 조건화를 구동합니다
3. **구조 생성**: 희소 구조 잠재 데이터가 샘플링되어 복셀로 디코딩된 다음 대략적인 메시로 변환됩니다
4. **형태 정제**: 형태 단계와 업샘플링 단계가 메시를 목표 해상도(1536)까지 정제합니다
5. **텍스처 생성**: 텍스처 확산 단계가 PBR 재질 복셀(기본 색상, 금속성, 거칠기)을 생성합니다
6. **후처리**: DC 리메시, QEM 디시메이션, UV 언랩핑, 그리고 기본 색상, 노멀(normal), 앰비언트 오클루전 맵을 최종 텍스처 메시에 베이킹합니다
## 실행 단계
1. **이미지 로드**: `LoadImage` 노드를 사용하여 객체의 단일 이미지를 로드합니다
2. **워크플로 실행 대기열에 추가**: Ctrl(macOS: Cmd) + Enter를 누릅니다
3. **파이프라인 대기**: 구조, 형태, 텍스처 단계가 순서대로 실행된 후 후처리가 진행됩니다.
4. **결과 확인**: `Preview3DAdvanced` 노드에서 메시를 확인합니다. GLB 파일은 `ComfyUI/output/3d/ComfyUI/`에 저장됩니다
## 모델 다운로드
이 워크플로에서 사용하는 모델을 다운로드합니다. 두 확산 모델이 모두 필요합니다. 스위치가 어떤 모델을 실행할지 선택합니다. 해당 `models/` 하위 디렉터리에 배치합니다.
pixal3d\_int8\_convrot.safetensors: Pixal3D 확산 모델 (기본으로 로드)
trellis\_2\_int8\_convrot.safetensors: TRELLIS.2 확산 모델 (스위치가 `true`일 때 로드)
trellis\_2\_shape\_vae\_bf16.safetensors: 구조 및 셰이프 디코딩용 VAE
trellis\_2\_texture\_vae\_bf16.safetensors: 텍스처 디코딩용 VAE
dino\_v3\_L\_naf\_fp32.safetensors: 이미지 컨디셔닝용 CLIP 비전 인코더
moge\_2\_vitl\_normal\_fp16.safetensors: 픽셀 정렬 컨디셔닝용 깊이 및 카메라 추정
birefnet.safetensors: 전처리용 배경 제거 모델
### 모델 저장 위치
```
📂 ComfyUI/
├── 📂 models/
│ ├── 📂 diffusion_models/
│ │ ├── trellis_2_int8_convrot.safetensors
│ │ └── pixal3d_int8_convrot.safetensors
│ ├── 📂 vae/
│ │ ├── trellis_2_shape_vae_bf16.safetensors
│ │ └── trellis_2_texture_vae_bf16.safetensors
│ ├── 📂 clip_vision/
│ │ └── dino_v3_L_naf_fp32.safetensors
│ ├── 📂 geometry_estimation/
│ │ └── moge_2_vitl_normal_fp16.safetensors
│ └── 📂 background_removal/
│ └── birefnet.safetensors
```