> ## Documentation Index
> Fetch the complete documentation index at: https://docs.comfy.org/llms.txt
> Use this file to discover all available pages before exploring further.
# Publishing Nodes
## Set up a Registry Account
Follow the steps below to set up a registry account and publish your first node.
### Watch a Tutorial
### Create a Publisher
A publisher is an identity that can publish custom nodes to the registry. Every custom node needs to include a publisher identifier in the pyproject.toml [file]().
Go to [Comfy Registry](https://registry.comfy.org), and create a publisher account. Your publisher id is globally unique, and cannot be changed later because it is used in the URL of your custom node.
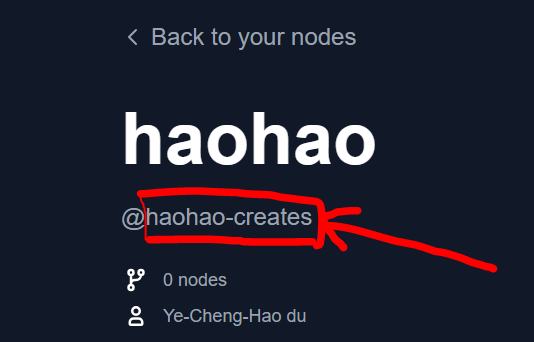
Your publisher id is found after the `@` symbol on your profile page.
### Create a Registry Publishing API Key
**Important:** This API key is specifically for **publishing custom nodes to the Registry and ComfyUI-Manager**. If you're looking to use paid Partner Nodes in your workflows instead, see [Partner Nodes Overview](/tutorials/partner-nodes/overview).
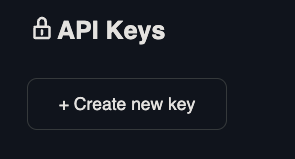
Go [here](https://registry.comfy.org/nodes) and click on the publisher you want to create an API key for. This key will be used to publish custom nodes to the Registry (which powers ComfyUI-Manager) via the CLI or GitHub Actions.
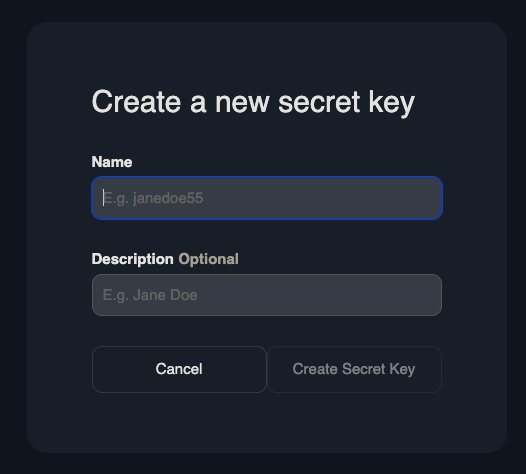
Name the API key and save it somewhere safe. If you lose it, you'll have to create a new key.
### Add Metadata
Have you installed the comfy-cli? [Do that first](/comfy-cli/getting-started).
```bash theme={null}
comfy node init
```
This command will generate the following metadata:
```toml theme={null}
# pyproject.toml
[project]
name = "" # Unique identifier for your node. Immutable after creation.
description = ""
version = "1.0.0" # Custom Node version. Must be semantically versioned.
license = { file = "LICENSE.txt" }
dependencies = [] # Filled in from requirements.txt
[project.urls]
Repository = "https://github.com/..."
[tool.comfy]
PublisherId = "" # TODO (fill in Publisher ID from Comfy Registry Website).
DisplayName = "" # Display name for the Custom Node. Can be changed later.
Icon = "https://example.com/icon.png" # SVG, PNG, JPG or GIF (MAX. 800x400px)
```
Add this file to your repository. Check the [specifications](/registry/specifications) for more information on the pyproject.toml file.
### Exclude Files with `.comfyignore`
By default `comfy node publish` packages every file tracked by `git`. To keep development-only files (tests, design assets, large samples) out of the published archive, add a `.comfyignore` file to your repository root. The syntax matches [`.gitignore`](https://git-scm.com/docs/gitignore):
```gitignore theme={null}
# Development-only assets
docs/
tests/
*.psd
.vscode/
```
* `.comfyignore` layers on top of `.gitignore` — files not tracked by git are already excluded. Use `.comfyignore` to drop files you *keep* in git but don't want in the registry archive.
* Directories listed in [`[tool.comfy].includes`](/registry/specifications) are force-included even if they match a `.comfyignore` pattern (useful when a built `dist/` folder is git-ignored but must ship).
* Commit `.comfyignore` to your repo so local runs and CI produce the same archive.
## Publish to the Registry
### Option 1: Comfy CLI
Run the command below to manually publish your node to the registry.
```bash theme={null}
comfy node publish
```
You'll be prompted for the API key.
```bash theme={null}
API Key for publisher '': ****************************************************
...Version 1.0.0 Published.
See it here: https://registry.comfy.org/publisherId/your-node
```
Keep in mind that the API key is hidden by default.
When copy-pasting, your API key might have an additional \x16 at the back when using CTRL+V (for Windows), eg: \*\*\*\*\*\*\*\*\*\*\*\*\*\*\*\*\*\*\*\*\*\*\*\*\*\*\*\*\*\*\*\*\*\*\*\*\*\*\*\*\*\*\*\*\*\*\*\*\x16.
It is recommended to copy-paste your API key via right-clicking instead.
### Option 2: Github Actions
Automatically publish your node through github actions.
Go to Settings -> Secrets and Variables -> Actions -> Under Secrets Tab and Repository secrets -> New Repository Secret.
Create a secret called `REGISTRY_ACCESS_TOKEN` and store your API key as the value.
Copy the code below and paste it here `/.github/workflows/publish_action.yml`
```bash theme={null}
name: Publish to Comfy registry
on:
workflow_dispatch:
push:
branches:
- main
paths:
- "pyproject.toml"
jobs:
publish-node:
name: Publish Custom Node to registry
runs-on: ubuntu-latest
steps:
- name: Check out code
uses: actions/checkout@v4
- name: Publish Custom Node
uses: Comfy-Org/publish-node-action@main
with:
personal_access_token: ${{ secrets.REGISTRY_ACCESS_TOKEN }} ## Add your own personal access token to your Github Repository secrets and reference it here.
```
If your working branch is named something besides `main`, such as `master`, add the name under the branches section.
Push an update to your `pyproject.toml`'s version number. You should see your updated node on the registry.
The github action will automatically run every time you push an update to your `pyproject.toml` file
 ### Create a Registry Publishing API Key
 Name the API key and save it somewhere safe. If you lose it, you'll have to create a new key.
 ### Add Metadata