> ## Documentation Index
> Fetch the complete documentation index at: https://docs.comfy.org/llms.txt
> Use this file to discover all available pages before exploring further.
# ComfyUI Image to Image Workflow
> This guide will help you understand and complete an image to image workflow
## What is Image to Image
Image to Image is a workflow in ComfyUI that allows users to input an image and generate a new image based on it.
Image to Image can be used in scenarios such as:
* Converting original image styles, like transforming realistic photos into artistic styles
* Converting line art into realistic images
* Image restoration
* Colorizing old photos
* ... and other scenarios
To explain it with an analogy:
It's like asking an artist to create a specific piece based on your reference image.
If you carefully compare this tutorial with the [Text to Image](/tutorials/basic/text-to-image) tutorial,
you'll notice that the Image to Image process is very similar to Text to Image,
just with an additional input reference image as a condition. In Text to Image, we let the artist (image model) create freely based on our prompts,
while in Image to Image, we let the artist create based on both our reference image and prompts.
## ComfyUI Image to Image Workflow Example Guide
### Model Installation
Download the [v1-5-pruned-emaonly-fp16.safetensors](https://huggingface.co/Comfy-Org/stable-diffusion-v1-5-archive/blob/main/v1-5-pruned-emaonly-fp16.safetensors) file and put it in your `ComfyUI/models/checkpoints` folder.
### Image to Image Workflow and Input Image
Download the image below and **drag it into ComfyUI** to load the workflow:

Images containing workflow JSON in their metadata can be directly dragged into ComfyUI or loaded using the menu `Workflows` -> `Open (ctrl+o)`.
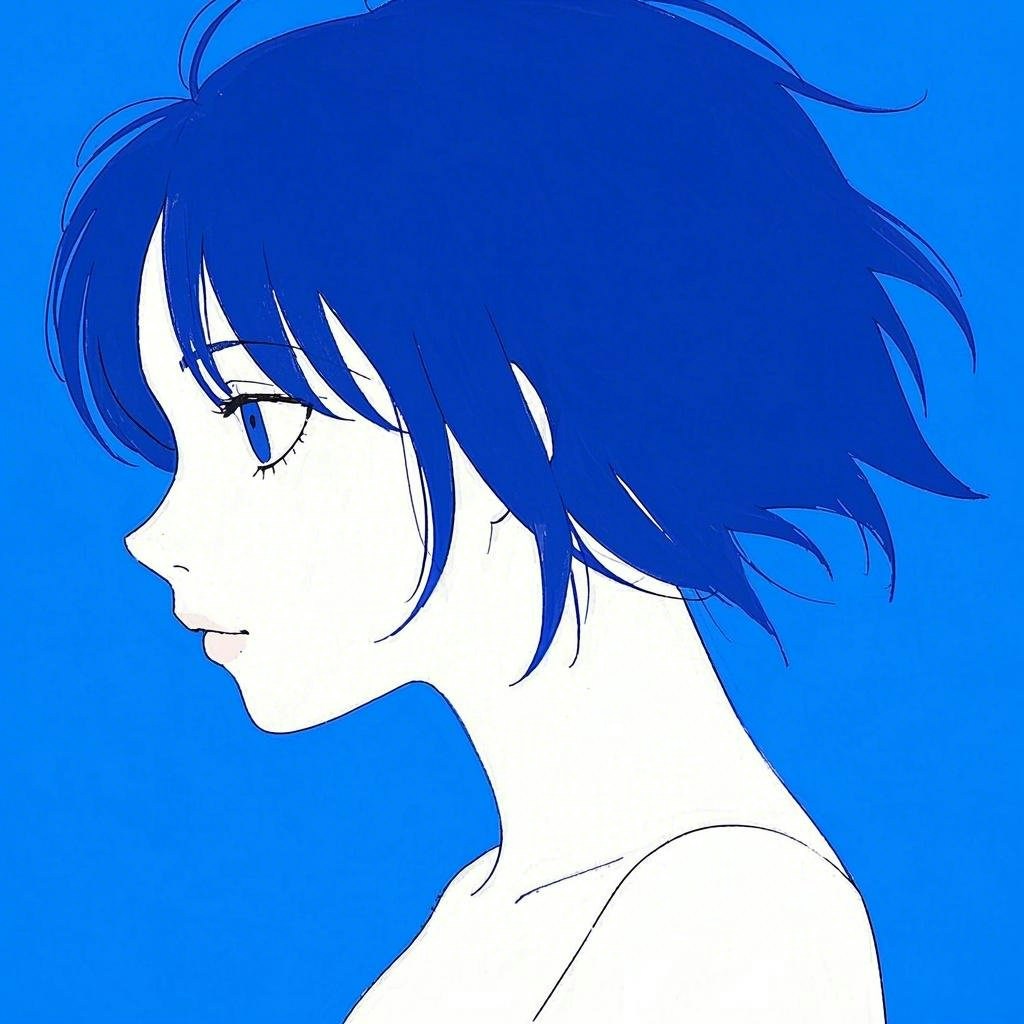
Download the image below and we will use it as the input image:
 ### Complete the Workflow Step by Step
Follow the steps in the diagram below to ensure the workflow runs correctly.
### Complete the Workflow Step by Step
Follow the steps in the diagram below to ensure the workflow runs correctly.
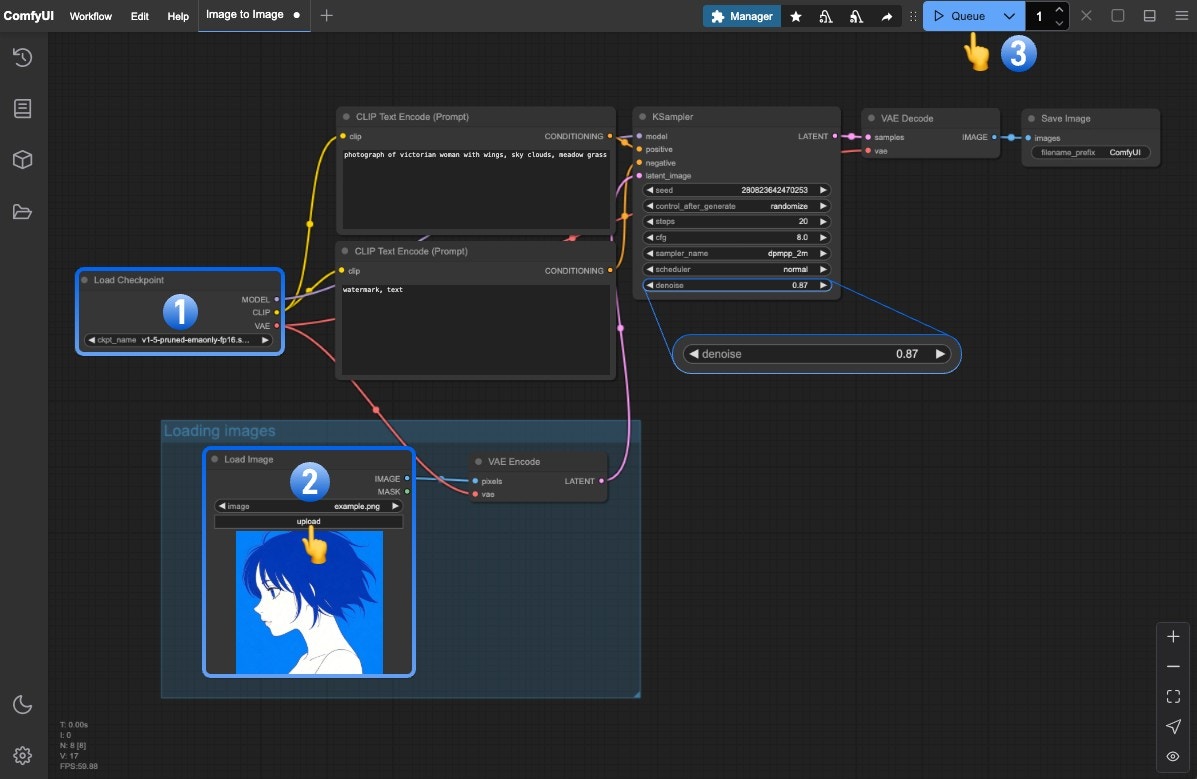 1. Ensure `Load Checkpoint` loads **v1-5-pruned-emaonly-fp16.safetensors**
2. Upload the input image to the `Load Image` node
3. Click `Queue` or press `Ctrl/Cmd + Enter` to generate
## Key Points of Image to Image Workflow
The key to the Image to Image workflow lies in the `denoise` parameter in the `KSampler` node, which should be **less than 1**
If you've adjusted the `denoise` parameter and generated images, you'll notice:
* The smaller the `denoise` value, the smaller the difference between the generated image and the reference image
* The larger the `denoise` value, the larger the difference between the generated image and the reference image
This is because `denoise` determines the strength of noise added to the latent space image after converting the reference image. If `denoise` is 1, the latent space image will become completely random noise, making it the same as the latent space generated by the `empty latent image` node, losing all characteristics of the reference image.
For the corresponding principles, please refer to the principle explanation in the [Text to Image](/tutorials/basic/text-to-image) tutorial.
## Try It Yourself
1. Try modifying the `denoise` parameter in the **KSampler** node, gradually changing it from 1 to 0, and observe the changes in the generated images
2. Replace with your own prompts and reference images to generate your own image effects
1. Ensure `Load Checkpoint` loads **v1-5-pruned-emaonly-fp16.safetensors**
2. Upload the input image to the `Load Image` node
3. Click `Queue` or press `Ctrl/Cmd + Enter` to generate
## Key Points of Image to Image Workflow
The key to the Image to Image workflow lies in the `denoise` parameter in the `KSampler` node, which should be **less than 1**
If you've adjusted the `denoise` parameter and generated images, you'll notice:
* The smaller the `denoise` value, the smaller the difference between the generated image and the reference image
* The larger the `denoise` value, the larger the difference between the generated image and the reference image
This is because `denoise` determines the strength of noise added to the latent space image after converting the reference image. If `denoise` is 1, the latent space image will become completely random noise, making it the same as the latent space generated by the `empty latent image` node, losing all characteristics of the reference image.
For the corresponding principles, please refer to the principle explanation in the [Text to Image](/tutorials/basic/text-to-image) tutorial.
## Try It Yourself
1. Try modifying the `denoise` parameter in the **KSampler** node, gradually changing it from 1 to 0, and observe the changes in the generated images
2. Replace with your own prompts and reference images to generate your own image effects