> ## Documentation Index
> Fetch the complete documentation index at: https://docs.comfy.org/llms.txt
> Use this file to discover all available pages before exploring further.
# ComfyUI Outpainting Workflow Example
> This guide will introduce you to the outpainting workflow in ComfyUI and walk you through an outpainting example
This guide will introduce you to the concept of outpainting in AI image generation and how to create an outpainting workflow in ComfyUI. We will cover:
* Using outpainting workflow to extend an image
* Understanding and using outpainting-related nodes in ComfyUI
* Mastering the basic outpainting process
## About Outpainting
In AI image generation, we often encounter situations where an existing image has good composition but the canvas area is too small, requiring us to extend the canvas to get a larger scene. This is where outpainting comes in.
Basically, it requires similar content to [Inpainting](/tutorials/basic/inpaint), but we use different nodes to **build the mask**.
Outpainting applications include:
* **Scene Extension:** Expand the scene range of the original image to show a more complete environment
* **Composition Adjustment:** Optimize the overall composition by extending the canvas
* **Content Addition:** Add more related scene elements to the original image
## ComfyUI Outpainting Workflow Example Explanation
### Preparation
#### 1. Model Installation
Download the following model file and save it to `ComfyUI/models/checkpoints` directory:
* [512-inpainting-ema.safetensors](https://huggingface.co/Comfy-Org/stable_diffusion_2.1_repackaged/resolve/main/512-inpainting-ema.safetensors)
#### 2. Input Image
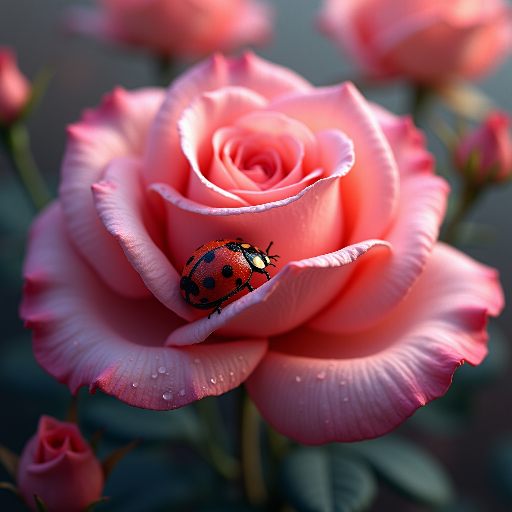
Prepare an image you want to extend. In this example, we will use the following image:
 #### 3. Outpainting Workflow
Download the image below and **drag it into ComfyUI** to load the workflow:

Images containing workflow JSON in their metadata can be directly dragged into ComfyUI or loaded using the menu `Workflows` -> `Open (ctrl+o)`.
### Outpainting Workflow Usage Explanation
#### 3. Outpainting Workflow
Download the image below and **drag it into ComfyUI** to load the workflow:

Images containing workflow JSON in their metadata can be directly dragged into ComfyUI or loaded using the menu `Workflows` -> `Open (ctrl+o)`.
### Outpainting Workflow Usage Explanation
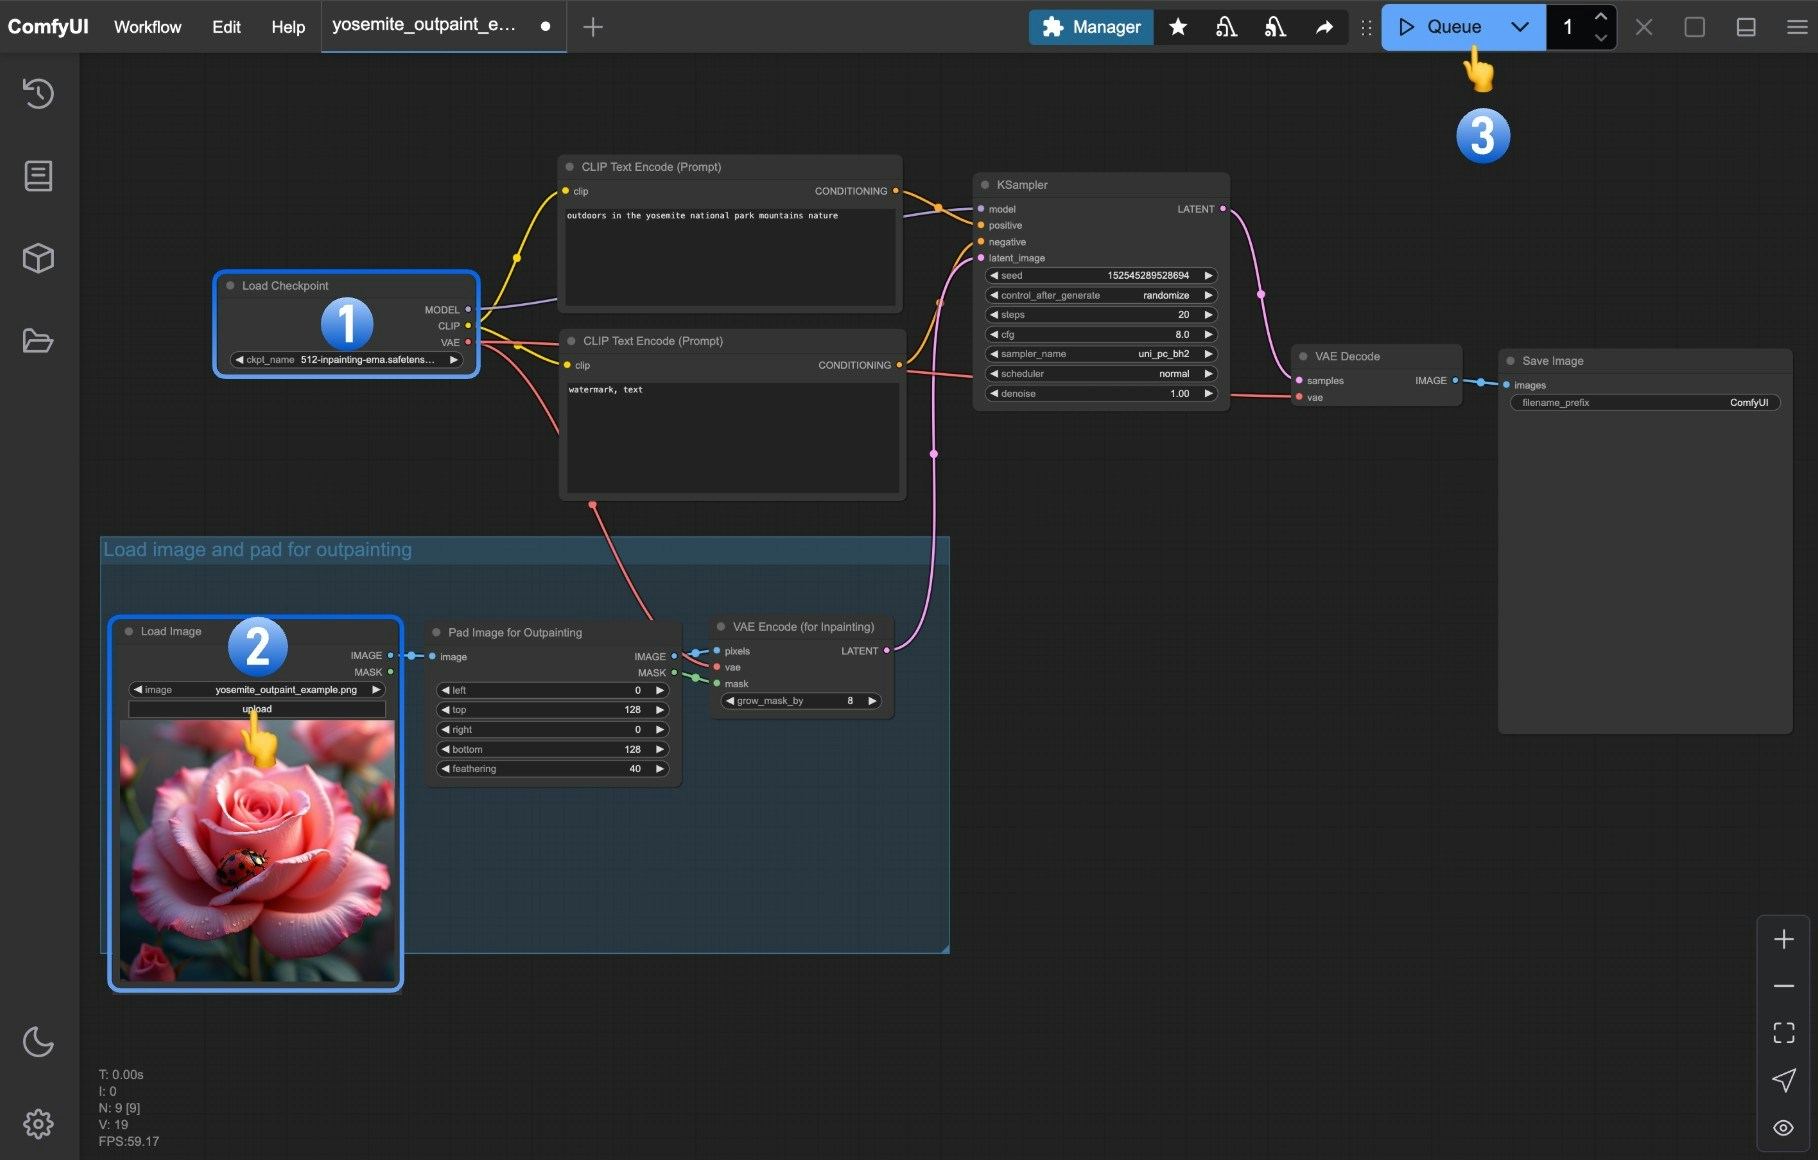 The key steps of the outpainting workflow are as follows:
1. Load the locally installed model file in the `Load Checkpoint` node
2. Click the `Upload` button in the `Load Image` node to upload your image
3. Click the `Queue` button or use the shortcut `Ctrl + Enter` to execute the image generation
In this workflow, we mainly use the `Pad Image for outpainting` node to control the direction and range of image extension. This is actually an [Inpaint](/tutorials/basic/inpaint) workflow, but we use different nodes to build the mask.
### Pad Image for outpainting Node
The key steps of the outpainting workflow are as follows:
1. Load the locally installed model file in the `Load Checkpoint` node
2. Click the `Upload` button in the `Load Image` node to upload your image
3. Click the `Queue` button or use the shortcut `Ctrl + Enter` to execute the image generation
In this workflow, we mainly use the `Pad Image for outpainting` node to control the direction and range of image extension. This is actually an [Inpaint](/tutorials/basic/inpaint) workflow, but we use different nodes to build the mask.
### Pad Image for outpainting Node
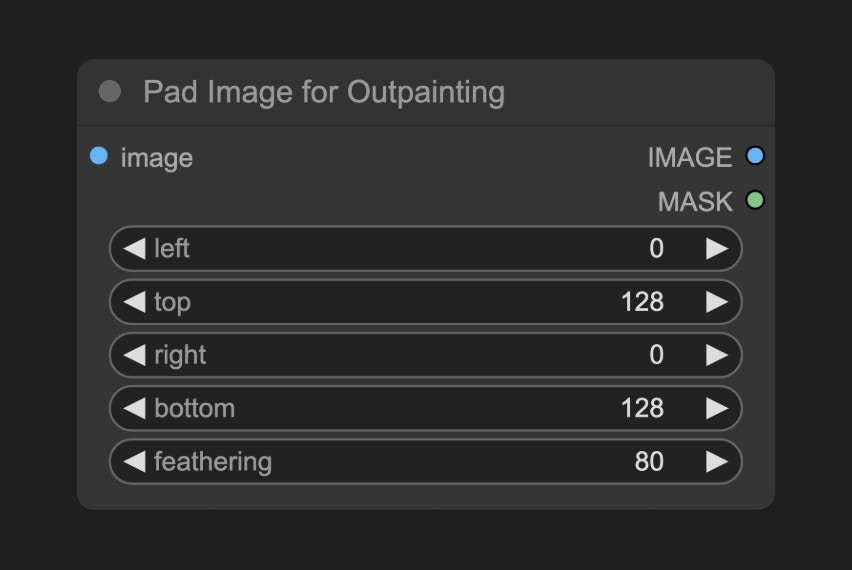 This node accepts an input image and outputs an extended image with a corresponding mask, where the mask is built based on the node parameters.
#### Input Parameters
| Parameter Name | Function |
| -------------- | ------------------------------------------------------------------------------------------------------------------------------------- |
| `image` | Input image |
| `left` | Left padding amount |
| `top` | Top padding amount |
| `right` | Right padding amount |
| `bottom` | Bottom padding amount |
| `feathering` | Controls the smoothness of the transition between the original image and the added padding, higher values create smoother transitions |
#### Output Parameters
| Parameter Name | Function |
| -------------- | -------------------------------------------------------------------------- |
| `image` | Output `image` represents the padded image |
| `mask` | Output `mask` indicates the original image area and the added padding area |
#### Node Output Content
After processing by the `Pad Image for outpainting` node, the output image and mask preview are as follows:
This node accepts an input image and outputs an extended image with a corresponding mask, where the mask is built based on the node parameters.
#### Input Parameters
| Parameter Name | Function |
| -------------- | ------------------------------------------------------------------------------------------------------------------------------------- |
| `image` | Input image |
| `left` | Left padding amount |
| `top` | Top padding amount |
| `right` | Right padding amount |
| `bottom` | Bottom padding amount |
| `feathering` | Controls the smoothness of the transition between the original image and the added padding, higher values create smoother transitions |
#### Output Parameters
| Parameter Name | Function |
| -------------- | -------------------------------------------------------------------------- |
| `image` | Output `image` represents the padded image |
| `mask` | Output `mask` indicates the original image area and the added padding area |
#### Node Output Content
After processing by the `Pad Image for outpainting` node, the output image and mask preview are as follows:
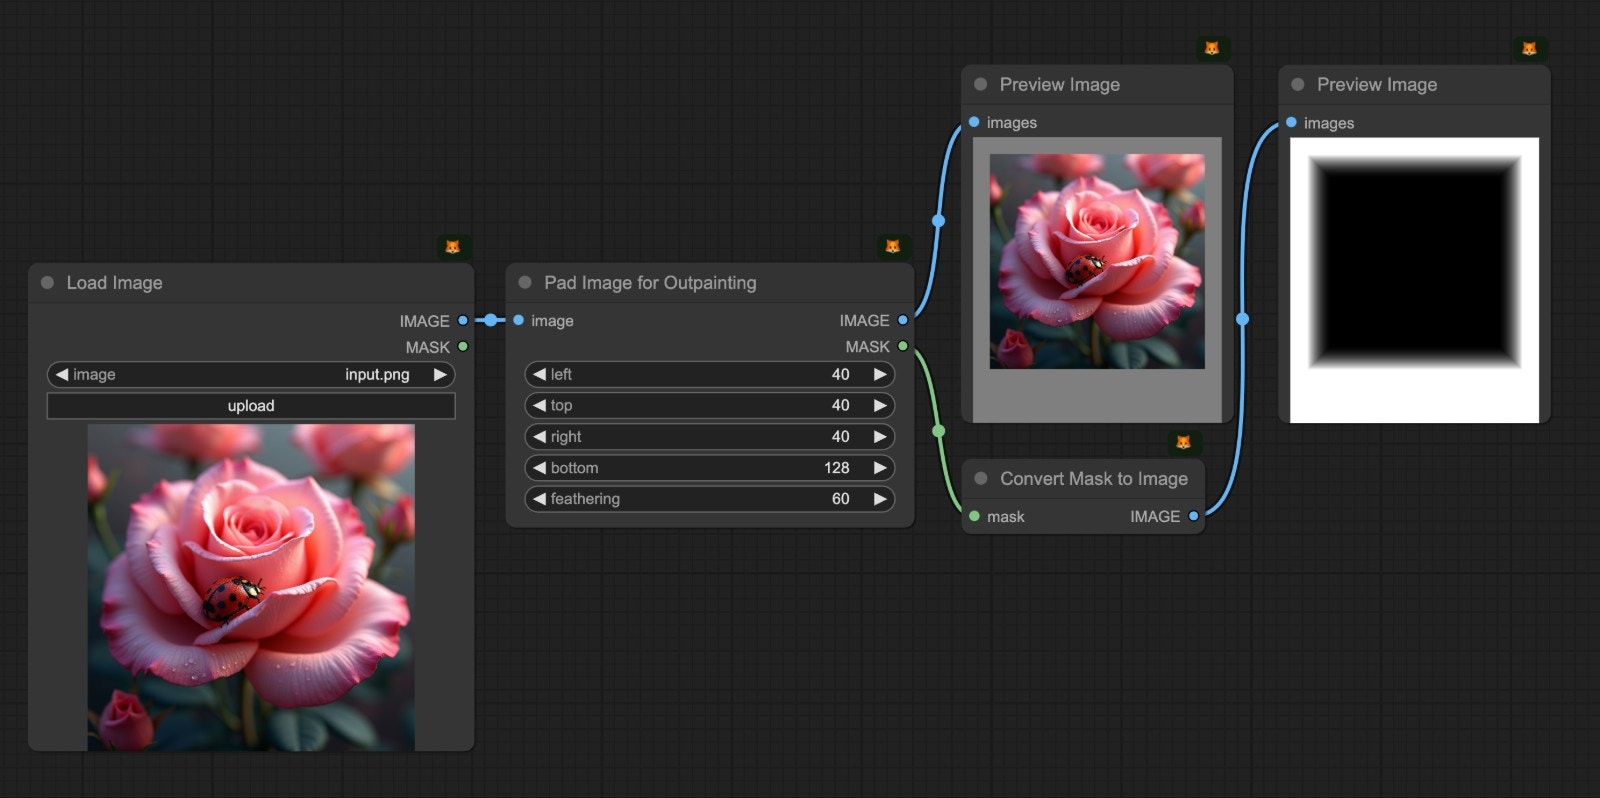 You can see the corresponding output results:
* The `Image` output is the extended image
* The `Mask` output is the mask marking the extension areas
You can see the corresponding output results:
* The `Image` output is the extended image
* The `Mask` output is the mask marking the extension areas