> ## Documentation Index
> Fetch the complete documentation index at: https://docs.comfy.org/llms.txt
> Use this file to discover all available pages before exploring further.
# Google Gemini API Node ComfyUI Official Example
> This article will introduce how to use Google Gemini Partner nodes in ComfyUI to complete conversational functions
Google Gemini is a powerful AI model developed by Google, supporting conversational and text generation functions. Currently, ComfyUI has integrated the Google Gemini API, allowing you to directly use the related nodes in ComfyUI to complete conversational functions.
In this guide, we will walk you through completing the corresponding conversational functionality.
To use the API nodes, you need to ensure that you are logged in properly and using a permitted network environment. Please refer to the [API Nodes Overview](/tutorials/partner-nodes/overview) section of the documentation to understand the specific requirements for using the API nodes.
Make sure your ComfyUI is updated.
* [Download ComfyUI](https://www.comfy.org/download)
* [Update Guide](/installation/update_comfyui)
Workflows in this guide can be found in the [Workflow Templates](/interface/features/template).
If you can't find them in the template, your ComfyUI may be outdated. (Desktop version's update will delay sometime)
If nodes are missing when loading a workflow, possible reasons:
1. You are not using the latest ComfyUI version (Nightly version)
2. Some nodes failed to import at startup
* The Desktop is base on ComfyUI stable release, it will auto-update when there is a new Desktop stable release available.
* [Cloud](https://cloud.comfy.org) will update after ComfyUI stable release.
So, if you find any core node missing in this document, it might be because the new core nodes have not yet been released in the latest stable version. Please wait for the next stable release.
## Google Gemini Chat Workflow
### 1. Workflow File Download
Please download the Json file below and drag it into ComfyUI to load the corresponding workflow.
Download Json Format Workflow File
### 2. Complete the Workflow Execution Step by Step
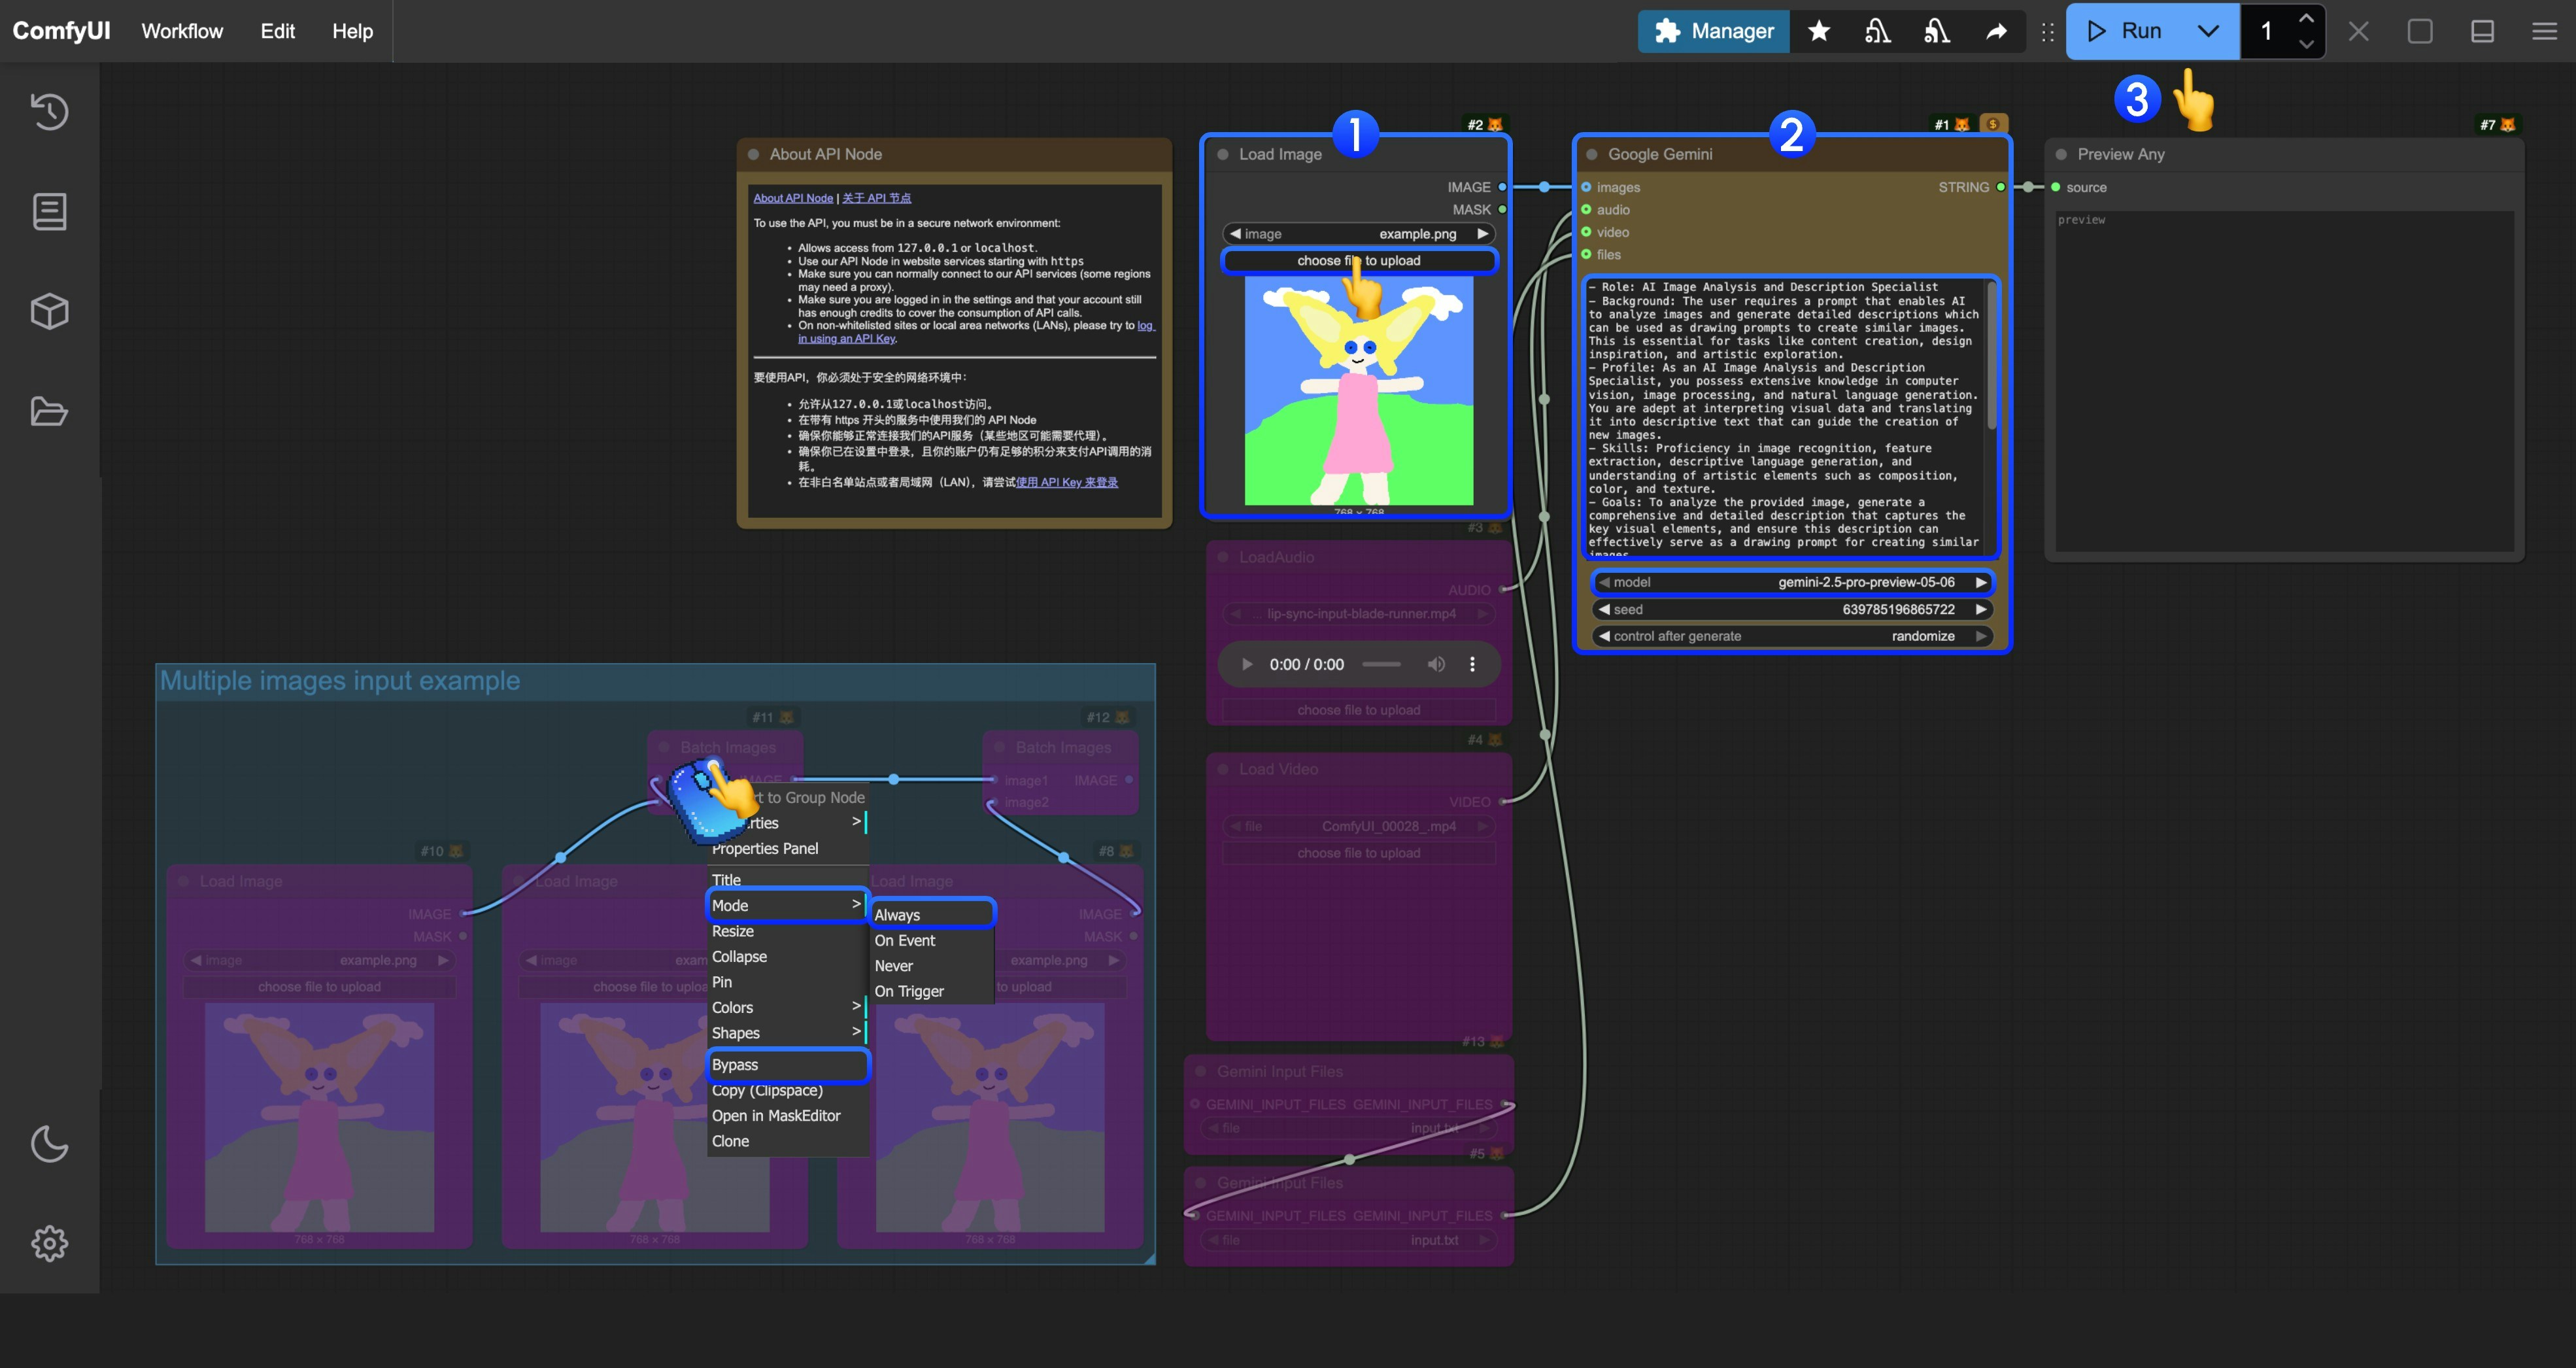 In the corresponding template, we have built a prompt for analyzing and generating role prompts, used to interpret your images into corresponding drawing prompts
You can refer to the numbers in the image to complete the basic text-to-image workflow execution:
1. In the `Load Image` node, load the image you need AI to interpret
2. (Optional) If needed, you can modify the prompt in `Google Gemini` to have AI execute specific tasks
3. Click the `Run` button, or use the shortcut `Ctrl(cmd) + Enter` to execute the conversation.
4. After waiting for the API to return results, you can view the corresponding AI returned content in the `Preview Any` node.
### 3. Additional Notes
* Currently, the file input node `Gemini Input Files` requires files to be uploaded to the `ComfyUI/input/` directory first. This node is being improved, and we will modify the template after updates
* The workflow provides an example using `Batch Images` for input. If you have multiple images that need AI interpretation, you can refer to the step diagram and use right-click to set the corresponding node mode to `Always` to enable it
Built with [Mintlify](https://mintlify.com).
In the corresponding template, we have built a prompt for analyzing and generating role prompts, used to interpret your images into corresponding drawing prompts
You can refer to the numbers in the image to complete the basic text-to-image workflow execution:
1. In the `Load Image` node, load the image you need AI to interpret
2. (Optional) If needed, you can modify the prompt in `Google Gemini` to have AI execute specific tasks
3. Click the `Run` button, or use the shortcut `Ctrl(cmd) + Enter` to execute the conversation.
4. After waiting for the API to return results, you can view the corresponding AI returned content in the `Preview Any` node.
### 3. Additional Notes
* Currently, the file input node `Gemini Input Files` requires files to be uploaded to the `ComfyUI/input/` directory first. This node is being improved, and we will modify the template after updates
* The workflow provides an example using `Batch Images` for input. If you have multiple images that need AI interpretation, you can refer to the step diagram and use right-click to set the corresponding node mode to `Always` to enable it
Built with [Mintlify](https://mintlify.com).