> ## Documentation Index
> Fetch the complete documentation index at: https://docs.comfy.org/llms.txt
> Use this file to discover all available pages before exploring further.
# Luma Image to Image Workflow in ComfyUI
> How to run the Luma Image to Image workflow in ComfyUI, locally or on Comfy Cloud
This guide shows how to run the Luma Image to Image workflow in ComfyUI. For what the model is and what it does best, see the [Luma Image to Image overview](/tutorials/partner-nodes/luma/luma-image-to-image).
To use the Partner Nodes, you need to ensure that you are logged in properly and using a permitted network environment. Please refer to the [Partner Nodes Overview](/tutorials/partner-nodes/overview) section of the documentation to understand the specific requirements for using the Partner Nodes.
Make sure your ComfyUI is updated.
* [Download ComfyUI](https://www.comfy.org/download)
* [Update Guide](/installation/update_comfyui)
Workflows in this guide can be found in the [Workflow Templates](/interface/features/template).
If you can't find them in the template, your ComfyUI may be outdated.
If nodes are missing when loading a workflow, possible reasons:
1. You are not using the latest ComfyUI version (Nightly version)
2. Some nodes failed to import at startup
* [Cloud](https://cloud.comfy.org) will update after ComfyUI stable release.
So, if you find any core node missing in this document, it might be because the new core nodes have not yet been released in the latest stable version. Please wait for the next stable release.
## Luma Image to Image Partner Nodes Workflow
This feature works well for changing objects and shapes. However, it may not be ideal for color changes. We recommend using lower weight values, around 0.0 to 0.1.
### 1. Download Workflow File
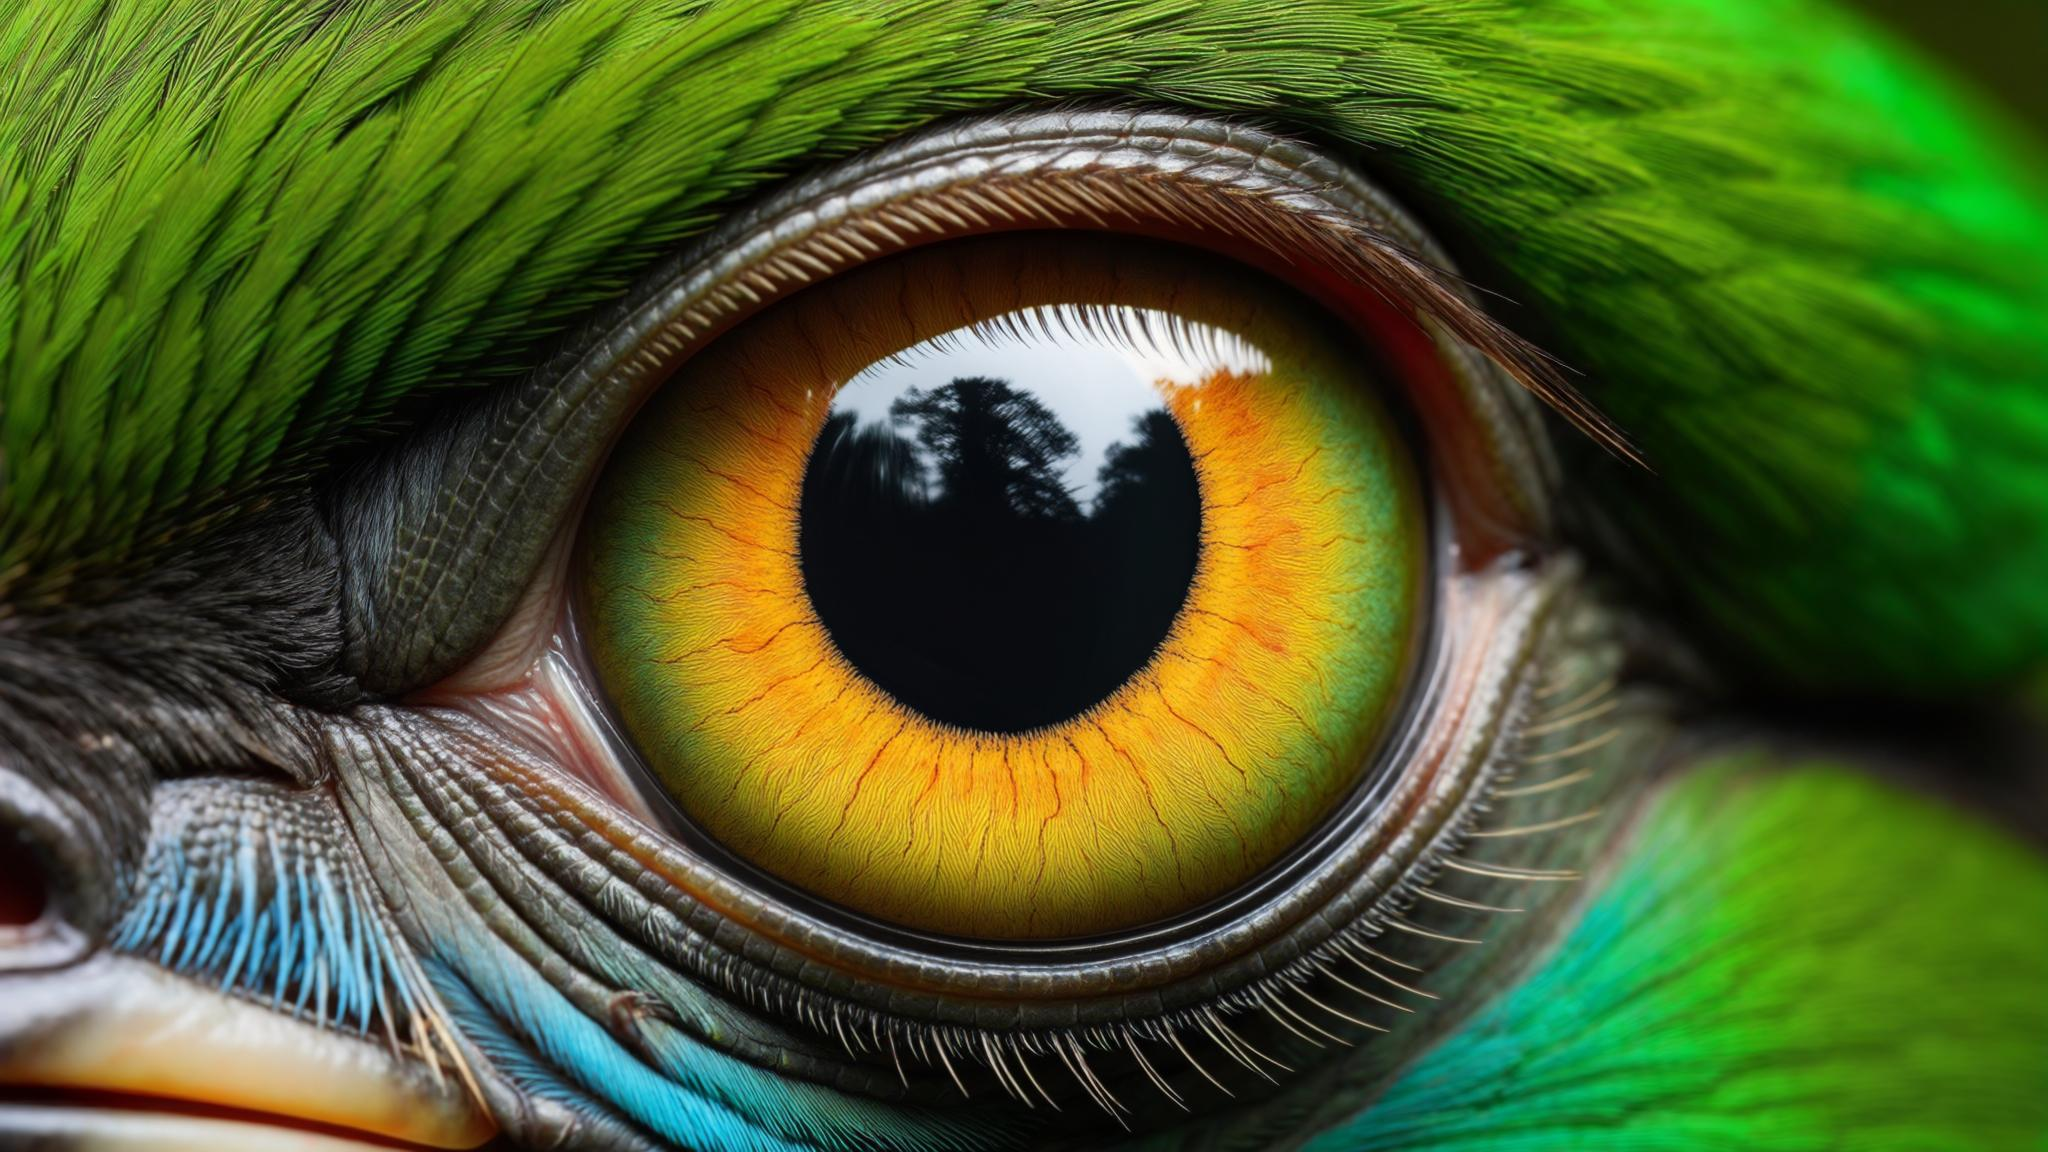
Download and drag the following image into ComfyUI to load the workflow (workflow information is included in the image metadata):

Download this image to use as input:
### 2. Complete the Workflow Steps
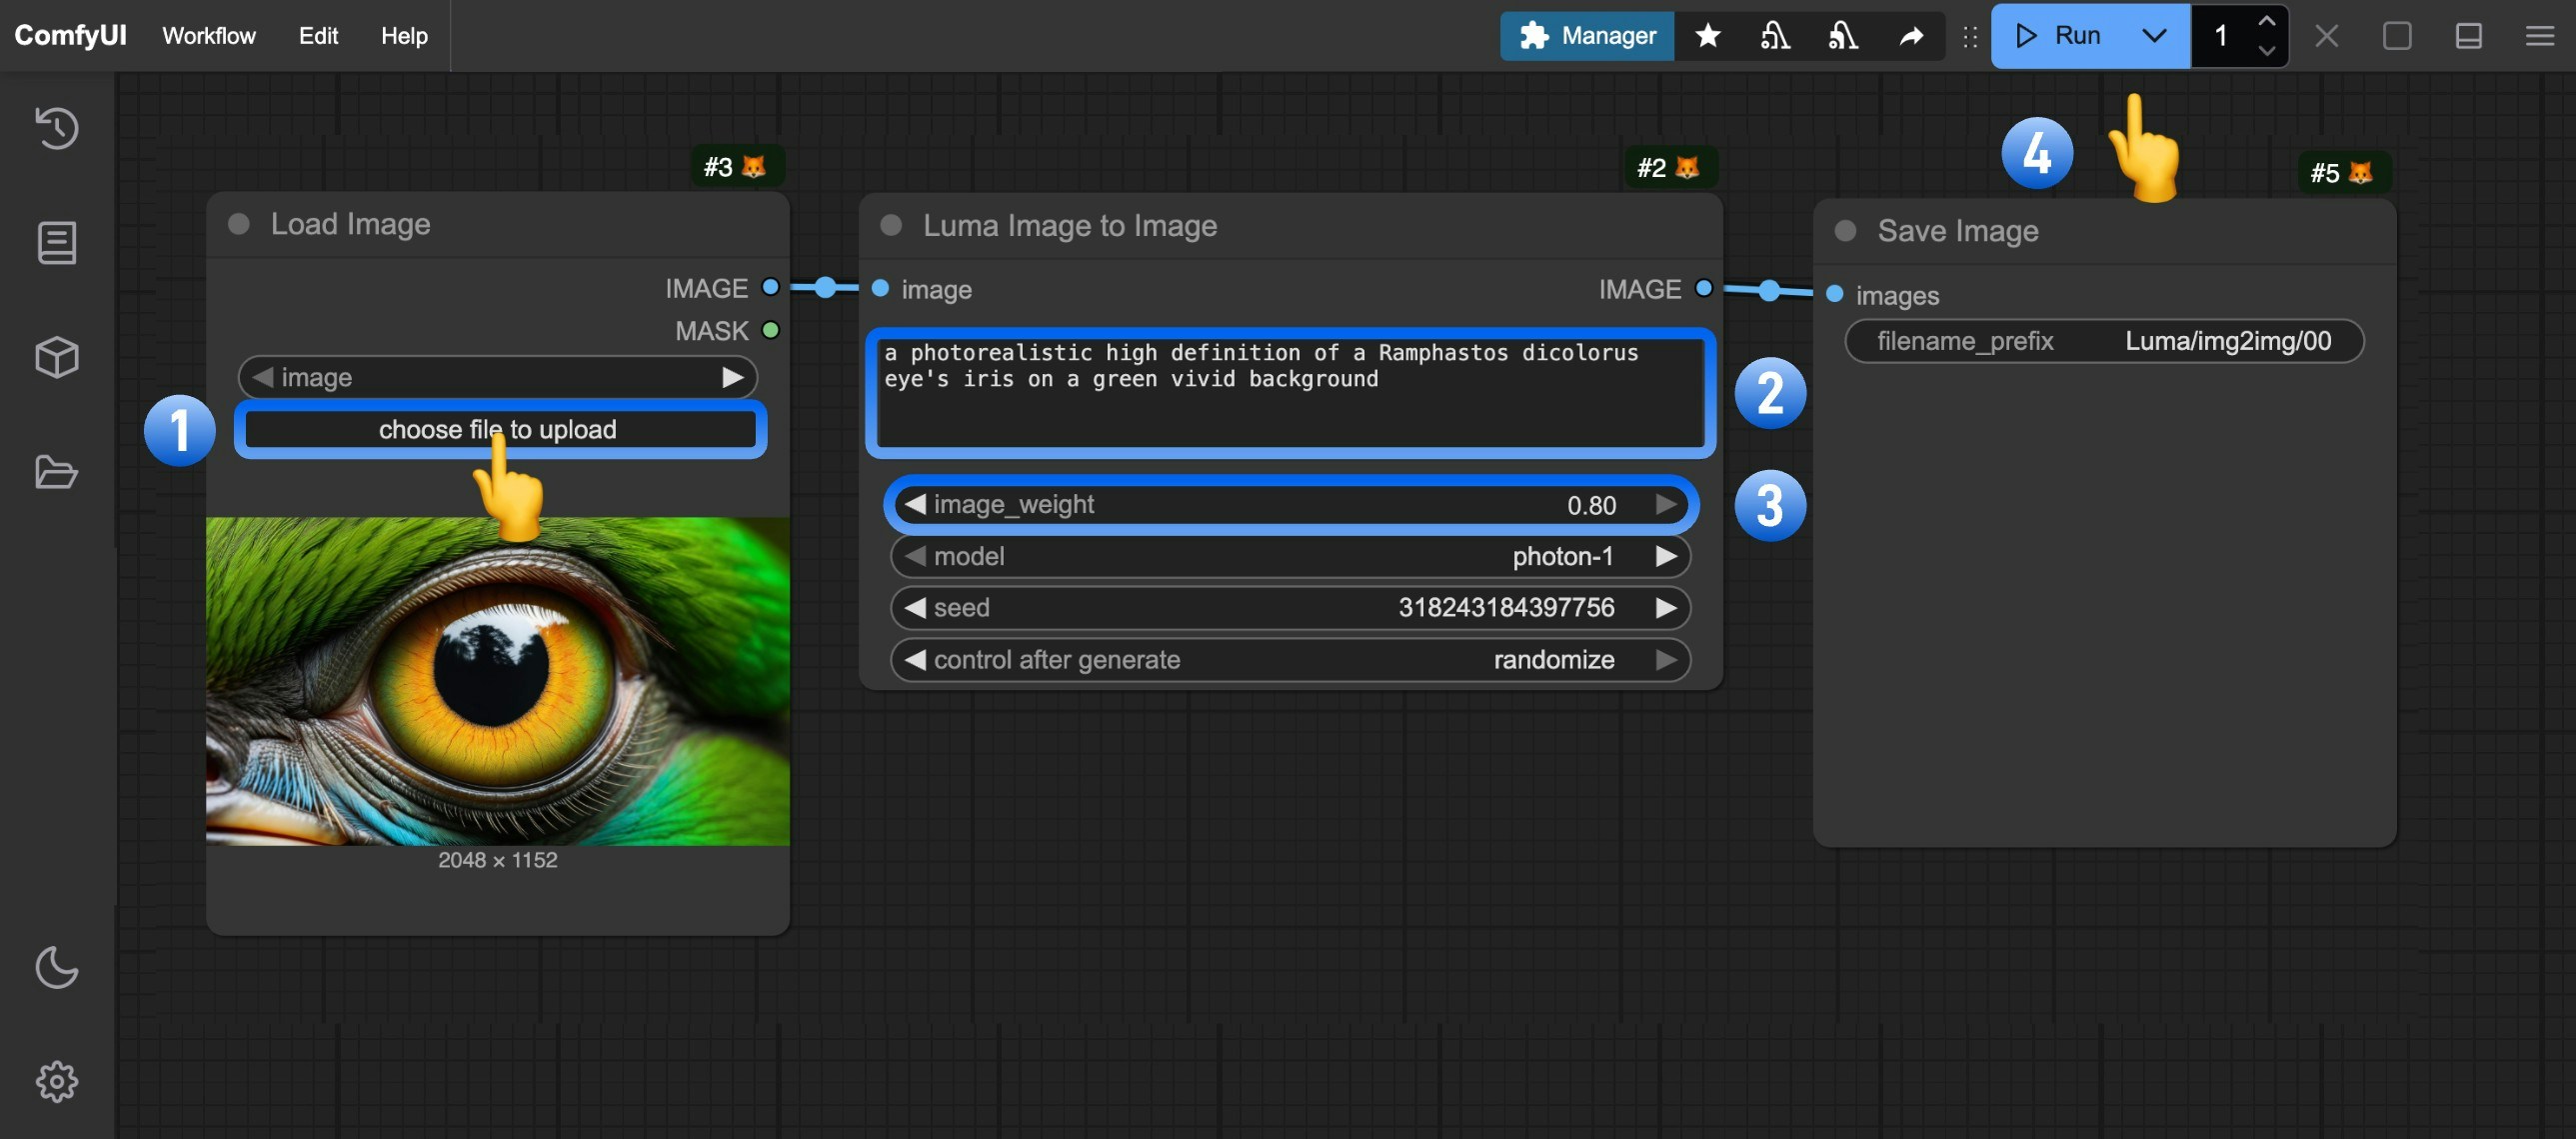 Follow these numbered steps:
1. Click **Upload** on the `Load Image` node to upload your input image
2. (Optional) Modify the workflow prompts
3. (Optional) Adjust `image_weight` to change input image influence (lower values stay closer to original)
4. Click `Run` or use shortcut `Ctrl(cmd) + Enter` to generate the image
5. After API returns results, view the generated image in the `Save Image` node. Images are saved to the `ComfyUI/output/` directory
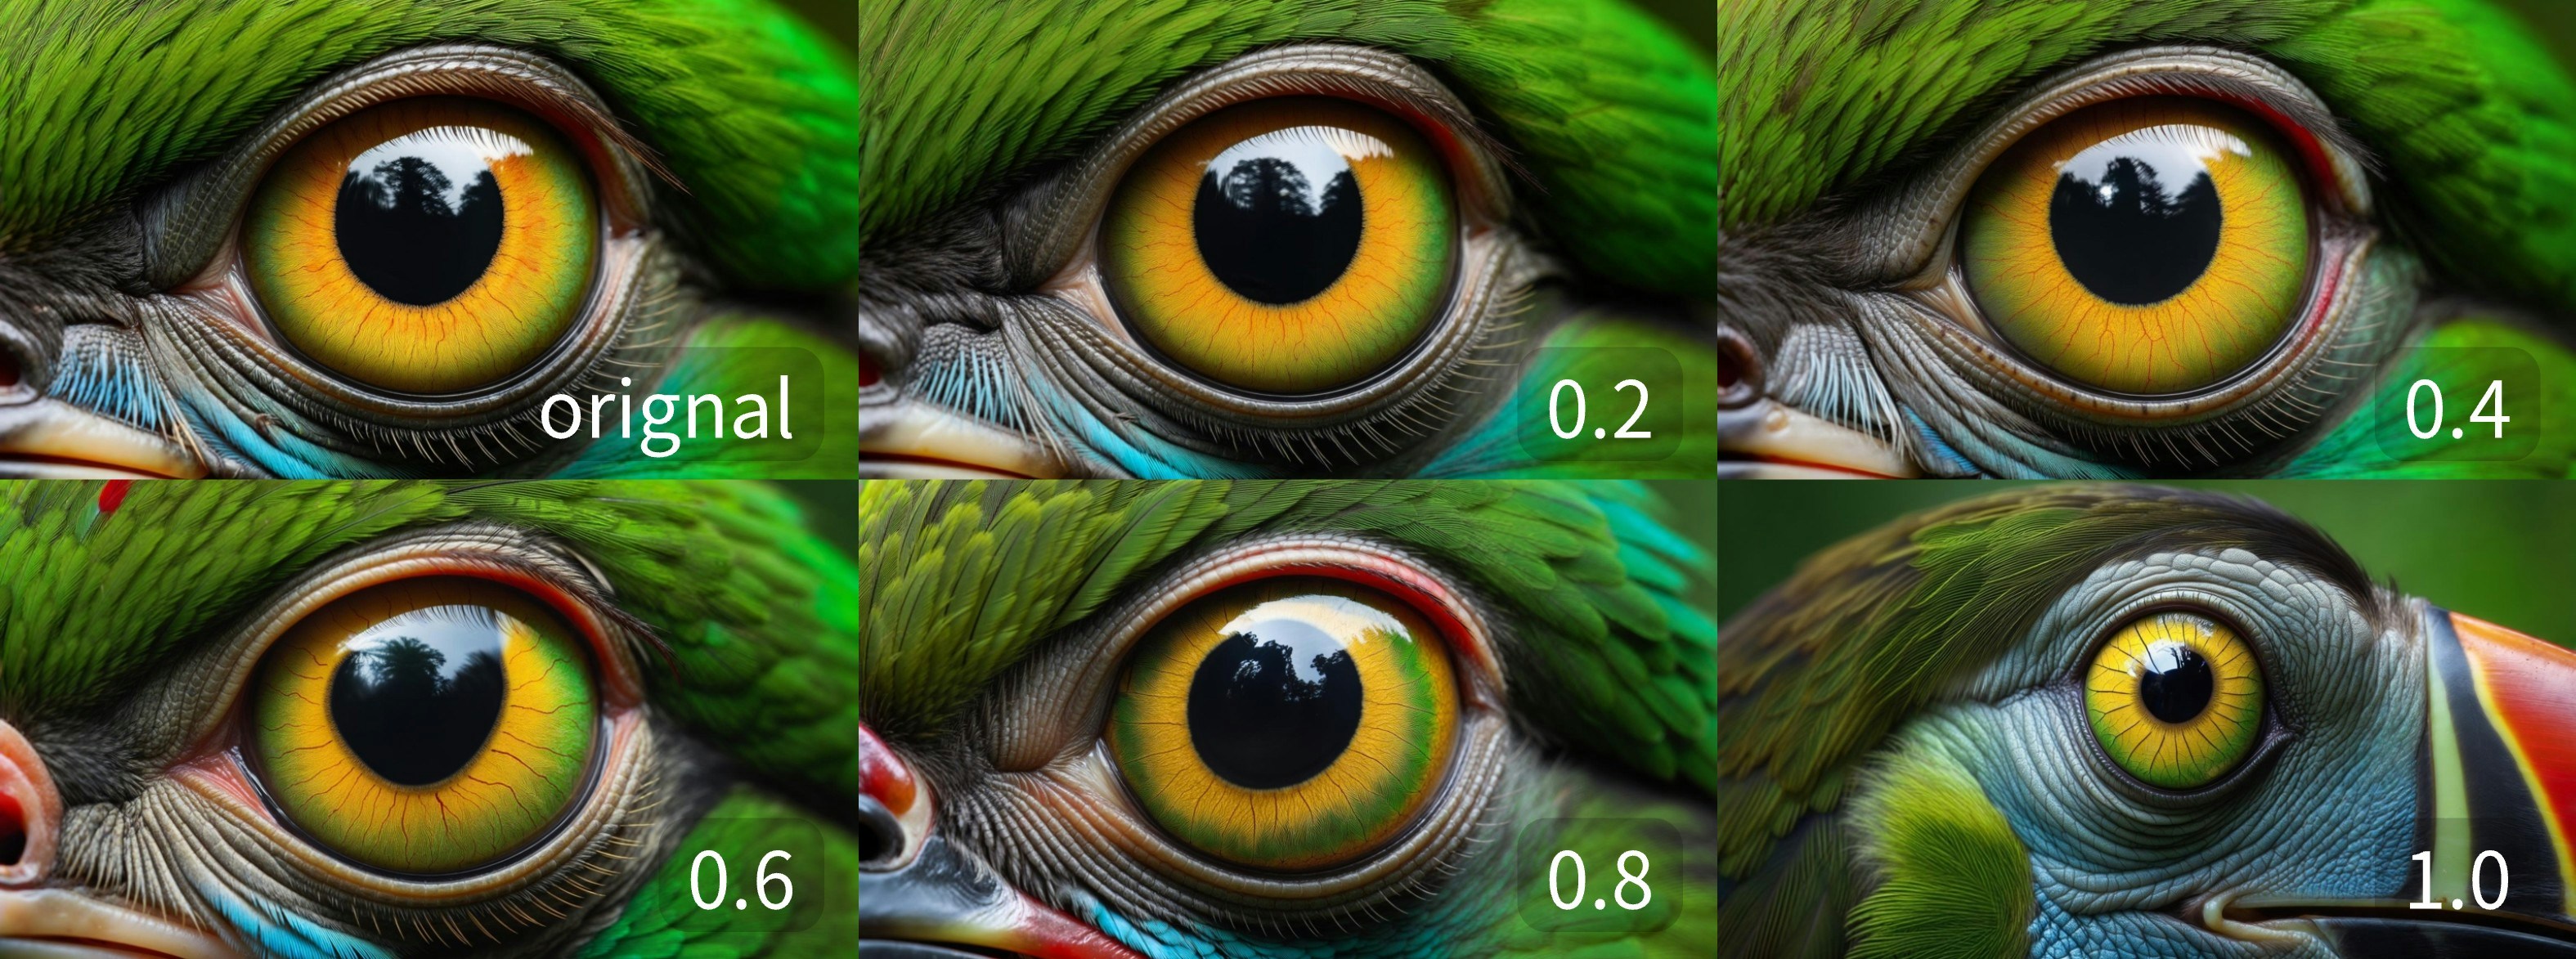
### 3. Results with Different `image_weight` Values
Follow these numbered steps:
1. Click **Upload** on the `Load Image` node to upload your input image
2. (Optional) Modify the workflow prompts
3. (Optional) Adjust `image_weight` to change input image influence (lower values stay closer to original)
4. Click `Run` or use shortcut `Ctrl(cmd) + Enter` to generate the image
5. After API returns results, view the generated image in the `Save Image` node. Images are saved to the `ComfyUI/output/` directory
### 3. Results with Different `image_weight` Values