> ## Documentation Index
> Fetch the complete documentation index at: https://docs.comfy.org/llms.txt
> Use this file to discover all available pages before exploring further.
# Luma Uni-1 Workflows in ComfyUI
> How to run the Luma Uni-1 Image Create and Image Edit workflows in ComfyUI, locally or on Comfy Cloud
This guide shows how to run the Luma Uni-1 workflows in ComfyUI. For what the model is and what it does best, see the [Luma Uni-1 overview](/tutorials/partner-nodes/luma/luma-uni-1).
To use the Partner Nodes, you need to ensure that you are logged in properly and using a permitted network environment. Please refer to the [Partner Nodes Overview](/tutorials/partner-nodes/overview) section of the documentation to understand the specific requirements for using the Partner Nodes.
Make sure your ComfyUI is updated.
* [Download ComfyUI](https://www.comfy.org/download)
* [Update Guide](/installation/update_comfyui)
Workflows in this guide can be found in the [Workflow Templates](/interface/features/template).
If you can't find them in the template, your ComfyUI may be outdated.
If nodes are missing when loading a workflow, possible reasons:
1. You are not using the latest ComfyUI version (Nightly version)
2. Some nodes failed to import at startup
* [Cloud](https://cloud.comfy.org) will update after ComfyUI stable release.
So, if you find any core node missing in this document, it might be because the new core nodes have not yet been released in the latest stable version. Please wait for the next stable release.
## The core distinction: Create vs Modify
Everything in Uni-1 starts with one question: **Am I creating something new, or changing something that already exists?**
| Mode | What it does | When to use |
| ---------------- | ---------------------------------------------------------------------------------------- | ----------------------------------------------- |
| **Create Image** | Produces a brand-new composition. Can be inspired by references. | "Create a new scene in the style of this photo" |
| **Modify Image** | Edits a specific input image. Preserves composition and structure unless told otherwise. | "Make this photo look like nighttime" |
When in doubt:
* If the output should look like a **version of your input**, use Modify
* If it should feel **inspired but new**, use Create
## Available workflows
### Image Create workflow
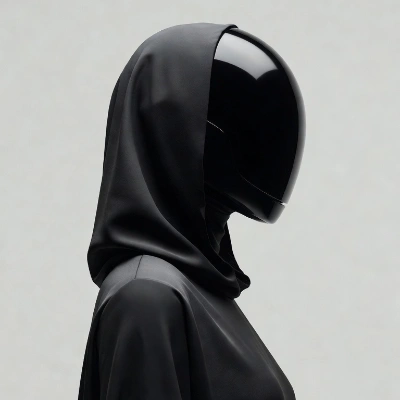 Try the Image Create workflow instantly on Comfy Cloud.
Download JSON or search "Luma UNI-1 Image Create" in Template Library
Try the Image Create workflow instantly on Comfy Cloud.
Download JSON or search "Luma UNI-1 Image Create" in Template Library
Input materials
Download this sample input image to try the workflow:
Download sample style reference
### Image Edit workflow
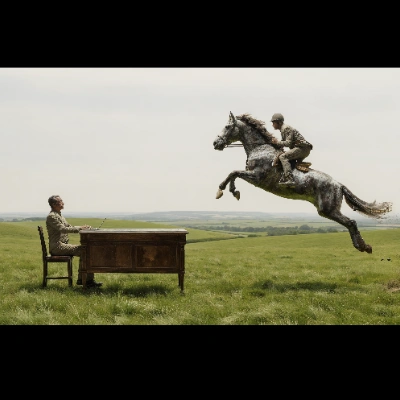 Try the Image Edit workflow instantly on Comfy Cloud.
Download JSON or search "Luma UNI-1 Image Edit" in Template Library
Try the Image Edit workflow instantly on Comfy Cloud.
Download JSON or search "Luma UNI-1 Image Edit" in Template Library
Input materials
Download this sample input image to try the workflow:
Download sample source image
The workflow is simple: **prompt → evaluate → refine**. Leave the seed blank while exploring. Once you find something strong, lock the seed and iterate from there.
## Core parameters
| Parameter | Description |
| ----------------------------- | ---------------------------------------------------------------------------------------------------------------- |
| **Prompt** | Your primary control. Up to 6,000 characters. Be precise. |
| **Aspect ratio** | Controls framing, not quality. Choose based on use case. |
| **Seed** | Same seed + same prompt → same result. Same seed + changed prompt → controlled variation. No seed → exploration. |
| **Reference images** (Create) | Up to 9 images to guide different aspects. |
| **Source image** (Modify) | The image you are editing. Dimensions are preserved automatically. |
## Working with reference images
References only work if you tell the model what they are for. Use this structure:
```text theme={null}
Use IMAGE1 ([description]) as a [ROLE] reference.
```
Possible roles: **Style**, **Character**, **Composition**, **Color palette**, **Lighting**, **Texture**, **Mood**.
Without roles, the model guesses, and guesses are unreliable.
### Create mode examples
**Style reference**
```text theme={null}
Use IMAGE1 (impressionist oil painting with loose brushwork and warm
sunset tones) as a STYLE reference. Create a portrait of a woman in her
30s applying IMAGE1's color palette and painterly texture. The subject
should be new.
```
**Character reference**
```text theme={null}
Use IMAGE1 (woman with short copper-red hair, freckles) as a CHARACTER
reference. Preserve her features. Generate a new scene: she's sitting
in a softly lit café.
```
**Multi-reference**
```text theme={null}
Use IMAGE1 as a COLOR PALETTE reference, IMAGE2 as LIGHTING, IMAGE3 as
COMPOSITION. Create a lone figure walking through a rain-slicked street
at night.
```
### Modify mode examples
In Modify mode, clarity is everything. Always specify **what to change** and **what must stay untouched**.
```text theme={null}
Change the time of day to golden hour. Update sky, light direction,
shadows, and color temperature. Keep all subjects and composition
unchanged.
```
```text theme={null}
Make the rain heavier and add reflections on the ground. Keep all other
elements unchanged.
```
## Prompting guidelines
Recommended lengths:
* **Text-to-image** → 80–250 words
* **Reference-guided** → 100–300 words
* **Modify** → 30–100 words
Avoid vague terms ("beautiful", "amazing"), redundant phrasing, and conflicting instructions. Instead, use specific, named aesthetics:
* `Golden hour, 85mm lens, shallow depth of field`
* `1970s Italian giallo film poster, high-contrast color blocking`
Precision beats generality.
## Aspect ratios
Choose based on where the image will live:
| Ratio | Use case |
| --------- | --------------------- |
| 1:1 | Social posts |
| 9:16 | Vertical video |
| 16:9 | Widescreen |
| 3:2 / 2:3 | Photography |
| 2:1 / 3:1 | Cinematic / panoramic |
| 1:2 / 1:3 | Ultra-tall |
In Modify mode, aspect ratio is locked to the source image.
## Seeds: control and reproducibility
Seeds turn experimentation into systems.
* **Fixed seed** → consistency
* **No seed** → exploration
Workflow:
1. Explore with no seed
2. Find a strong result
3. Lock the seed
4. Change one variable at a time
Save your prompt and seed together. That's your reusable recipe.
## Advanced techniques
### Character consistency
1. Generate a clean, front-facing reference image
2. Reuse it as `IMAGE1 (CHARACTER)` in every scene
3. Keep the label identical across prompts
### Multi-reference architecture
Assign one role per image:
* IMAGE1 → character
* IMAGE2 → style
* IMAGE3 → lighting
* IMAGE4 → environment
End the prompt with:
```text theme={null}
Treat each reference as having authority over its assigned layer only.
```
### Create → Modify chain
Use Create to explore compositions, then Modify to refine details. This is one of the most powerful workflows.
### Iterative refinement
1. Explore (no seed)
2. Lock seed
3. Change one variable per generation
4. Document results
It feels slower, but it's actually faster, because you always know what changed.
## Troubleshooting
| Problem | Fix |
| ------------------------------------- | ----------------------------------------- |
| References ignored | Label each one clearly |
| Modify changes too much | Explicitly state what must stay unchanged |
| Inconsistent outputs | Lock the seed |
| Prompt partially ignored | Remove conflicts or split into steps |
| Output looks like the reference image | You may be in Modify mode |
| Character inconsistency | Reuse a canonical reference image |
## Quick reference
**Create Image**
* New compositions
* Text + up to 9 references
* Descriptive prompts
**Modify Image**
* Edits existing images
* Source image + references
* Direct, surgical prompts
## The golden rules
1. Label every reference
2. In Modify mode, always state what should **not** change
3. Change one variable at a time when refining
4. Save prompt + seed for reproducibility
5. Create = new scenes, Modify = edits
## Key takeaway
Mastering Uni-1 comes down to three things: **choose the right mode → control your references → iterate with intention**. Once those are in place, you're no longer guessing, you're directing.