Download Json Format Workflow File
Download the image below as input image  ### 2. Complete the Workflow Execution Step by Step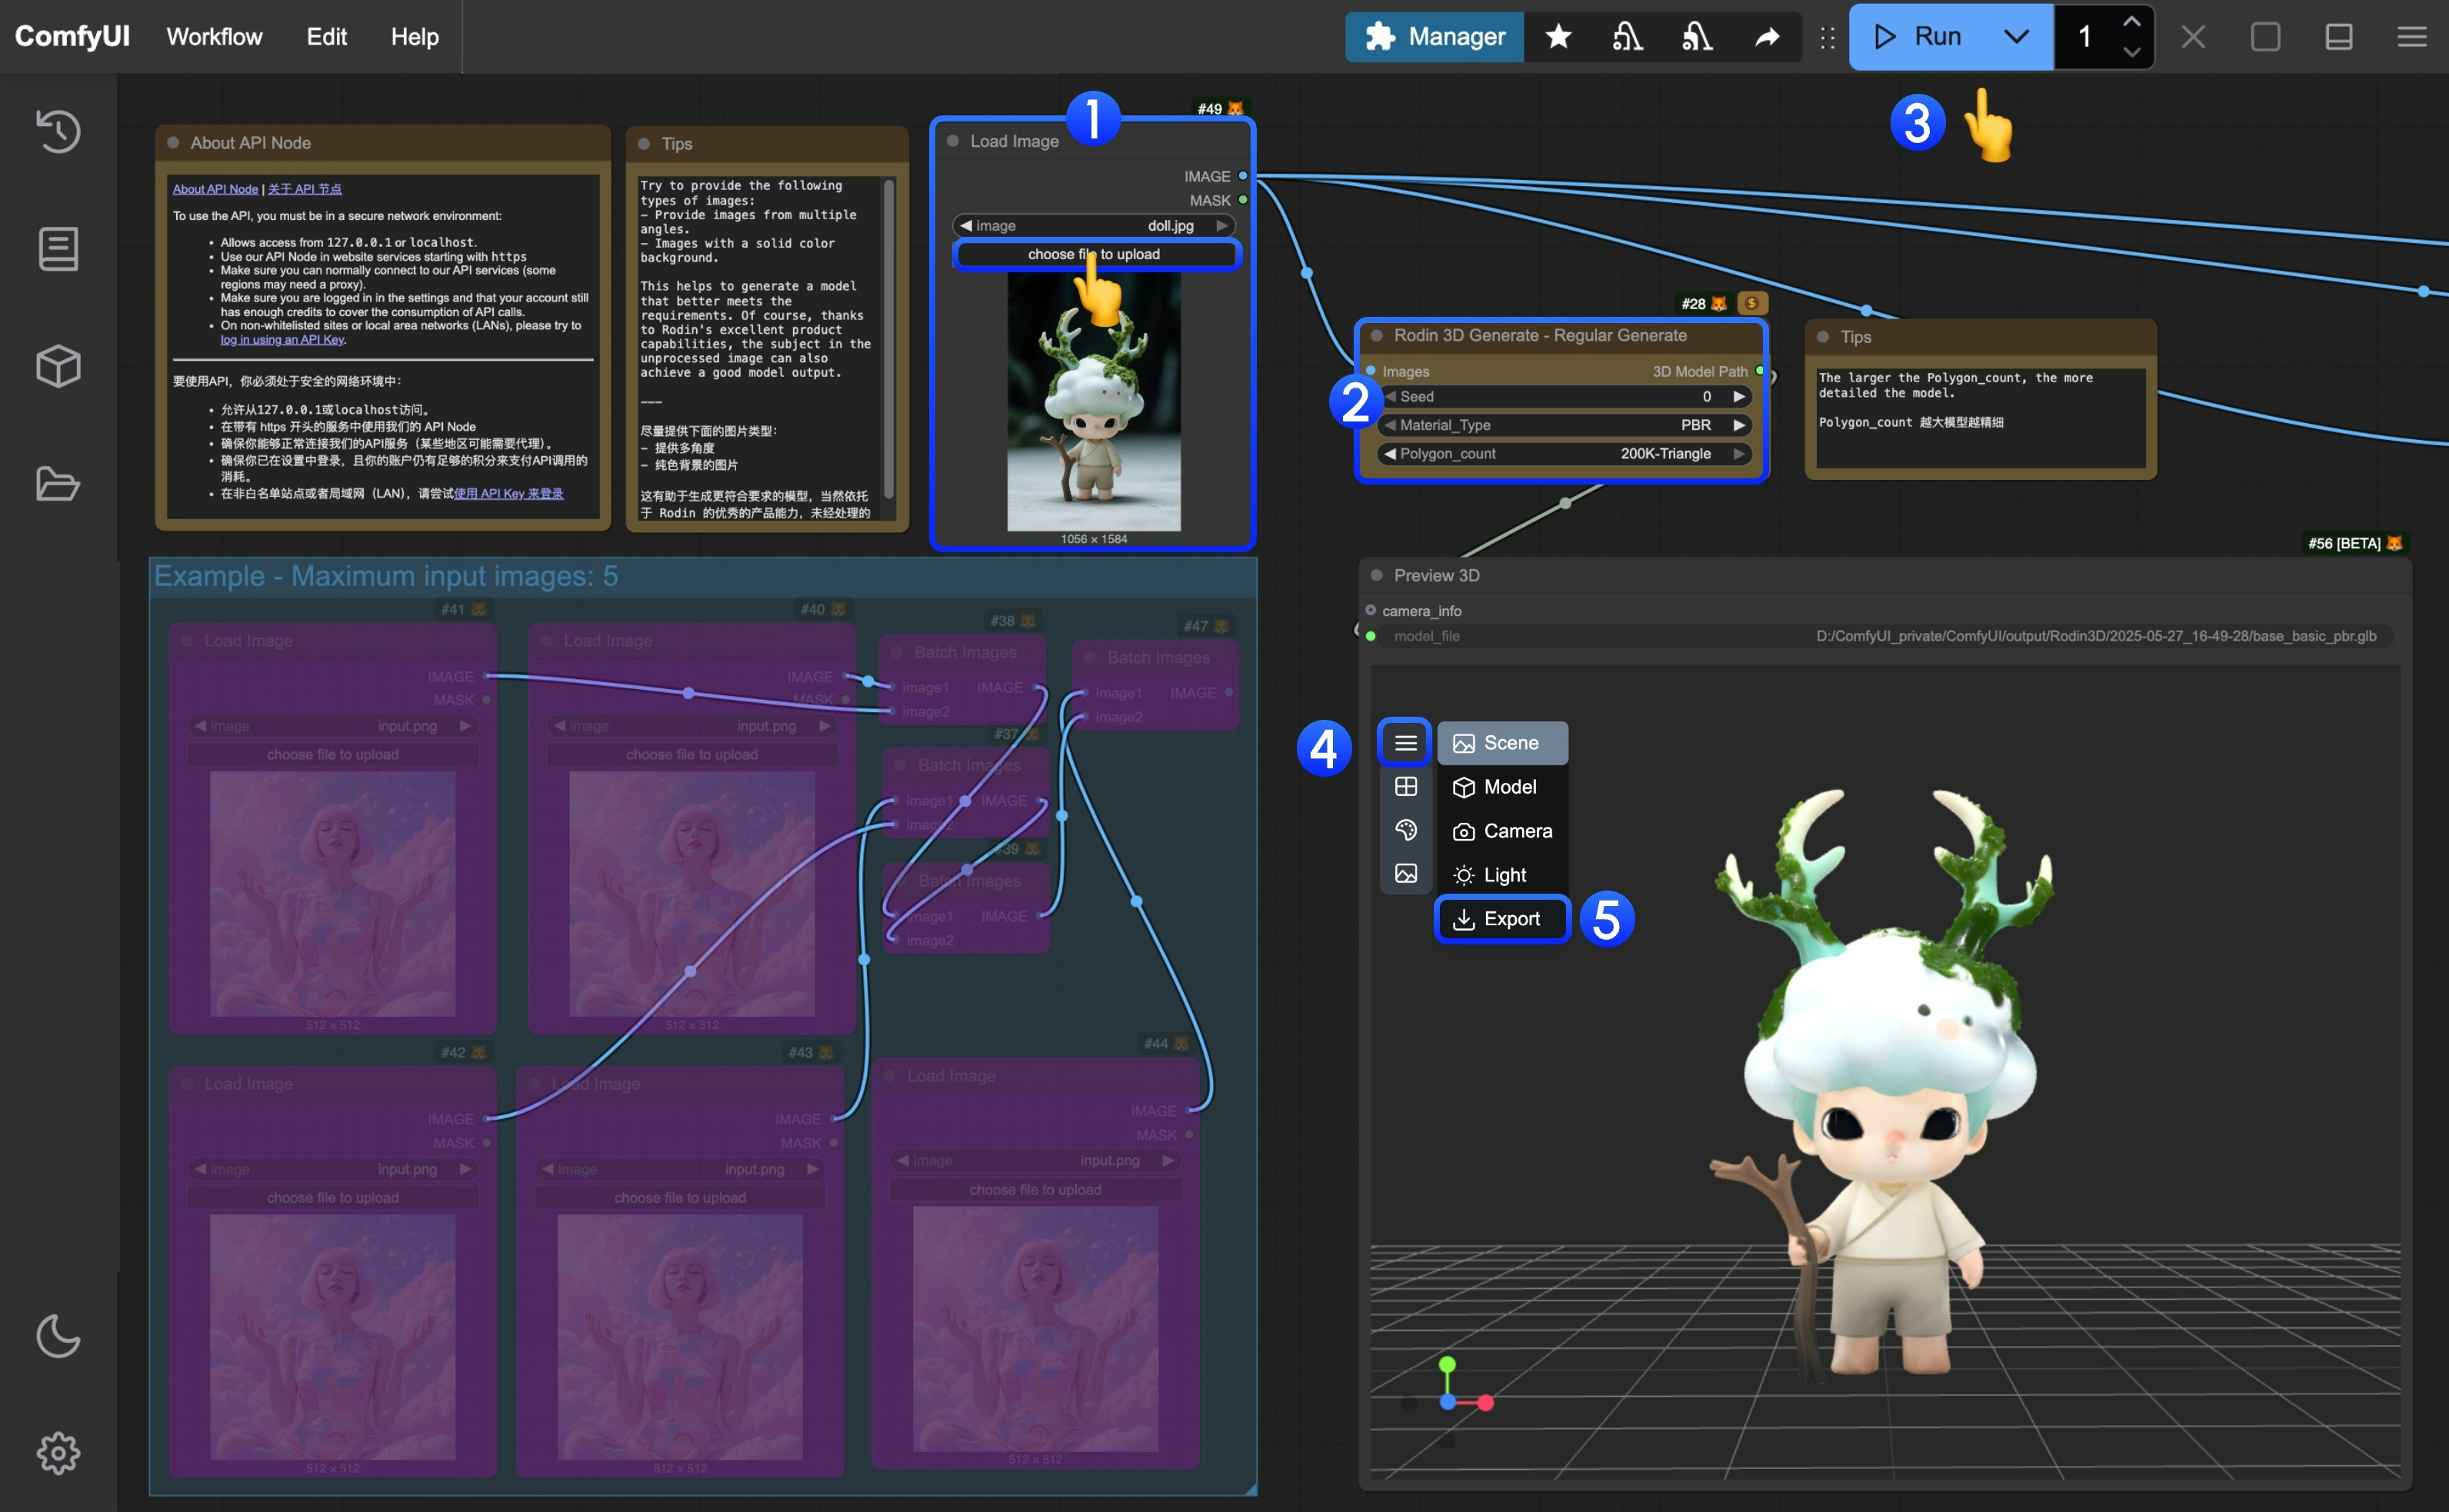 You can refer to the numbers in the image to complete the basic text-to-image workflow execution:
1. In the `Load Image` node, load the provided input image
2. (Optional) In `Rodin 3D Generate - Regular Generate` adjust the corresponding parameters
* polygon\_count: You can set different polygon counts, the higher the value, the smoother and more detailed the model
3. Click the `Run` button, or use the shortcut `Ctrl(cmd) + Enter` to execute model generation. After the workflow completes, the corresponding model will be automatically saved to the `ComfyUI/output/Rodin` directory
4. In the `Preview 3D` node, click to expand the menu
5. Select `Export` to directly export the corresponding model
## Multi-view Model Generation Workflow
The corresponding `Rodin 3D Generate - Regular Generate` allows up to 5 image inputs
### 1. Workflow File Download
You can modify the single-view workflow to a multi-view workflow, or directly download the workflow file below
Download the file below and drag it into ComfyUI to load the corresponding workflow.
You can refer to the numbers in the image to complete the basic text-to-image workflow execution:
1. In the `Load Image` node, load the provided input image
2. (Optional) In `Rodin 3D Generate - Regular Generate` adjust the corresponding parameters
* polygon\_count: You can set different polygon counts, the higher the value, the smoother and more detailed the model
3. Click the `Run` button, or use the shortcut `Ctrl(cmd) + Enter` to execute model generation. After the workflow completes, the corresponding model will be automatically saved to the `ComfyUI/output/Rodin` directory
4. In the `Preview 3D` node, click to expand the menu
5. Select `Export` to directly export the corresponding model
## Multi-view Model Generation Workflow
The corresponding `Rodin 3D Generate - Regular Generate` allows up to 5 image inputs
### 1. Workflow File Download
You can modify the single-view workflow to a multi-view workflow, or directly download the workflow file below
Download the file below and drag it into ComfyUI to load the corresponding workflow.
Download Json Format Workflow File
Download the images below as input images  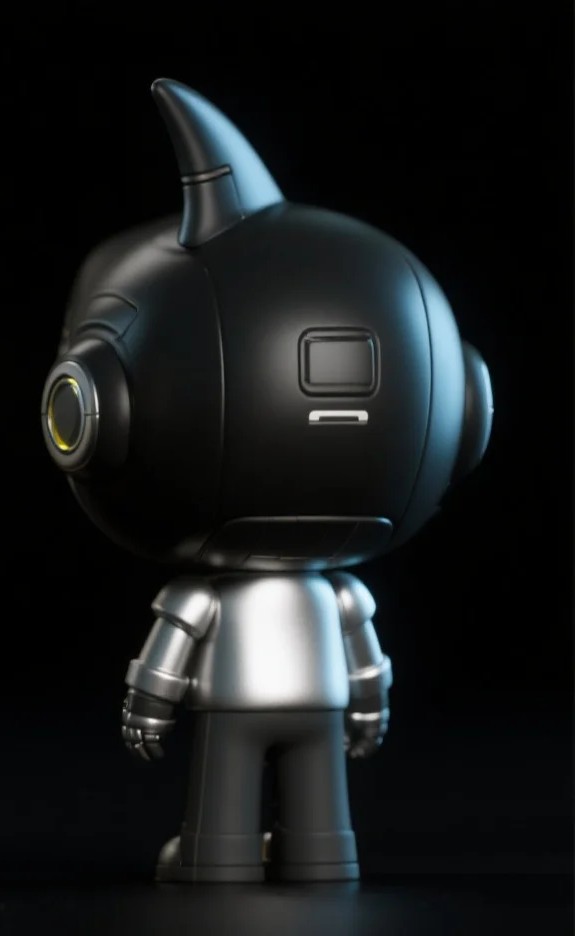  ### 2. Complete the Workflow Execution Step by Step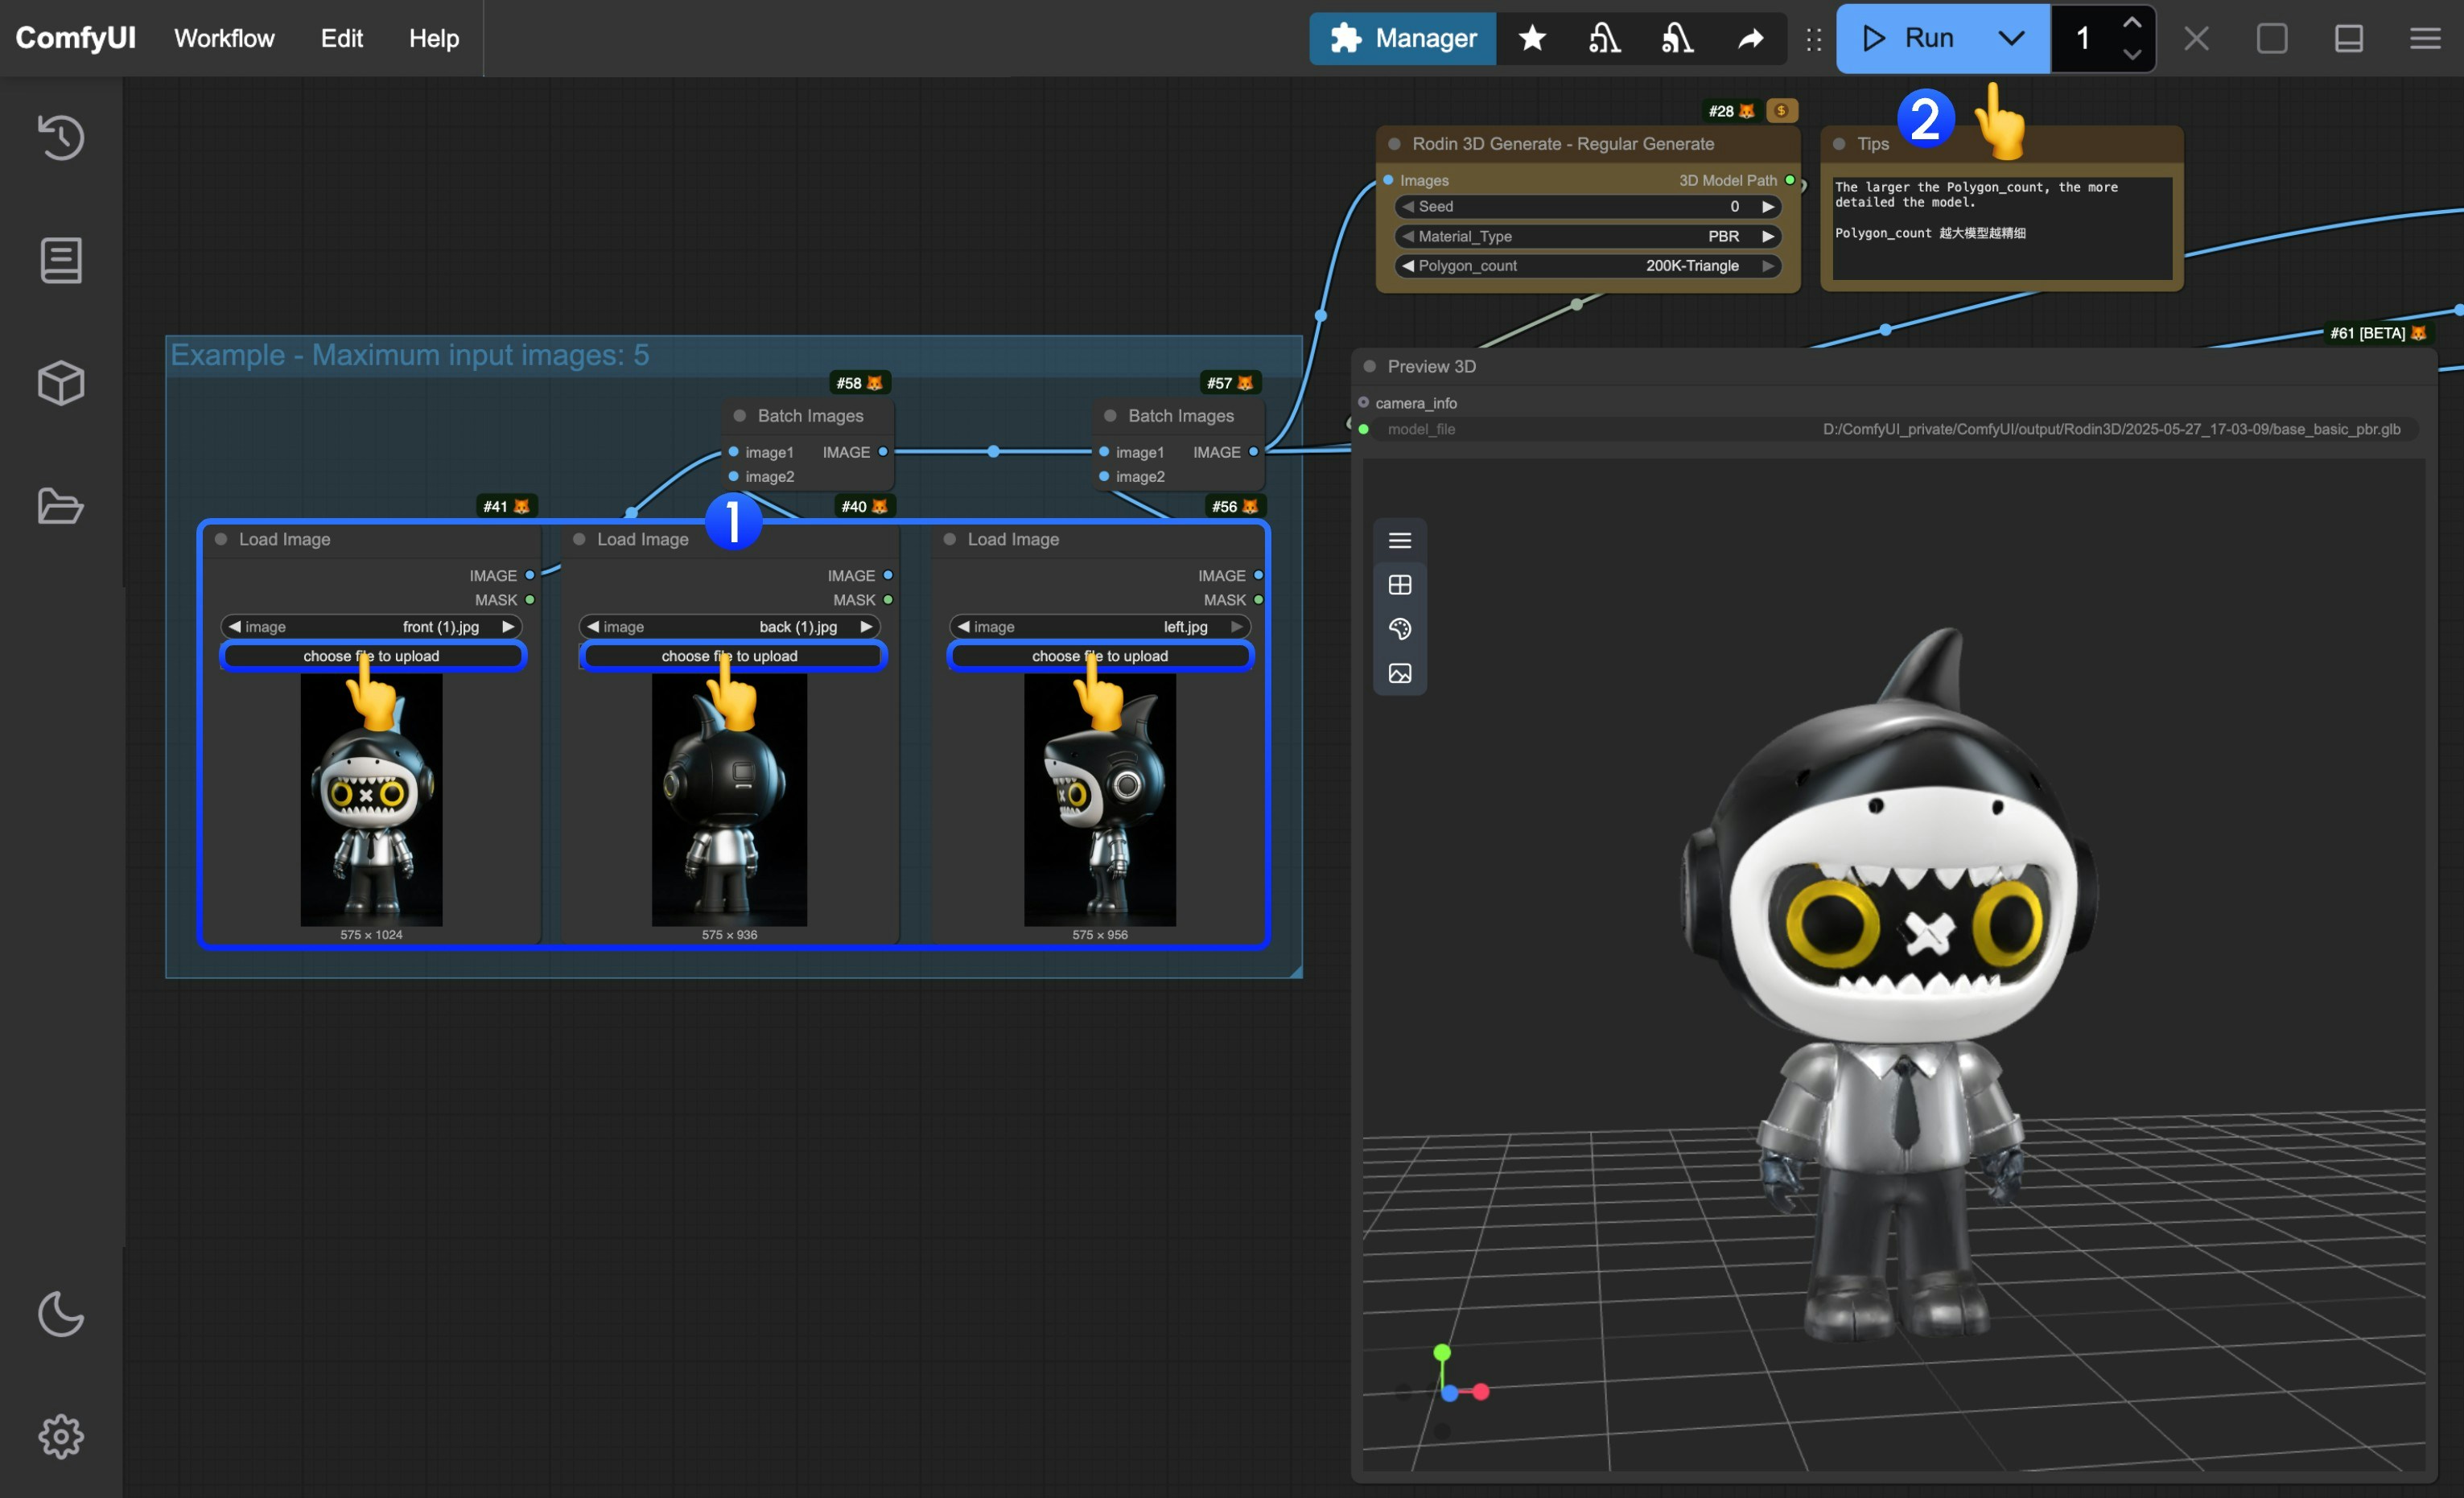 You can refer to the numbers in the image to complete the basic text-to-image workflow execution:
1. In the `Load Image` node, load the provided input images
2. Click the `Run` button, or use the shortcut `Ctrl(cmd) + Enter` to execute model generation. After the workflow completes, the corresponding model will be automatically saved to the `ComfyUI/output/Rodin` directory
3. In the `Preview 3D` node, click to expand the menu
4. Select `Export` to directly export the corresponding model
## Other Related Nodes
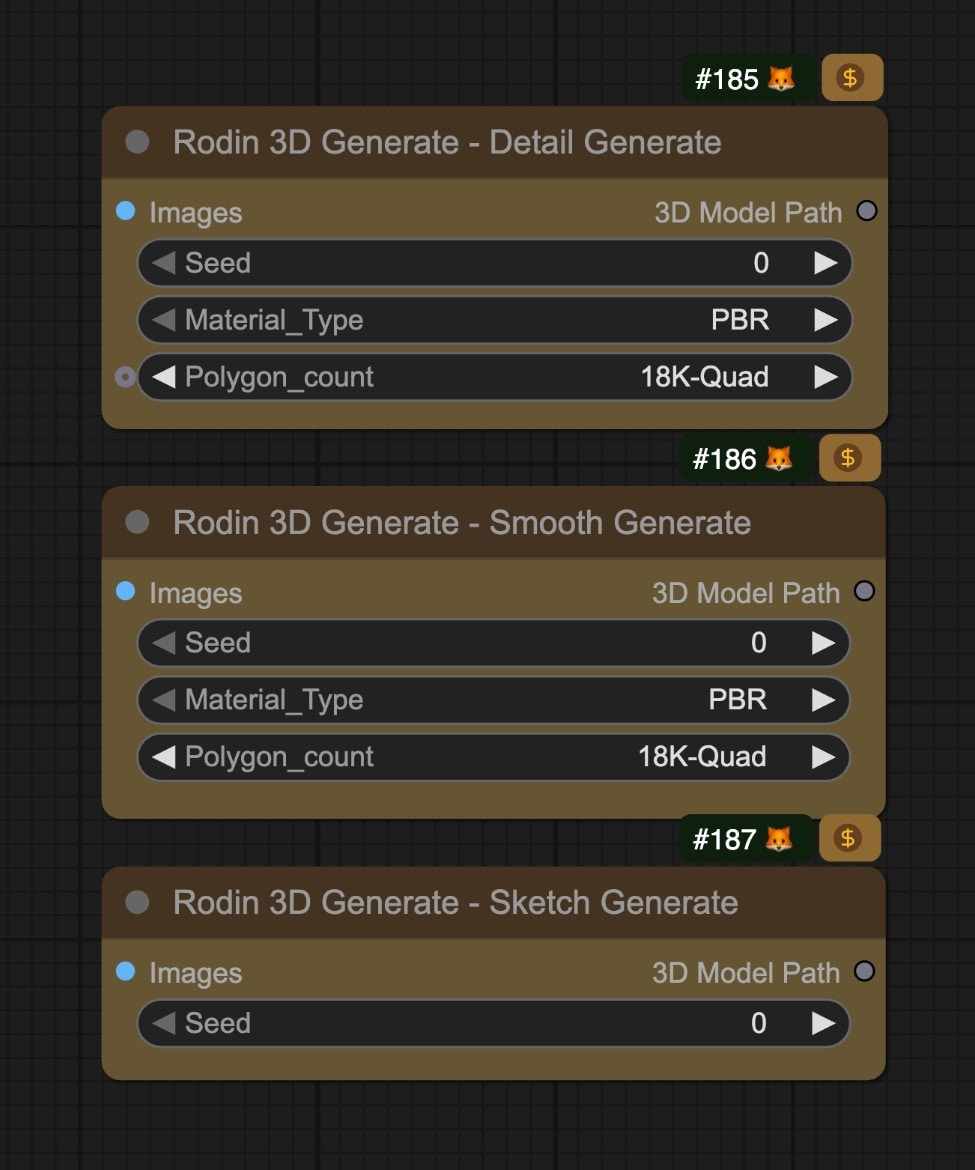
Currently, Rodin provides different types of model generation nodes in ComfyUI, since the corresponding input conditions are the same as the workflow introduced in this article, you can enable them as needed. In addition, we have provided corresponding nodes in the corresponding templates, you can also modify the corresponding node mode as needed to enable them
You can refer to the numbers in the image to complete the basic text-to-image workflow execution:
1. In the `Load Image` node, load the provided input images
2. Click the `Run` button, or use the shortcut `Ctrl(cmd) + Enter` to execute model generation. After the workflow completes, the corresponding model will be automatically saved to the `ComfyUI/output/Rodin` directory
3. In the `Preview 3D` node, click to expand the menu
4. Select `Export` to directly export the corresponding model
## Other Related Nodes
Currently, Rodin provides different types of model generation nodes in ComfyUI, since the corresponding input conditions are the same as the workflow introduced in this article, you can enable them as needed. In addition, we have provided corresponding nodes in the corresponding templates, you can also modify the corresponding node mode as needed to enable them
 Built with [Mintlify](https://mintlify.com).