> ## Documentation Index
> Fetch the complete documentation index at: https://docs.comfy.org/llms.txt
> Use this file to discover all available pages before exploring further.
# ComfyUI 中的 Bria Eraser、Expand Image 和 GenFill
> 使用 ComfyUI 中的 Bria Eraser、Expand Image 和 Generative Fill 合作节点移除对象、扩展图像,并在遮罩区域内生成内容。
Bria 的图像编辑工具以合作节点(Partner Nodes)的形式在 ComfyUI 中提供。本页介绍三种基于遮罩的编辑工作流:**Bria Eraser**(移除对象)、**Bria Expand Image**(在边界之外进行 outpaint)和 **Bria Generative Fill**(在遮罩区域内生成内容)。这三种工作流都能让编辑区域之外的所有内容保持像素级不变。
每种工作流都接受单个输入图像加一个遮罩。模板中的 **Painter** 节点提供用于绘制遮罩的画笔画布,**ImageCompare**(图像对比)节点会并排显示之前/之后的结果。Painter 节点仅在 Nodes 2.0 下可用;如果你只看到“Painter:仅限 Node 2.0”,请通过 **菜单 -> Nodes2.0** 启用 Nodes 2.0,或改用[遮罩编辑器](https://docs.comfy.org/interface/maskeditor)创建遮罩。
使用 API 节点需要保证你已经正常登录,并在受许可的网络环境下使用,请参考[API 节点总览](/zh/tutorials/partner-nodes/overview)部分文档来了解使用 API 节点的具体使用要求。
请确保你的 ComfyUI 已经更新。
* [ComfyUI 下载](https://www.comfy.org/download)
* [ComfyUI 更新教程](/zh/installation/update_comfyui)
本指南里的工作流可以在[工作流模板](/zh/interface/features/template)中找到。如果找不到,可能是 ComfyUI 没有更新。
如果加载工作流时有节点缺失,可能原因有:
1. 你用的不是最新版(每夜版)。
2. 启动时有些节点导入失败。
* [Cloud](https://cloud.comfy.org) 会在 ComfyUI 稳定版本发布后更新。
所以,如果你发现本文档中有任何核心节点缺失,可能是因为新核心节点尚未在最新稳定版中发布。请等待下一个稳定版发布。
Bria:Eraser
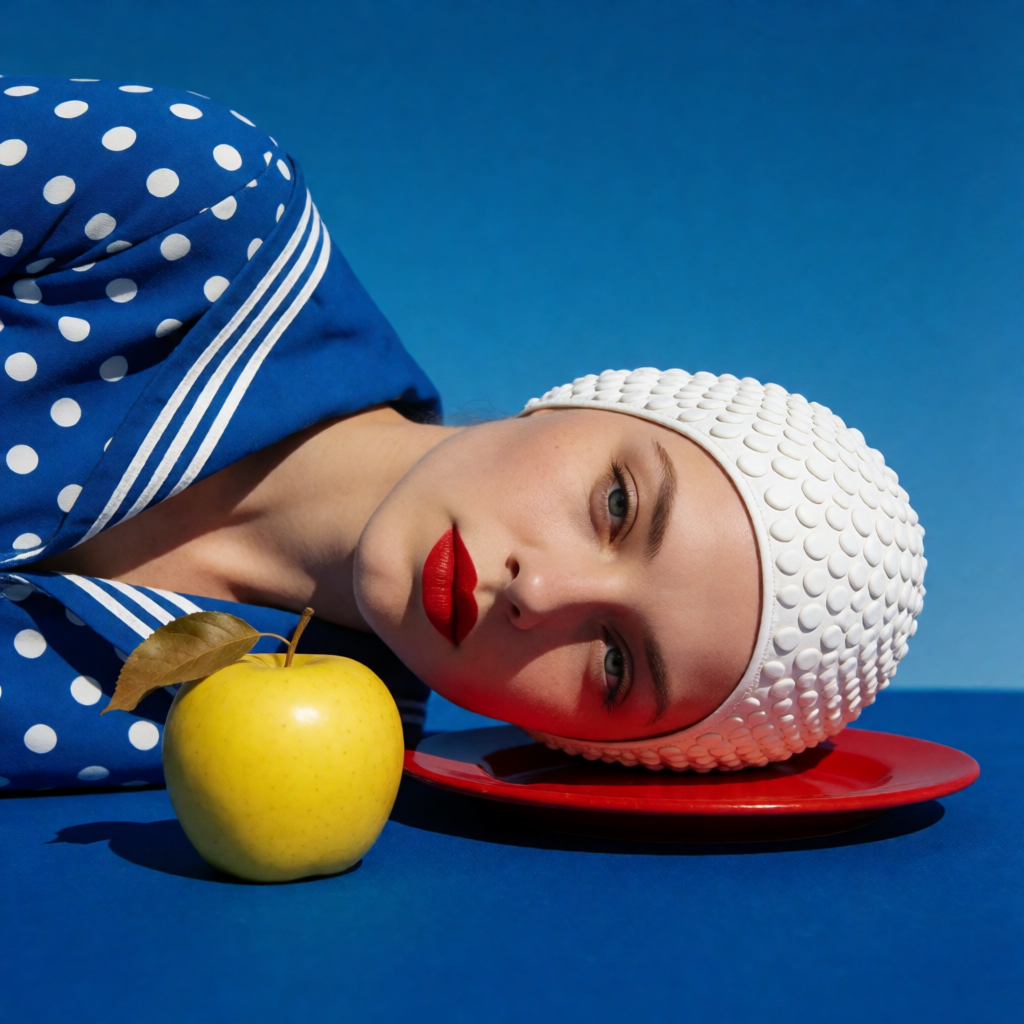
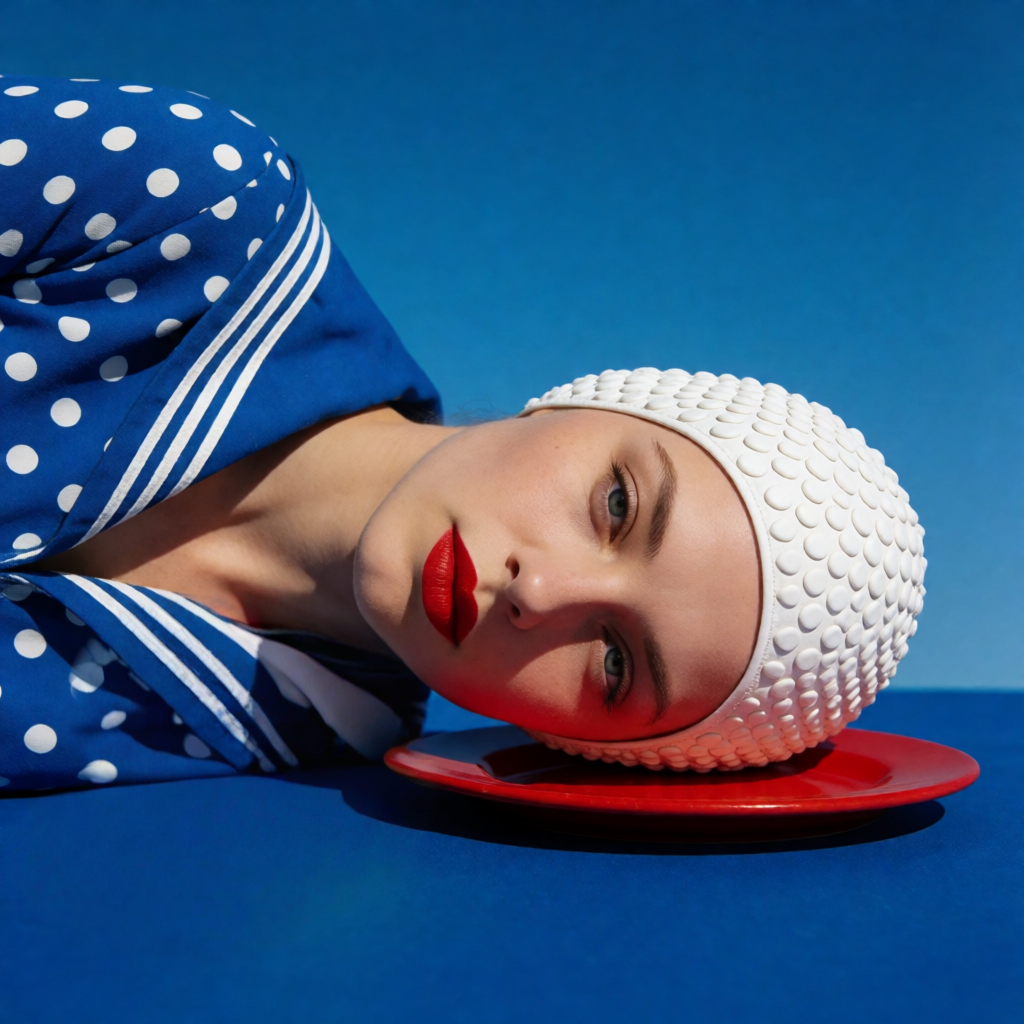
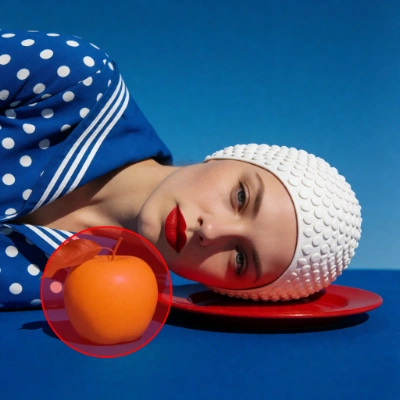
从图像中移除特定对象或区域。遮罩区域会被擦除,并用周围的环境内容填充;遮罩之外的所有内容保持不变。
 在 Comfy Cloud 中打开
下载 JSON,或在模板库中搜索 "Bria Eraser"
**输入素材**
将此文件上传到对应的 `LoadImage` 节点:
下载示例输入图像
**使用方法**
1. **加载图像**:在 `LoadImage` 中上传你的图像。Painter 画布和对比视图会自动更新。
2. **绘制遮罩**:在要移除的对象或区域上涂抹画笔。稍微涂抹到对象边缘之外(头发、玻璃、布料、接触点),让模型有足够的空间进行自然融合。
3. **运行 `BriaEraser`**:无需提示词。该节点会擦除遮罩区域,并对背景进行 inpaint。如果尚未设置 `api_key`,请输入。
4. **对比并保存**:`ImageCompare`(图像对比)显示之前/之后的效果,`SaveImageAdvanced` 导出结果。
遮罩区域会完全根据周围环境重新生成,因此结果会无缝融合。遮罩是二值的:白色(255)标记要擦除的区域,其余位置为黑色(0),并且遮罩必须与图像的宽高比一致。若要获得更精确的结果,可使用自动分割遮罩(SAM 风格,如果可用):API 的 `mask_type` 区分 `manual`(画笔绘制)和 `automatic`(算法生成)两种遮罩。
在 Comfy Cloud 中打开
下载 JSON,或在模板库中搜索 "Bria Eraser"
**输入素材**
将此文件上传到对应的 `LoadImage` 节点:
下载示例输入图像
**使用方法**
1. **加载图像**:在 `LoadImage` 中上传你的图像。Painter 画布和对比视图会自动更新。
2. **绘制遮罩**:在要移除的对象或区域上涂抹画笔。稍微涂抹到对象边缘之外(头发、玻璃、布料、接触点),让模型有足够的空间进行自然融合。
3. **运行 `BriaEraser`**:无需提示词。该节点会擦除遮罩区域,并对背景进行 inpaint。如果尚未设置 `api_key`,请输入。
4. **对比并保存**:`ImageCompare`(图像对比)显示之前/之后的效果,`SaveImageAdvanced` 导出结果。
遮罩区域会完全根据周围环境重新生成,因此结果会无缝融合。遮罩是二值的:白色(255)标记要擦除的区域,其余位置为黑色(0),并且遮罩必须与图像的宽高比一致。若要获得更精确的结果,可使用自动分割遮罩(SAM 风格,如果可用):API 的 `mask_type` 区分 `manual`(画笔绘制)和 `automatic`(算法生成)两种遮罩。
Bria:Expand Image
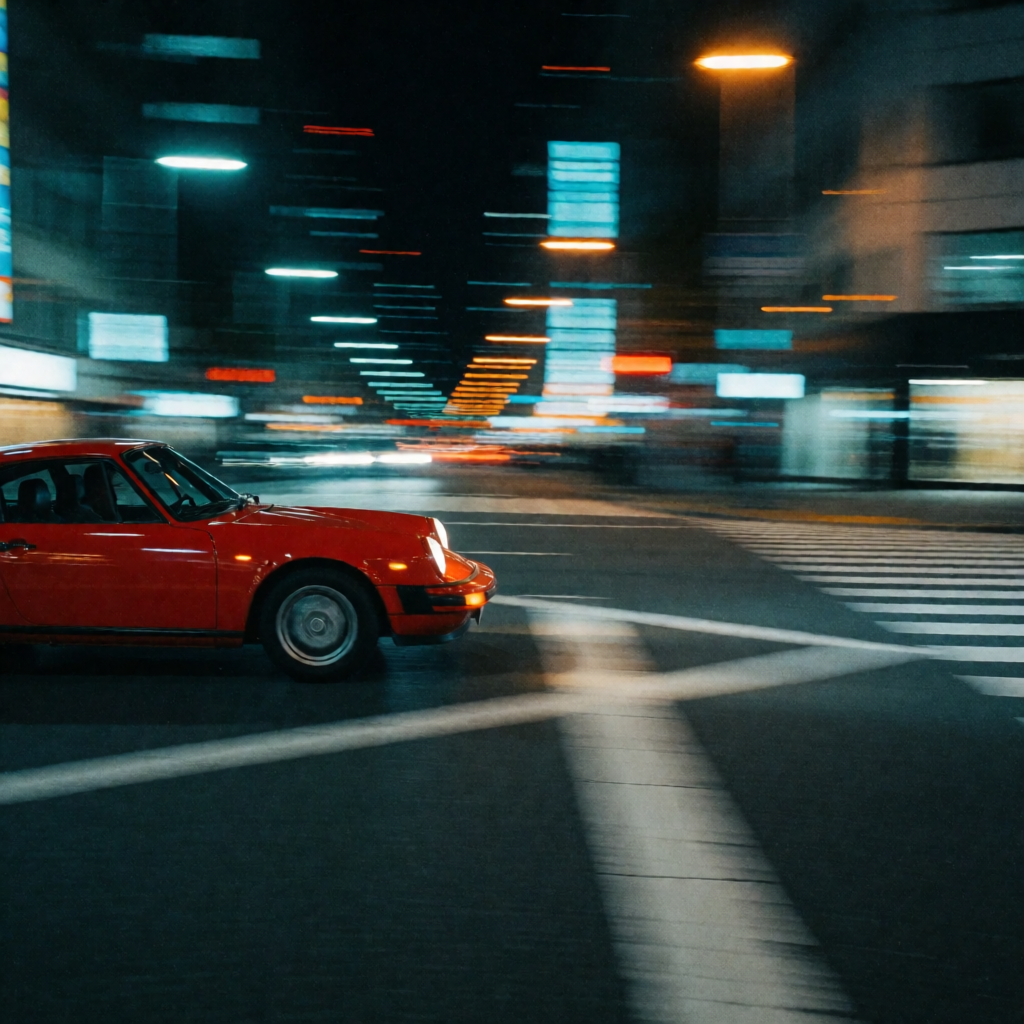
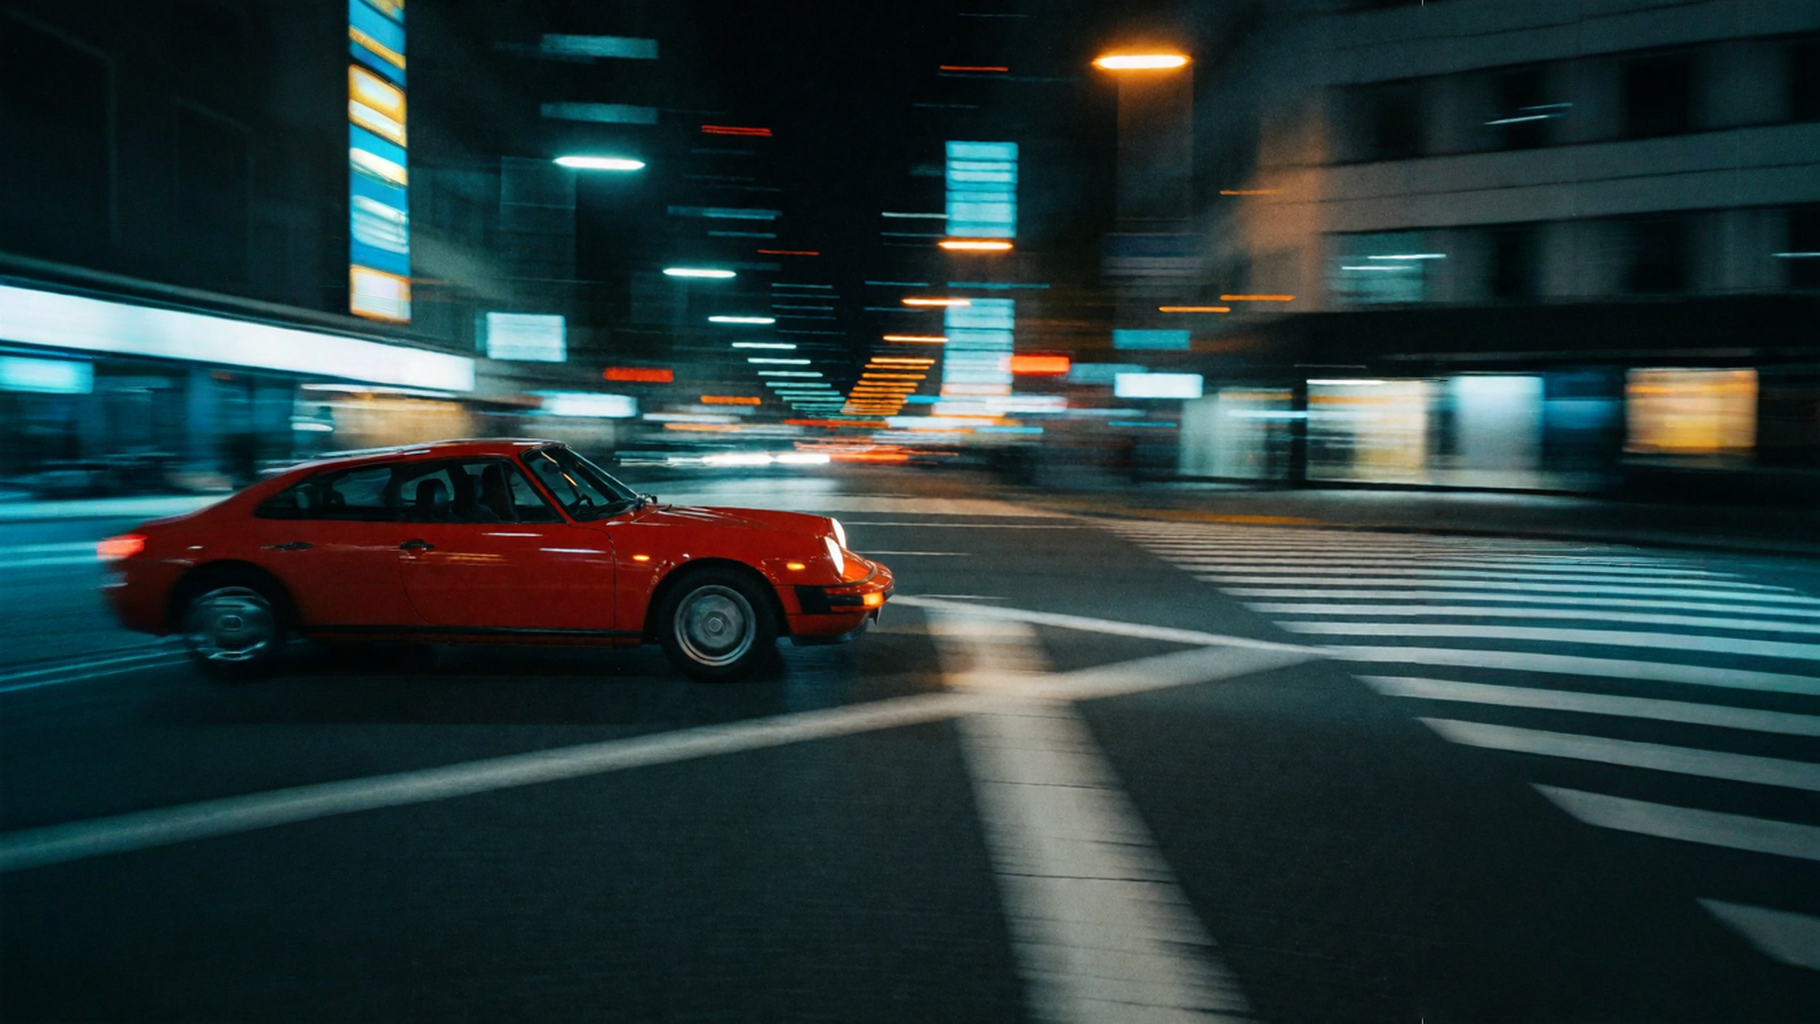
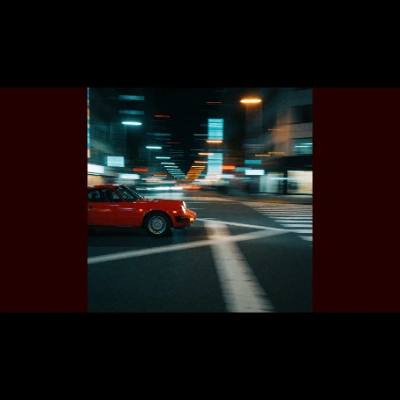
将图像扩展到原始边界之外。原始图像保持原样;周围区域会生成与图像的光照、透视和纹理相匹配的内容。
 在 Comfy Cloud 中打开
下载 JSON,或在模板库中搜索 "Bria Expand Image"
**输入素材**
将此文件上传到对应的 `LoadImage` 节点:
下载示例输入图像
**使用方法**
1. **加载图像**:在 `LoadImage` 中上传你的图像,并将其连接到 `BriaExpandImage`。
2. **在 `expand_mode` 下拉菜单中选择扩展模式**:
* **预设宽高比**:选择 `1:1`、`2:3`、`3:2`、`3:4`、`4:3`、`4:5`、`5:4`、`9:16`、`16:9` 之一。图像会居中,边缘会扩展以适应该比例。
* **自定义比例**:选择 `custom_ratio` 并设置 `ratio_width` / `ratio_height`(例如 21:9 时设为 21 和 9)。Bria 接受 0.5 到 3.0 之间的宽高比,因此任何高于 1:2 的比例都需要使用手动模式。
* **手动**:选择 `manual`,然后在画布上放置原始图像,设置 `canvas_width` / `canvas_height`(最大 5000 x 5000)、`image_width` / `image_height` 以及 `image_x` / `image_y`(图像左上角坐标;可以为负值以实现裁剪)。
3. **提示词(可选)**:留空时,Bria 会根据输入图像自动生成提示词,并扩展以匹配场景和风格。你也可以自己编写提示词来明确引导扩展方向,例如“the street continuing to the right”“add a streetlamp”“no other cars”。仅支持英文;不支持特殊字符。
4. **可选参数**:`negative_prompt` 用于避免不希望出现的内容,`seed` 用于复现结果,`moderation` 用于启用内容审核。
5. **保存**:将图像输出连接到 `SaveImage`。
节点上的 `prompt` 输出会显示实际使用的提示词:即你输入的内容,或该字段留空时由 Bria 自动生成的内容。如果目标宽高比与图像当前比例相同(例如 1:1 的图像设置为 `1:1`),则不会进行任何更改,图像将原样返回。画布区域限制为 5,000 x 5,000 像素。为获得最佳效果,请让主体保持在总画布面积的 15% 以上。
在 Comfy Cloud 中打开
下载 JSON,或在模板库中搜索 "Bria Expand Image"
**输入素材**
将此文件上传到对应的 `LoadImage` 节点:
下载示例输入图像
**使用方法**
1. **加载图像**:在 `LoadImage` 中上传你的图像,并将其连接到 `BriaExpandImage`。
2. **在 `expand_mode` 下拉菜单中选择扩展模式**:
* **预设宽高比**:选择 `1:1`、`2:3`、`3:2`、`3:4`、`4:3`、`4:5`、`5:4`、`9:16`、`16:9` 之一。图像会居中,边缘会扩展以适应该比例。
* **自定义比例**:选择 `custom_ratio` 并设置 `ratio_width` / `ratio_height`(例如 21:9 时设为 21 和 9)。Bria 接受 0.5 到 3.0 之间的宽高比,因此任何高于 1:2 的比例都需要使用手动模式。
* **手动**:选择 `manual`,然后在画布上放置原始图像,设置 `canvas_width` / `canvas_height`(最大 5000 x 5000)、`image_width` / `image_height` 以及 `image_x` / `image_y`(图像左上角坐标;可以为负值以实现裁剪)。
3. **提示词(可选)**:留空时,Bria 会根据输入图像自动生成提示词,并扩展以匹配场景和风格。你也可以自己编写提示词来明确引导扩展方向,例如“the street continuing to the right”“add a streetlamp”“no other cars”。仅支持英文;不支持特殊字符。
4. **可选参数**:`negative_prompt` 用于避免不希望出现的内容,`seed` 用于复现结果,`moderation` 用于启用内容审核。
5. **保存**:将图像输出连接到 `SaveImage`。
节点上的 `prompt` 输出会显示实际使用的提示词:即你输入的内容,或该字段留空时由 Bria 自动生成的内容。如果目标宽高比与图像当前比例相同(例如 1:1 的图像设置为 `1:1`),则不会进行任何更改,图像将原样返回。画布区域限制为 5,000 x 5,000 像素。为获得最佳效果,请让主体保持在总画布面积的 15% 以上。
Bria:Generative Fill
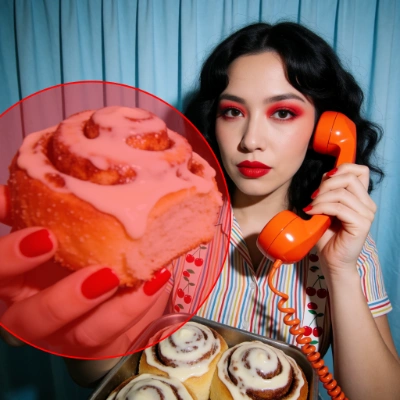
根据提示词重新生成图像的特定区域。遮罩区域会被完全重新生成;遮罩之外的所有内容保持像素级不变。
 在 Comfy Cloud 中打开
下载 JSON,或在模板库中搜索 "Bria: Generative Fill"
**输入素材**
将此文件上传到对应的 `LoadImage` 节点:
下载示例输入图像
**使用方法**
1. **加载图像**:在 `LoadImage` 中上传你的图像。Painter 画布和对比视图会自动更新。
2. **绘制遮罩**:在要重新生成的区域上涂抹画笔。斑点状(blob)的画笔绘制遮罩效果最佳。稍微涂抹到对象边缘之外(头发、玻璃、布料、接触点),让模型有融合的空间。
3. **编写提示词**:在 `BriaGenFill` 中描述遮罩区域内应生成的内容,就像在指导一个裁剪后的微场景:说出对象的名称、材质和大小、它与表面的互动方式,并要求添加接触阴影。大约 90-110 个词效果最佳。请保持启用 `refine_prompt`。
4. **可选参数**:`negative_prompt` 用于避免不希望出现的细节。使用固定的 `seed` 来迭代调整遮罩或措辞,待结果满意后再随机化。
5. **对比并保存**:`ImageCompare`(图像对比)显示之前/之后的效果,`SaveImageAdvanced` 导出结果。
遮罩触发的是生成式替换,而不是像素修饰:遮罩区域的含义是“重新生成此区域”,而不是“修饰此区域”。
## 开始使用
1. 将 ComfyUI 更新到最新版本
2. 打开模板库,搜索 `Bria Eraser`、`Bria Expand Image` 或 `Bria Generative Fill`
在 Comfy Cloud 中打开
下载 JSON,或在模板库中搜索 "Bria: Generative Fill"
**输入素材**
将此文件上传到对应的 `LoadImage` 节点:
下载示例输入图像
**使用方法**
1. **加载图像**:在 `LoadImage` 中上传你的图像。Painter 画布和对比视图会自动更新。
2. **绘制遮罩**:在要重新生成的区域上涂抹画笔。斑点状(blob)的画笔绘制遮罩效果最佳。稍微涂抹到对象边缘之外(头发、玻璃、布料、接触点),让模型有融合的空间。
3. **编写提示词**:在 `BriaGenFill` 中描述遮罩区域内应生成的内容,就像在指导一个裁剪后的微场景:说出对象的名称、材质和大小、它与表面的互动方式,并要求添加接触阴影。大约 90-110 个词效果最佳。请保持启用 `refine_prompt`。
4. **可选参数**:`negative_prompt` 用于避免不希望出现的细节。使用固定的 `seed` 来迭代调整遮罩或措辞,待结果满意后再随机化。
5. **对比并保存**:`ImageCompare`(图像对比)显示之前/之后的效果,`SaveImageAdvanced` 导出结果。
遮罩触发的是生成式替换,而不是像素修饰:遮罩区域的含义是“重新生成此区域”,而不是“修饰此区域”。
## 开始使用
1. 将 ComfyUI 更新到最新版本
2. 打开模板库,搜索 `Bria Eraser`、`Bria Expand Image` 或 `Bria Generative Fill`