> ## Documentation Index
> Fetch the complete documentation index at: https://docs.comfy.org/llms.txt
> Use this file to discover all available pages before exploring further.
# Clarity AI Crystal Upscaler:ComfyUI 忠实图像放大
> 在 ComfyUI 中使用 Clarity AI 的 Crystal Upscaler 放大图像:忠实还原细节,最高可达 100 百万像素,并提供缩放系数与创造力控制。
**Clarity AI Crystal Upscaler** 是 ComfyUI 中的高保真图像放大工具。它不会凭空生成新内容,而是以更大的尺寸重新渲染图像,同时保持与原始图像高度接近:人脸、皮肤和精细纹理都会恢复清晰,画面结构也得以保留。它专为人像、产品拍摄以及可用于印刷的放大场景而设计,在这些场景中,忠实还原细节比创意性的重新演绎更为重要。
在 ComfyUI 中,该模型通过 **Clarity AI Crystal Upscale** 合作伙伴节点运行。它是一个云端 API 节点:需要拥有带积分的 Comfy 账户,且不会下载任何本地模型。你输入一张图像,即可得到一张放大后的图像,以及一张并排对比图。每百万像素的费率请参见[合作伙伴节点定价](/zh/tutorials/partner-nodes/pricing)。
输出上限为 100 百万像素,且每边不超过 65535 像素。该节点会将输入宽度和高度乘以 `scale_factor`,因此使用较小的来源图像或较低的倍数,才能保持在限制范围内。
## 可用工作流
### 图像放大
放大单张图像,并将结果与原始图像进行对比。该模板会加载一张来源图像,将其放大 2 倍,并以 `ImageCompare` 视图展示输入与输出。
 在 Comfy Cloud 中打开
下载 JSON,或在模板库中搜索 “Clarity AI: Crystal Upscaler”
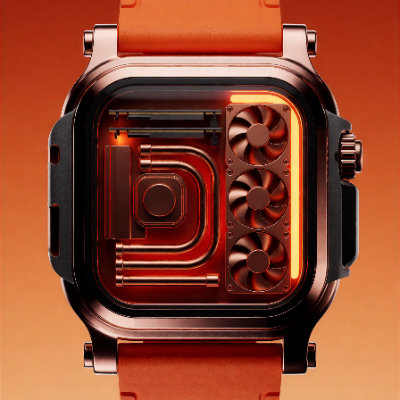
**输入素材**
加载到为 Clarity AI Crystal Upscale 节点提供输入的 `LoadImage` 节点中
### 工作流总览
该模板使用了四个节点:
* **LoadImage**:提供来源图像
* **ClarityCrystalUpscaleNode**:核心节点,使用 `crystal-upscaler` 模型进行配置
* **SaveImageAdvanced**:将放大后的输出保存为 PNG
* **ImageCompare**:将放大后的结果显示在原始图像旁边
### 运行步骤
1. **加载图像**:在 **LoadImage** 节点中上传或选择你的来源图像
2. **选择模型**:在 **Clarity AI Crystal Upscale** 节点上保留 `crystal-upscaler`
3. **设置缩放倍数**:选择图像的放大程度,范围为 1x 到 200x
4. **设置创意度**:`0` 最接近原始图像;数值越高,模型能够重建的细节越多
5. **点击 Queue**,或按 `Ctrl+Enter` 进行生成
## 节点控制
| 控件 | 取值 | 效果 |
| - | - | - |
| `image` | 一张图像 | 来源图像。该节点只接受一张图像;传入批处理会被拒绝 |
| `scale_factor` | 1.0 到 200.0,默认 2.0 | 将输入的宽度和高度乘以该系数。输出上限为 100 百万像素,且每边不超过 65535 像素 |
| `creativity` | 0 到 10,默认 0 | `0` 最接近地保留原始图像。取值越高,模型会重建更多细节,而不是严格遵循来源图像。当图像的较短边小于或等于 256 像素时,该参数无效 |
## 提示
* **从 2x 开始,只在确有需要时才提高倍率**。倍率会同时放大图像的两条边,因此过大的倍率可能让输出超过 100 百万像素或单边 65535 像素,从而导致运行失败。
* **产品图和存档照片请将 `creativity` 设为 0**。此时结果最接近来源;只有当你希望模型重建来源中已不存在的纹理时,才提高该值。
* **较小的输入会忽略 `creativity`**。短边为 256 像素或更小的图像,无论该设置如何,结果都相同。
* **查看对比视图**。模板会将输出与输入配对显示,因此你可以在进行大规模渲染之前判断新增的细节是否忠实。
## 开始使用
1. 将 ComfyUI 更新到最新版本
2. 前往模板库,搜索 `Clarity AI: Crystal Upscaler`
This documentation is built and hosted on [Mintlify](https://mintlify.com), a developer documentation platform.
在 Comfy Cloud 中打开
下载 JSON,或在模板库中搜索 “Clarity AI: Crystal Upscaler”
**输入素材**
加载到为 Clarity AI Crystal Upscale 节点提供输入的 `LoadImage` 节点中
### 工作流总览
该模板使用了四个节点:
* **LoadImage**:提供来源图像
* **ClarityCrystalUpscaleNode**:核心节点,使用 `crystal-upscaler` 模型进行配置
* **SaveImageAdvanced**:将放大后的输出保存为 PNG
* **ImageCompare**:将放大后的结果显示在原始图像旁边
### 运行步骤
1. **加载图像**:在 **LoadImage** 节点中上传或选择你的来源图像
2. **选择模型**:在 **Clarity AI Crystal Upscale** 节点上保留 `crystal-upscaler`
3. **设置缩放倍数**:选择图像的放大程度,范围为 1x 到 200x
4. **设置创意度**:`0` 最接近原始图像;数值越高,模型能够重建的细节越多
5. **点击 Queue**,或按 `Ctrl+Enter` 进行生成
## 节点控制
| 控件 | 取值 | 效果 |
| - | - | - |
| `image` | 一张图像 | 来源图像。该节点只接受一张图像;传入批处理会被拒绝 |
| `scale_factor` | 1.0 到 200.0,默认 2.0 | 将输入的宽度和高度乘以该系数。输出上限为 100 百万像素,且每边不超过 65535 像素 |
| `creativity` | 0 到 10,默认 0 | `0` 最接近地保留原始图像。取值越高,模型会重建更多细节,而不是严格遵循来源图像。当图像的较短边小于或等于 256 像素时,该参数无效 |
## 提示
* **从 2x 开始,只在确有需要时才提高倍率**。倍率会同时放大图像的两条边,因此过大的倍率可能让输出超过 100 百万像素或单边 65535 像素,从而导致运行失败。
* **产品图和存档照片请将 `creativity` 设为 0**。此时结果最接近来源;只有当你希望模型重建来源中已不存在的纹理时,才提高该值。
* **较小的输入会忽略 `creativity`**。短边为 256 像素或更小的图像,无论该设置如何,结果都相同。
* **查看对比视图**。模板会将输出与输入配对显示,因此你可以在进行大规模渲染之前判断新增的细节是否忠实。
## 开始使用
1. 将 ComfyUI 更新到最新版本
2. 前往模板库,搜索 `Clarity AI: Crystal Upscaler`
This documentation is built and hosted on [Mintlify](https://mintlify.com), a developer documentation platform.