> ## Documentation Index
> Fetch the complete documentation index at: https://docs.comfy.org/llms.txt
> Use this file to discover all available pages before exploring further.
# 在 ComfyUI 中使用 Krea 3:文生图与图像编辑
> 通过合作节点在 ComfyUI 中运行 Krea 3:根据文本提示生成图像,或用自然语言指令配合最多 8 张参考图像编辑照片。
Krea 3 是来自 [Krea](https://www.krea.ai) 的托管图像模型。它专为指令驱动的编辑而打造:你描述哪些内容需要改变、哪些内容需要保持不变,模型便会返回编辑后的图像。如果不连接任何图像,它就会改为根据文本生成。
Krea 3 以合作伙伴节点的形式在 ComfyUI 中运行,因此无需下载任何权重,也不会有任何计算在你的本地 GPU 上执行。该节点会将你的提示词和参考图像发送到 Krea 的服务器,并把已完成的图像返回给你的工作流。
## Krea 3 擅长什么
* **指令驱动的编辑**:用自然语言写下要修改的内容(例如“把绿色汽车换成橙色汽车”),Krea 3 会返回整张图像,并保持你未要求修改的部分不变
* **同一个节点完成文生图**:将图像输入留空,节点仅根据提示词生成图像
* **最多 8 张参考图像**:按照你希望引用它们的顺序连接,然后在提示词中以 `@Image1`、`@Image2` 等方式提及它们
* **两种思考模式**:`fast` 是默认且推荐的设置,而 `high` 会规划更复杂的编辑,耗时更长
* **精确编辑**:开启 `precise_edit` 可保持编辑区域之外的一切不变
* **分辨率控制**:输出 1K 或 2K,使用 `auto` 比例时跟随第一张参考图像
使用 API 节点需要保证你已经正常登录,并在受许可的网络环境下使用,请参考[API 节点总览](/zh/tutorials/partner-nodes/overview)部分文档来了解使用 API 节点的具体使用要求。
请确保你的 ComfyUI 已经更新。
* [ComfyUI 下载](https://www.comfy.org/download)
* [ComfyUI 更新教程](/zh/installation/update_comfyui)
本指南里的工作流可以在[工作流模板](/zh/interface/features/template)中找到。如果找不到,可能是 ComfyUI 没有更新。
如果加载工作流时有节点缺失,可能原因有:
1. 你用的不是最新版(每夜版)。
2. 启动时有些节点导入失败。
* [Cloud](https://cloud.comfy.org) 会在 ComfyUI 稳定版本发布后更新。
所以,如果你发现本文档中有任何核心节点缺失,可能是因为新核心节点尚未在最新稳定版中发布。请等待下一个稳定版发布。
Krea 3 文生图工作流
仅凭提示词生成图像。Krea 3 Image 节点未连接任何图像,因此它会使用提示词和宽高比设置。
 在 Comfy Cloud 中打开
下载 JSON,或在模板库中搜索“Krea 3”
1. 在 **Krea 3 Image** 节点中编写提示词。随附的示例是一句详细的描述,涵盖主体、光照和构图
2. 设置 `aspect_ratio`。保持为 `auto` 可跟随提示词,或从十种支持的比例中选择一种
3. 选择 `resolution`:模板默认使用 `1K`,而 `2K` 会以更高的成本提供更大的画布
4. 将 `thinking_mode` 保持为 `fast`,当提示词描述的是复杂场景时,可切换为 `high`
5. 点击 **Queue**。图像由 `SaveImageAdvanced` 节点保存到 `ComfyUI/output/`
在 Comfy Cloud 中打开
下载 JSON,或在模板库中搜索“Krea 3”
1. 在 **Krea 3 Image** 节点中编写提示词。随附的示例是一句详细的描述,涵盖主体、光照和构图
2. 设置 `aspect_ratio`。保持为 `auto` 可跟随提示词,或从十种支持的比例中选择一种
3. 选择 `resolution`:模板默认使用 `1K`,而 `2K` 会以更高的成本提供更大的画布
4. 将 `thinking_mode` 保持为 `fast`,当提示词描述的是复杂场景时,可切换为 `high`
5. 点击 **Queue**。图像由 `SaveImageAdvanced` 节点保存到 `ComfyUI/output/`
Krea 3 图像编辑工作流
根据指令提示词编辑现有图像。参考图像连接到 Krea 3 Image 节点,提示词描述你想要的结果。
 在 Comfy Cloud 中打开
下载 JSON,或在模板库中搜索 "Krea 3"
**输入素材**
将此文件上传到 `LoadImage` 节点,或使用你自己的图像:
`LoadImage` 节点 · `wide_format_digital_render.png`
在 Comfy Cloud 中打开
下载 JSON,或在模板库中搜索 "Krea 3"
**输入素材**
将此文件上传到 `LoadImage` 节点,或使用你自己的图像:
`LoadImage` 节点 · `wide_format_digital_render.png`
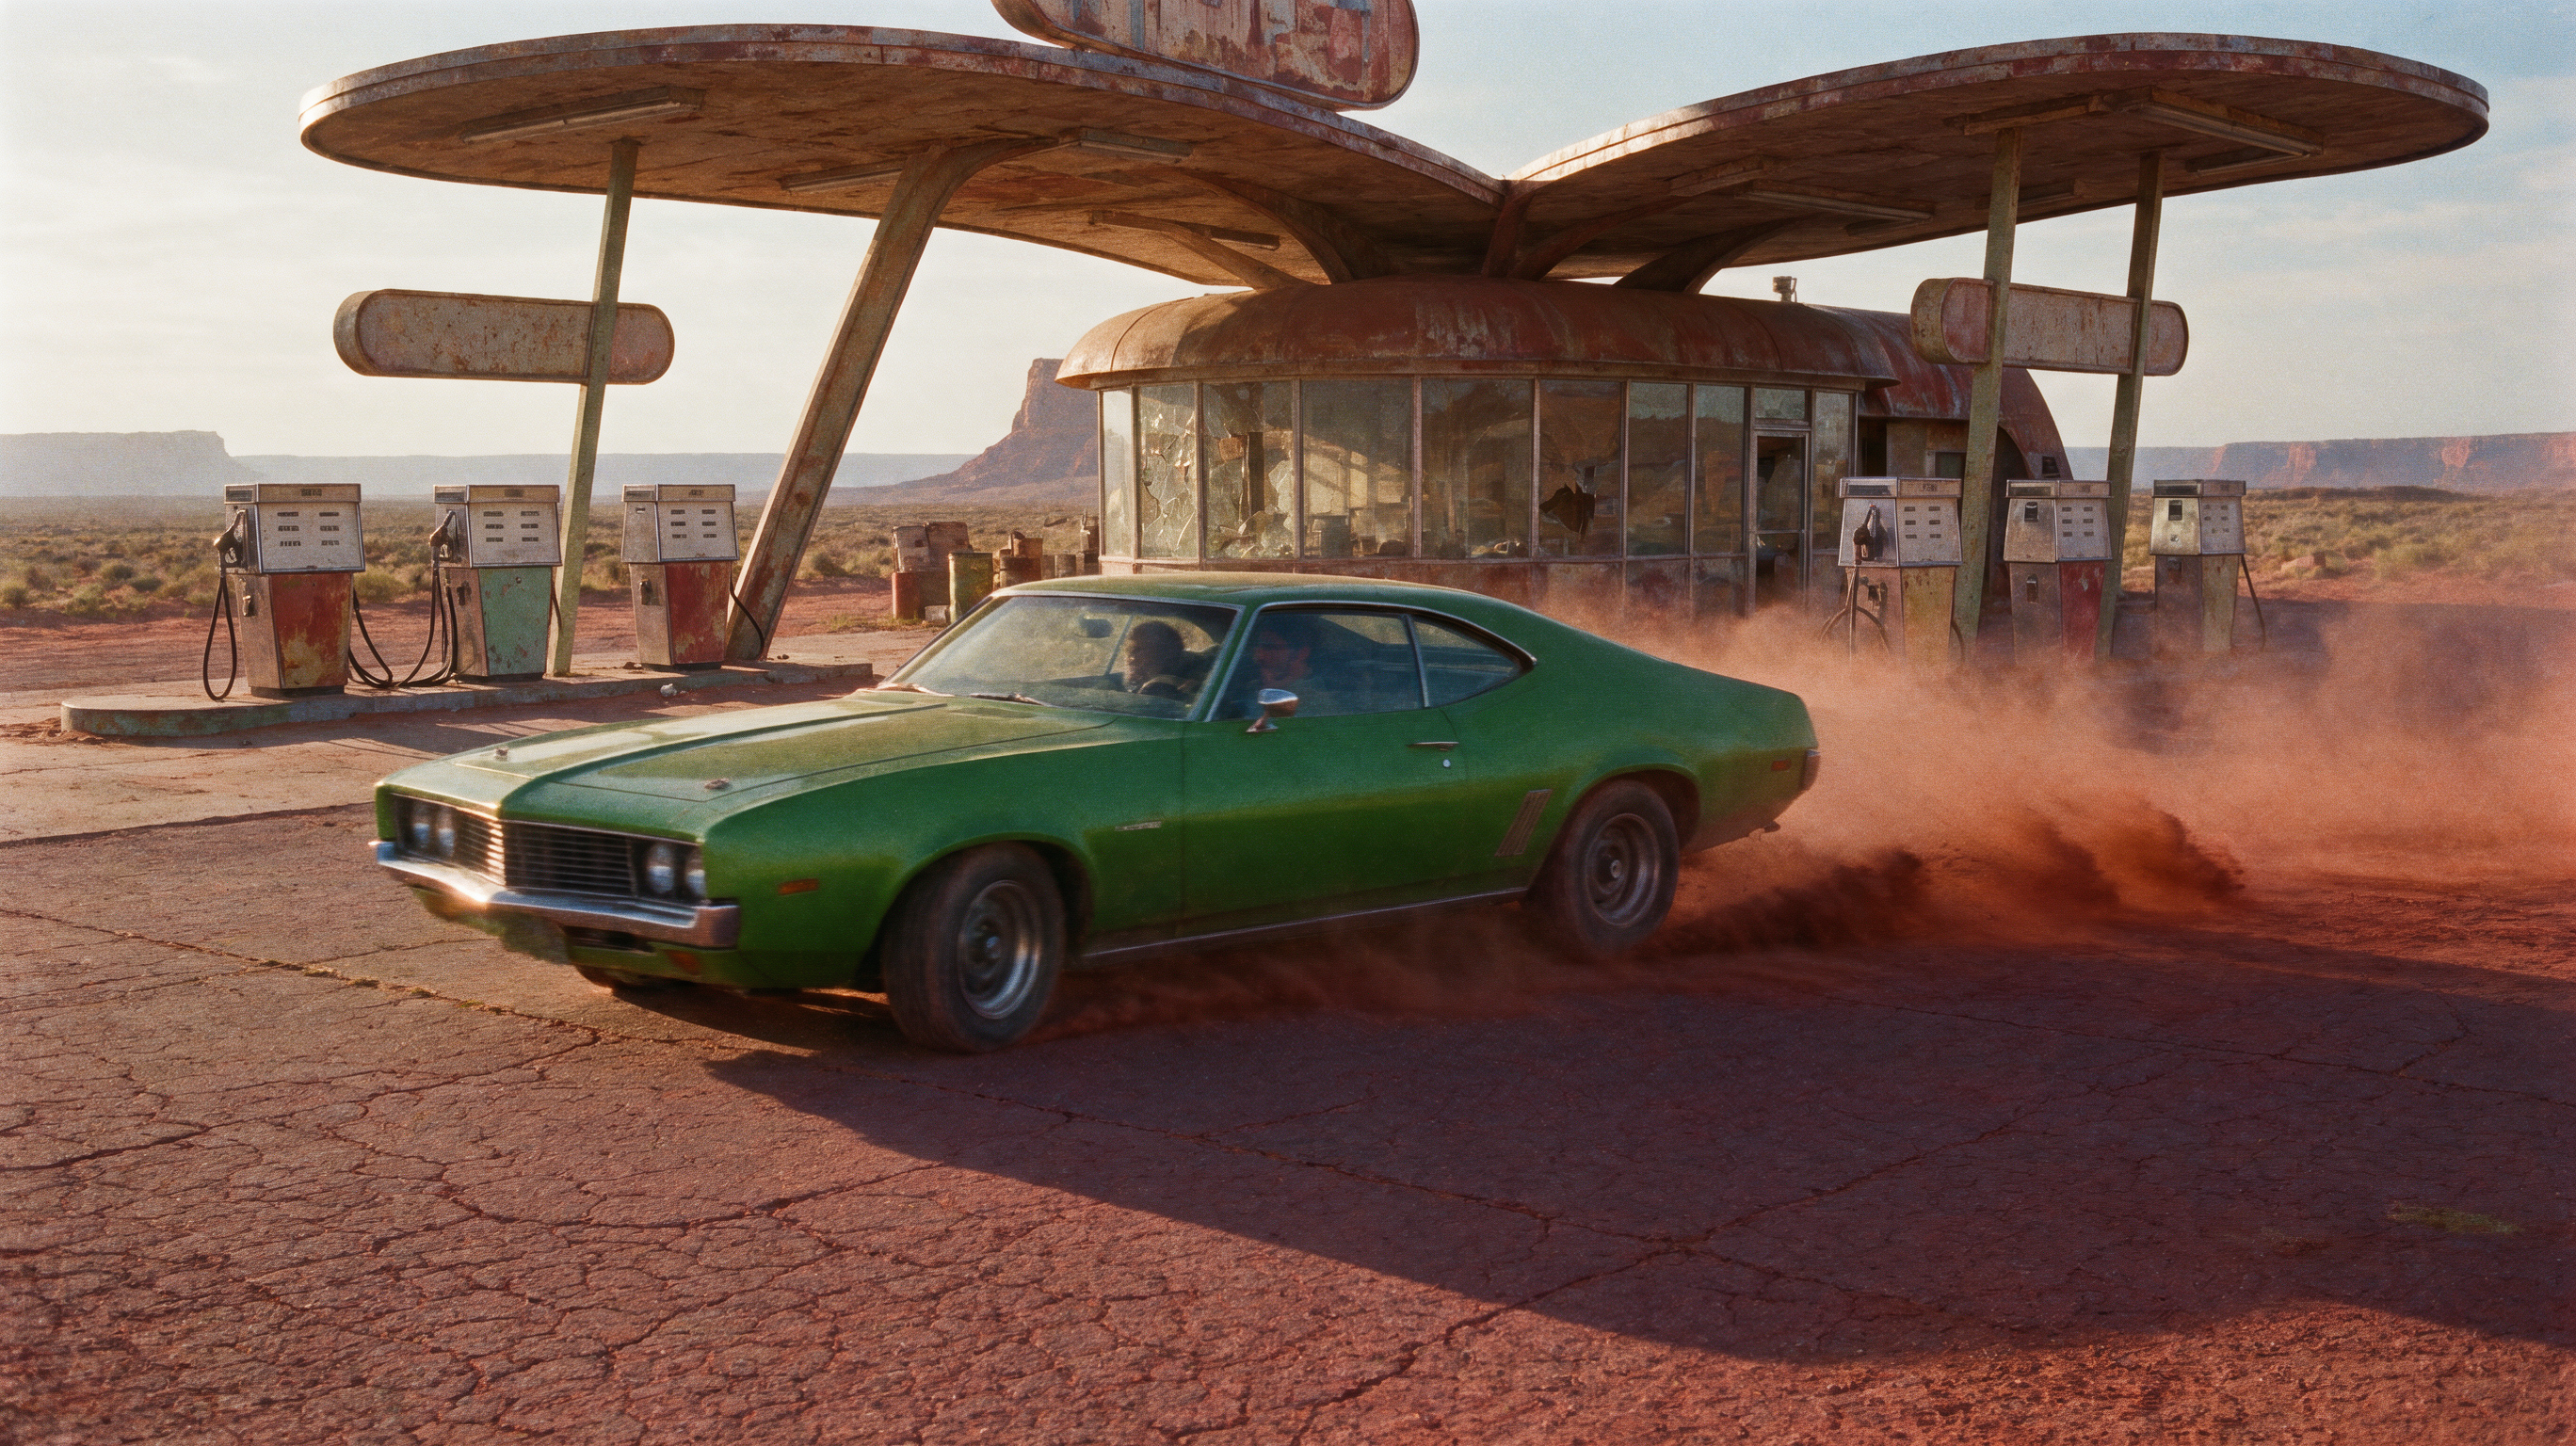 1. 在 `LoadImage` 节点中加载你想要编辑的图像,并将其连接到 **Krea 3 Image** 节点
2. 以指令的形式编写编辑内容。随附的示例将场景中的绿色汽车替换为橙色汽车,并列出了必须保持不变的内容:构图、背景、建筑、灰尘、光照和透视
3. 如果编辑区域之外的所有内容都必须保留,请开启 `precise_edit`。它需要至少一张参考图像
4. 调整 `aspect_ratio` 和 `resolution` 以设置输出画布
5. 点击 **Queue**,将输入与结果进行对比
**更多参考图像**
该节点最多接受 8 张图像。按你想要引用它们的顺序添加,然后在提示词中以 `@Image1`、`@Image2` 等方式提及每一张。
## Krea 3 节点参数
**Krea 3 Image** 节点(`Krea3ImageNode`)提供以下设置:
* `image_1` ... `image_8`: 最多 8 张参考图像,按连接顺序编号。留空则进行文生图
* `prompt`: 指令或场景描述。使用 `@Image1`、`@Image2` 等引用参考图像
* `aspect_ratio`: `auto`,或 `1:1`、`4:5`、`3:4`、`2:3`、`9:16`、`5:4`、`4:3`、`3:2`、`16:9`、`21:9` 之一。`auto` 跟随第一张参考图像,未连接任何图像时则跟随 prompt
* `resolution`: 输出为 `1K` 或 `2K`
* `thinking_mode`: 推荐使用 `fast`,`high` 会更详细地规划复杂的编辑,耗时也更长
* `precise_edit`: 保持编辑区域之外的所有内容不变。它至少需要一张参考图像
* `seed`: 请求的种子。Krea 会在生成之前重写 prompt,因此相同的种子无法复现相同的图像
## 注意事项与限制
* **提示词重写**:Krea 会在生成之前重写你的提示词,这就是为什么重复使用同一个种子并不会生成相同的图像
* **参考图尺寸**:每张参考图在上传前都会按输出像素预算进行缩放,因此 2K 设置比 1K 能保留更多参考细节
* **计费**:Krea 3 是合作伙伴节点,所以每次运行都会计入你的 Comfy 账户费用。费率请参阅[合作伙伴节点积分](/zh/tutorials/partner-nodes/pricing),可在途请求数量请参阅[并发限制](/zh/tutorials/partner-nodes/concurrency-limits)
* **版本**:Krea 3 Image 节点随 ComfyUI [PR #17067](https://github.com/comfyanonymous/ComfyUI/pull/17067) 一起发布,这两个模板自 `workflow_templates` 0.11.84 起就属于模板库的一部分
This documentation is built and hosted on [Mintlify](https://mintlify.com), a developer documentation platform.
1. 在 `LoadImage` 节点中加载你想要编辑的图像,并将其连接到 **Krea 3 Image** 节点
2. 以指令的形式编写编辑内容。随附的示例将场景中的绿色汽车替换为橙色汽车,并列出了必须保持不变的内容:构图、背景、建筑、灰尘、光照和透视
3. 如果编辑区域之外的所有内容都必须保留,请开启 `precise_edit`。它需要至少一张参考图像
4. 调整 `aspect_ratio` 和 `resolution` 以设置输出画布
5. 点击 **Queue**,将输入与结果进行对比
**更多参考图像**
该节点最多接受 8 张图像。按你想要引用它们的顺序添加,然后在提示词中以 `@Image1`、`@Image2` 等方式提及每一张。
## Krea 3 节点参数
**Krea 3 Image** 节点(`Krea3ImageNode`)提供以下设置:
* `image_1` ... `image_8`: 最多 8 张参考图像,按连接顺序编号。留空则进行文生图
* `prompt`: 指令或场景描述。使用 `@Image1`、`@Image2` 等引用参考图像
* `aspect_ratio`: `auto`,或 `1:1`、`4:5`、`3:4`、`2:3`、`9:16`、`5:4`、`4:3`、`3:2`、`16:9`、`21:9` 之一。`auto` 跟随第一张参考图像,未连接任何图像时则跟随 prompt
* `resolution`: 输出为 `1K` 或 `2K`
* `thinking_mode`: 推荐使用 `fast`,`high` 会更详细地规划复杂的编辑,耗时也更长
* `precise_edit`: 保持编辑区域之外的所有内容不变。它至少需要一张参考图像
* `seed`: 请求的种子。Krea 会在生成之前重写 prompt,因此相同的种子无法复现相同的图像
## 注意事项与限制
* **提示词重写**:Krea 会在生成之前重写你的提示词,这就是为什么重复使用同一个种子并不会生成相同的图像
* **参考图尺寸**:每张参考图在上传前都会按输出像素预算进行缩放,因此 2K 设置比 1K 能保留更多参考细节
* **计费**:Krea 3 是合作伙伴节点,所以每次运行都会计入你的 Comfy 账户费用。费率请参阅[合作伙伴节点积分](/zh/tutorials/partner-nodes/pricing),可在途请求数量请参阅[并发限制](/zh/tutorials/partner-nodes/concurrency-limits)
* **版本**:Krea 3 Image 节点随 ComfyUI [PR #17067](https://github.com/comfyanonymous/ComfyUI/pull/17067) 一起发布,这两个模板自 `workflow_templates` 0.11.84 起就属于模板库的一部分
This documentation is built and hosted on [Mintlify](https://mintlify.com), a developer documentation platform.