

To use your own LoRA or another model with Nodes that Comfy Cloud already supports, you don’t need a Build. Upload the model to your Model Library instead. See Add your own LoRA or model.
Prerequisites
Before you create a Build, make sure you have these:- A saved Workflow on Comfy Cloud
- An active subscription or a Comfy Credits balance above zero
Create a Build from your Workflow
If your Workflow uses Custom Nodes Comfy Cloud doesn’t support, Comfy Cloud shows a dialog when you open it. The dialog lists the missing Custom Node packs (groups of Custom Nodes) and models, such as LoRAs. To run the Workflow, create a Build with them. When you pick your saved Workflow, the Developer Platform finds its Custom Nodes and models and selects them for you.1
Open the Developer Platform
In the dialog, click Create on Platform. The Developer Platform opens in a new tab, on its Deploy page.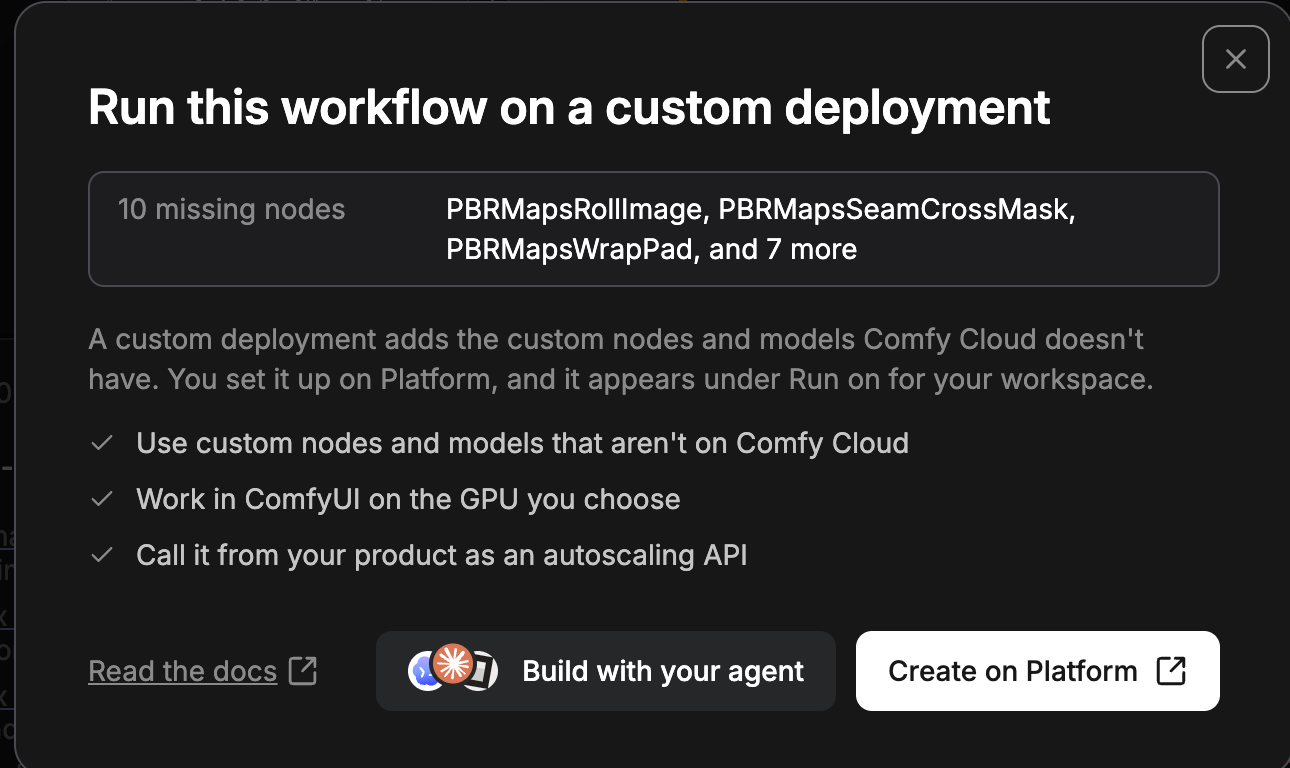
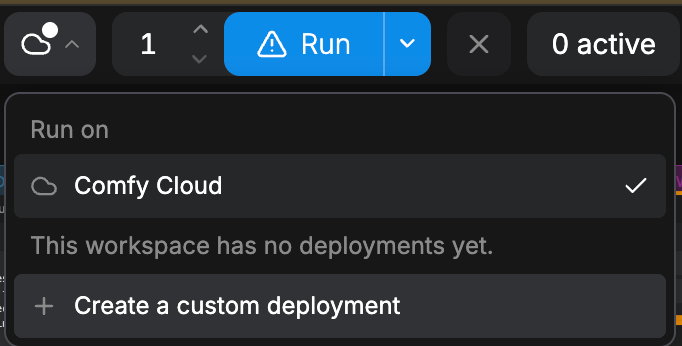
2
Start a new Build
On the Deploy page, click New build. If you have no Builds yet, click Start from scratch instead.
3
Pick your Workflow
- Click Pick from Comfy Cloud.
- Select your Workflow, and then click Add 1 workflow.
.json file, or a .png image made with it, onto the drop area.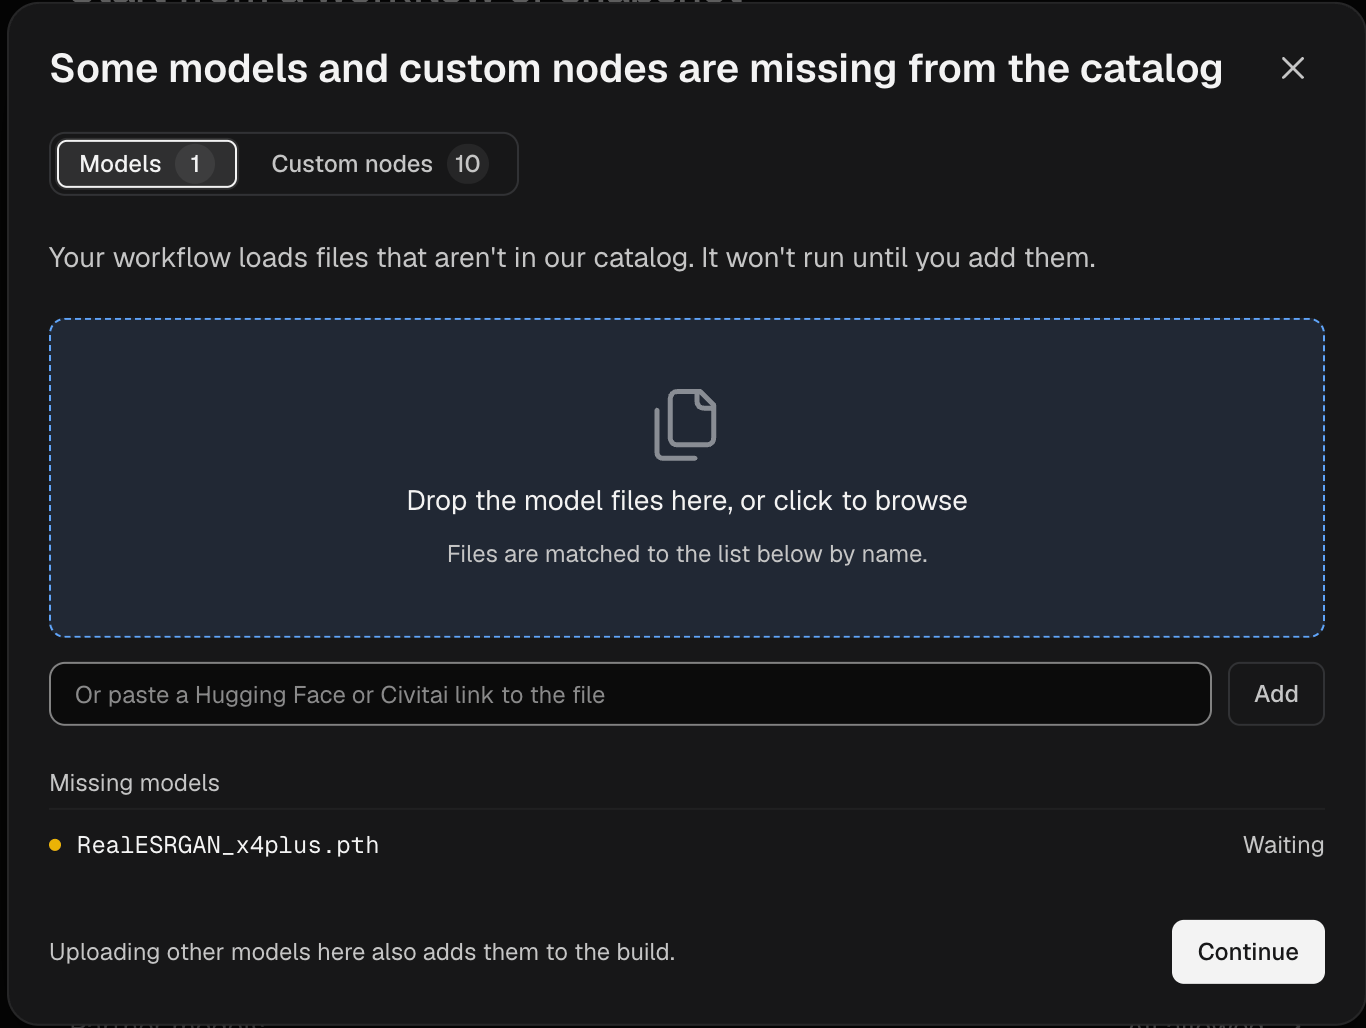
4
Build with the suggested defaults
Click Build with defaults…. The Choose build targets dialog opens.If Build with defaults… is unavailable, a line under the button says why. When it reads Add the missing models and custom nodes on their steps first., add what’s missing:
- Click Customise build.
- Click Next until a step lists the missing Custom Nodes or models.
- On each one, click Use suggestion or Upload.
- Which custom nodes does the build need?: choose the Custom Nodes.
- Which models ship inside the build?: choose which models the Build includes. A model the Build doesn’t include downloads the first time a job uses it.
Publish the Build
Publishing turns your Build into a numbered version, such asv1, that you can deploy now and later. Publishing is free.
- In the Choose build targets dialog, keep Serverless build selected. It’s the target that runs on Comfy Cloud.
- Click Publish.
- In the Developer Platform sidebar, click Deploy.
- In the Builds section, click your Build.
- Under Versions, click the latest version.
What if the build fails?
What if the build fails?
Some Custom Nodes fail to build. When that happens, the Serverless build row on your Build’s page shows Build failed.
- Open Logs on the row to read what failed.
- Click Edit build, and change the Build, such as by removing the Custom Node that failed.
- Publish the Build again.
Deploy and run your Workflow
A deployment is your Build running on Comfy Cloud GPUs. Deploy the Build, and then switch the Comfy Cloud editor to the deployment to run your Workflow.- On the Serverless build row, click Deploy. The Deploy v1 of your Build’s name dialog opens.
- Select a GPU. Each GPU shows its VRAM (GPU memory) and its price per hour.
- If the dialog shows Ready for the Cloud editor, leave it selected. It’s on by default.
-
Leave the other settings at their defaults. With Always-warm workers at
0, the deployment turns its GPUs off when no jobs come in. By default, Keep worker up after a job keeps a GPU on for 3 minutes after the last job, and that idle time is billed at the GPU rate. - Check the Estimated cost panel. It shows the GPU time per hour and the model storage per month.
- Click Create deployment. The deployment’s page opens. Wait until the status under the deployment’s name reads Ready.
-
In the Comfy Cloud editor, click the cloud menu to the left of Run. Under Run on, select your deployment. The editor reloads, and your tabs stay open.
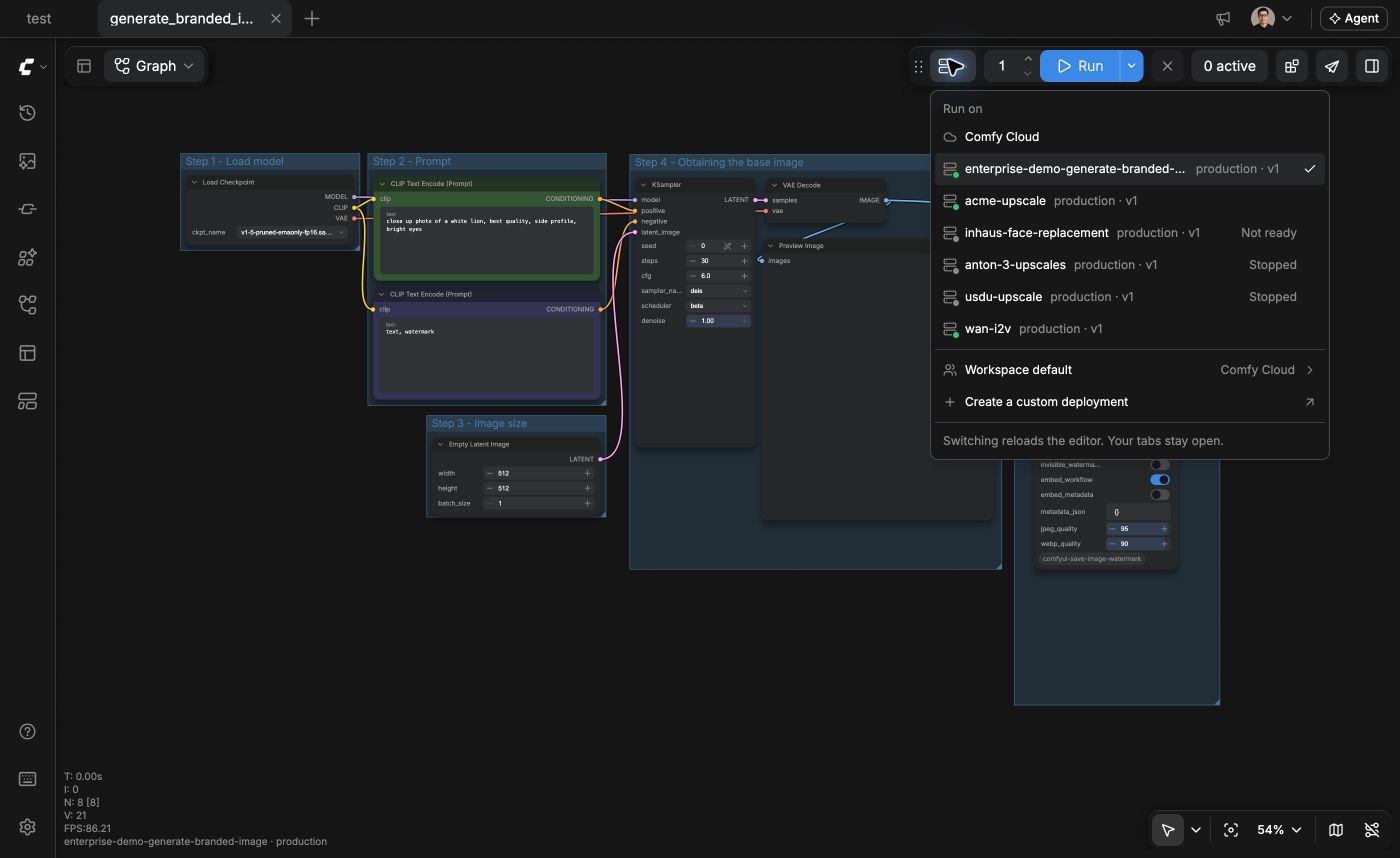
- Open your Workflow, and then click Run. Your first job can wait while the deployment starts a GPU.
Add your own LoRA or model
The Model Library holds the models your workspace uploads. A model you upload runs on Comfy Cloud and on your deployments. Before you upload a model, make sure you meet these requirements:- An active Pro, Creator, Team, or Enterprise plan: your workspace needs one to upload a model.
- A
.safetensorsfile of 2 GB or less: put larger base models, such as SDXL or Flux, in the Build.
Upload the model
You can upload in the Comfy Cloud editor or on the Developer Platform. Pick the tab for the place you’re working in.- Cloud editor
- Developer Platform
- In the cloud menu to the left of Run, make sure Comfy Cloud is selected under Run on. On a deployment, the Model Library has no Import button.
- In the Left sidebar, click Model Library, and then click Import.
-
Click Choose a file, or drag a
.safetensorsfile into the dialog. - Under What type of model is this?, keep LoRA for a LoRA, or select the type that matches the file.
-
Click Upload. When the dialog says Model successfully imported., click Finish.
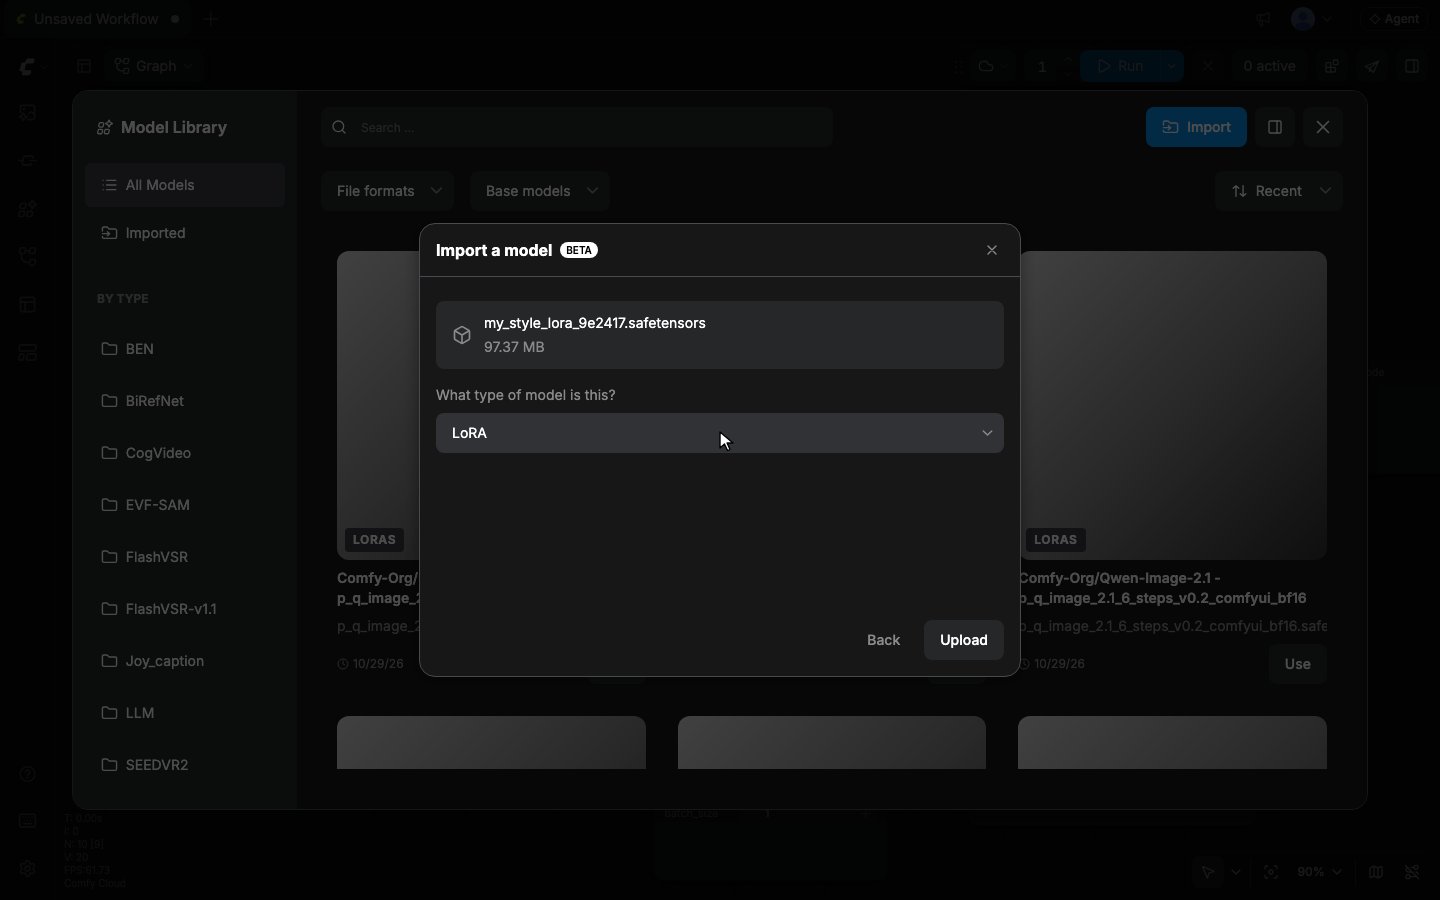
- In the Import dialog, paste the model’s link in Paste link here.
- Click Continue.
- Under What type of model is this?, select the model type.
- Click Import.
.ckpt, imports into the Model Library but doesn’t run on a deployment.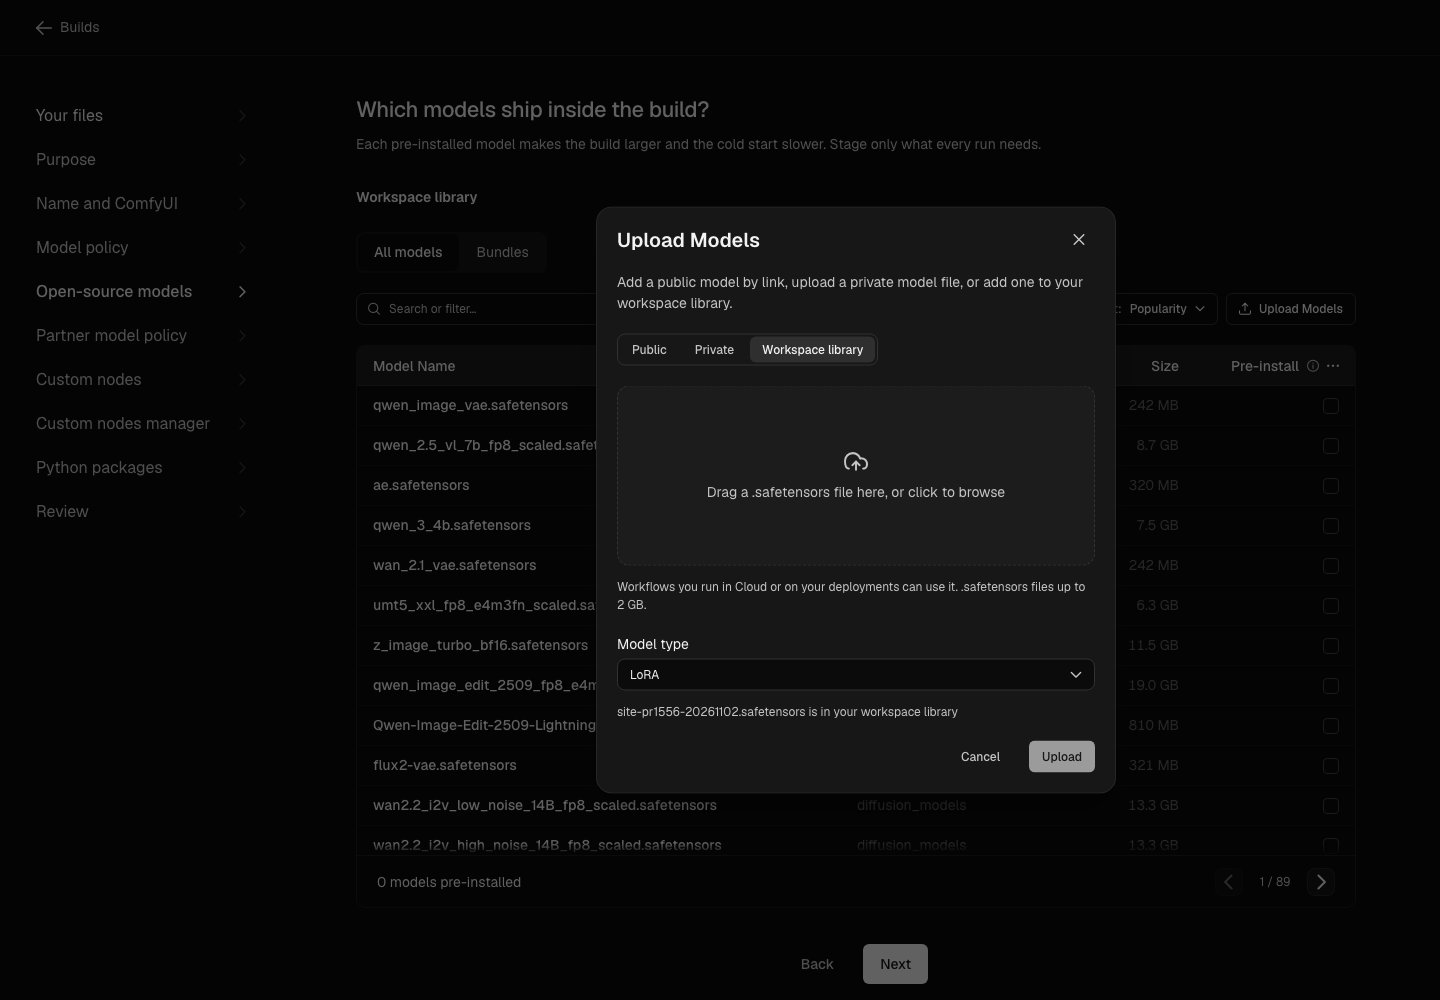
Use the model in your Workflow
Once the model is uploaded, you can use it on Comfy Cloud or on your deployment.- In the cloud menu to the left of Run, select where to run: Comfy Cloud, or your deployment.
- Add a
Load LoRA (Model and CLIP)Node, or open a Workflow that has one. - In the Node’s
lora_namelist, select your file. - Click Run.
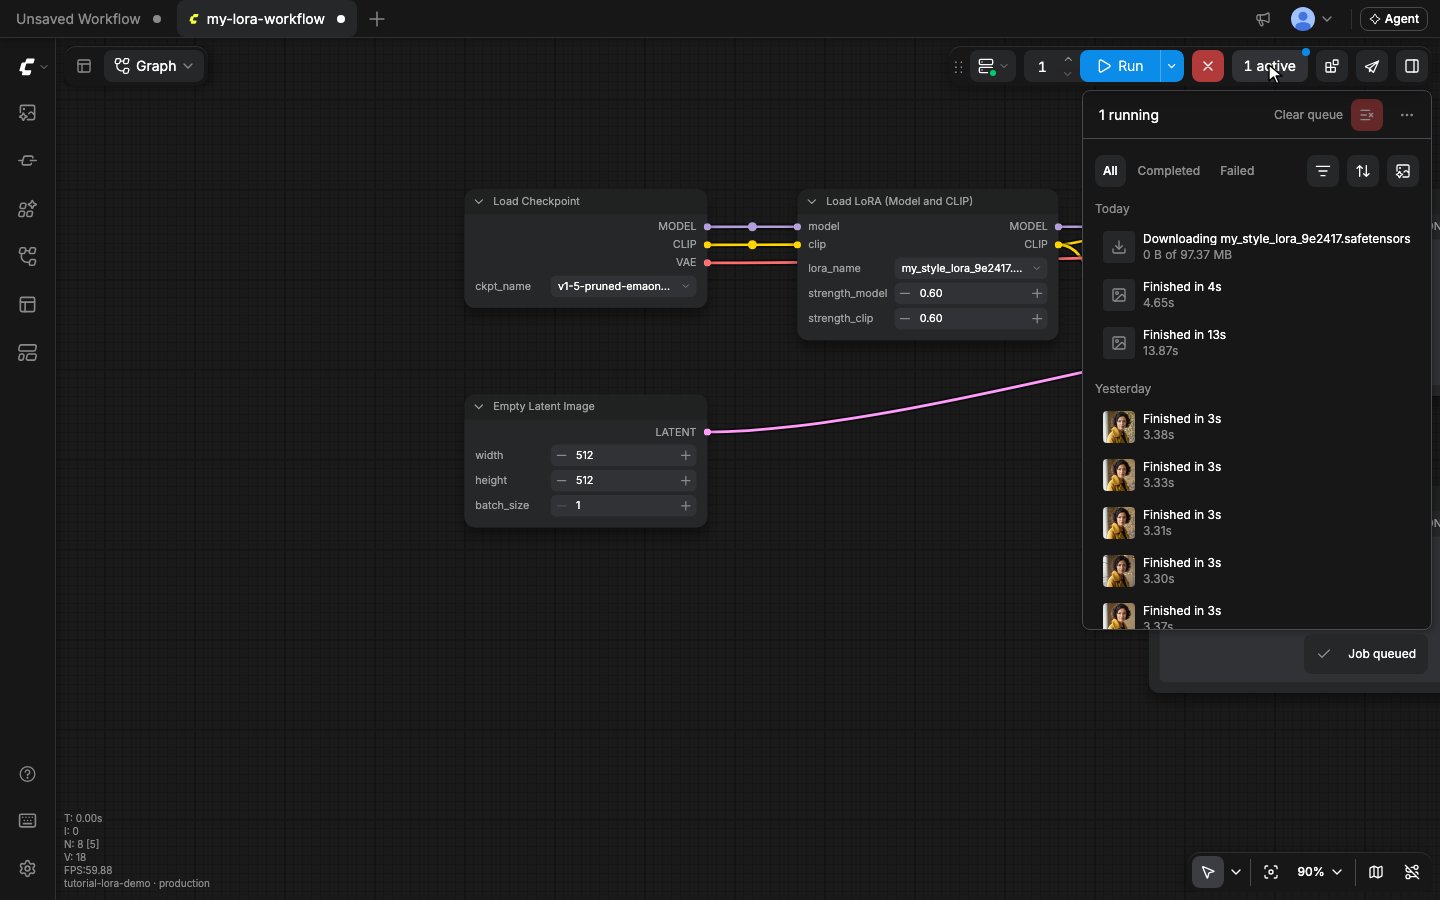
- Pick the matching type. A loader Node lists only models of its type. A
Load LoRA (Model and CLIP)Node lists models uploaded as LoRA. - Use a new file name. If your Build already has a model with the same name, a job on your deployment uses the Build’s file, not your upload.
- Match the base model. A LoRA must match the base model your Workflow loads.
- Use a loader Node that Comfy Cloud has. If the loader Node comes from a Custom Node that Comfy Cloud doesn’t have, add the model to the Build.
Change or delete a library model
When a deployment is selected under Run on, the Model Library lists only the Build’s models. To change or delete a model you uploaded, switch back to Comfy Cloud first, and then in the Left sidebar, click Model Library. To change the model type:- Hover over the model’s card, and then click Model Info.
- Select a new Model Type.
- Hover over the model’s card, click More, and then click Delete.
- In Delete this model?, click Delete.
Stop or delete your deployment
A deployment costs storage until you delete it, even while it’s stopped. Stop a deployment to keep it for later without running jobs. Delete it to stop paying for it. To open the deployment’s page:- In the Developer Platform sidebar, click Deploy.
- In the Deployments section, click the deployment’s name.
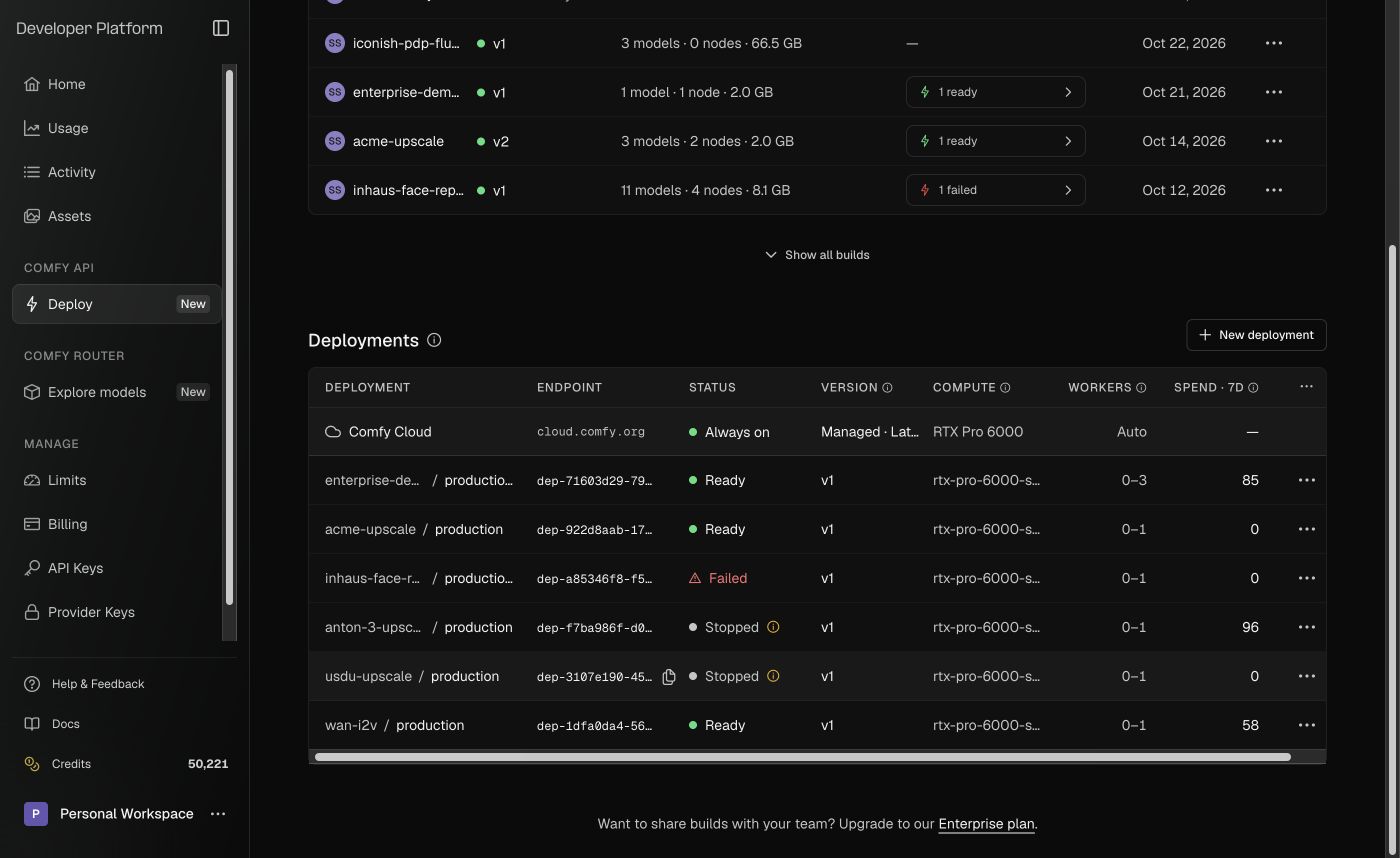
- Click Stop.
- In the Stop deployment dialog, click Stop.
- Click Start.
- On a stopped deployment, click Delete. On a running deployment, open the More actions menu, and then select Delete.
- In the Delete deployment dialog, click Delete.
Next steps
Library models in API requests
Upload a model from a terminal and pick it per request with
lora_name.Comfy API Quickstart
Call your deployment from your own code as an autoscaling endpoint.
Usage and Limits
See how Comfy Cloud credits and concurrent job limits work.
Workflow API Format
Export a Workflow in the format that API requests send.