ComfyUI/input/3d/. You can also upload supported 3D files for preview using the upload function.
Supported Formats
Currently, this node supports multiple 3D file formats, including .gltf, .glb, .obj, .fbx, and .stl.
3D Node Preferences
Some related preferences for 3D nodes can be configured in ComfyUI’s settings menu. Please refer to the following documentation for corresponding settings:
Settings Menu
Besides regular node outputs, Load3D has lots of 3D view-related settings in the canvas menu.
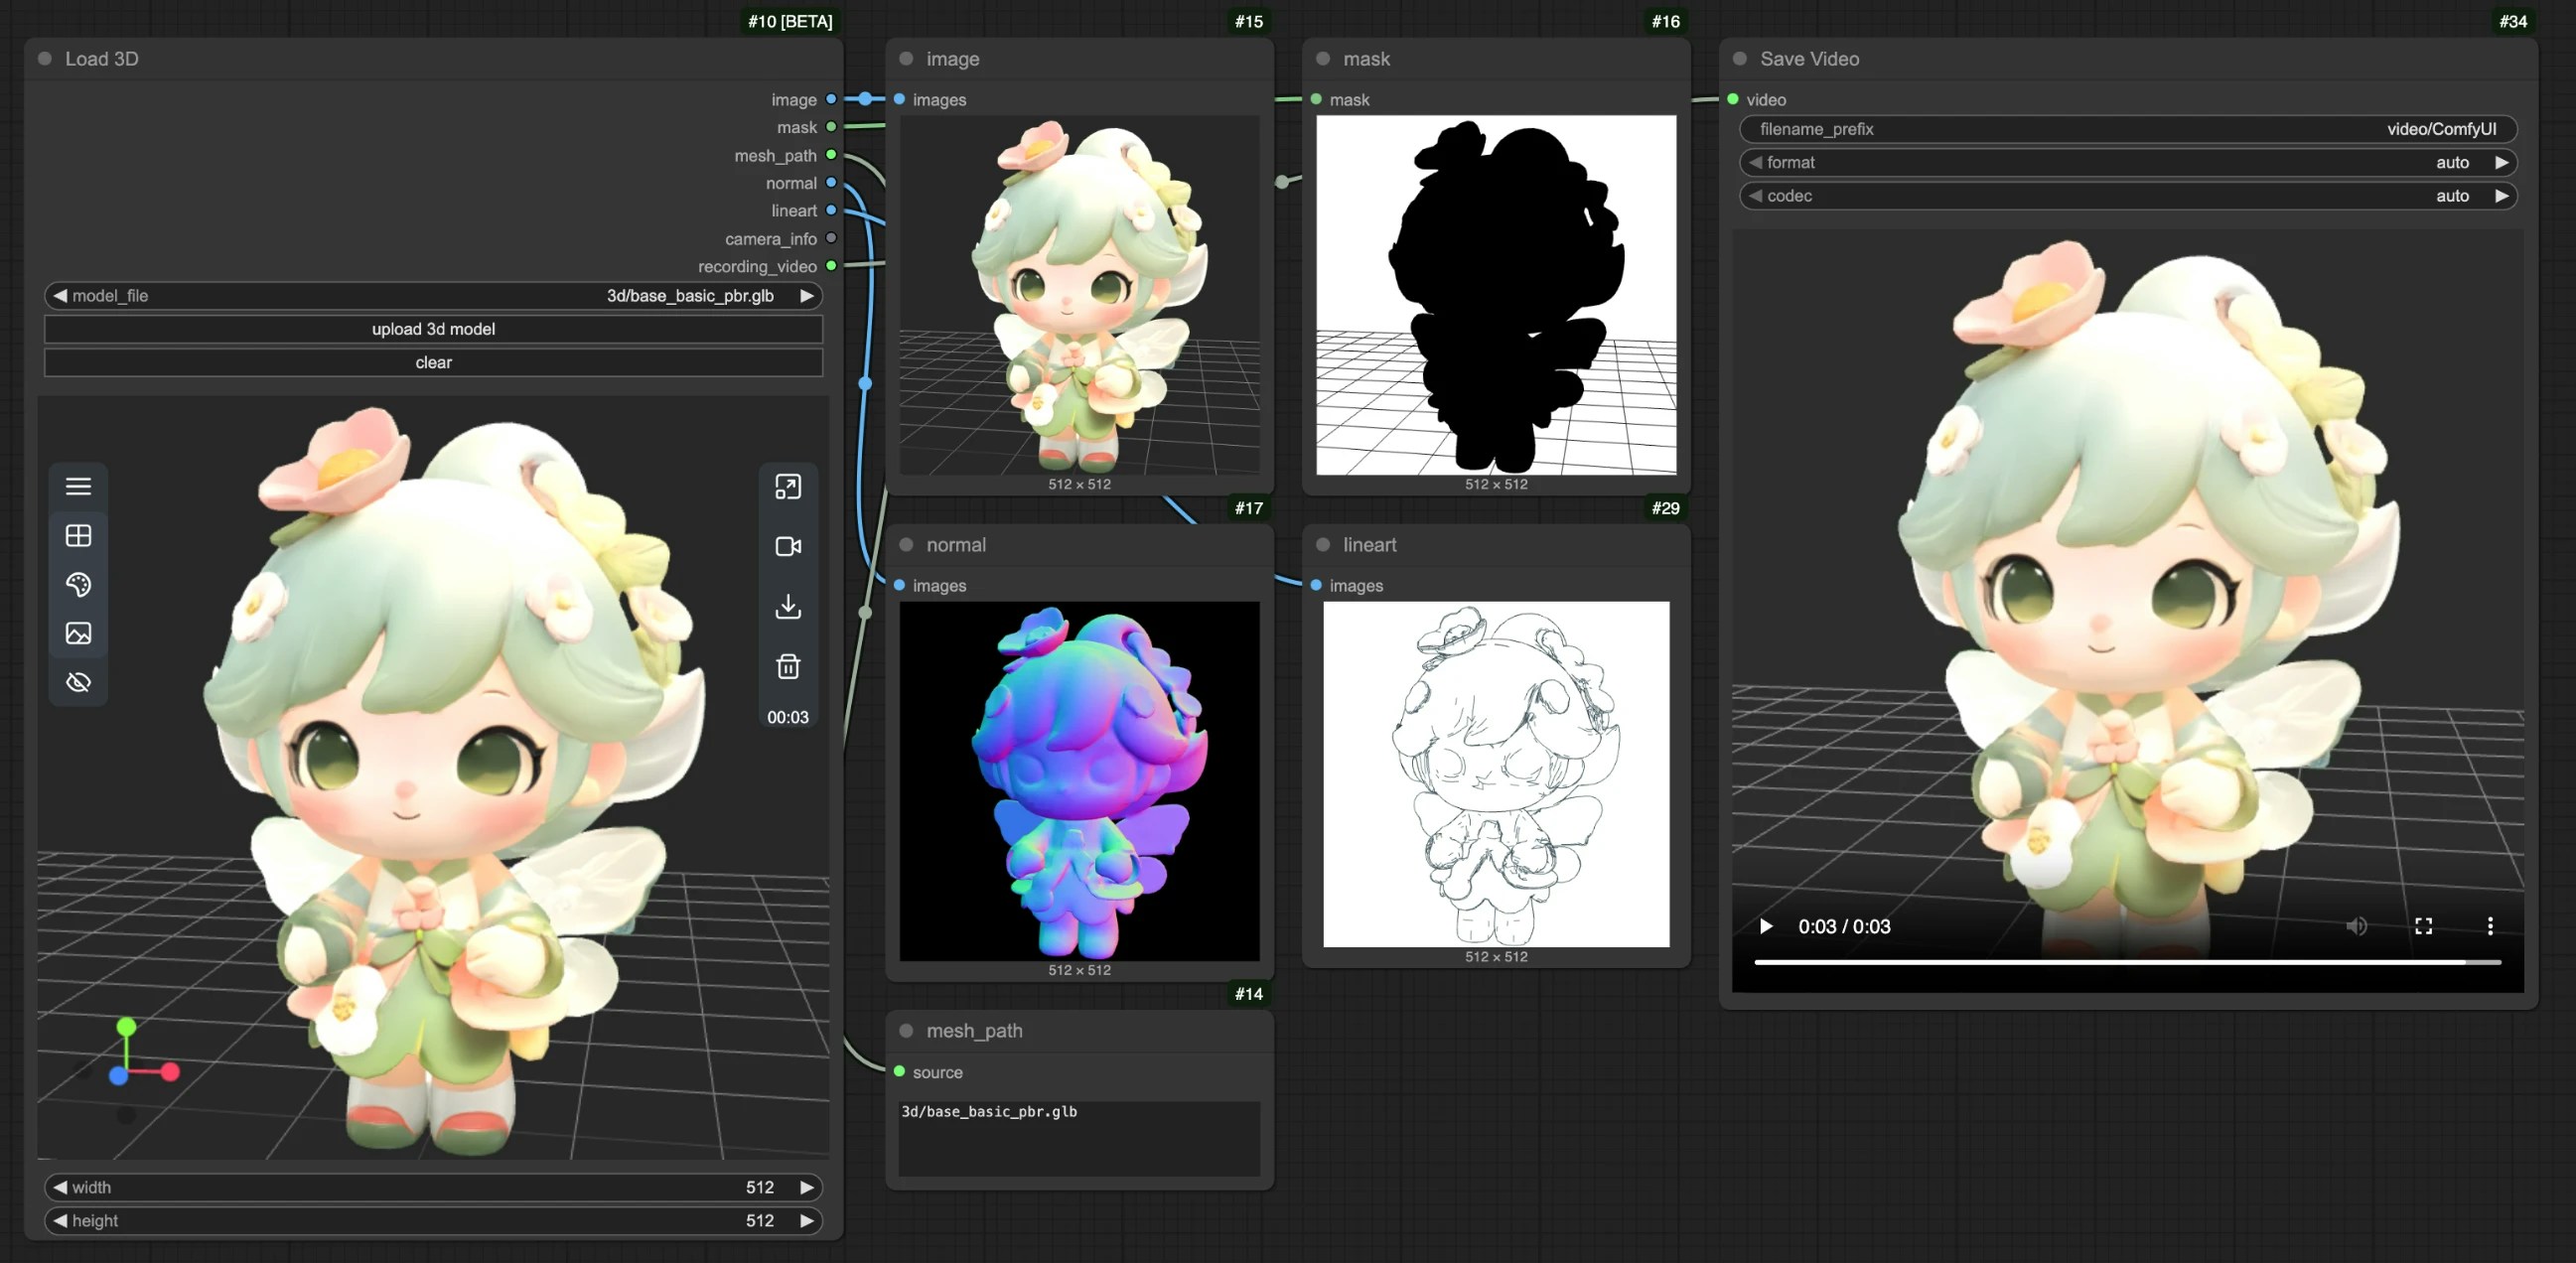
Inputs
Outputs
All the outputs preview:
Canvas Area Description
The Load3D node’s Canvas area contains numerous view operations, including:- Preview view settings (grid, background color, preview view)
- Camera control: Control FOV, camera type
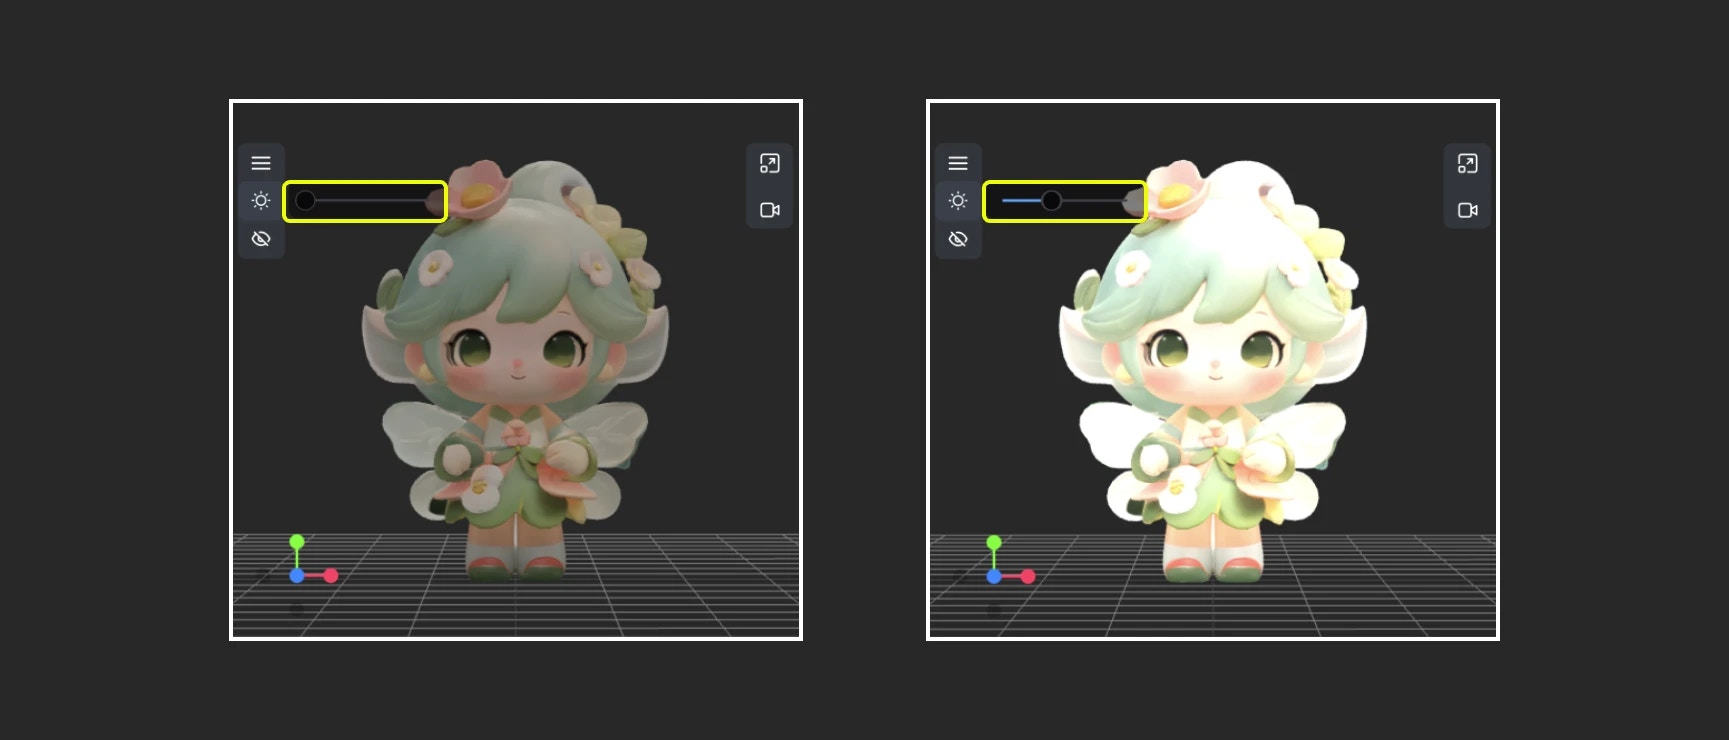
- Global illumination intensity: Adjust lighting intensity
- Video recording: Record and export videos
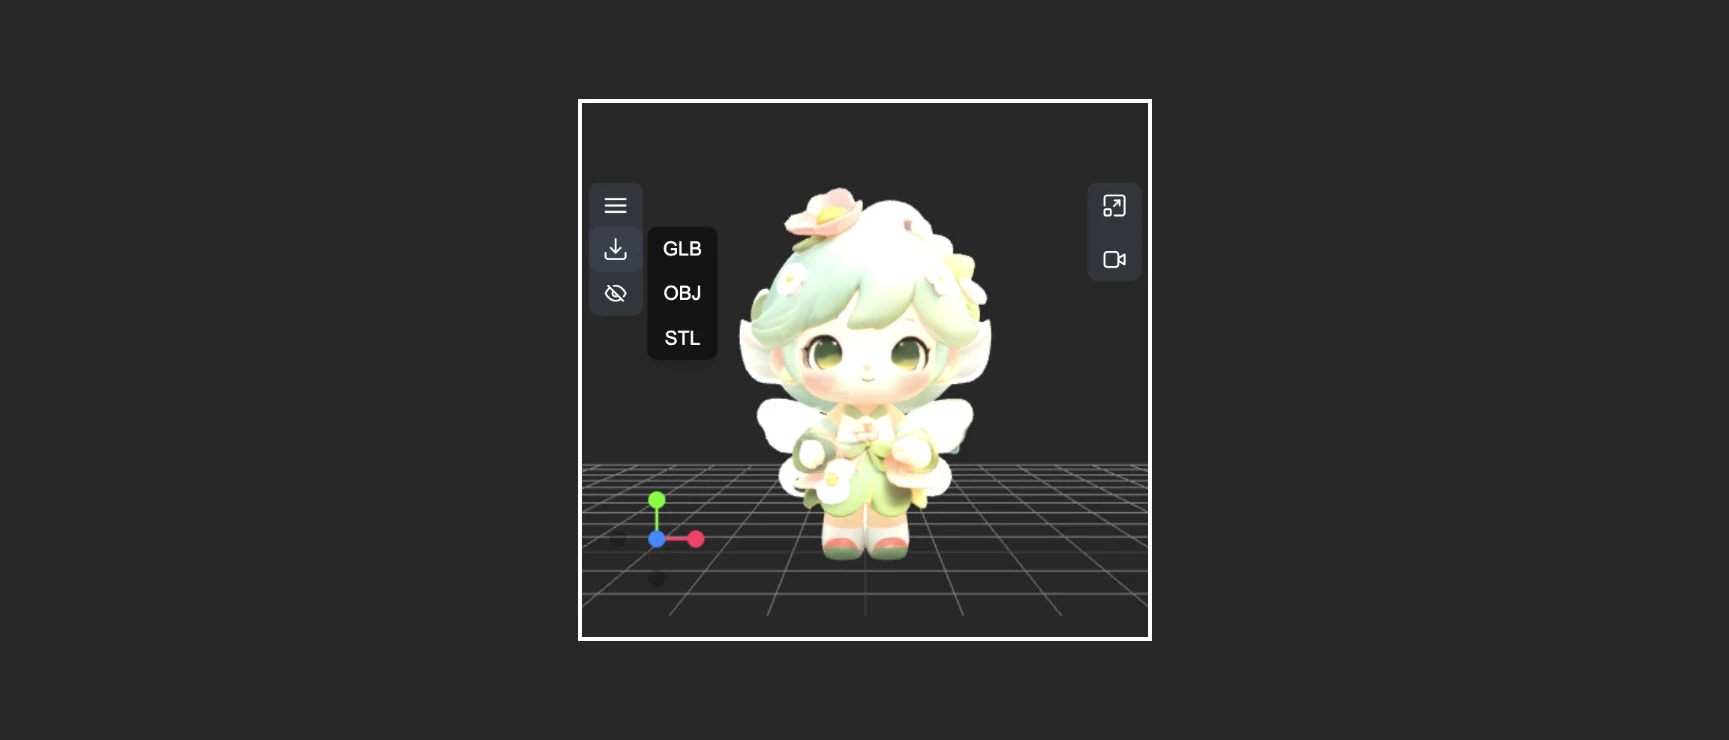
- Model export: Supports
GLB,OBJ,STLformats - And more
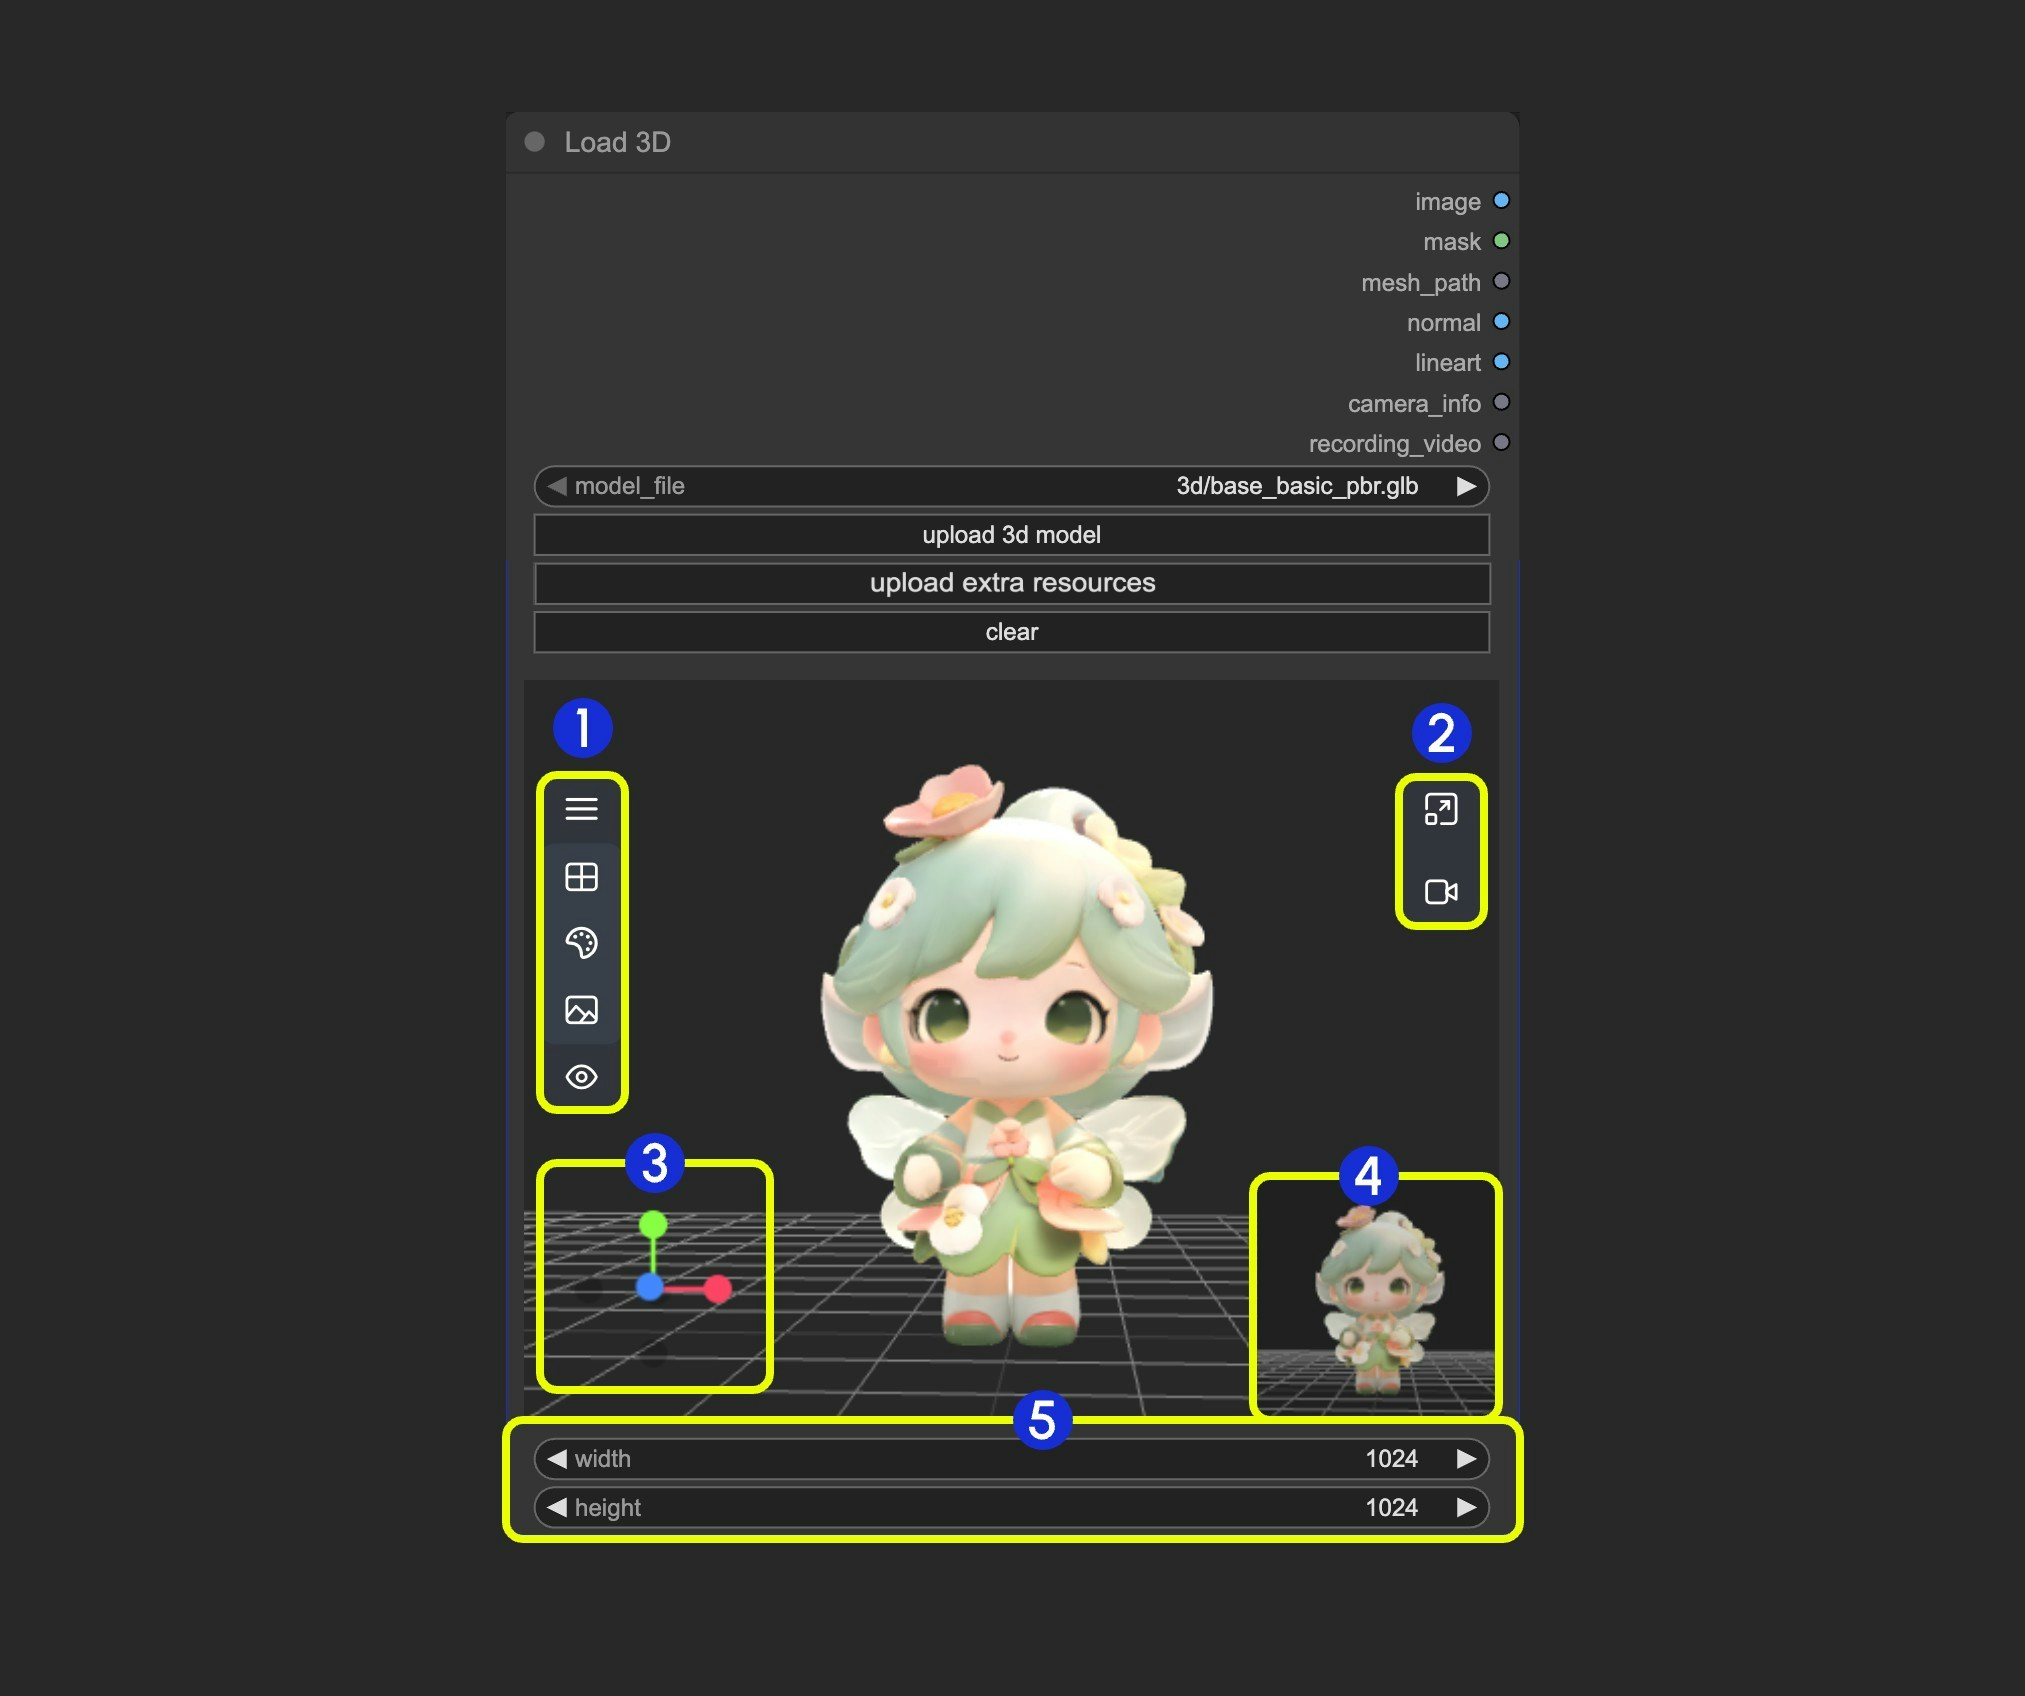
- Contains multiple menus and hidden menus of the Load 3D node
- Menu for
resizing preview windowandcanvas video recording - 3D view operation axis
- Preview thumbnail
- Preview size settings, scale preview view display by setting dimensions and then resizing window
1. View Operations
View control operations:- Left-click + drag: Rotate the view
- Right-click + drag: Pan the view
- Middle wheel scroll or middle-click + drag: Zoom in/out
- Coordinate axis: Switch views
2. Left Menu Functions

-
- Scene: Contains preview window grid, background color, preview settings
-
- Model: Model rendering mode, texture materials, up direction settings
-
- Camera: Switch between orthographic and perspective views, and set the perspective angle size
-
- Light: Scene global illumination intensity
-
- Export: Export model to other formats (GLB, OBJ, STL)
Scene
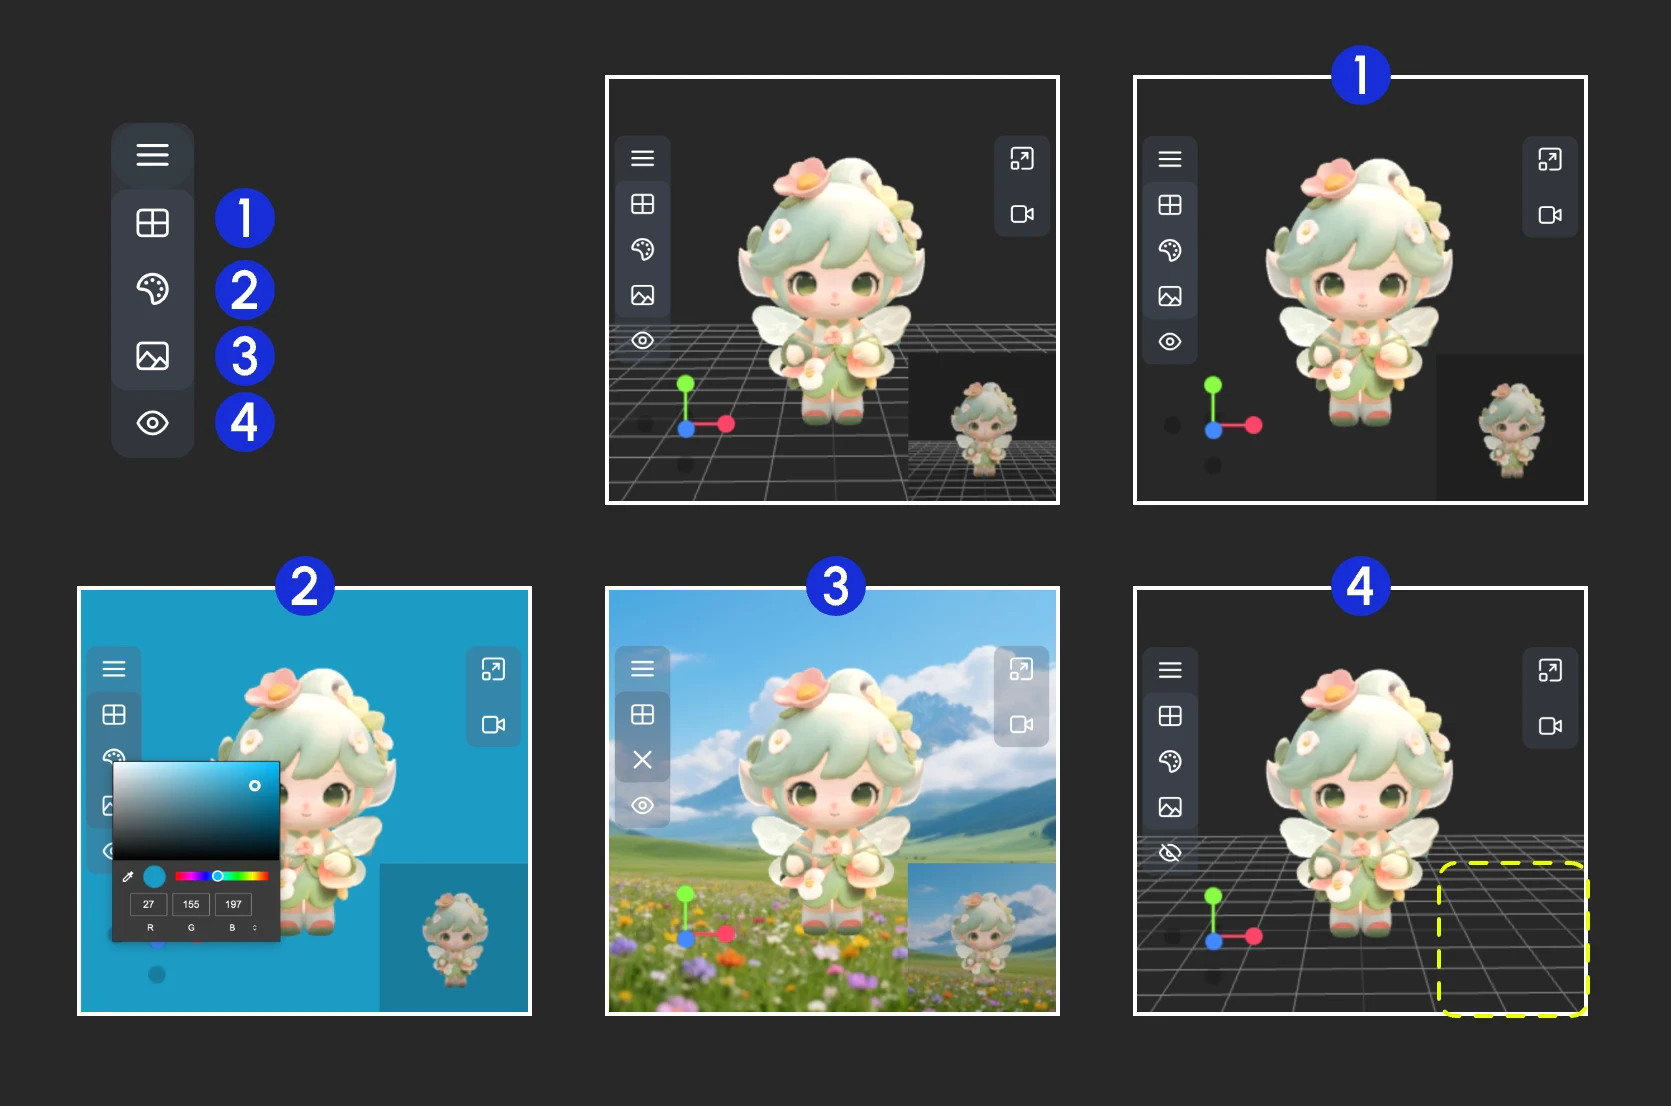
- Show/Hide grid
- Set background color
- Click to upload a background image
- Hide the preview
Model

- Up direction: Determine which axis is the up direction for the model
- Material mode: Switch model rendering modes - Original, Normal, Wireframe, Lineart
Camera
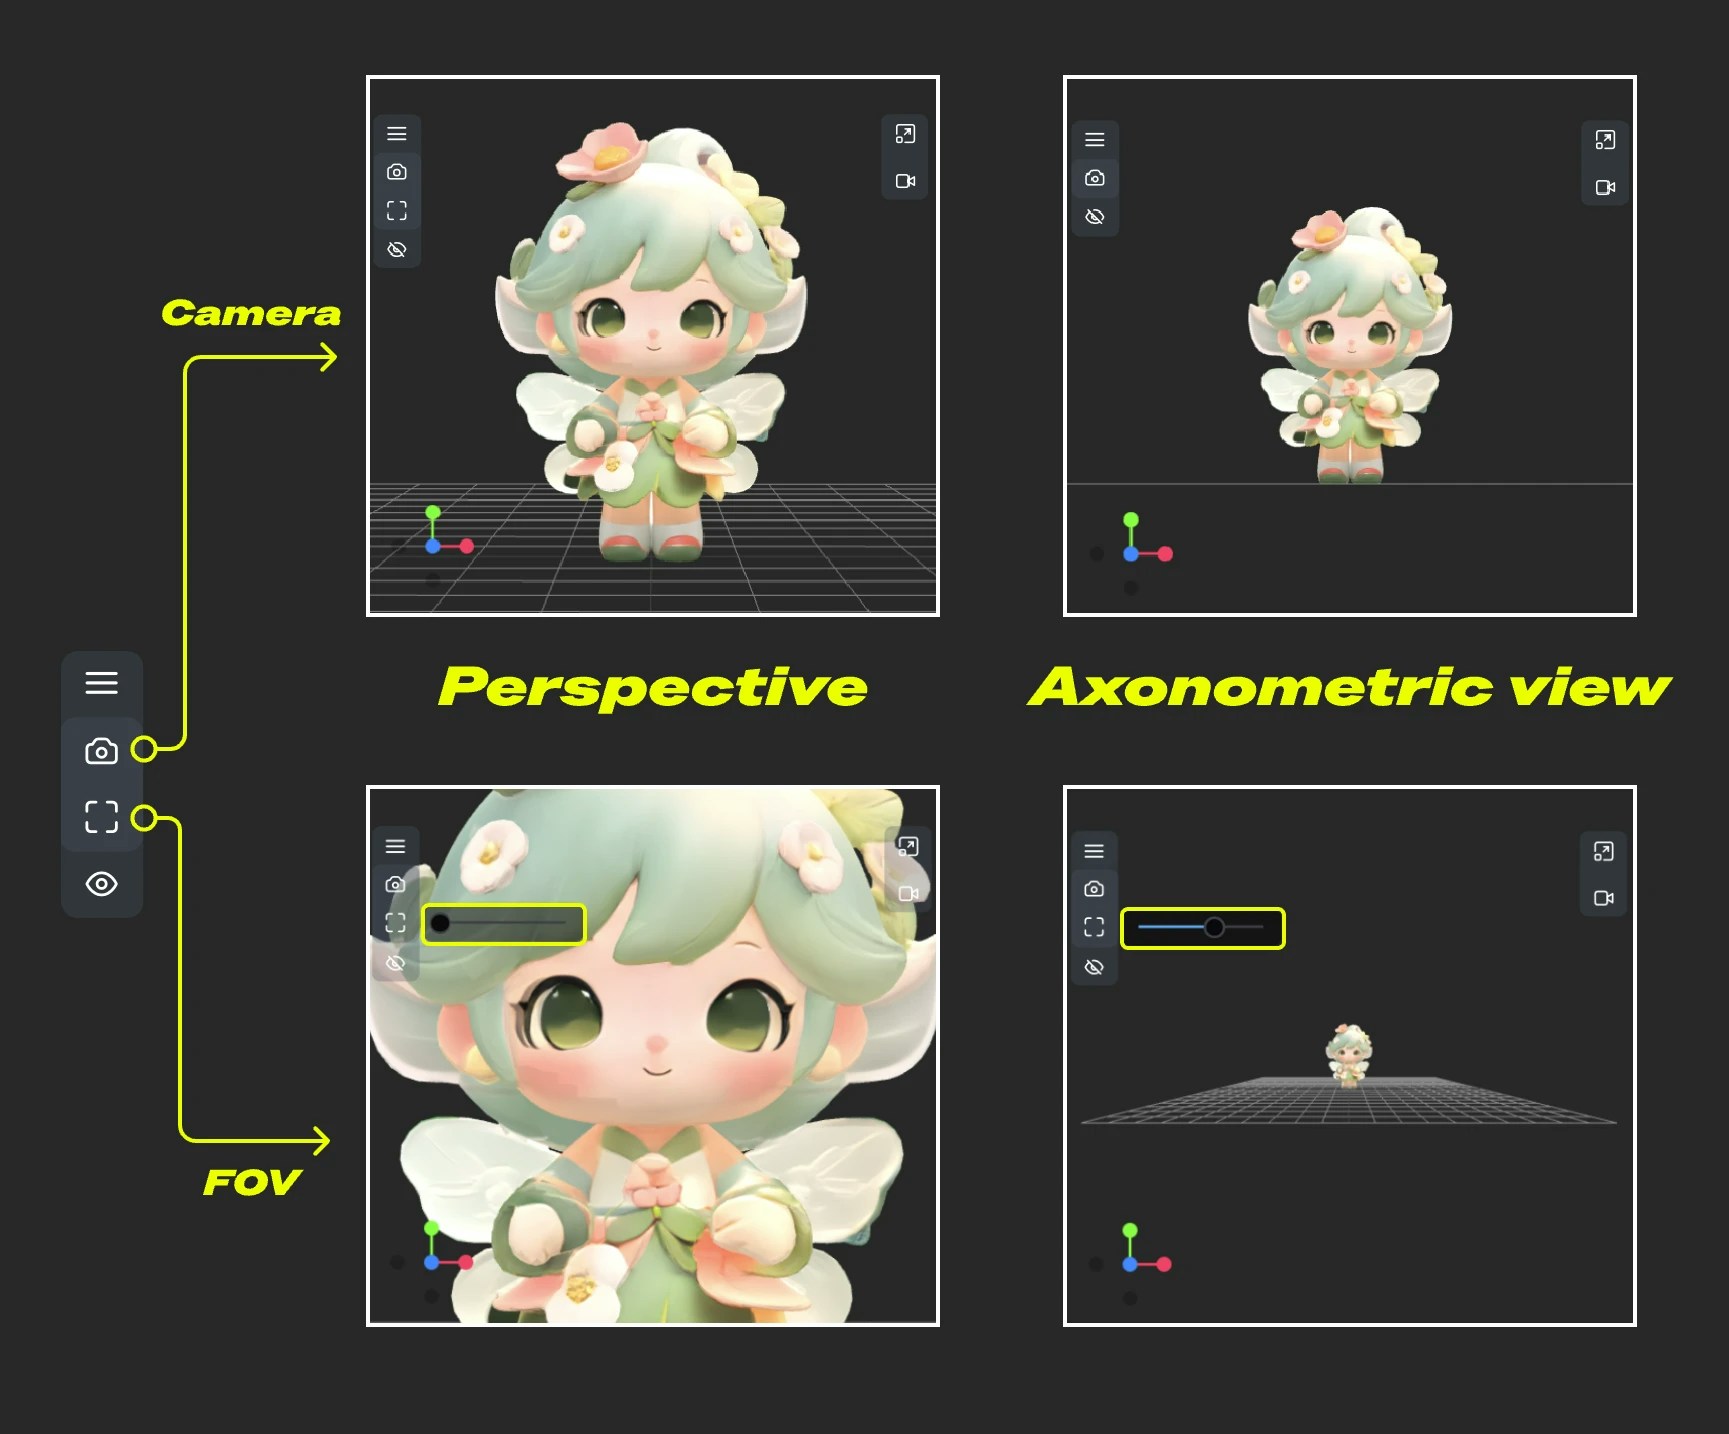
- Camera: Quickly switch between orthographic and orthographic views
- FOV: Adjust FOV angle
Light
Export
3. Right Menu Functions
The right menu has two main functions:- Reset view ratio: After clicking the button, the view will adjust the canvas rendering area ratio according to the set width and height
- Video recording: Allows you to record current 3D view operations as video, allows import, and can be output as
recording_videoto subsequent nodes
This documentation was AI-generated. If you find any errors or have suggestions for improvement, please feel free to contribute! Edit on GitHub