

The settings described on this page are located in the ComfyUI in-app settings menu. You can open it by navigating to Settings (gear icon) or using the
Ctrl + , keyboard shortcut, then select the corresponding category to view and configure these options.Camera
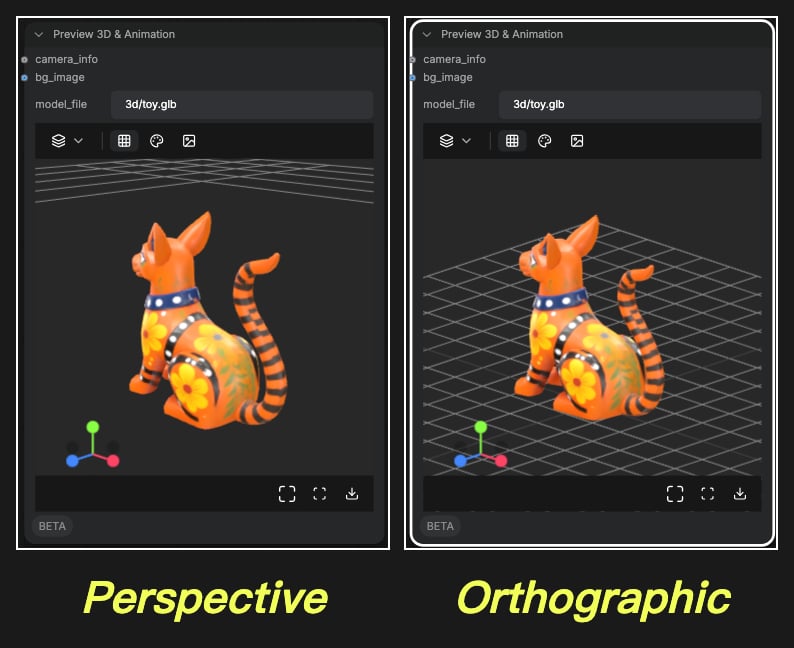
Initial Camera Type
- Options:
perspectiveorthographic
- Function: Controls whether the default camera is perspective or orthographic when creating new 3D components. This default setting can still be switched individually for each component after creation
Light
The light settings in this section are used to set the default lighting settings for 3D components. The corresponding settings in the 3D settings in ComfyUI can also be modified.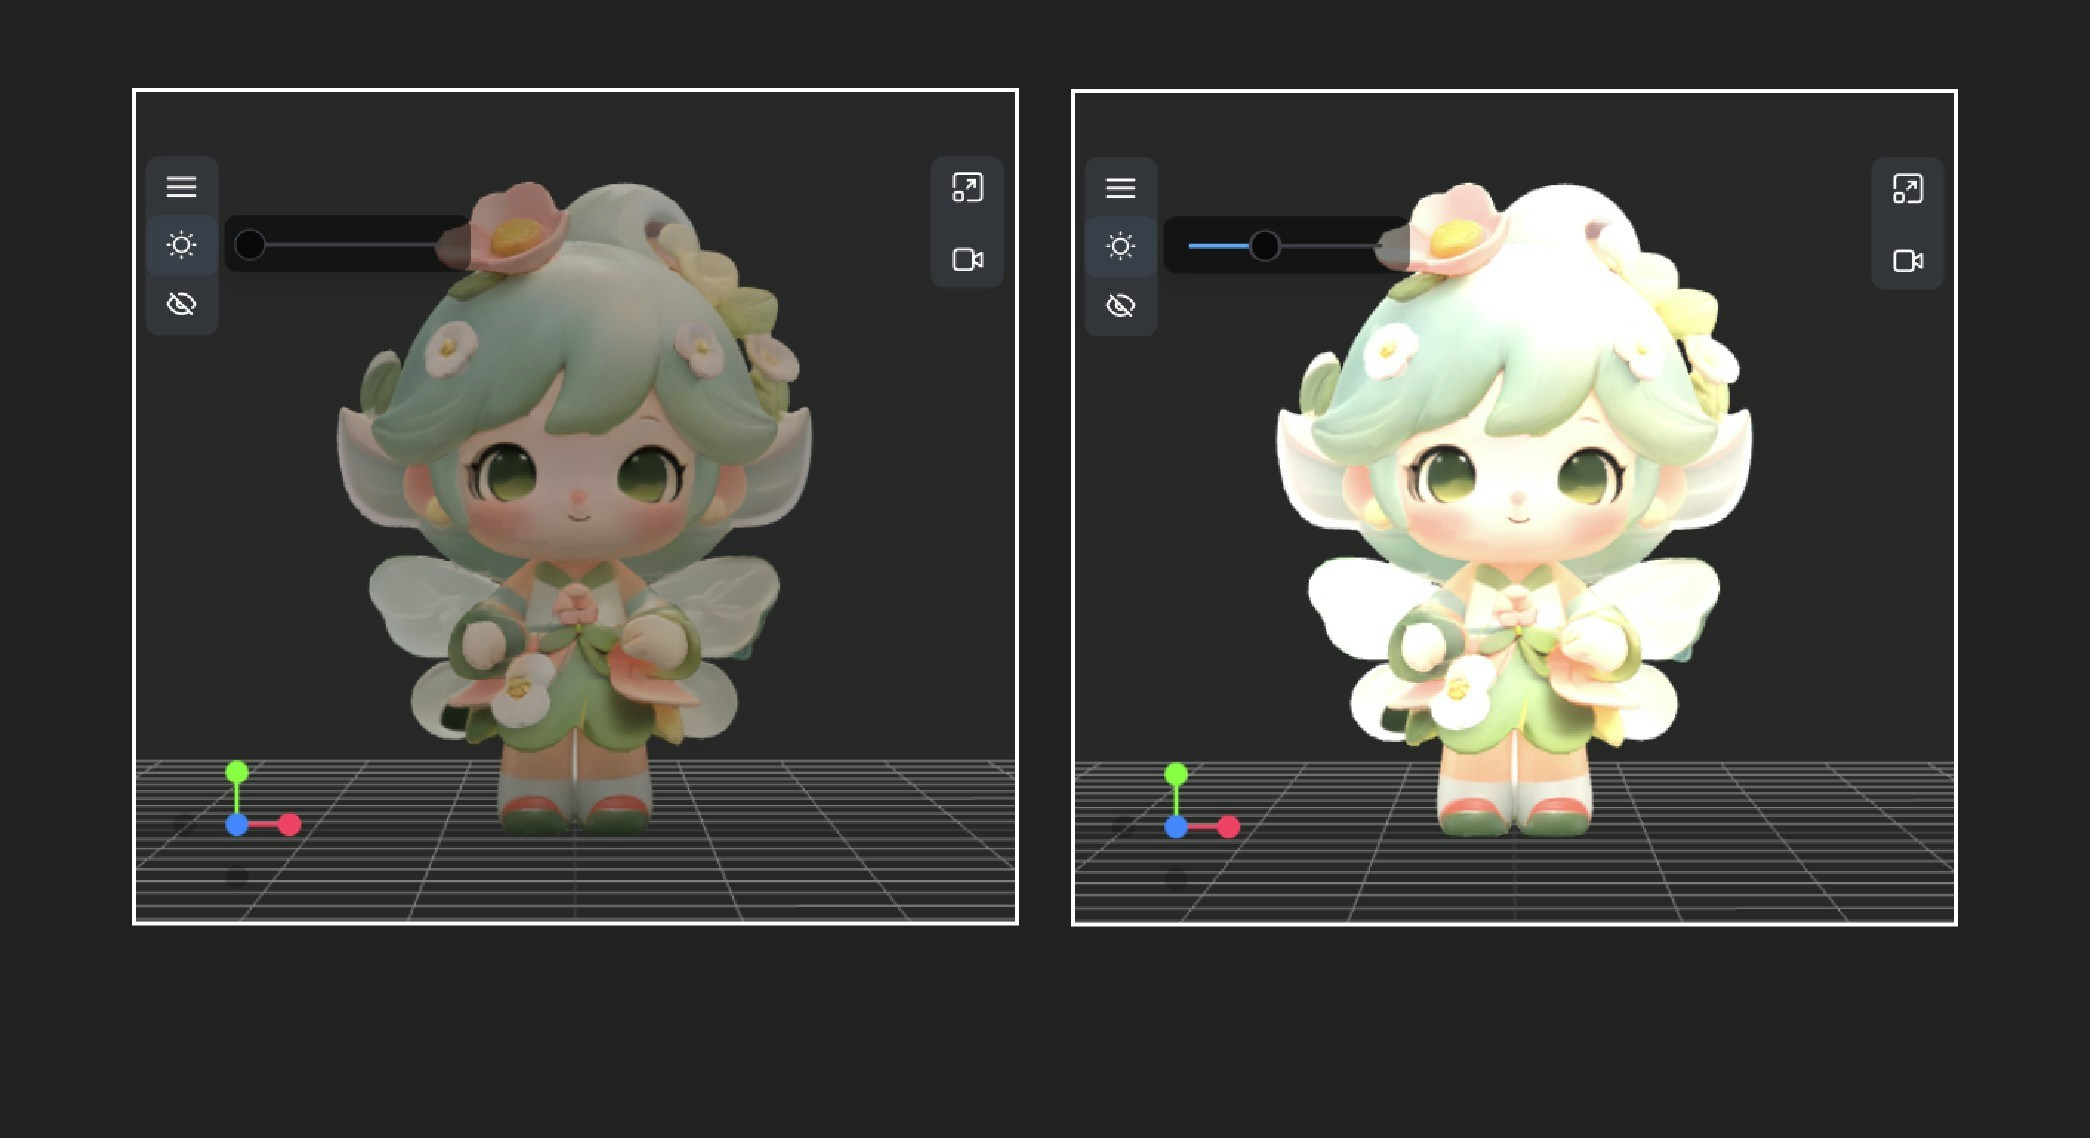
Light Adjustment Increment
- Default Value: 0.5
- Function: Controls the step size when adjusting light intensity in 3D scenes. Smaller step values allow for finer light adjustments, while larger values make each adjustment more noticeable
Light Intensity Minimum
- Default Value: 1
- Function: Sets the minimum light intensity value allowed in 3D scenes. This defines the lowest brightness that can be set when adjusting the lighting of any 3D control
Light Intensity Maximum
- Default Value: 10
- Function: Sets the maximum light intensity value allowed in 3D scenes. This defines the upper limit of brightness that can be set when adjusting the lighting of any 3D control
Initial Light Intensity
- Default Value: 3
- Function: Sets the default brightness level of lights in 3D scenes. This value determines the intensity with which lights illuminate objects when creating new 3D controls, but each control can be adjusted individually after creation
Scene
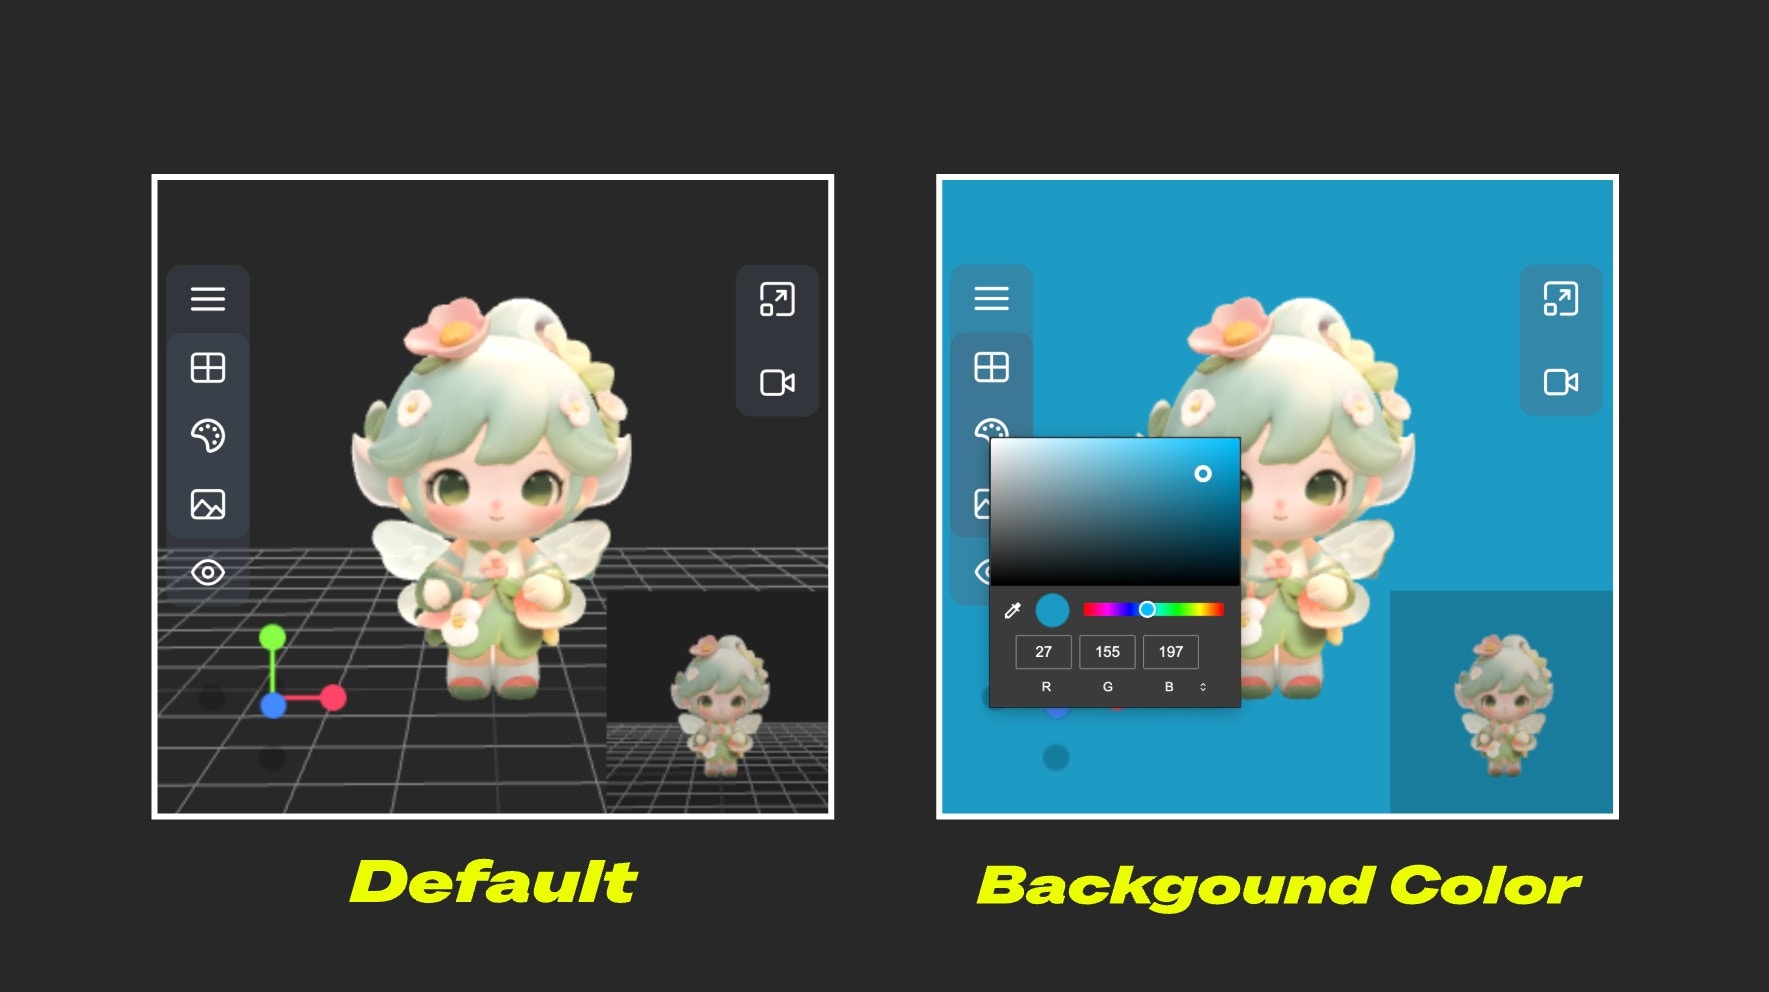
Initial Background Color
- Function: Controls the default background color of 3D scenes. This setting determines the background appearance when creating new 3D components, but each component can be adjusted individually after creation
- Default Value:
282828(dark gray)
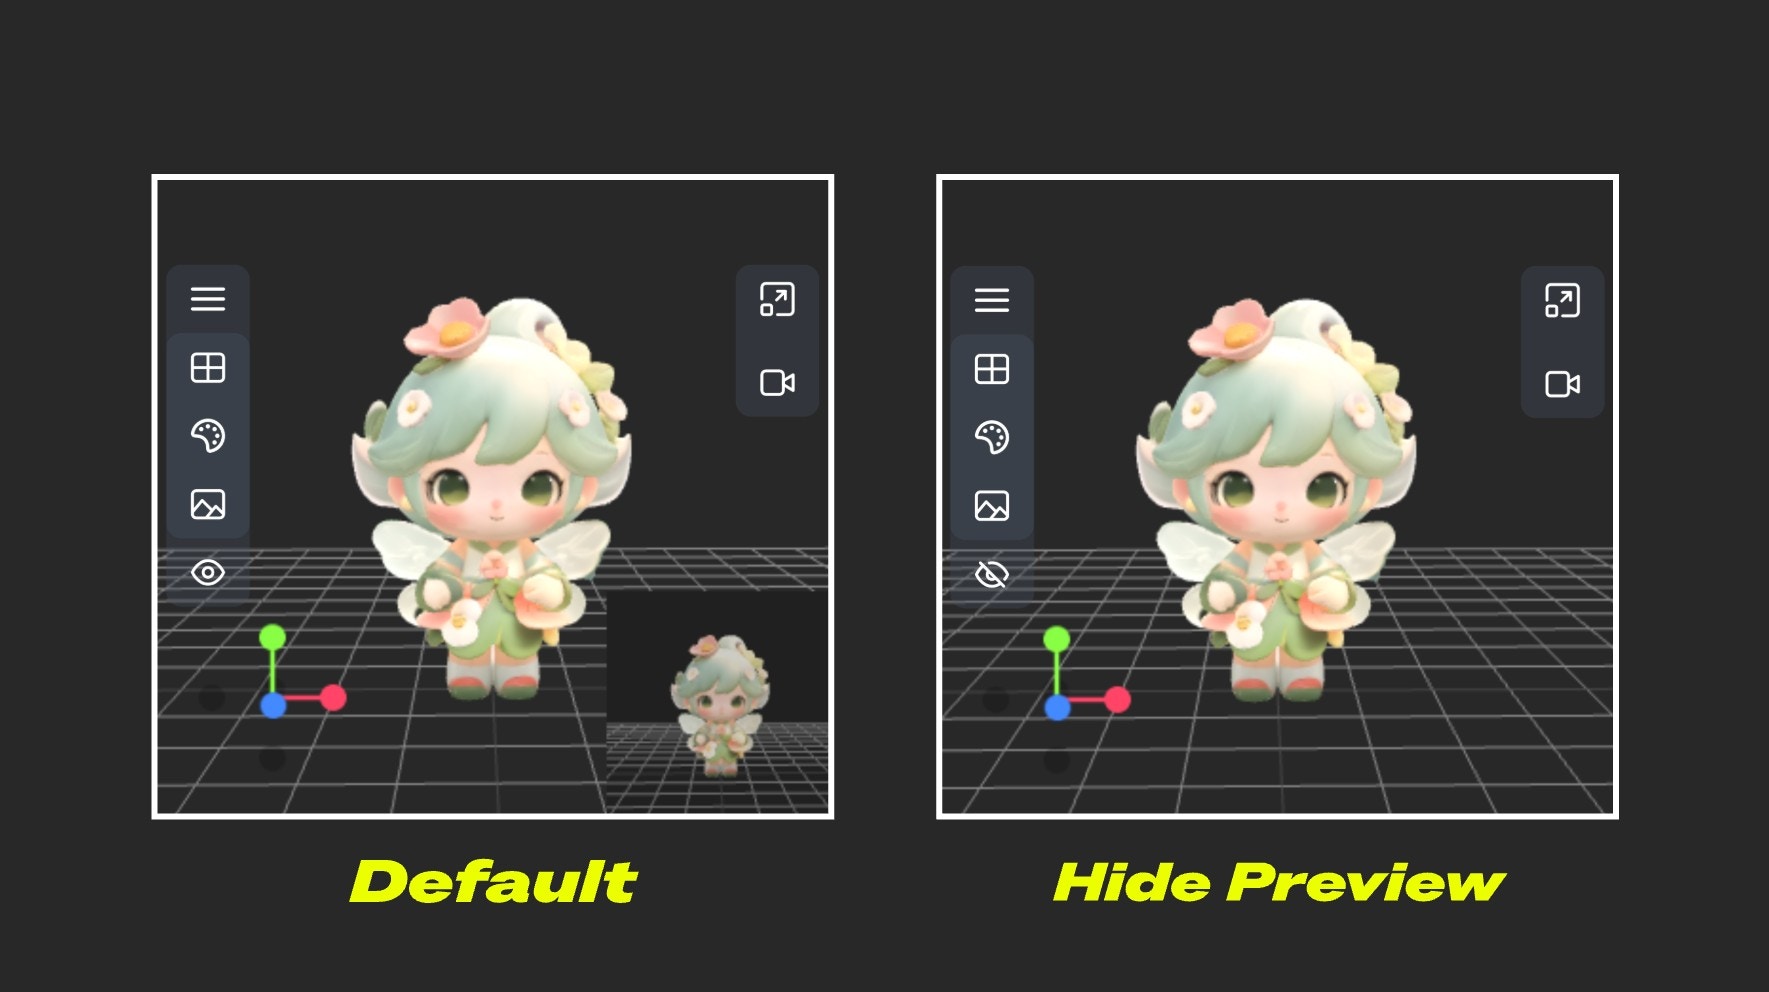
Initial Preview Visibility
- Function: Controls whether the preview screen is displayed by default when creating new 3D components. This default setting can still be toggled individually for each component after creation
- Default Value: true (enabled)
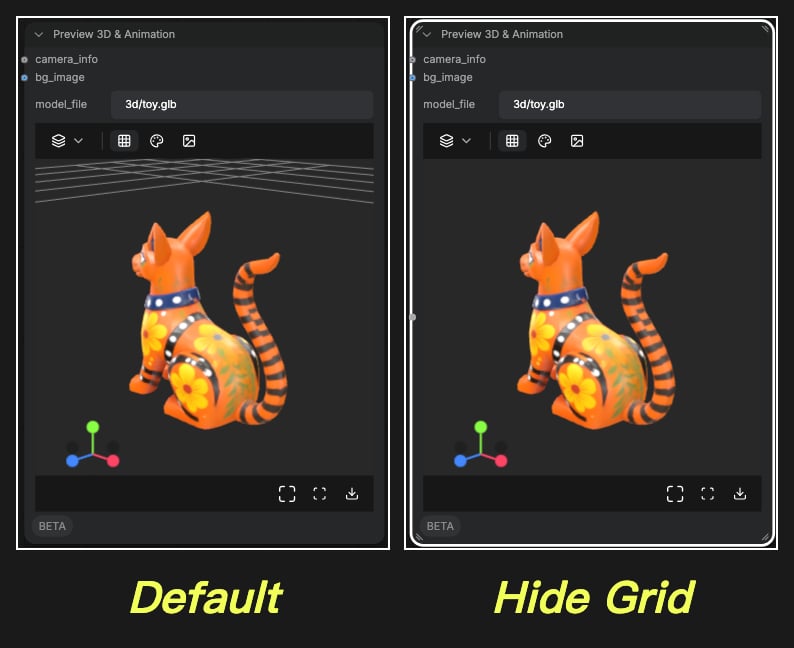
Initial Grid Visibility
- Function: Controls whether the grid is displayed by default when creating new 3D components. This default setting can still be toggled individually for each component after creation
- Default Value: true (enabled)
3D Viewer (Beta)
The 3D Viewer (Beta) opens a 3D model in a full-size window, separate from the preview inside the node. Use it to inspect a model, adjust how the model is placed, and export it. Select a single Load 3D node on the canvas, then click the viewer button in the selection toolbox. The button opens the 3D Viewer (Beta) window, which can be maximized.Enable 3D Viewer (Beta)
- Options:
- enabled
- disabled
- Default Value: enabled
- Function: Controls whether the viewer button appears in the selection toolbox when a single Load 3D node is selected. When disabled, the button does not appear. The setting carries a Beta marker in the settings list.
Viewer panels
The viewer has its own panels for the scene, camera, lighting, model, gizmo, animation, and export:- Scene: background color, grid visibility, and a background image rendered as tiled or panorama
- Camera: camera type and field of view
- Light: light intensity
- Model: up direction and material mode
- Gizmo: move, rotate, or scale the model in the viewport
- Animation: play the animation clips stored in the file, with speed and seek controls
- Export: save the loaded model. Mesh files export as GLB, OBJ, STL, or FBX, while point cloud and Gaussian splat files keep their original format
Point Cloud
Point Cloud Engine
- Options:
threejsfastply
- Default Value:
threejs - Function: Selects the engine that loads point cloud PLY files.
threejsuses the native Three.js PLYLoader, which reads binary and ASCII files and can load meshes.fastplyuses an optimized parser for ASCII PLY files. 3D Gaussian Splat files are detected automatically and always use the Gaussian splat renderer, whichever engine is selected here.