How to disable all custom nodes?
- Desktop Users
- Manual Install
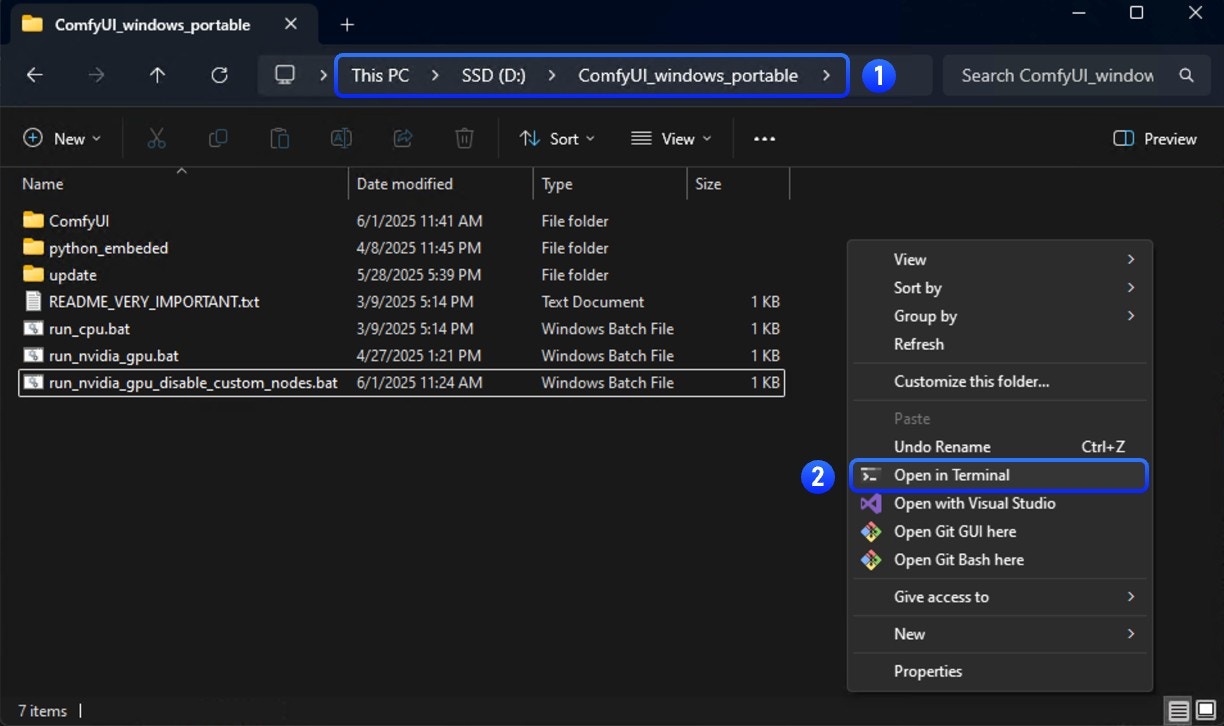
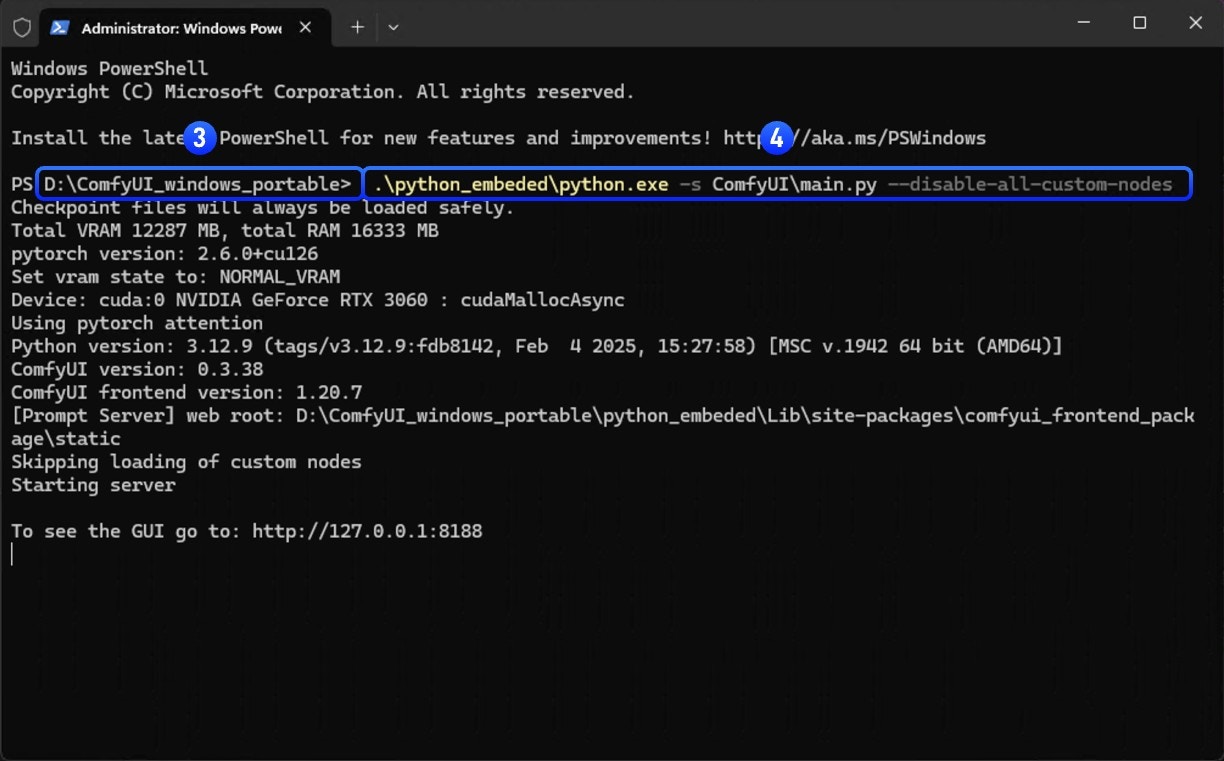
- Portable
Start Comfy Desktop with custom nodes disabled from the settings menu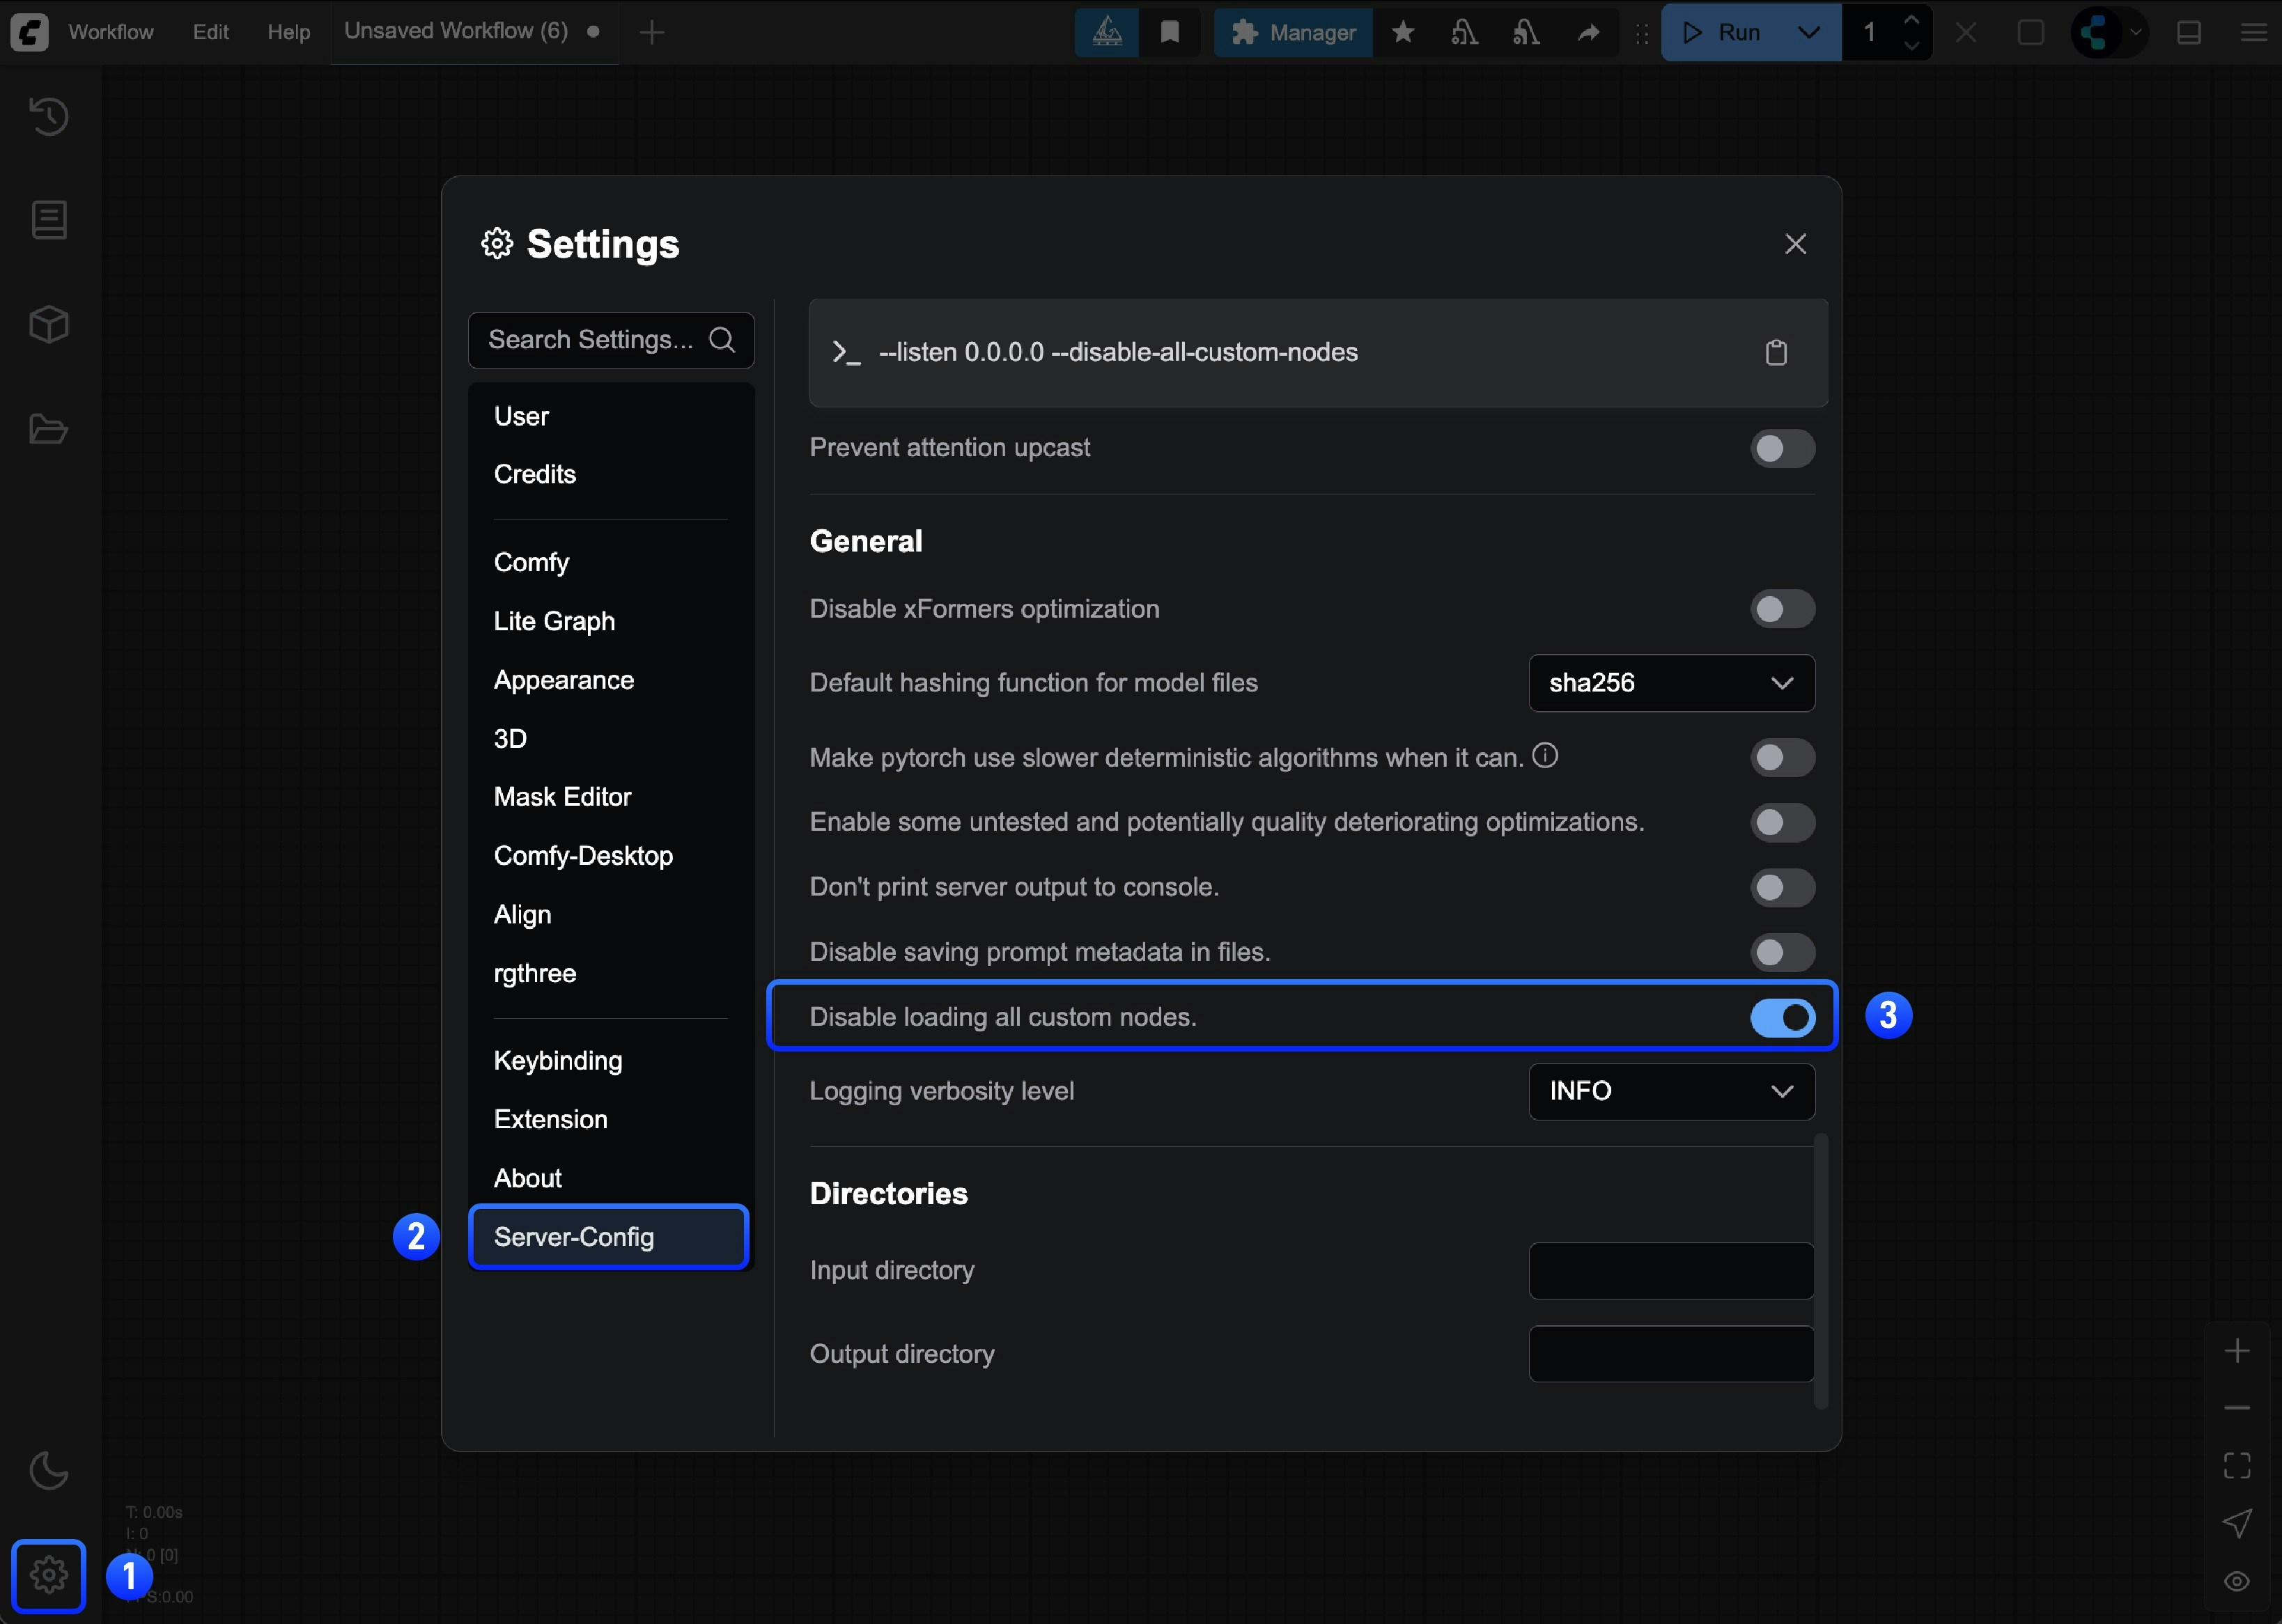

- ✅ Issue disappears: A custom node is causing the problem → Continue to Step 2
- ❌ Issue persists: Not a custom node issue → Report the issue
What is Binary Search?
In this document, we will introduce the binary search approach for troubleshooting custom node issues, which involves checking half of the custom nodes at a time until we locate the problematic node. Please refer to the flowchart below for the specific approach - enable half of the currently disabled nodes each time and check if the issue appears, until we identify which custom node is causing the issueTwo Troubleshooting Methods
In this document, we categorize custom nodes into two types for troubleshooting:
- A: Custom nodes with frontend extensions
- B: Regular custom nodes
- Custom Nodes with Frontend Extensions
- Regular Custom Nodes
For custom nodes, we can prioritize troubleshooting those with frontend extensions, as they cause the most issues. Their main conflicts arise from incompatibilities with ComfyUI frontend version updates.Common issues include:
- Workflows not executing
- Some nodes can’t show preview images(such as save image node)
- Misaligned UI elements
- Unable to access ComfyUI frontend
- Completely broken UI or blank screen
- Unable to communicate normally with ComfyUI backend
- Node connections not working properly
- And more
- Frontend modifications during updates that custom nodes haven’t adapted to yet
- Users updating ComfyUI without synchronously upgrading custom nodes, even though authors have released compatible versions
- Authors stopping maintenance, leading to incompatibility between custom node extensions and the ComfyUI frontend
Using Binary Search for Troubleshooting
Among these two different types of custom node issues, conflicts between custom node frontend extensions and ComfyUI are more common. We’ll prioritize troubleshooting these nodes first. Here’s the overall troubleshooting approach:1. Troubleshooting the Custom Nodes’ Frontend Extensions
1
Disable All Third-Party Frontend Extensions
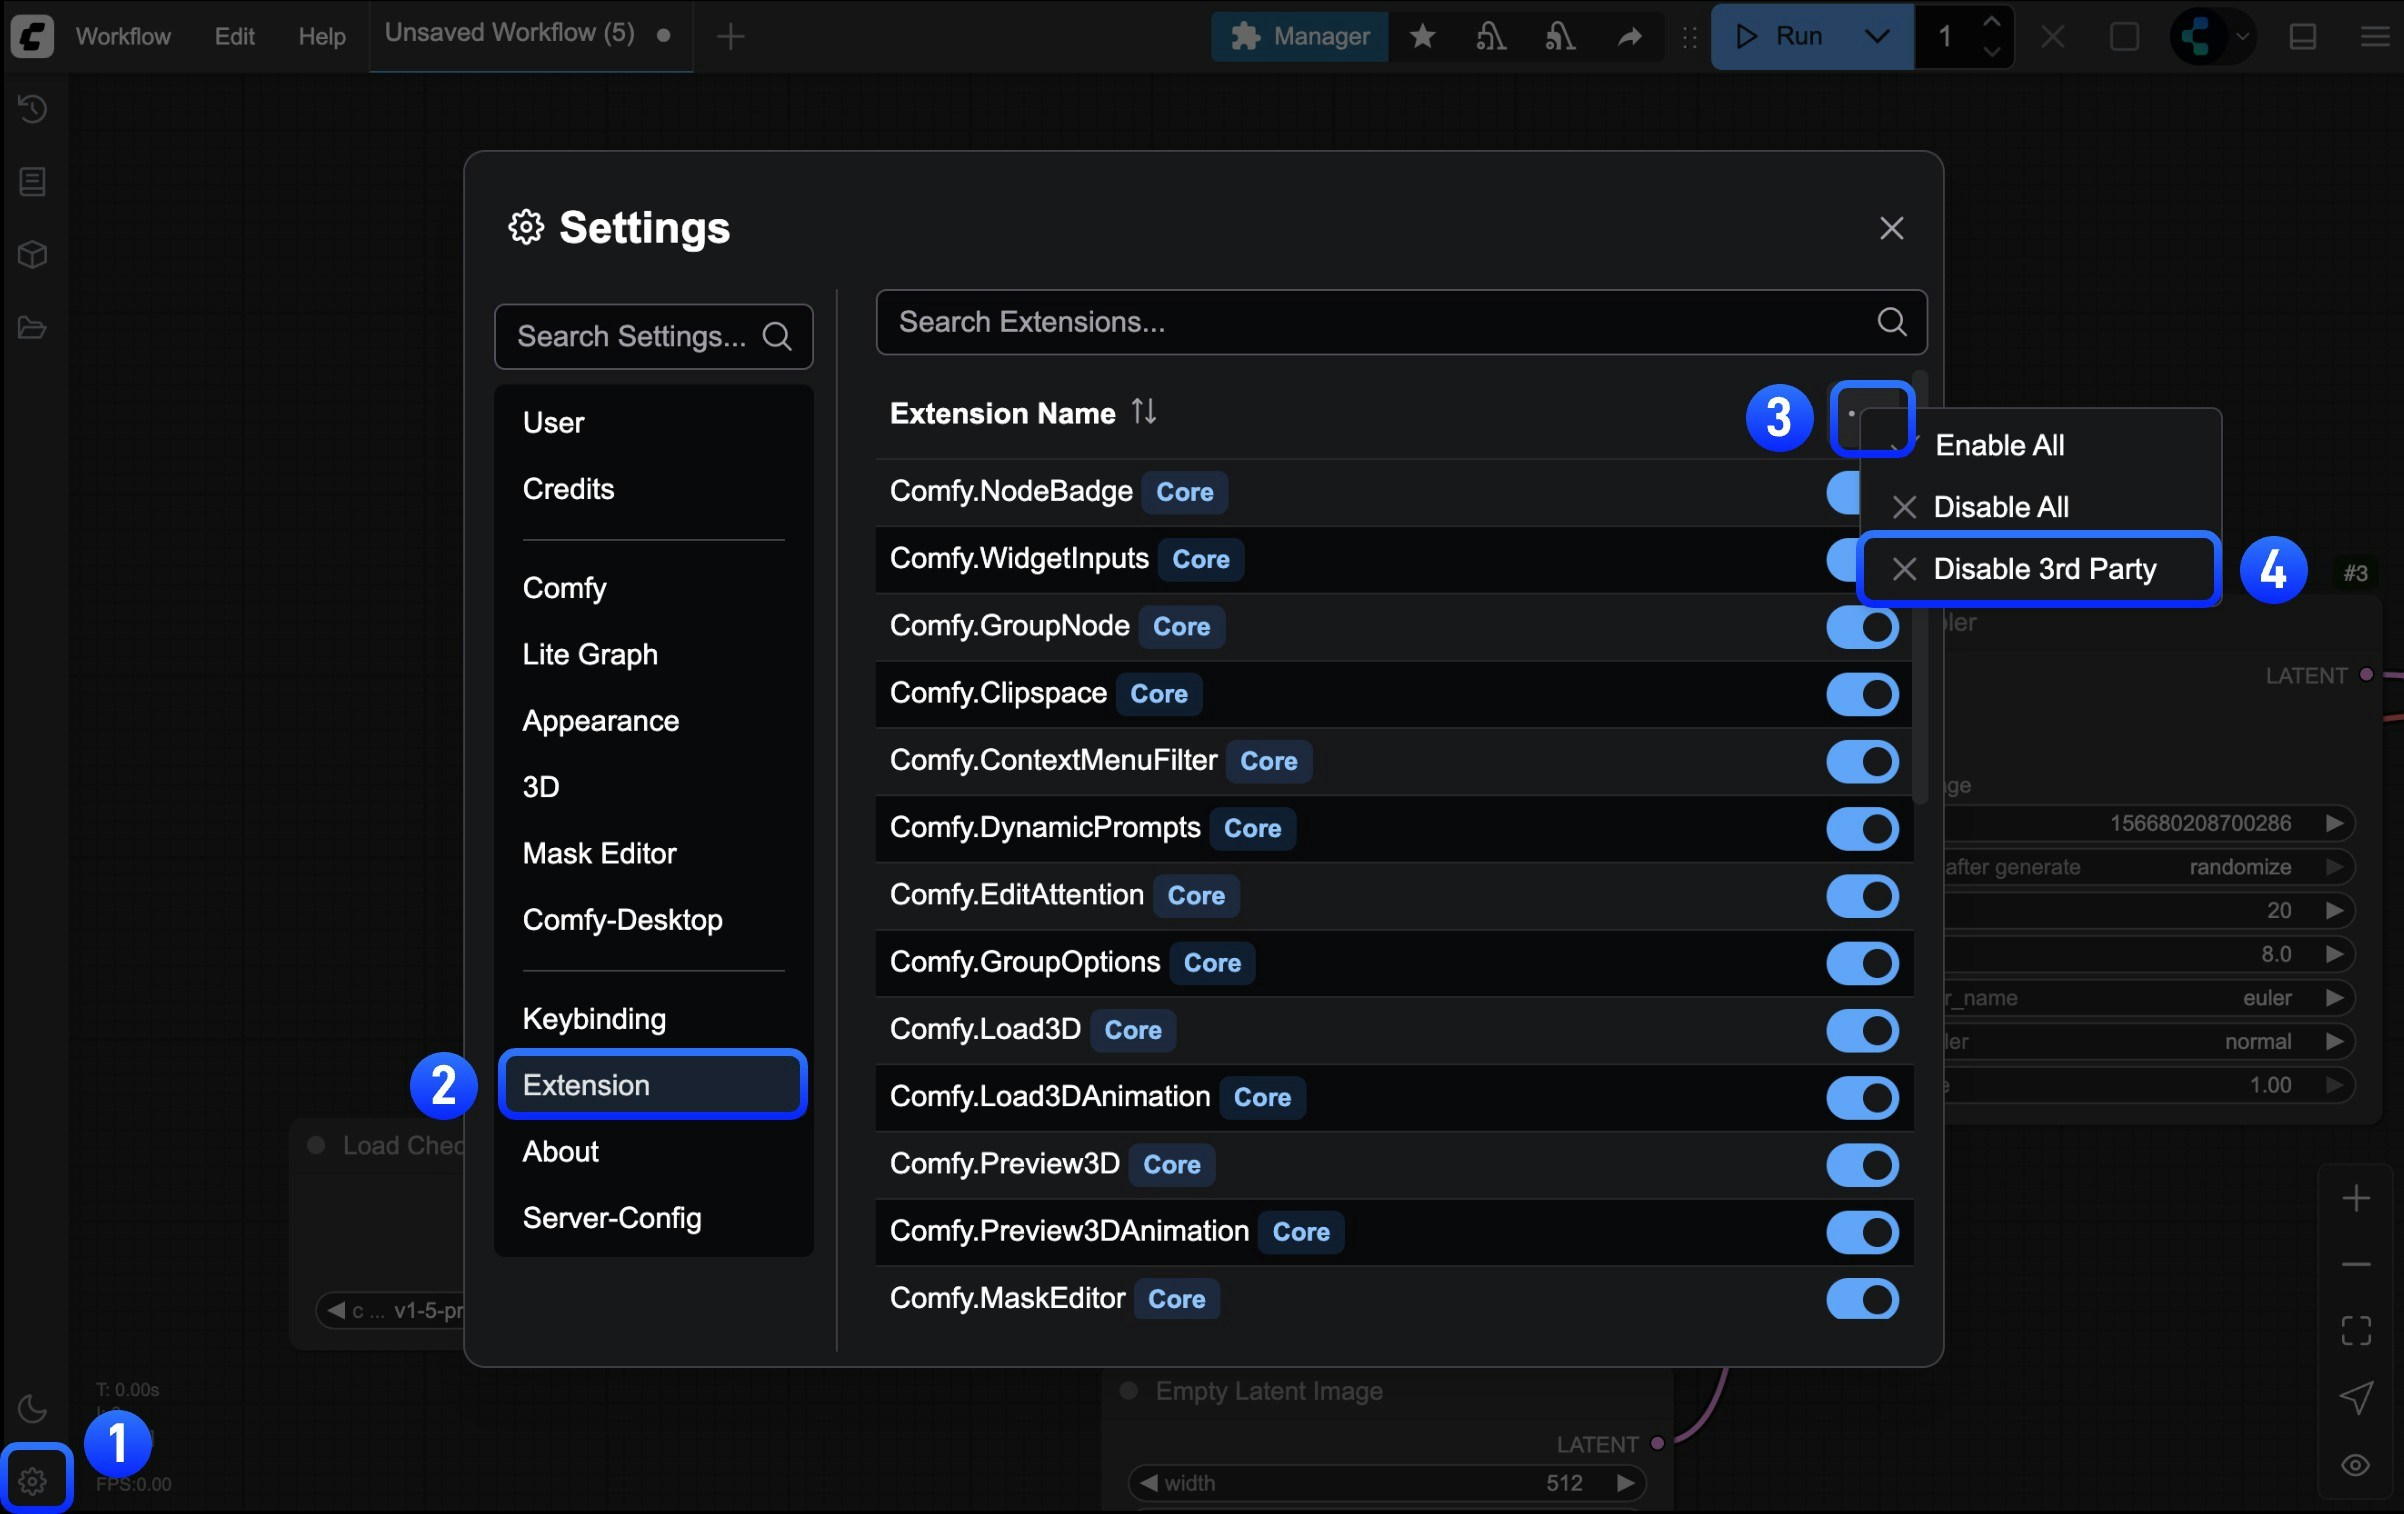
Extensions menu in settings and follow the steps shown in the image to disable all third-party extensions2
Restart ComfyUI
After disabling frontend extensions for the first time, it’s recommended to restart ComfyUI to ensure all frontend extensions are properly disabled
- If the problem disappears, then it was caused by custom node frontend extensions, and we can proceed with binary search troubleshooting
- If the problem persists, then it’s not caused by frontend extensions - please refer to the other troubleshooting approaches in this document
3
Use Binary Search to Locate Problem Nodes
Use the method mentioned at the beginning of this document to troubleshoot, enabling half of the custom nodes at a time until you find the problematic node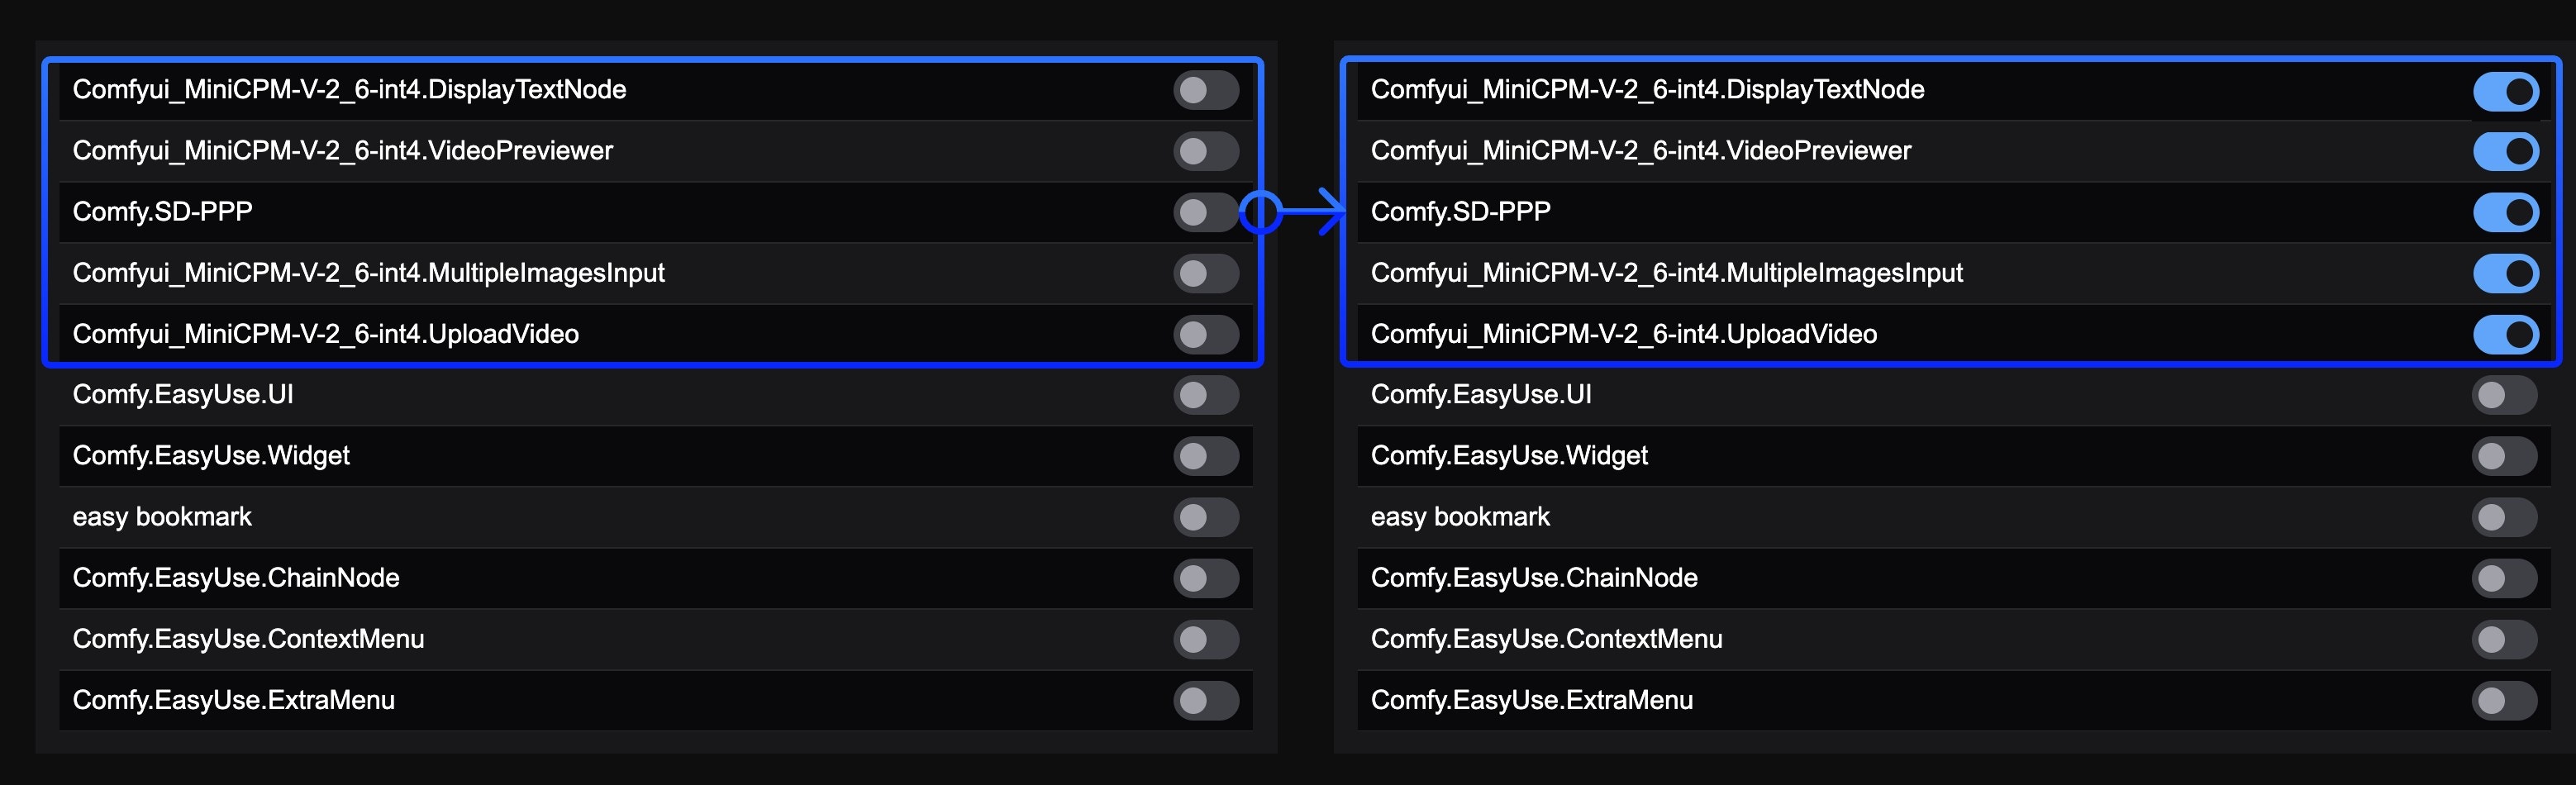
4
Follow-up Actions
If you find the problematic custom node, please refer to the problem fixing section of this document to resolve the custom node issues
2. General Custom Node Troubleshooting
1
Use Binary Search to Locate Custom Nodes
For the binary search localization method, in addition to manual search, we also have automated binary search using comfy-cli, as detailed below:
- Using Comfy CLI (Recommended)
- Manual Binary Search
Using Comfy CLI requires some command line experience. If you’re not comfortable with it, use manual binary search instead.If you have Comfy CLI installed, you can use the automated bisect tool to find the problematic node:The bisect tool will automatically enable/disable nodes and guide you through the process.
How to Fix the Issue
Once you’ve identified the problematic custom node:Option 1: Update the Node
- Check if there’s an update available in ComfyUI Manager
- Update the node and test again
Option 2: Replace the Node
- Look for alternative custom nodes with similar functionality
- Check the ComfyUI Registry for alternatives
Option 3: Report the Issue
Contact the custom node developer:- Find the node’s GitHub repository
- Create an issue with:
- Your ComfyUI version
- Error messages/logs
- Steps to reproduce
- Your operating system
Option 4: Remove or Disable the Node
If no fix is available and you don’t need the functionality:- Remove the problematic node from
custom_nodes/or disable it in the ComfyUI Manager interface - Restart ComfyUI
Reporting Issues
If the issue isn’t caused by custom nodes, refer to the general troubleshooting overview for other common problems.For Custom Node-Specific Issues
Contact the custom node developer:- Find the node’s GitHub repository
- Create an issue with your ComfyUI version, error messages, reproduction steps, and OS
- Check the node’s documentation and Issues page for known issues
For ComfyUI Core Issues
- GitHub: ComfyUI Issues
- Forum: Official ComfyUI Forum
For Desktop App Issues
- GitHub: Comfy Desktop Issues
For Frontend Issues
- GitHub: ComfyUI Frontend Issues
For general installation, model, or performance issues, see our troubleshooting overview and model issues pages.