

- Comfy Cloud: the Assets panel is enabled by default.
- Self-hosted ComfyUI: start the server with
--enable-assetsto turn on the assets system. The flag requires a working database connection, so keep the default database location or pass--database-url. Without the flag the panel still opens, but it lists files from the local history and output folders instead of the asset library.
Opening the Assets panel
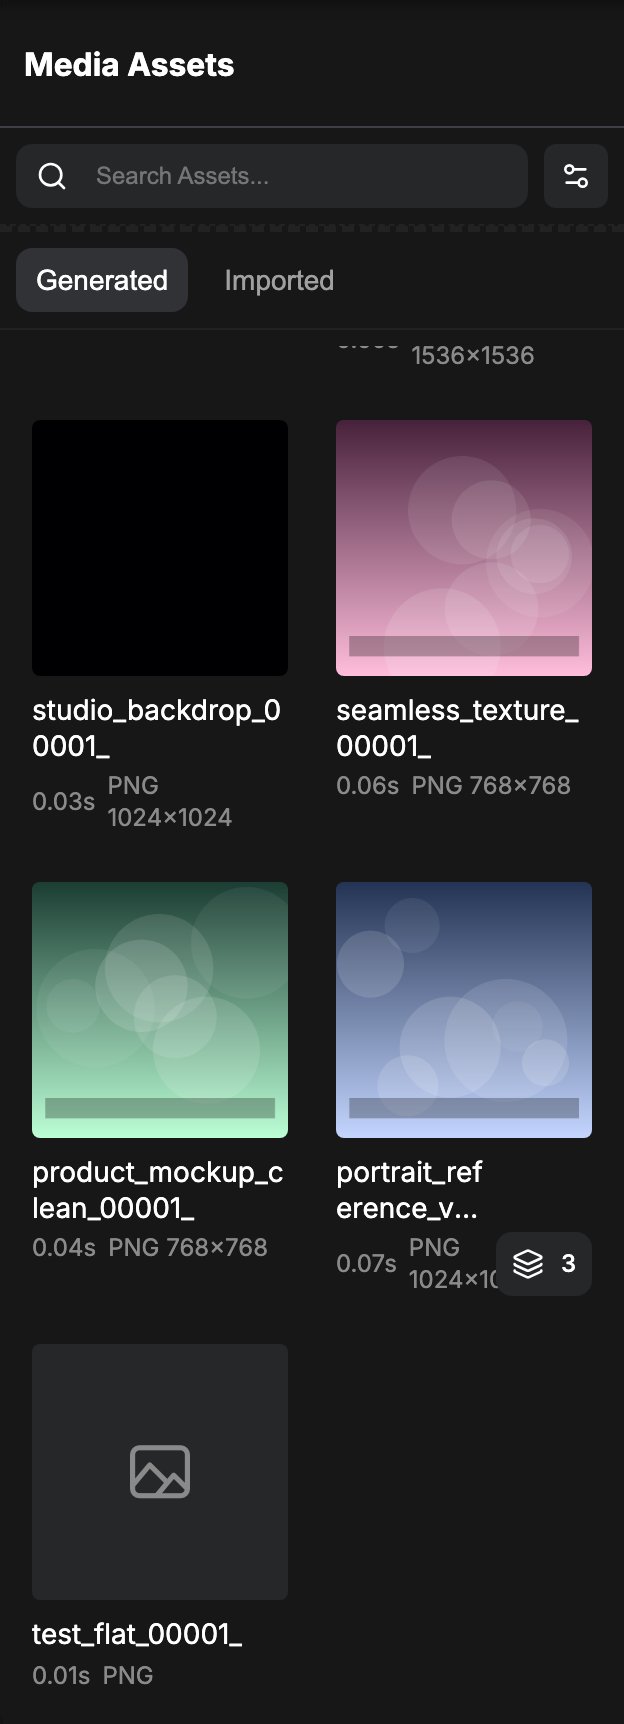
Click the Assets icon in the left sidebar to open the panel.Generated and imported assets
The panel splits your files into two tabs:- Generated: every file saved by a workflow run. When one run produces several outputs, the panel groups them into a single card that shows the number of files, and the badge on that card opens the group.
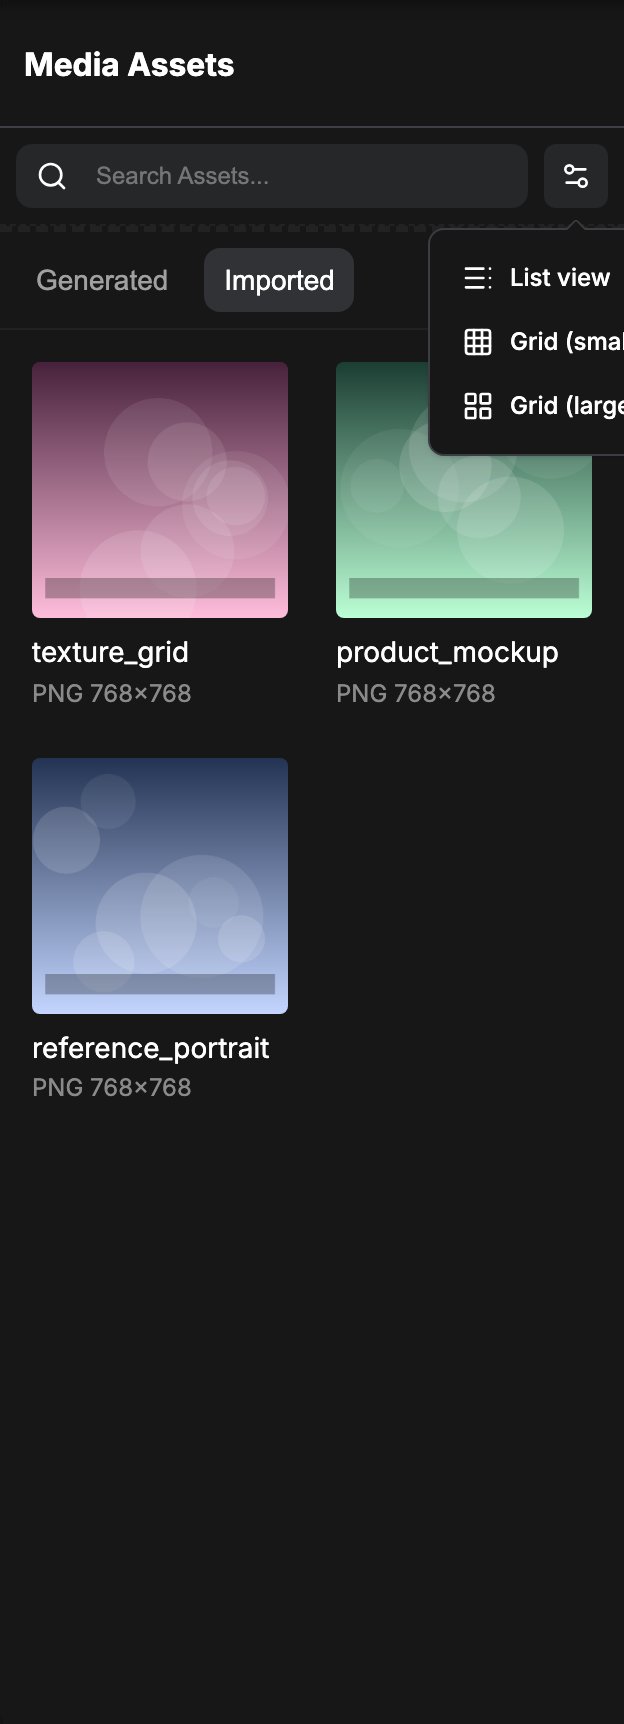
- Imported: files you uploaded into workflows, such as reference images for an image-to-image graph, or assets you imported into your Comfy Cloud workspace.
Finding an asset
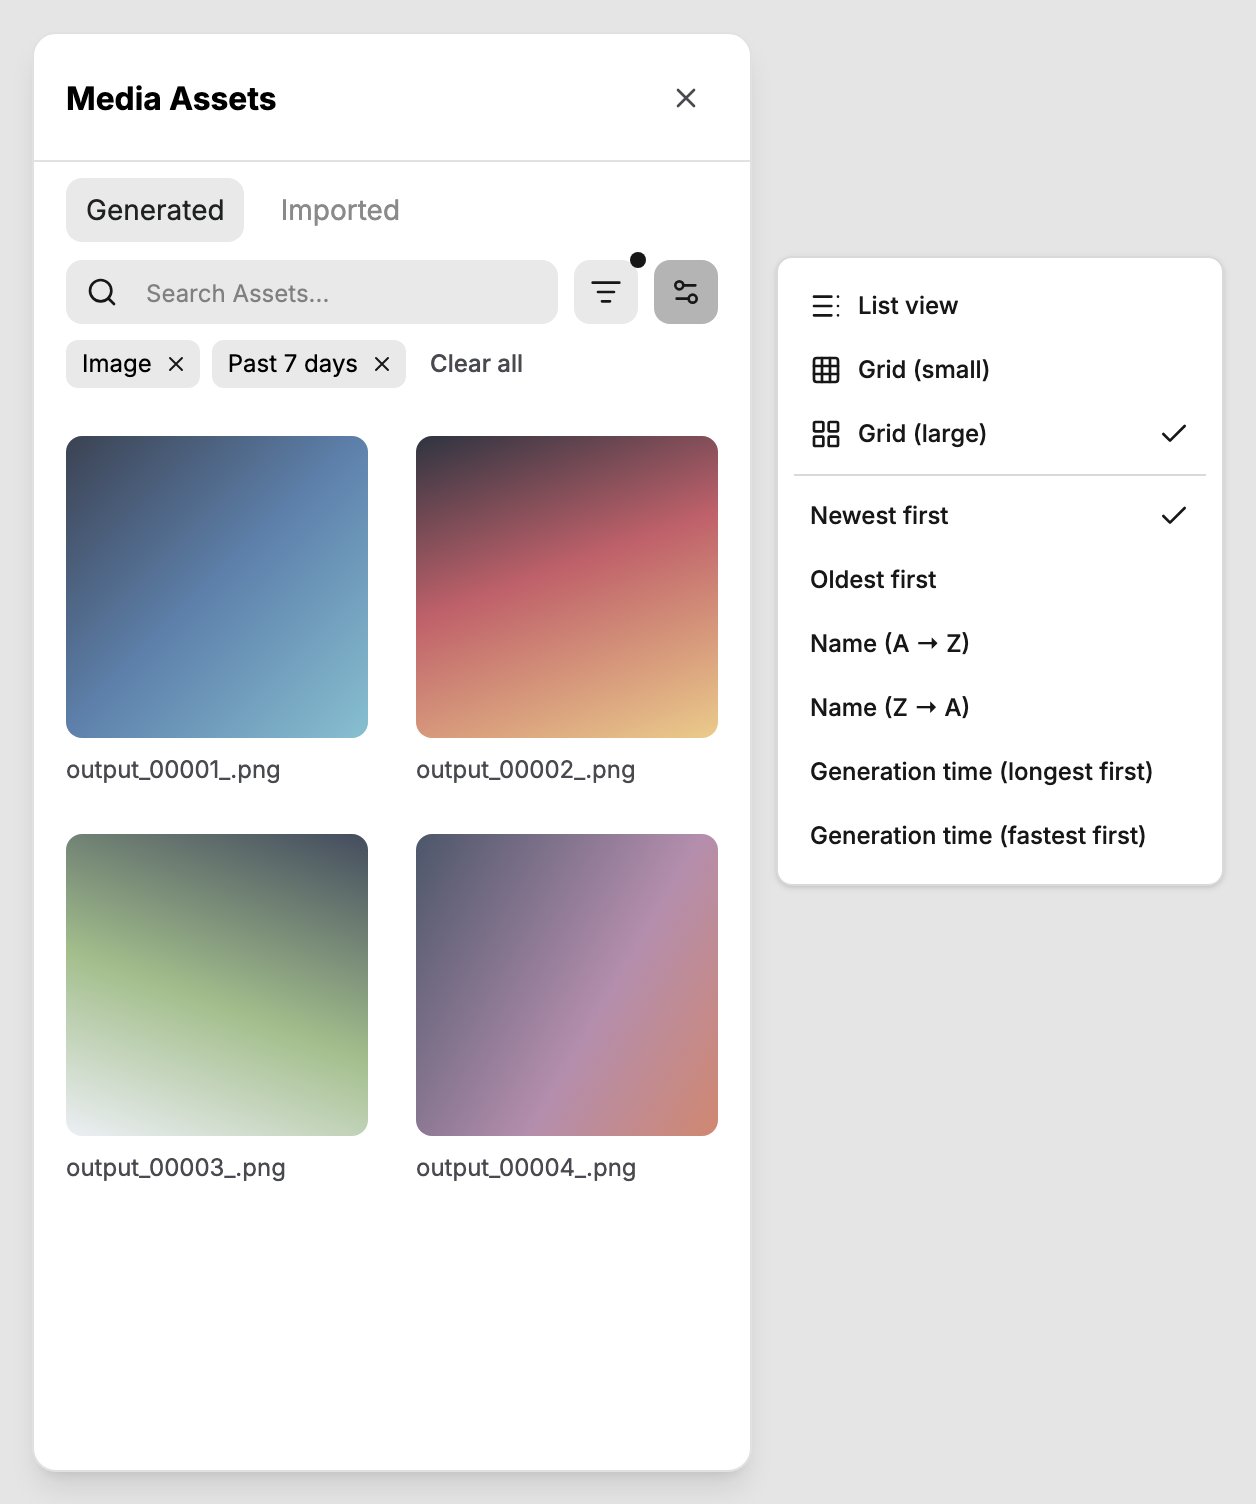
The panel header holds the search box and the display controls.- Search: filters the current tab by file name as you type.
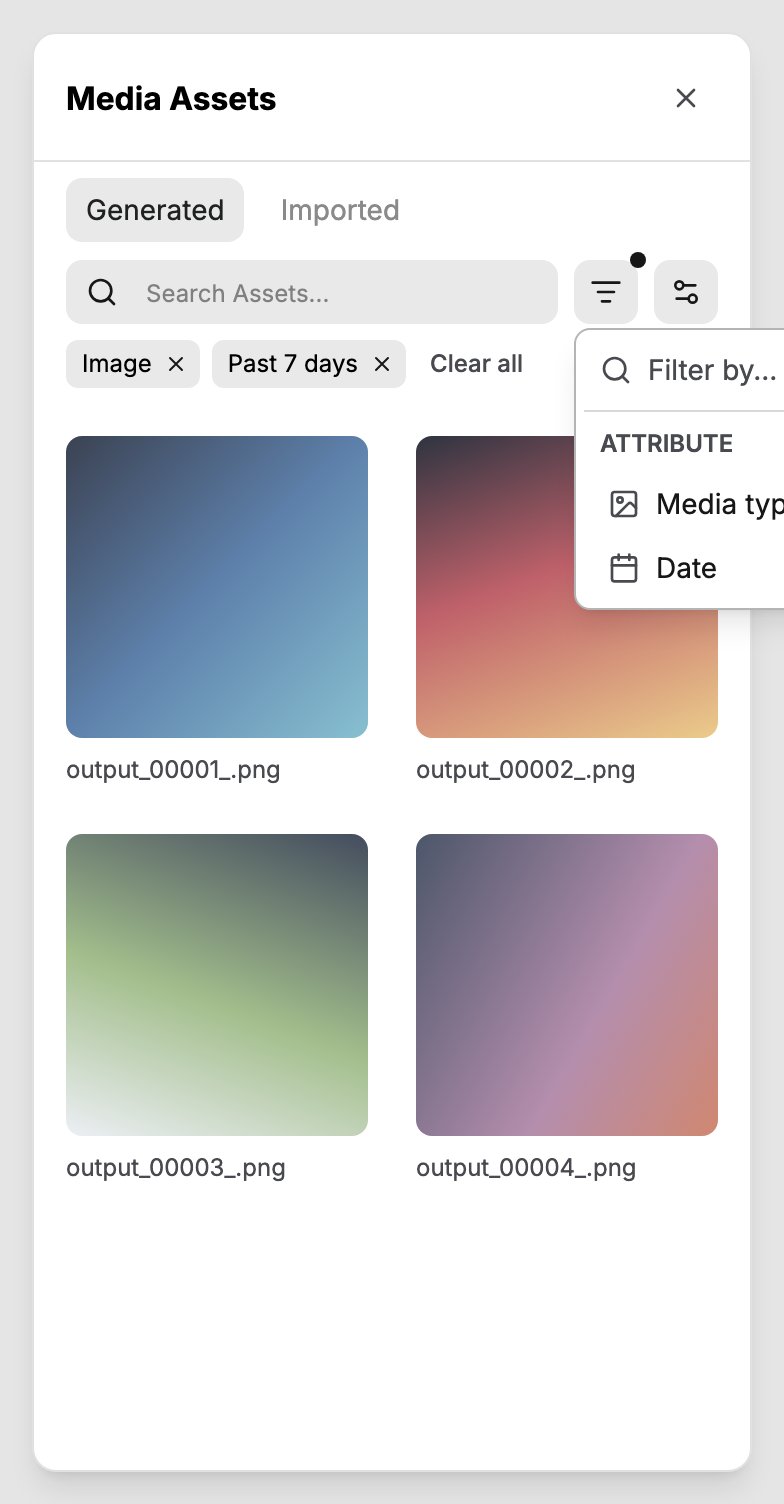
- Filter by (Cloud): narrow the list by media type (
Image,Video,Audio,3D,Text) or by date (All time,Today,Past 7 days,Past 30 days,This year). Active filters appear as chips that you can remove one by one, or clear them all at once. - View settings: switch between
List view,Grid (small), andGrid (large). - Sort (Cloud): newest first, oldest first, name (A to Z), name (Z to A), and, on the Generated tab, generation time from longest or fastest first.
Previewing an asset
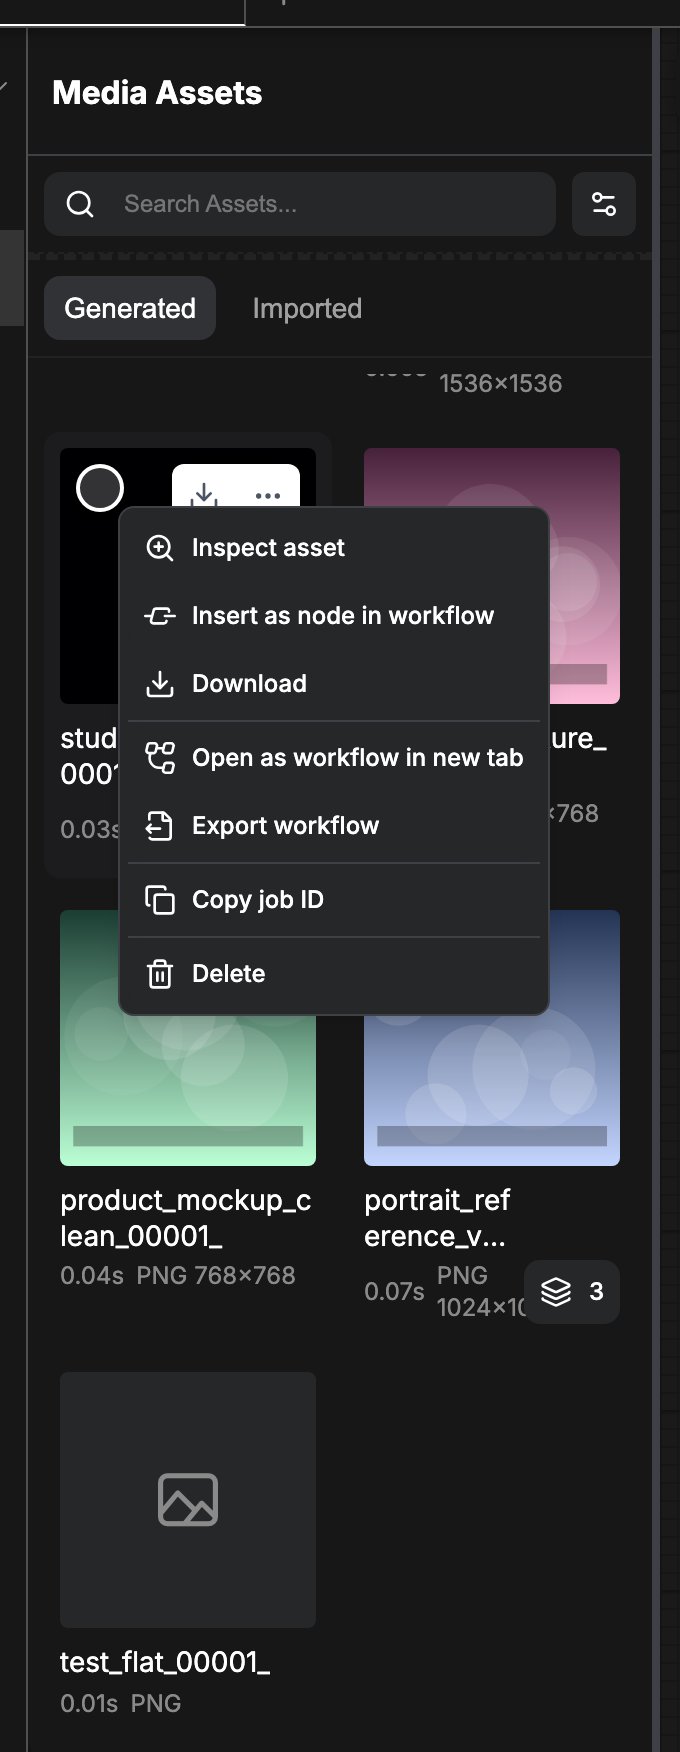
Click a card to select it, or double-click an image to open it in a zoomed preview. Videos play inline with a play overlay, and audio and 3D files open in dedicated viewers. Right-click a card and choose Inspect asset to open the same preview.Reusing an asset in a workflow
- Insert as node in workflow: right-click a card and pick this entry to add the matching loader node (for example
Load Image,Load Video, orLoad Audio) at the center of the canvas with the asset already selected in the node. Only file types that have a loader node show this entry. - Drag onto the canvas: drag a card onto the canvas to load it the same way. Hold
CtrlorCmdwhile clicking to select assets instead of starting a drag. - Drag into the Comfy Agent composer: an asset dropped on the agent composer is attached to the message you are writing.
- Open as workflow in new tab and Export workflow: available for generated files and for imported files that carry workflow metadata, such as PNG and WebP images written by ComfyUI. Exported workflows save as JSON.
Downloading assets
Open the right-click menu on one or more cards and choose Download, or use the download button that appears on a card when you hover it.- A single file downloads on its own.
- On Comfy Cloud, selecting several assets, or selecting a card whose run produced multiple outputs, prepares a ZIP archive instead of downloading file after file.
- On a self-hosted server, grouped outputs are expanded into their individual files.
Working with several assets at once
Drag a marquee across the grid to select a block of assets, then use the selection bar at the bottom of the panel. It shows how many assets are selected and offers Deselect all, Download, and Delete. Right-clicking a selected card opens the bulk menu with Insert all assets as nodes, Open all workflows, Export all workflows, Download all, and Delete all.Grouped outputs
When a run produced several files, the card carries a badge with the output count. Clicking that badge opens a folder view for that job instead of a flat grid. The folder header shows the job ID with a copy button and the execution time of the run, and Back to all assets returns to the full list.Deleting assets
Choose Delete from the right-click menu, or Delete all for a selection. A confirmation dialog lists the affected files first. What happens next depends on the server:- Comfy Cloud deletes the stored file as well, so the asset is gone.
- For generated assets, a server that does not support file deletion removes the asset from the library only. The file stays on disk.
- Imported assets can be deleted on Comfy Cloud only. On a self-hosted server they have no Delete entry.
- Deleting a queue entry that has no stored asset affects the history only, and the files remain on disk.
Related pages
- Interface overview: where the Assets panel sits among the other sidebar entries.
- Import models: uploading your own models to Comfy Cloud.
- Startup flags:
--enable-assetsand--enable-asset-hashing.