What are Custom Nodes ?
Custom nodes are extensions for ComfyUI that add new functionality like advanced image processing, machine learning fine-tuning, color adjustments, and more. These community-developed nodes can significantly expand ComfyUI’s core capabilities. All custom node installations require completing these two steps:- Clone the node code to the
ComfyUI/custom_nodesdirectory - Install the required Python dependencies
Tip: Before installing custom nodes, check the plugin’s README file to understand installation methods, usage, and requirements like specific models, dependency versions, and common issue solutions.
Method 1: ComfyUI Manager (Recommended)
You need ComfyUI Manager available in your environment before using this method. If it is missing or disabled, see the ComfyUI Manager overview and installation guide.
New UI (default for Desktop)
The new node management interface, enabled by default for Desktop users.
Legacy UI
The classic Manager interface for custom node installation.
Method 2: Manual Installation Using Git
Suitable for new nodes not found in Manager or when specific versions are needed. Requires Git installed on your system.1
Get the repository URL
Click the “Code” button on GitHub and copy the HTTPS link
2
Navigate to custom_nodes directory
3
Clone the repository
4
Install dependencies
Dependencies must be installed in your ComfyUI environment - be careful not to mix with your system environment to avoid contamination
- Windows Portable
- Manual Install
For Windows portable version, install dependencies in the embedded Python environment
5
Restart ComfyUI and refresh browser
Restart ComfyUI and refresh your browser. Check startup logs for any
import failed errorsMethod 3: ZIP Download Installation
Suitable for users who cannot use Git or Manager1
Click `Code` → `Download ZIP` on GitHub
Click 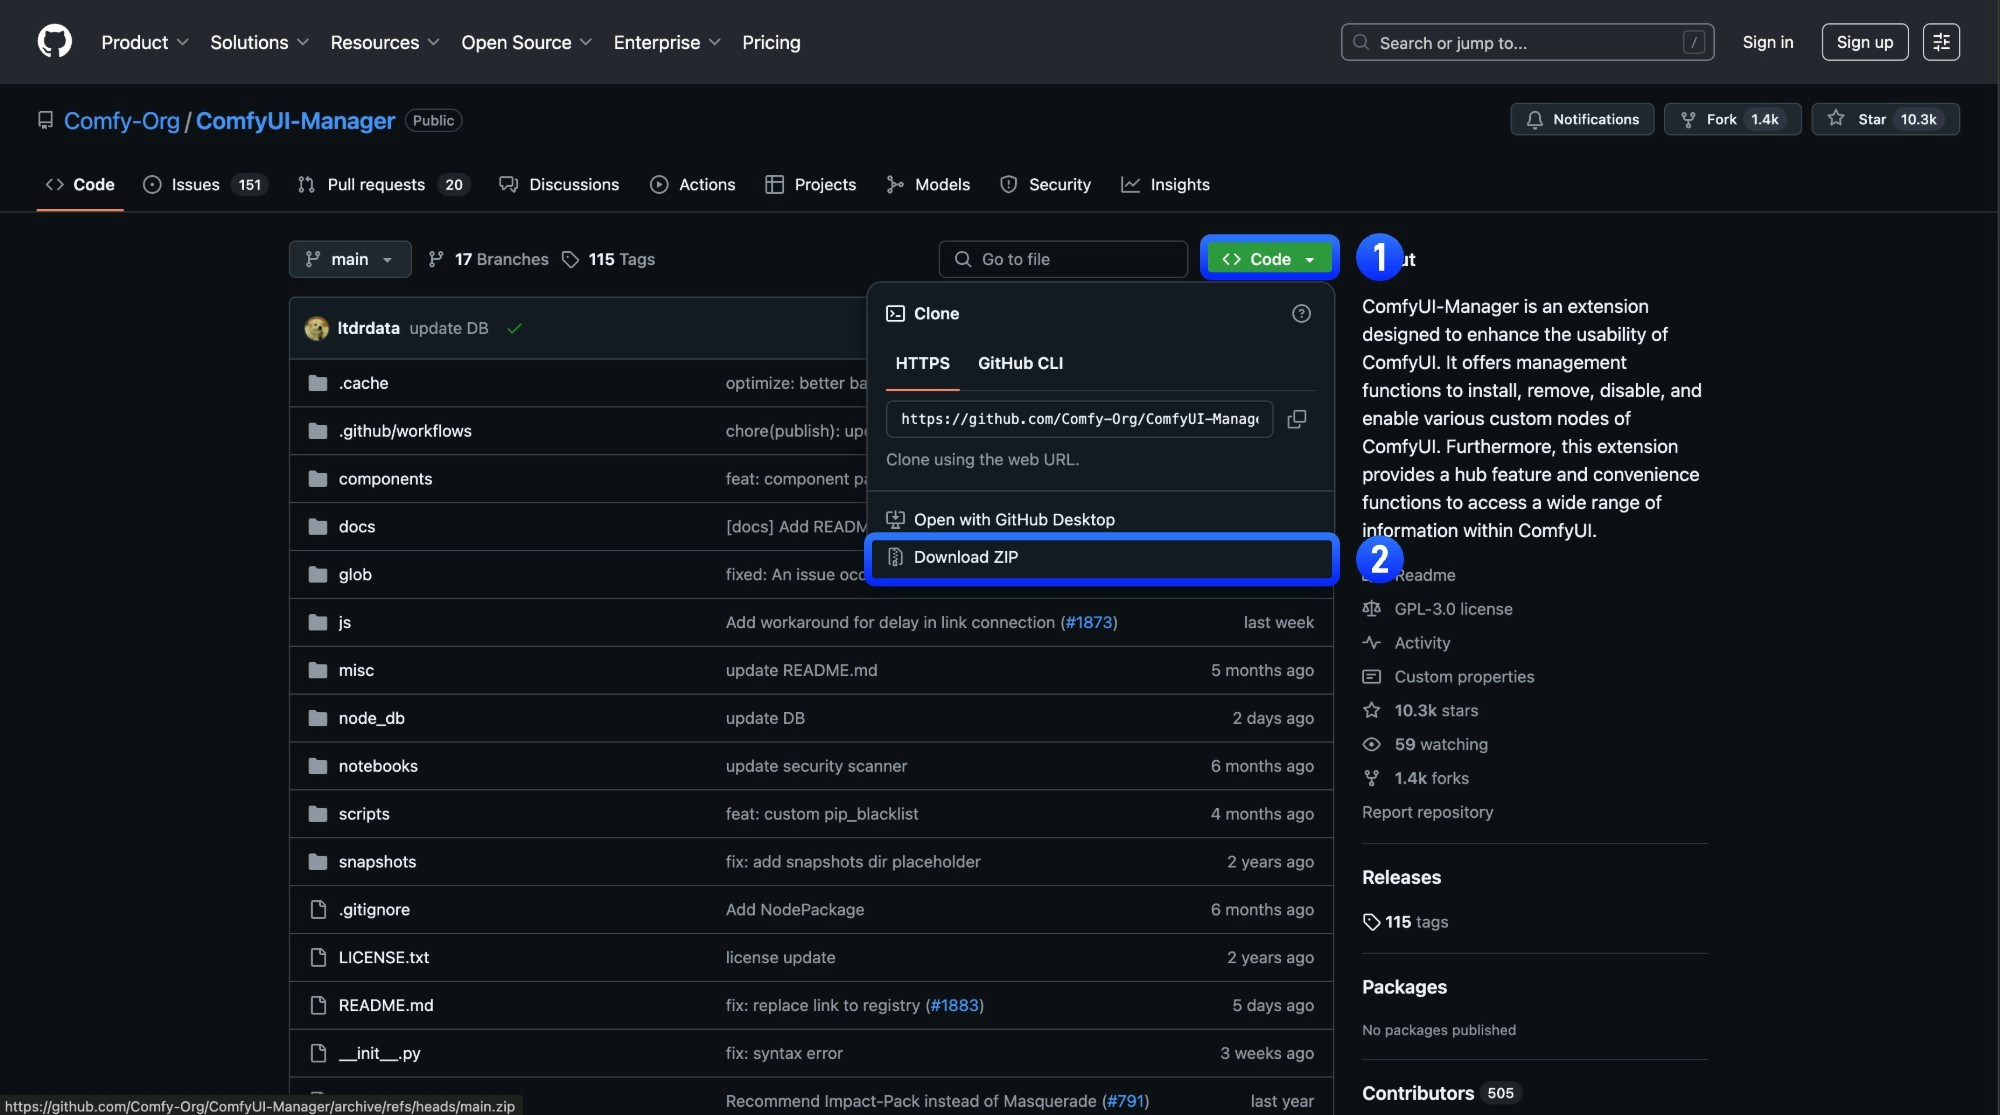
Code → Download ZIP on the GitHub page2
Extract the ZIP file
Extract the downloaded ZIP file
3
Copy extracted folder to `ComfyUI/custom_nodes/` directory
Copy the extracted folder to
ComfyUI/custom_nodes/ directory4
Install dependencies manually (same as Git method step 4)
Restart ComfyUI and refresh browser
5
Verify successful installation
Check ComfyUI Manager after restart to confirm the plugin installed successfully and there are no
import failed errorsCustom Node Resources
In ComfyUI, besides the basic node extension functionality, custom nodes can also include the following additional resources:- Node Documentation: This feature supports all custom and basic nodes. You can use it to view node documentation, understand the purpose and usage of nodes, and contribute documentation via PRs to the author.
- Custom Node Workflow Templates: Workflow templates provided by node authors as example workflows, which can be browsed and loaded from the ComfyUI templates.
- Multi-language Support