Download ComfyUI Portable
Choose the download package that matches your GPU type. ComfyUI Portable provides separate packages for different GPU hardware.
- Nvidia GPU
- AMD GPU
- Intel GPU
Standard portable for Nvidia GPUs
Nvidia GPU (CUDA 13.0, Python 3.13)
For modern Nvidia GPUs (RTX series)
Nvidia GPU (CUDA 12.6, Python 3.12)
For Nvidia 10 series and older GPUs
run_nvidia_gpu.bat to launch ComfyUI.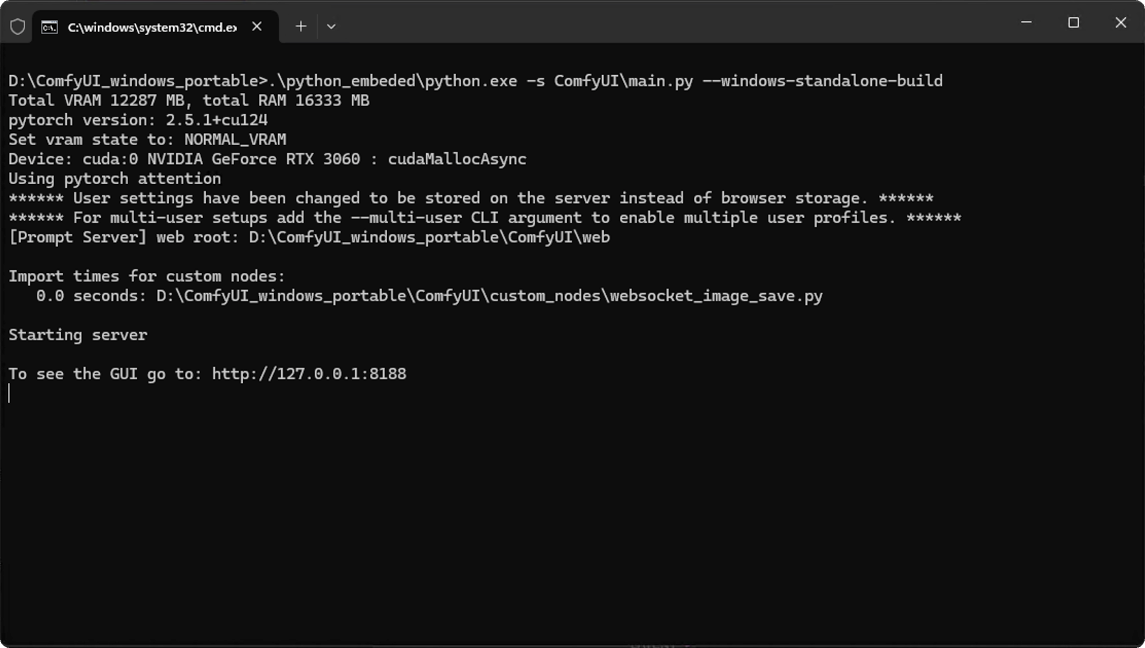
http://127.0.0.1:8188. If it doesn’t open automatically, please manually open your browser and visit this address.
Adding Extra Model Paths
If you want to manage your model files outside ofComfyUI/models, you may have the following reasons:
- You have multiple ComfyUI instances and want them to share model files to save disk space
- You have different types of GUI programs (such as WebUI) and want them to use the same model files
- Model files cannot be recognized or found
extra_model_paths.yaml configuration file
Open Config File
- Portable/Manual Install
- Comfy Desktop
For the ComfyUI version such as portable and manual, you can find an example file named Copy and rename it to
extra_model_paths.yaml.example in the root directory of ComfyUI:extra_model_paths.yaml for use. Keep it in ComfyUI’s root directory at ComfyUI/extra_model_paths.yaml.
You can also find the config example file here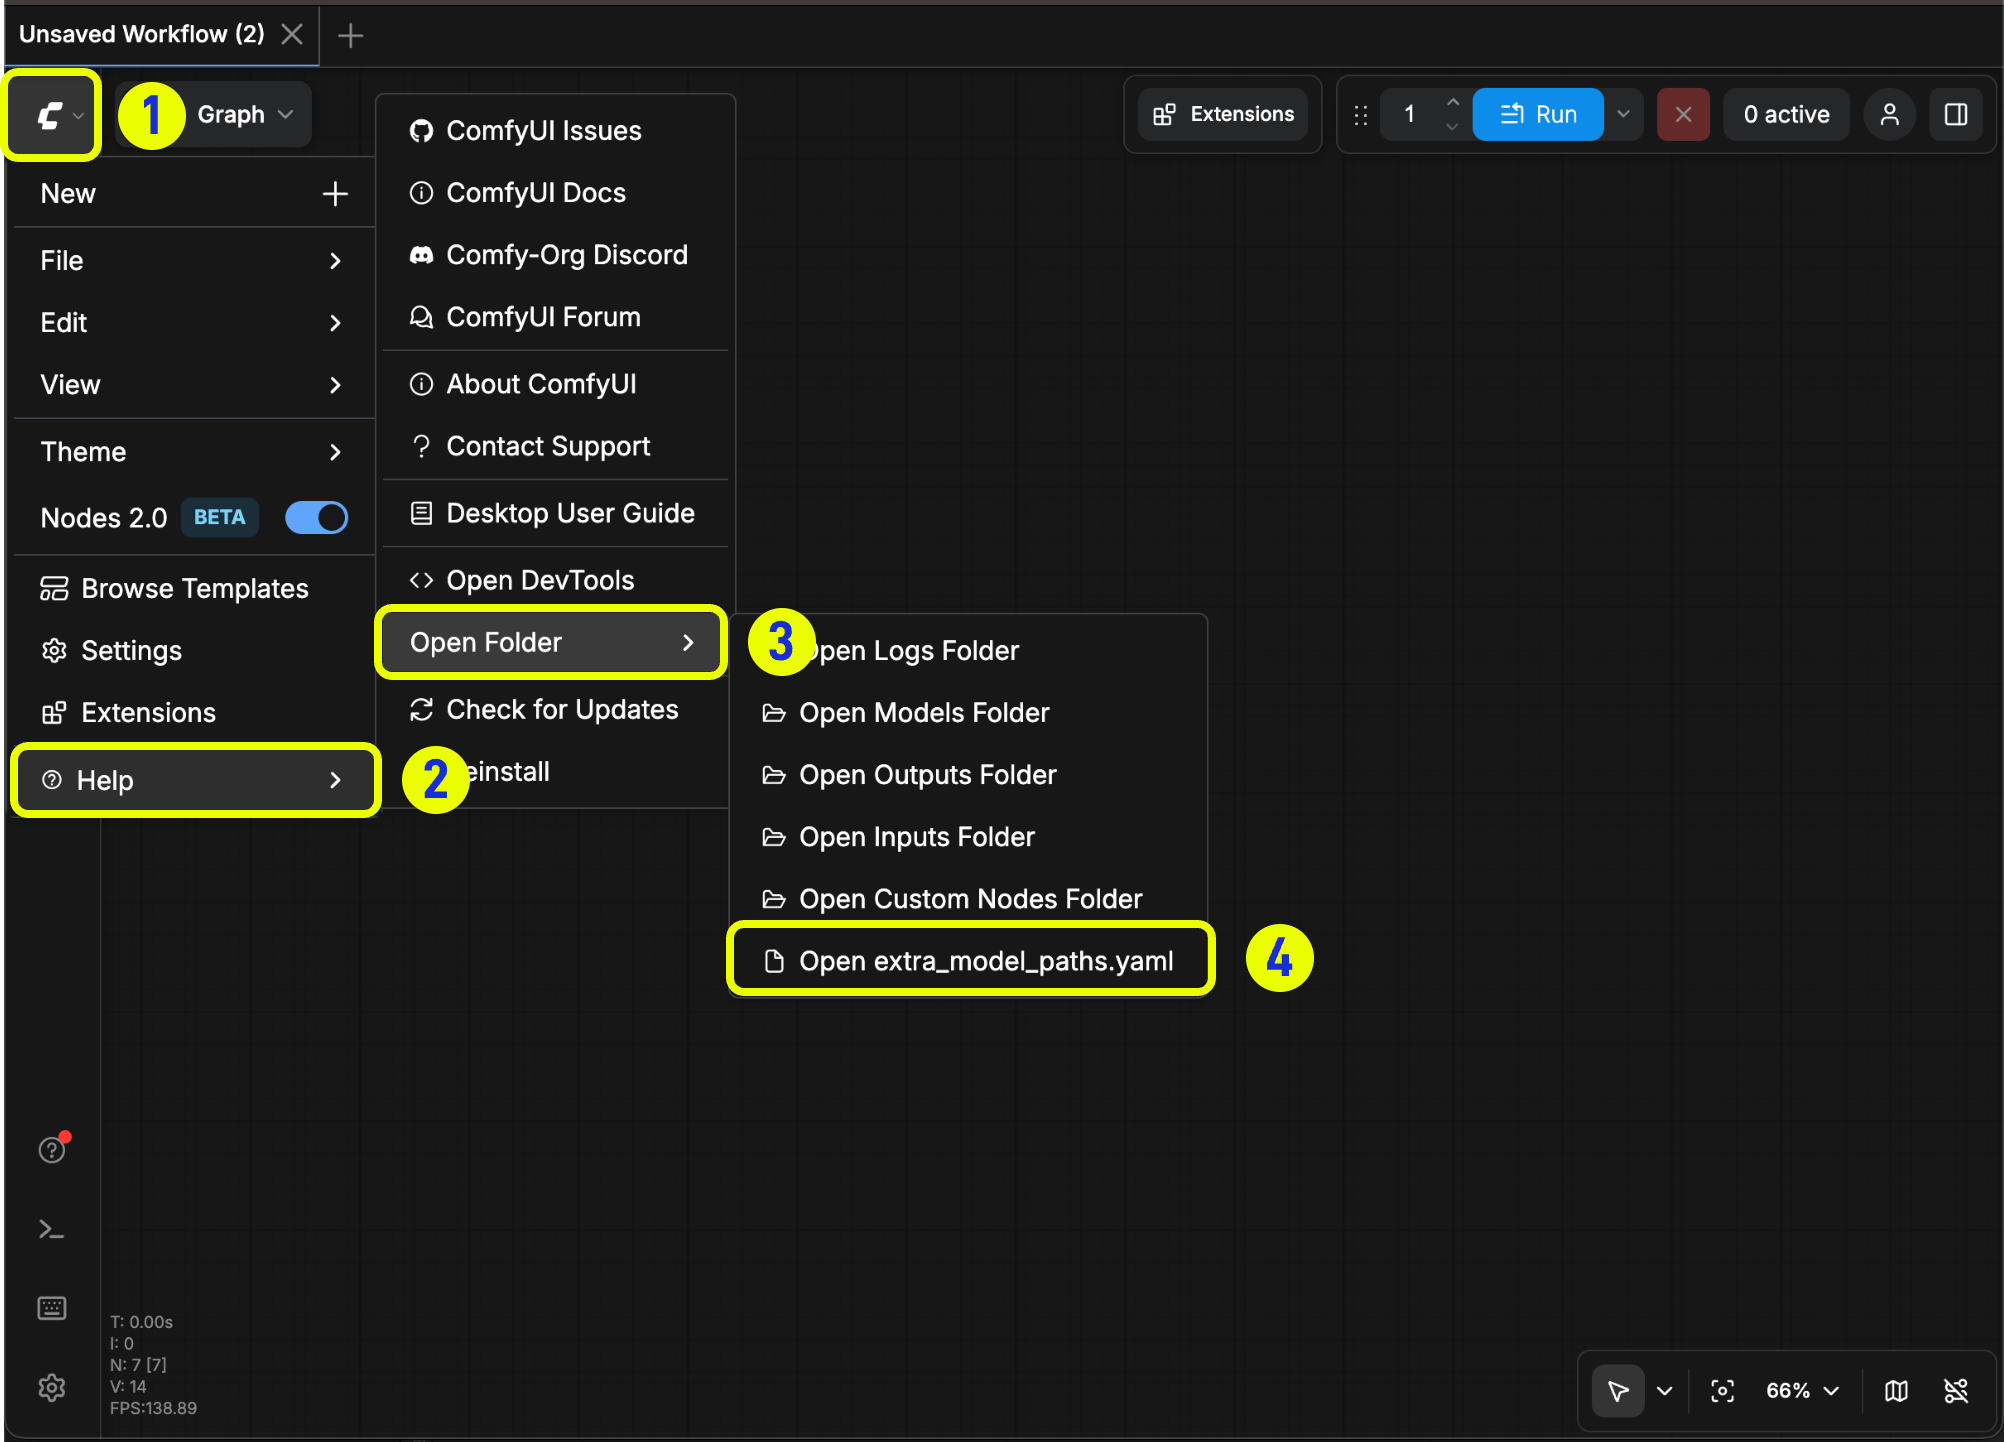
Example Structure
Suppose you want to add the following model paths to ComfyUI:extra_model_paths.yaml file like below to let ComfyUI recognize the model paths on your device:
D:\stable-diffusion-webui\, you can modify the corresponding configuration to
Add Extra Custom Nodes Path
Besides adding external models, you can also add custom nodes paths that are not in the default path of ComfyUI Below is a simple configuration example (MacOS), please modify it according to your actual situation and add it to the corresponding configuration file, save it and restart ComfyUI for the changes to take effect:First Image Generation
After successful installation, you can refer to the section below to start your ComfyUI journey~First Image Generation
This tutorial will guide you through your first model installation and text-to-image generation
Additional ComfyUI Portable Instructions
1. Upgrading ComfyUI Portable
You can use the batch commands in the update folder to upgrade your ComfyUI Portable version2. Setting Up LAN Access for ComfyUI Portable
If your ComfyUI is running on a local network and you want other devices to access ComfyUI, you can modify the corresponding.bat file (e.g. run_nvidia_gpu.bat, run_amd_gpu.bat, or run_cpu.bat) using Notepad to complete the configuration. This is mainly done by adding --listen to specify the listening address.
Below is an example of the run_nvidia_gpu.bat file command with the --listen parameter added
WIN + R and type cmd to open the command prompt, then enter ipconfig to view your local IP address. Other devices can then access ComfyUI by entering http://your-local-IP:8188 in their browser.
3. Installing Additional Python Packages
The portable version ships with an embedded Python environment (python_embeded). To install additional Python packages (such as attention optimizations, custom node dependencies, or other tools), use the embedded Python’s pip from the command line:
.bat file (e.g. run_nvidia_gpu.bat):