- Create a virtual environment(avoid polluting the system-level Python environment)
- Clone the ComfyUI code repository
- Install dependencies
- Start ComfyUI
Create a virtual environment
Install Miniconda. This will help you install the correct versions of Python and other libraries needed by ComfyUI. Create an environment with Conda.Clone the ComfyUI code repository
You need to ensure that you have installed Git on your system. First, you need to open the terminal (command line), then clone the code repository.- Windows
- Linux
- MacOS
Install GPU and ComfyUI dependencies
Install GPU dependencies
Install GPU Dependencies
Alternatively, you can install the nightly version of PyTorch.
Alternatively, you can install the nightly version of PyTorch (ROCm 7.2).
Nvidia
Nvidia
Install Nightly
Install Nightly
AMD
AMD
Install Nightly
Install Nightly
Mac ARM Silicon
Mac ARM Silicon
Start ComfyUI
Start the applicationRun
python main.py --help for built-in help, or see the Startup Flags reference for a complete list of command-line options.How to update ComfyUI
pull the latest code
Use the command line to enter the installation path of ComfyUI, then pull the latest code.
Adding Extra Model Paths
If you want to manage your model files outside ofComfyUI/models, you may have the following reasons:
- You have multiple ComfyUI instances and want them to share model files to save disk space
- You have different types of GUI programs (such as WebUI) and want them to use the same model files
- Model files cannot be recognized or found
extra_model_paths.yaml configuration file
Open Config File
- Portable/Manual Install
- Comfy Desktop
For the ComfyUI version such as portable and manual, you can find an example file named Copy and rename it to
extra_model_paths.yaml.example in the root directory of ComfyUI:extra_model_paths.yaml for use. Keep it in ComfyUI’s root directory at ComfyUI/extra_model_paths.yaml.
You can also find the config example file here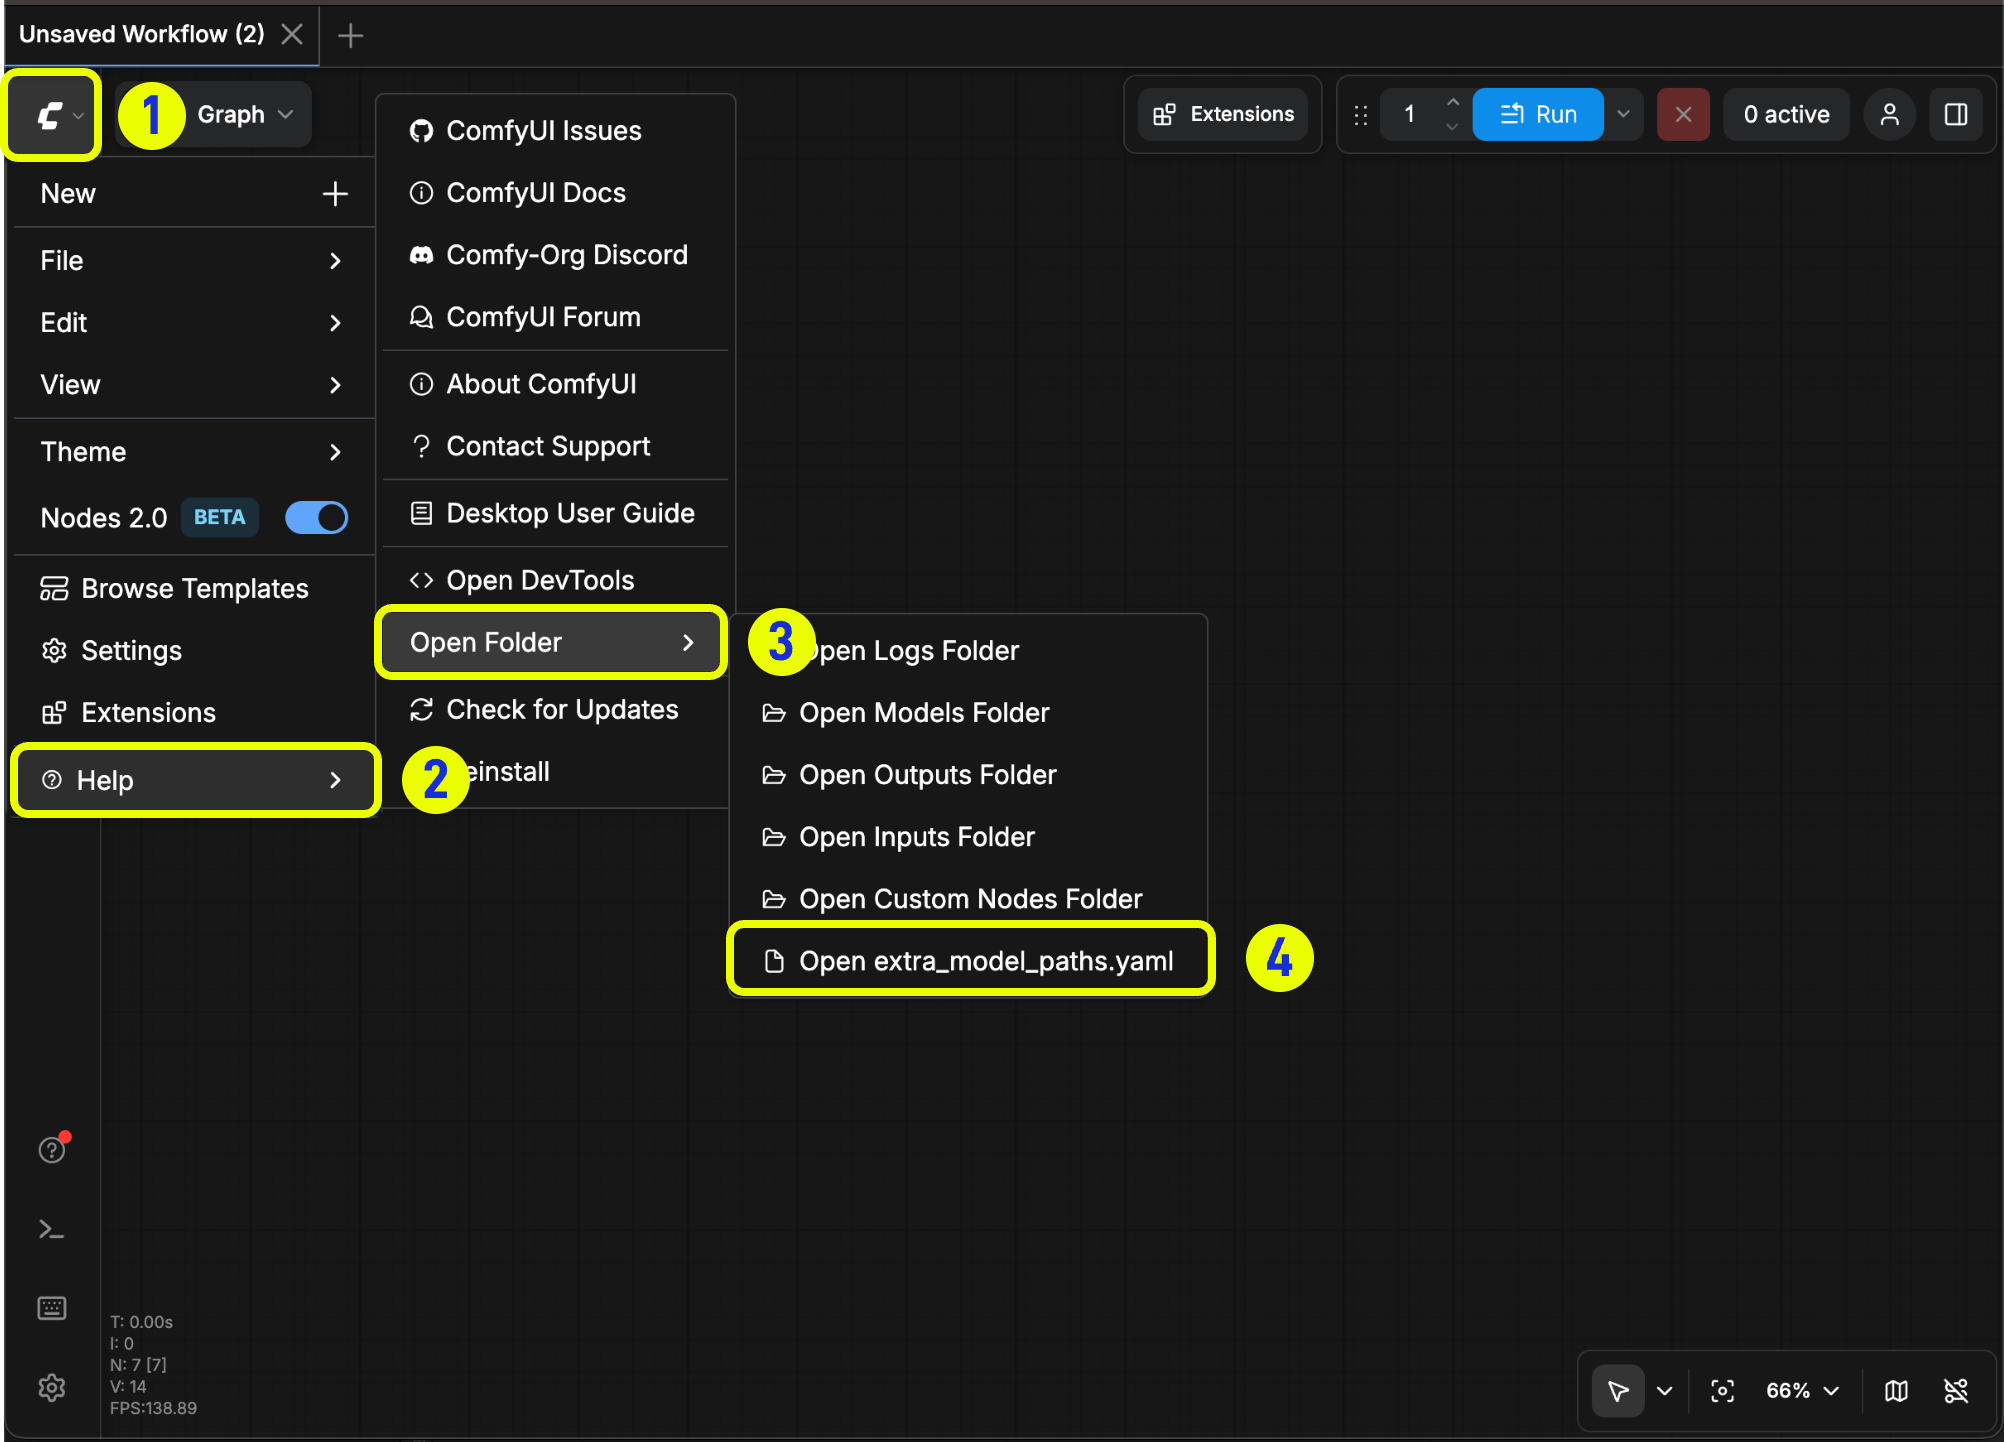
Example Structure
Suppose you want to add the following model paths to ComfyUI:extra_model_paths.yaml file like below to let ComfyUI recognize the model paths on your device:
D:\stable-diffusion-webui\, you can modify the corresponding configuration to
Add Extra Custom Nodes Path
Besides adding external models, you can also add custom nodes paths that are not in the default path of ComfyUI Below is a simple configuration example (MacOS), please modify it according to your actual situation and add it to the corresponding configuration file, save it and restart ComfyUI for the changes to take effect:FAQ
Docker: ComfyUI does not provide an official Docker image. If you want to run ComfyUI in a container, search Docker Hub for community-maintained images. Note that none of these are official ComfyUI images, and they are not supported by the ComfyUI team. Use them at your own risk.