Luma 이미지 → 이미지 파트너 노드 워크플로우
1. 워크플로우 파일 다운로드
다음 이미지를 다운로드하여 ComfyUI로 드래그하여 워크플로우를 로드하세요(워크플로우 정보는 이미지 메타데이터에 포함되어 있습니다): 입력으로 사용할 다음 이미지를 다운로드하세요:
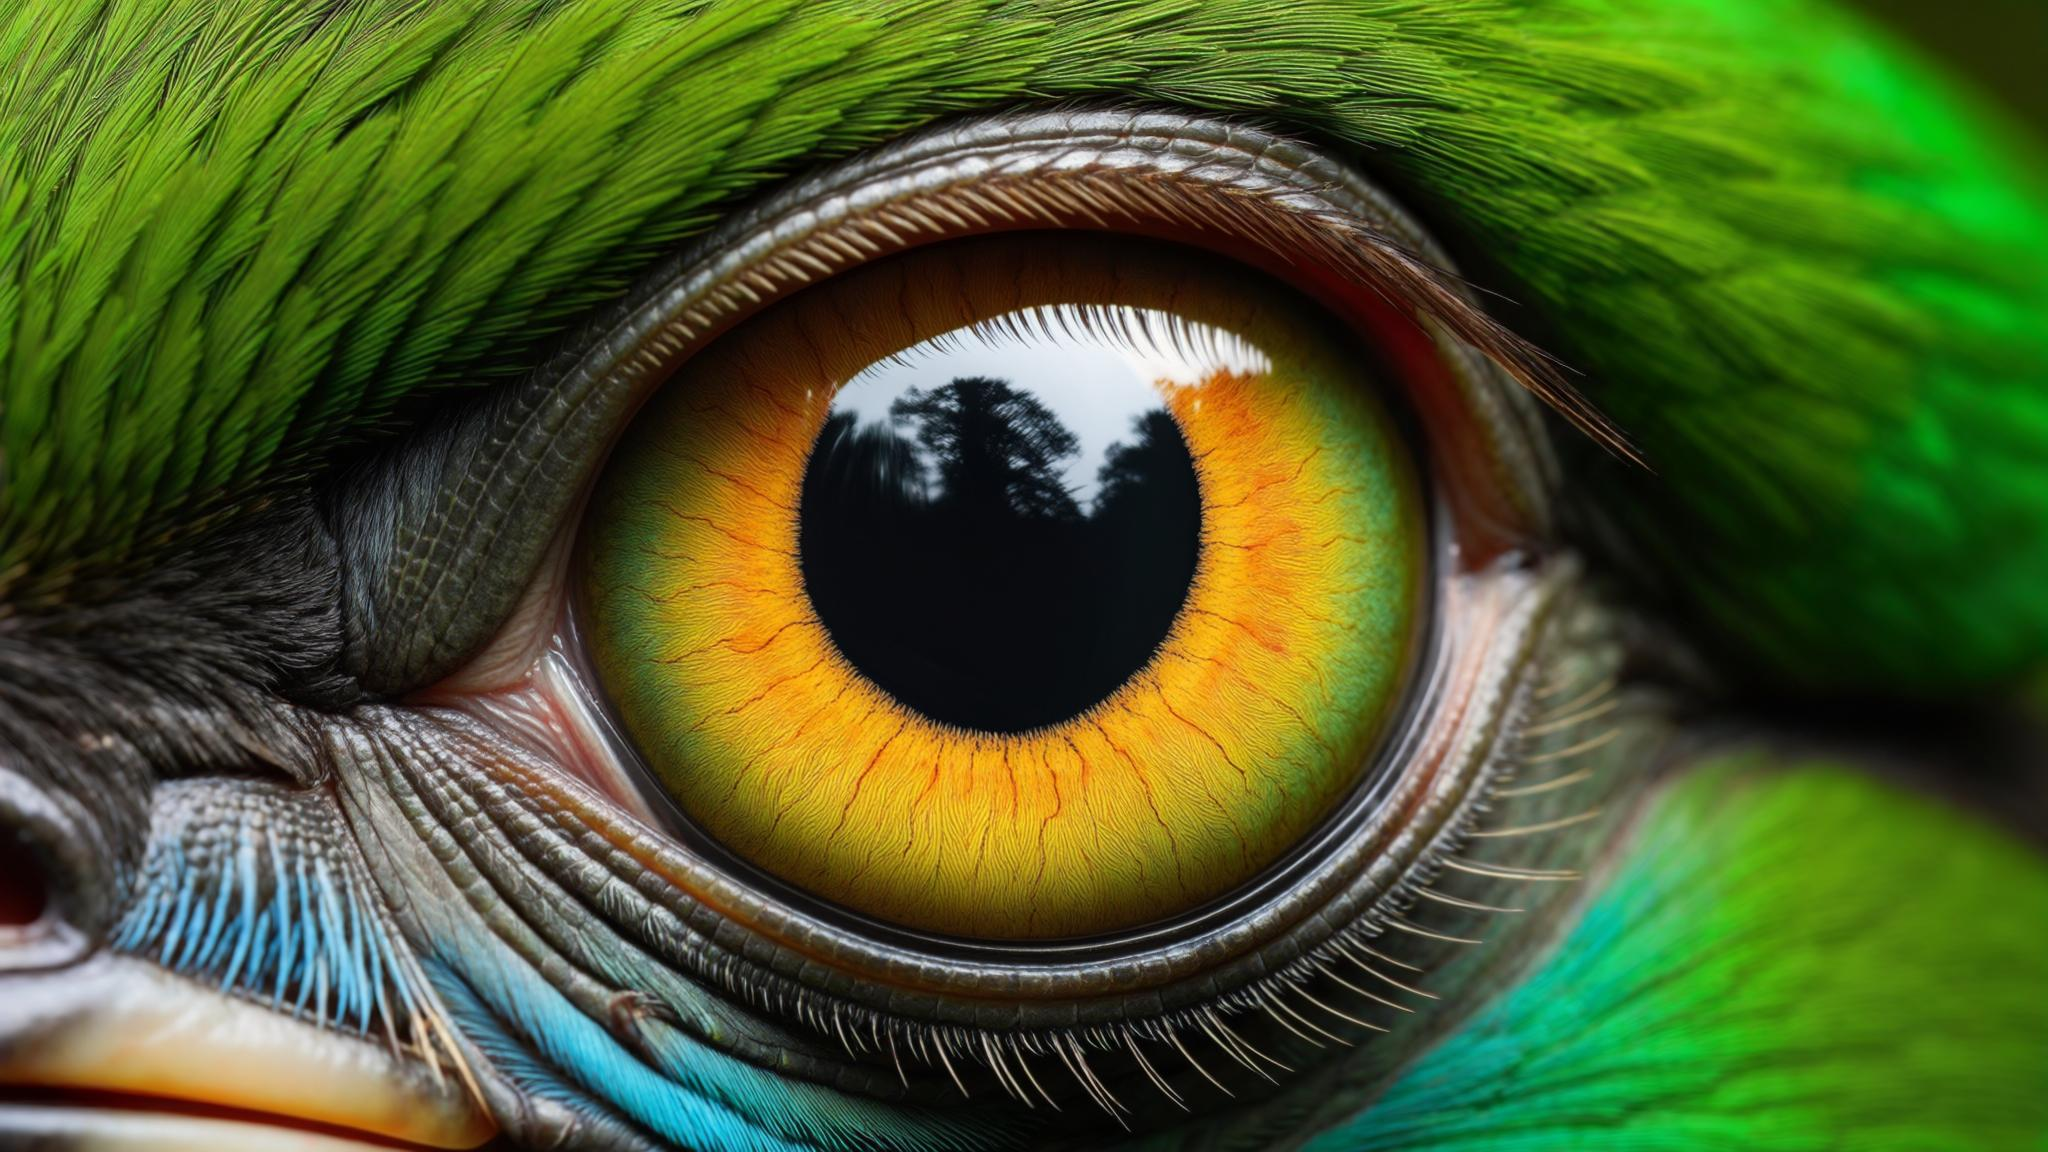
2. 워크플로우 단계 완료하기
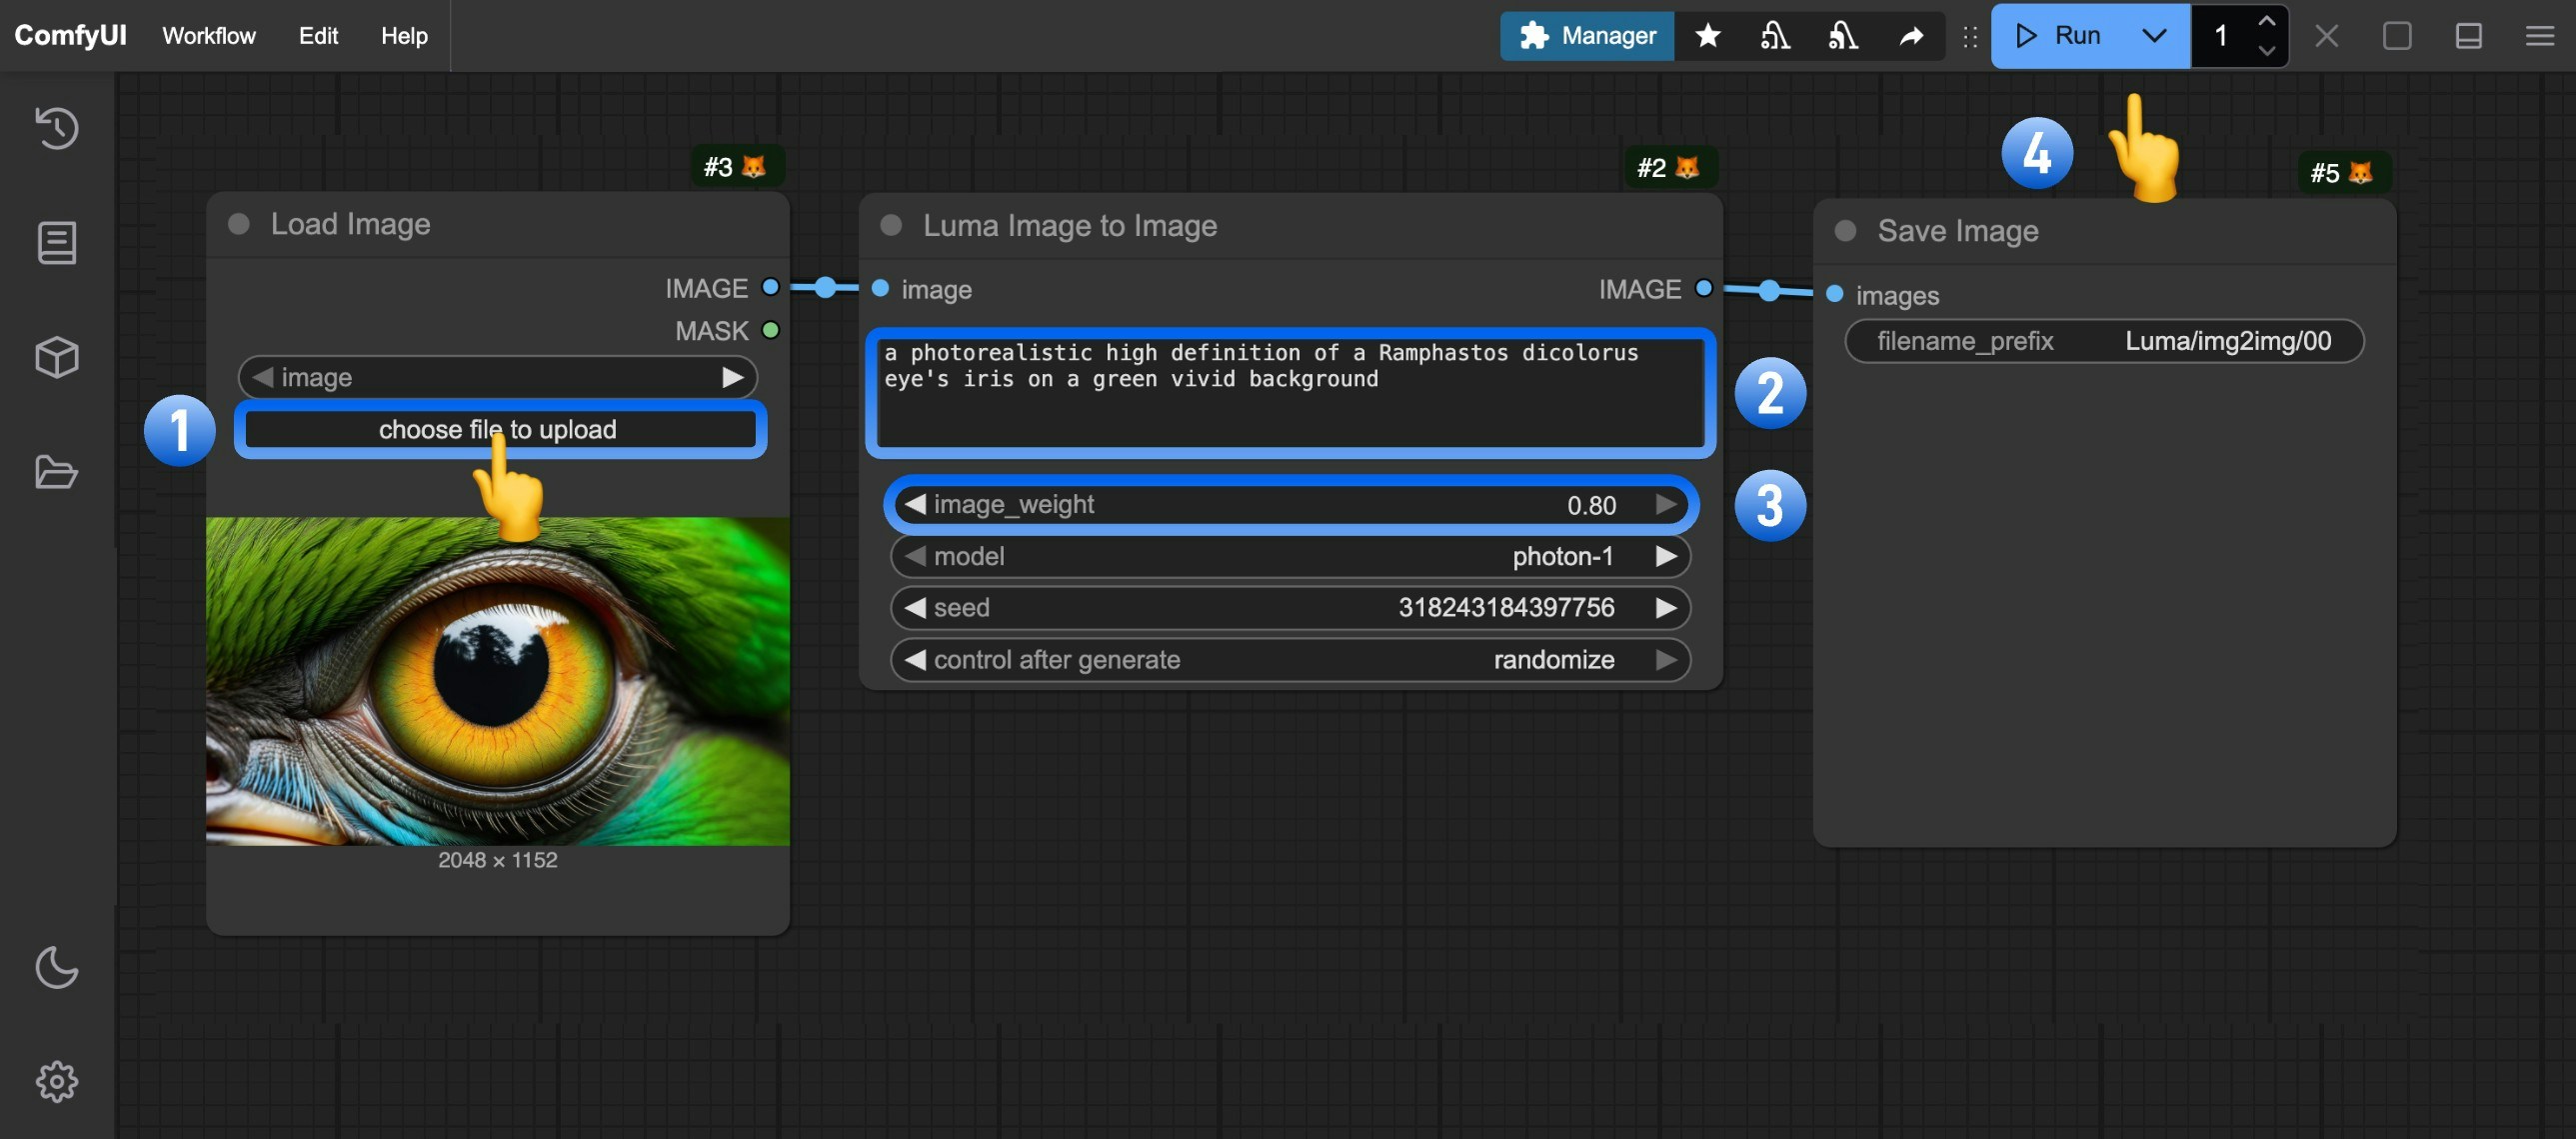
Load Image노드에서 Upload를 클릭해 입력 이미지를 업로드하세요- (선택사항) 워크플로우 프롬프트를 수정하세요
- (선택사항)
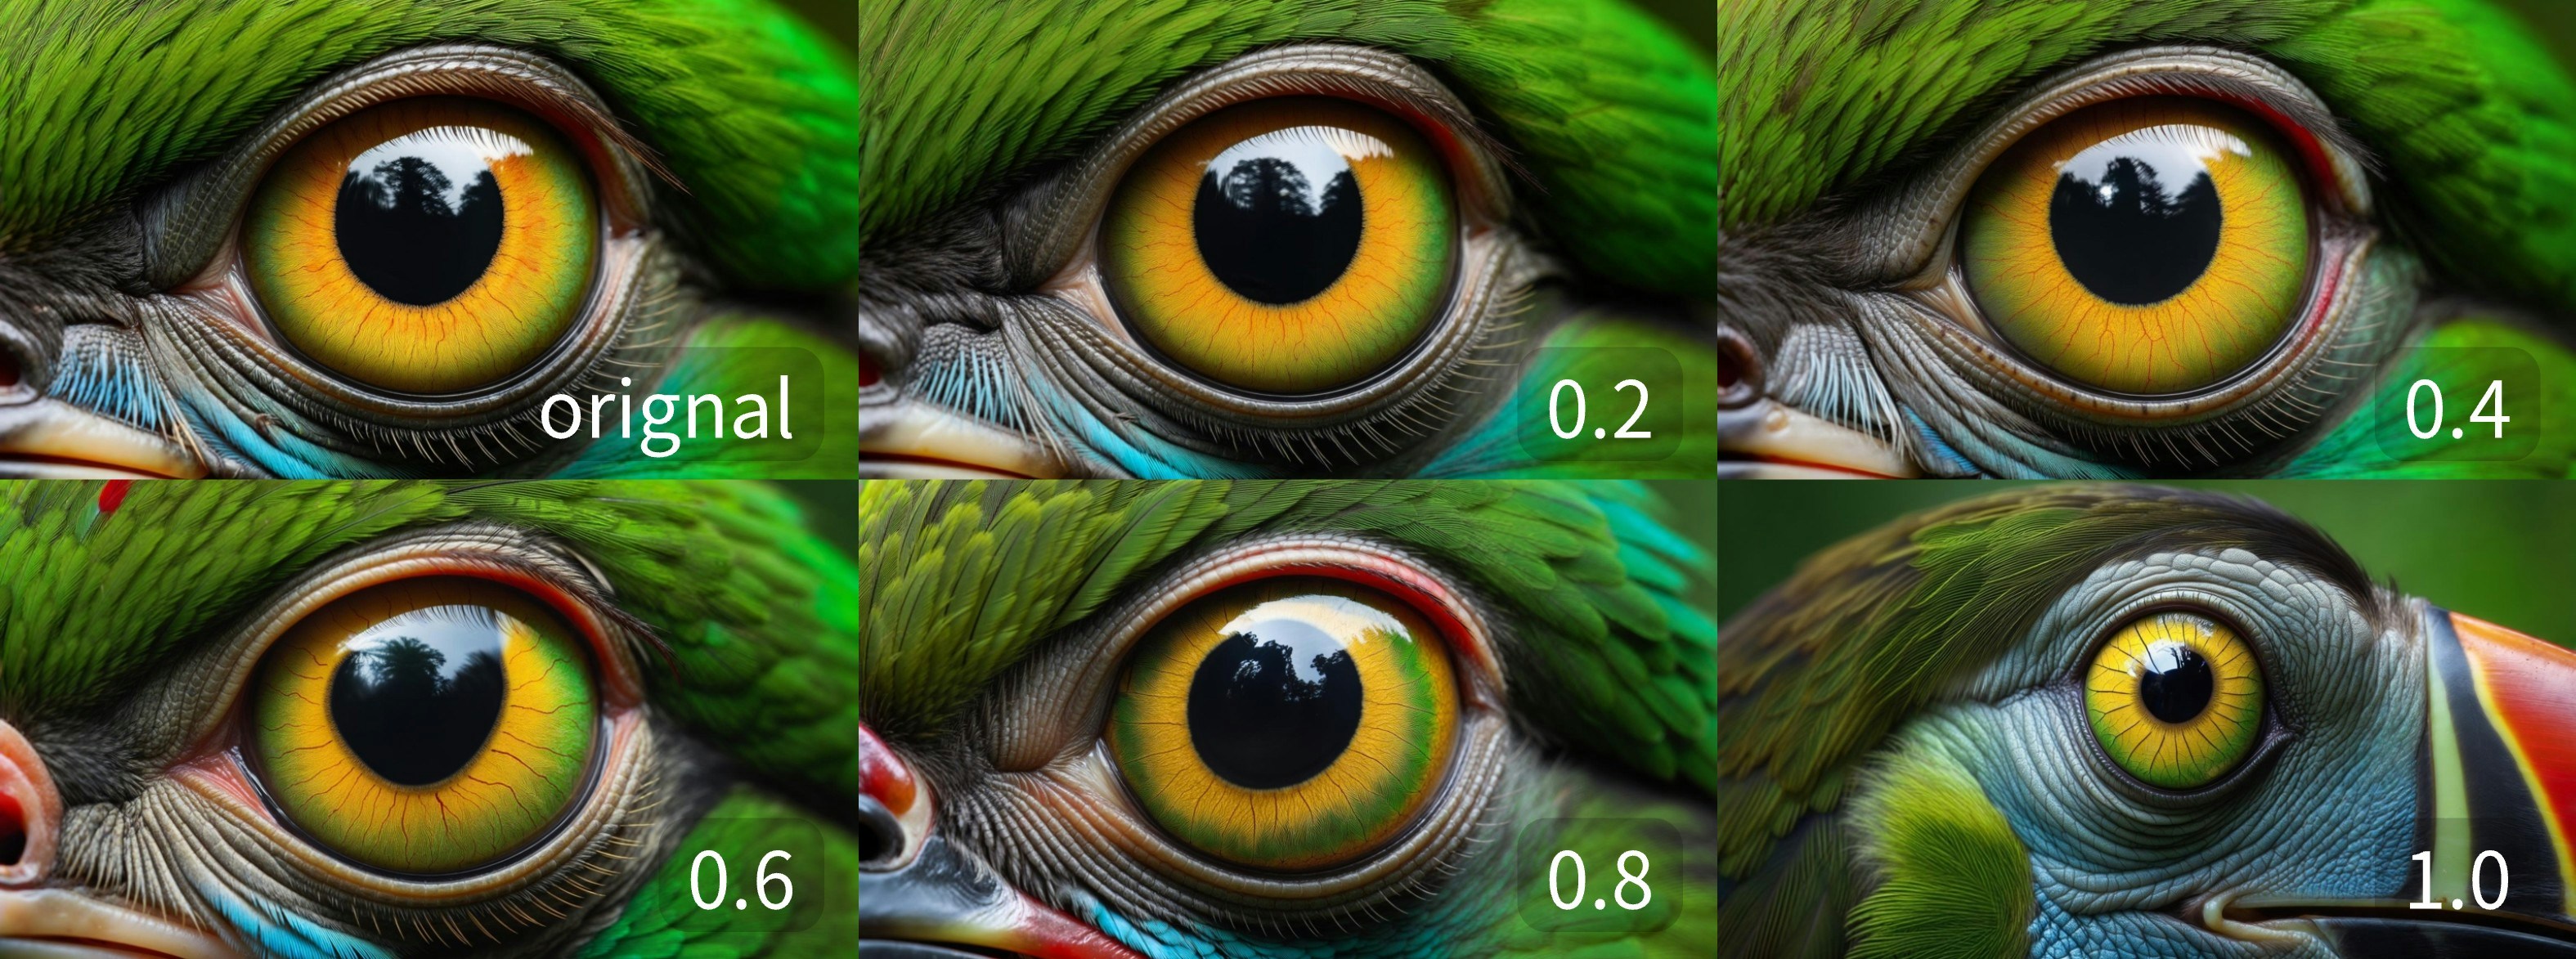
image_weight를 조정해 입력 이미지의 영향력을 변경하세요(낮은 값일수록 원본에 더 가까워집니다) Run을 클릭하거나 단축키Ctrl(cmd) + Enter를 사용해 이미지를 생성하세요- API가 결과를 반환한 후,
Save Image노드에서 생성된 이미지를 확인하세요. 이미지는ComfyUI/output/디렉터리에 저장됩니다
3. 서로 다른 image_weight 값으로 얻은 결과