The Luma Text to Video node allows you to create high-quality, smooth videos from text descriptions using Luma AI’s innovative video generation technology. In this guide, we’ll show you how to set up a text-to-video workflow using this node.Documentation Index
Fetch the complete documentation index at: https://docs.comfy.org/llms.txt
Use this file to discover all available pages before exploring further.
Luma Text to Video Node Documentation
Check out the following documentation to learn more about the node parameters:Luma Text to Video Node Docs
Documentation for the Luma Text to Video Partner node
Luma Concepts Node Docs
Documentation for the Luma Concepts Partner node
Text to Video Workflow with Luma API Node
The Luma Text to Video node requires text prompts to describe the video content. In this guide, we’ve created examples usingprompt and luma_concepts to showcase Luma AI’s excellent video generation capabilities.
1. Download the Workflow
The workflow information is included in the metadata of the video below. Download and drag it into ComfyUI to load the workflow.2. Follow the Steps
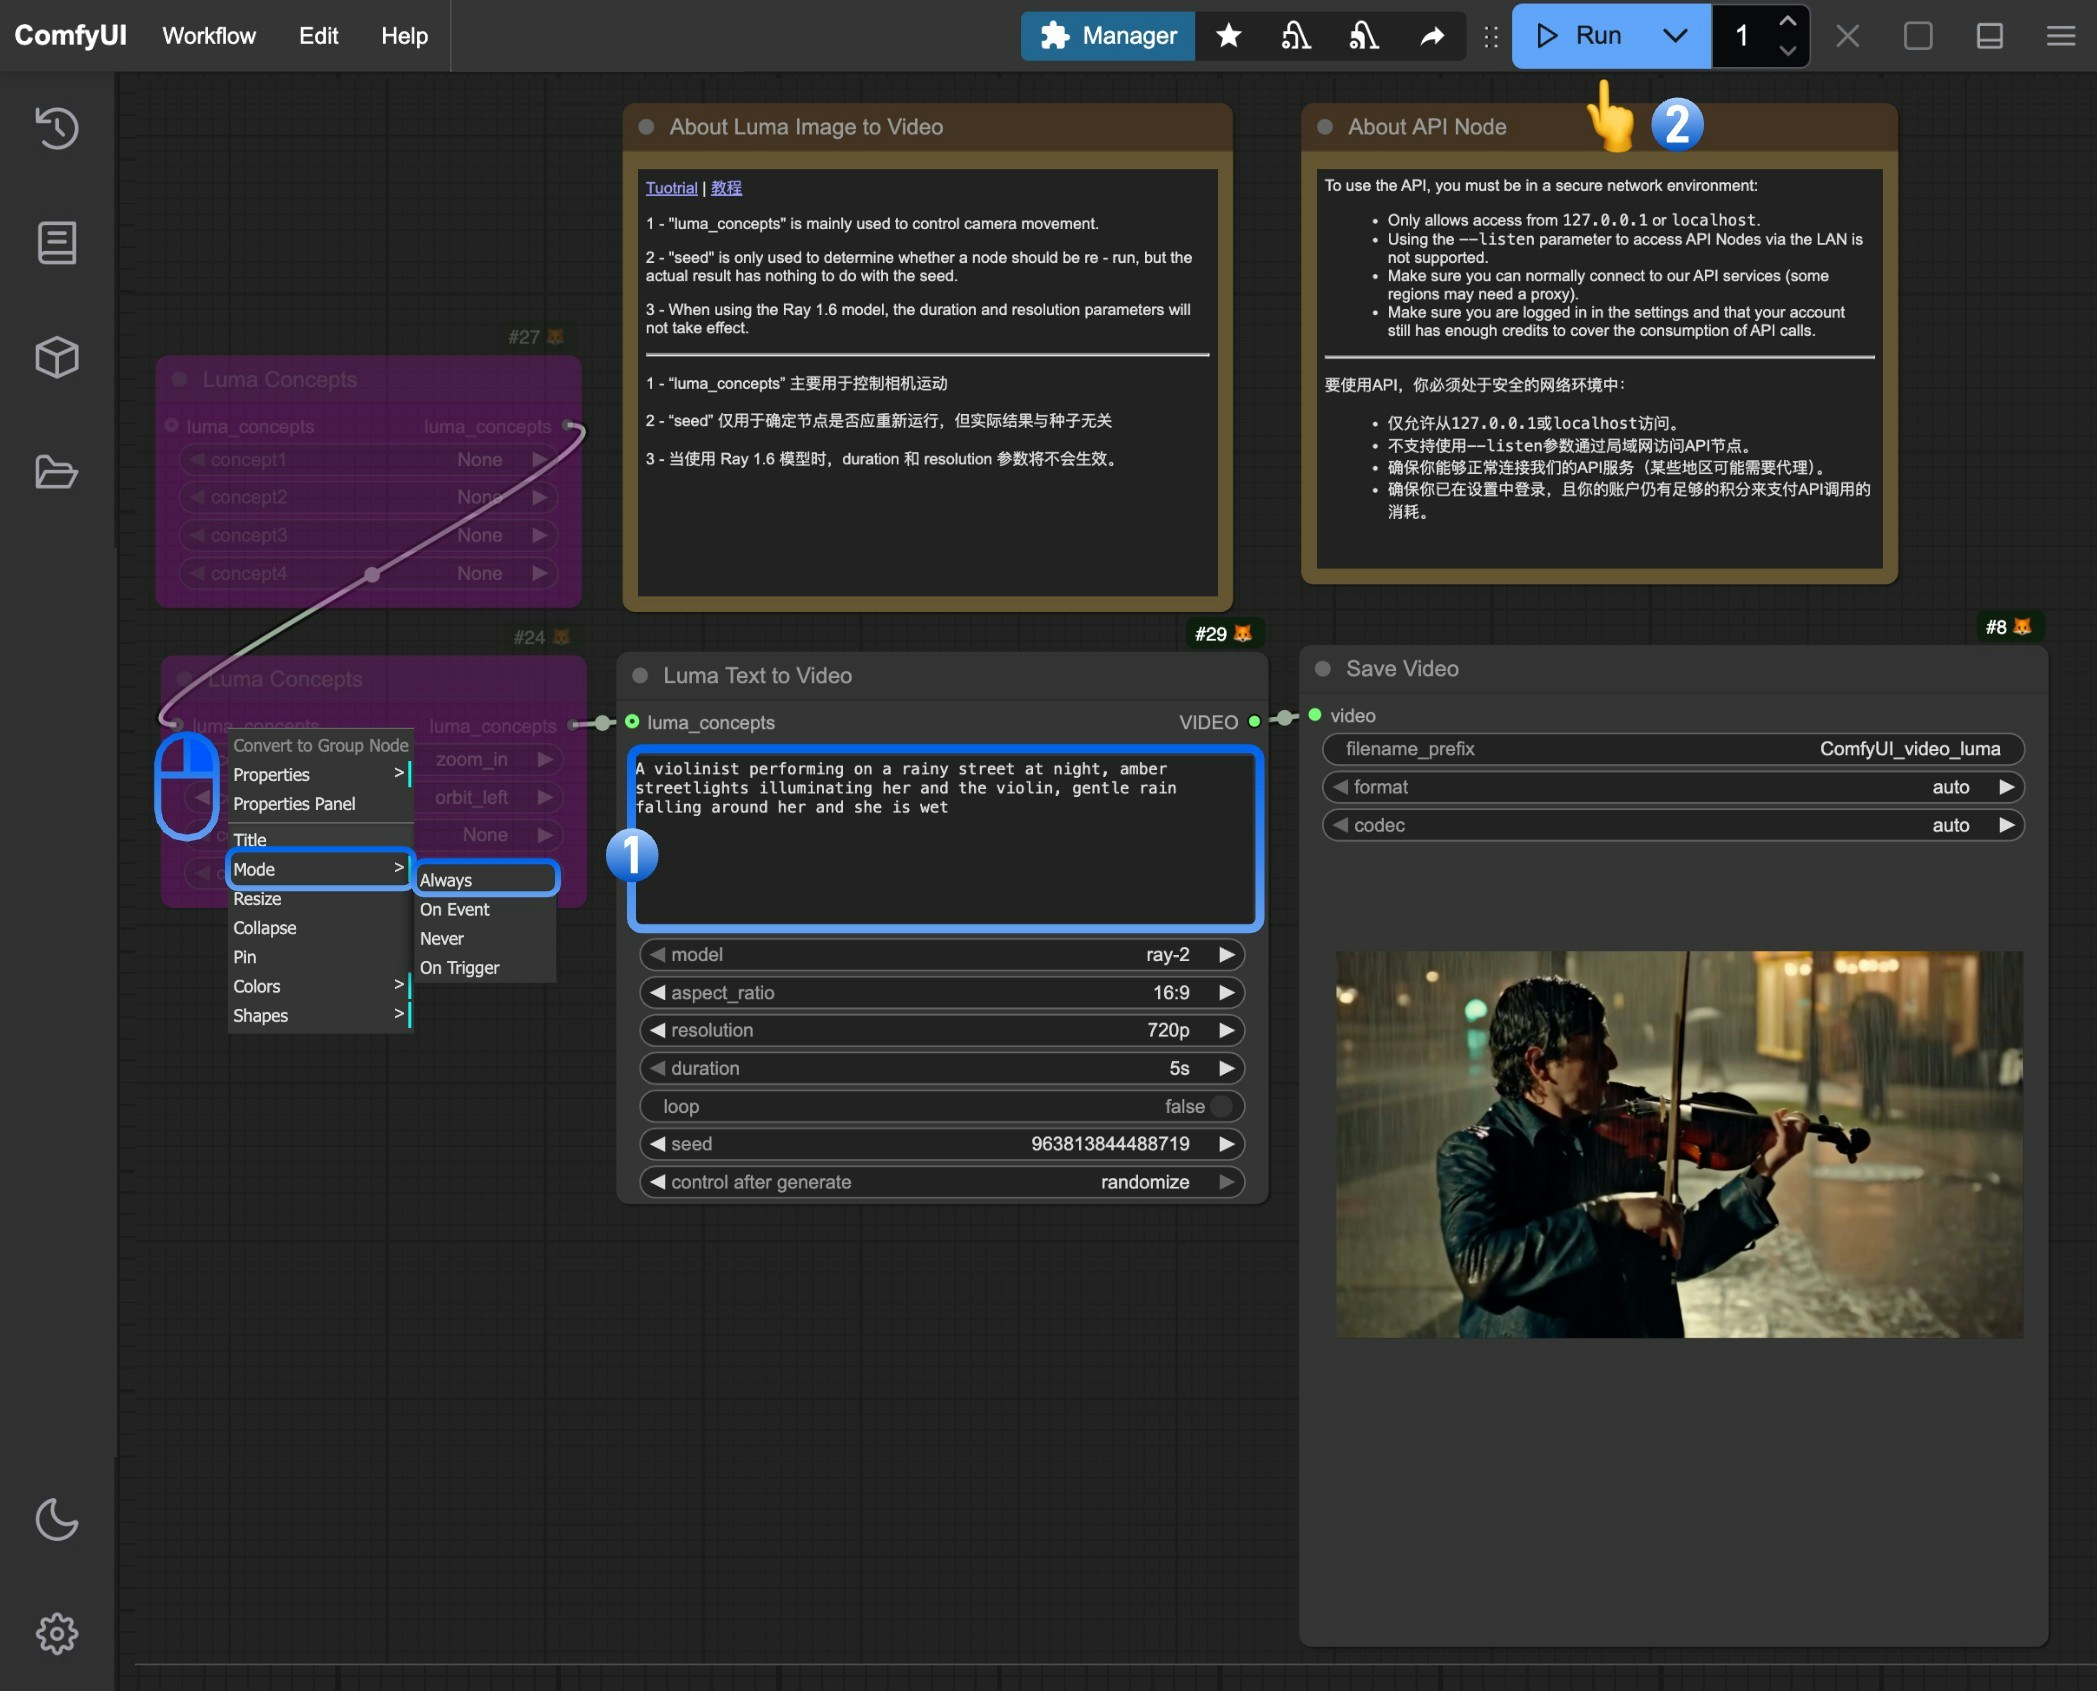
- Write your prompt in the
Luma Text to Videonode to describe the video content you want - Click the
Runbutton or use the shortcutCtrl(cmd) + Enterto generate the video - After the API returns results, you can view the generated video in the
Save Videonode. The video will also be saved to theComfyUI/output/directory
(Optional) Modify the Luma Concepts node to control camera movements and add professional cinematography
3. Additional Notes
- Writing Prompts: Describe scenes, subjects, actions, and mood in detail for best results
- Luma Concepts: Mainly used for camera control to create professional video shots
- Seed Parameter: Only determines if the node should rerun, doesn’t affect generation results
- Model Selection: Different video models have different features, adjustable via the model parameter
- Resolution and Duration: Adjust output video resolution and length using these parameters
- Ray 1.6 Model Note: Duration and resolution parameters don’t work when using the Ray 1.6 model