- Using inpainting workflows to modify images
- Using the ComfyUI mask editor to draw masks
VAE Encoder (for Inpainting)node
About Inpainting
In AI image generation, we often encounter situations where we’re satisfied with the overall image but there are elements we don’t want or that contain errors. Simply regenerating might produce a completely different image, so using inpainting to fix specific parts becomes very useful. It’s like having an artist (AI model) paint a picture, but we’re still not satisfied with the specific details. We need to tell the artist which areas to adjust (mask), and then let them repaint (inpaint) according to our requirements. Common inpainting scenarios include:- Defect Repair: Removing unwanted objects, fixing incorrect AI-generated body parts, etc.
- Detail Optimization: Precisely adjusting local elements (like modifying clothing textures, adjusting facial expressions)
- And other scenarios
ComfyUI Inpainting Workflow Example
Model and Resource Preparation
1. Model Installation
Download the 512-inpainting-ema.safetensors file and put it in yourComfyUI/models/checkpoints folder:
2. Inpainting Asset
Please download the following image which we’ll use as input:
This image already contains an alpha channel (transparency mask), so you don’t need to manually draw a mask. This tutorial will also cover how to use the mask editor to draw masks.
3. Inpainting Workflow
Download the image below and drag it into ComfyUI to load the workflow:
ComfyUI Inpainting Workflow Example Explanation
Follow the steps in the diagram below to ensure the workflow runs correctly.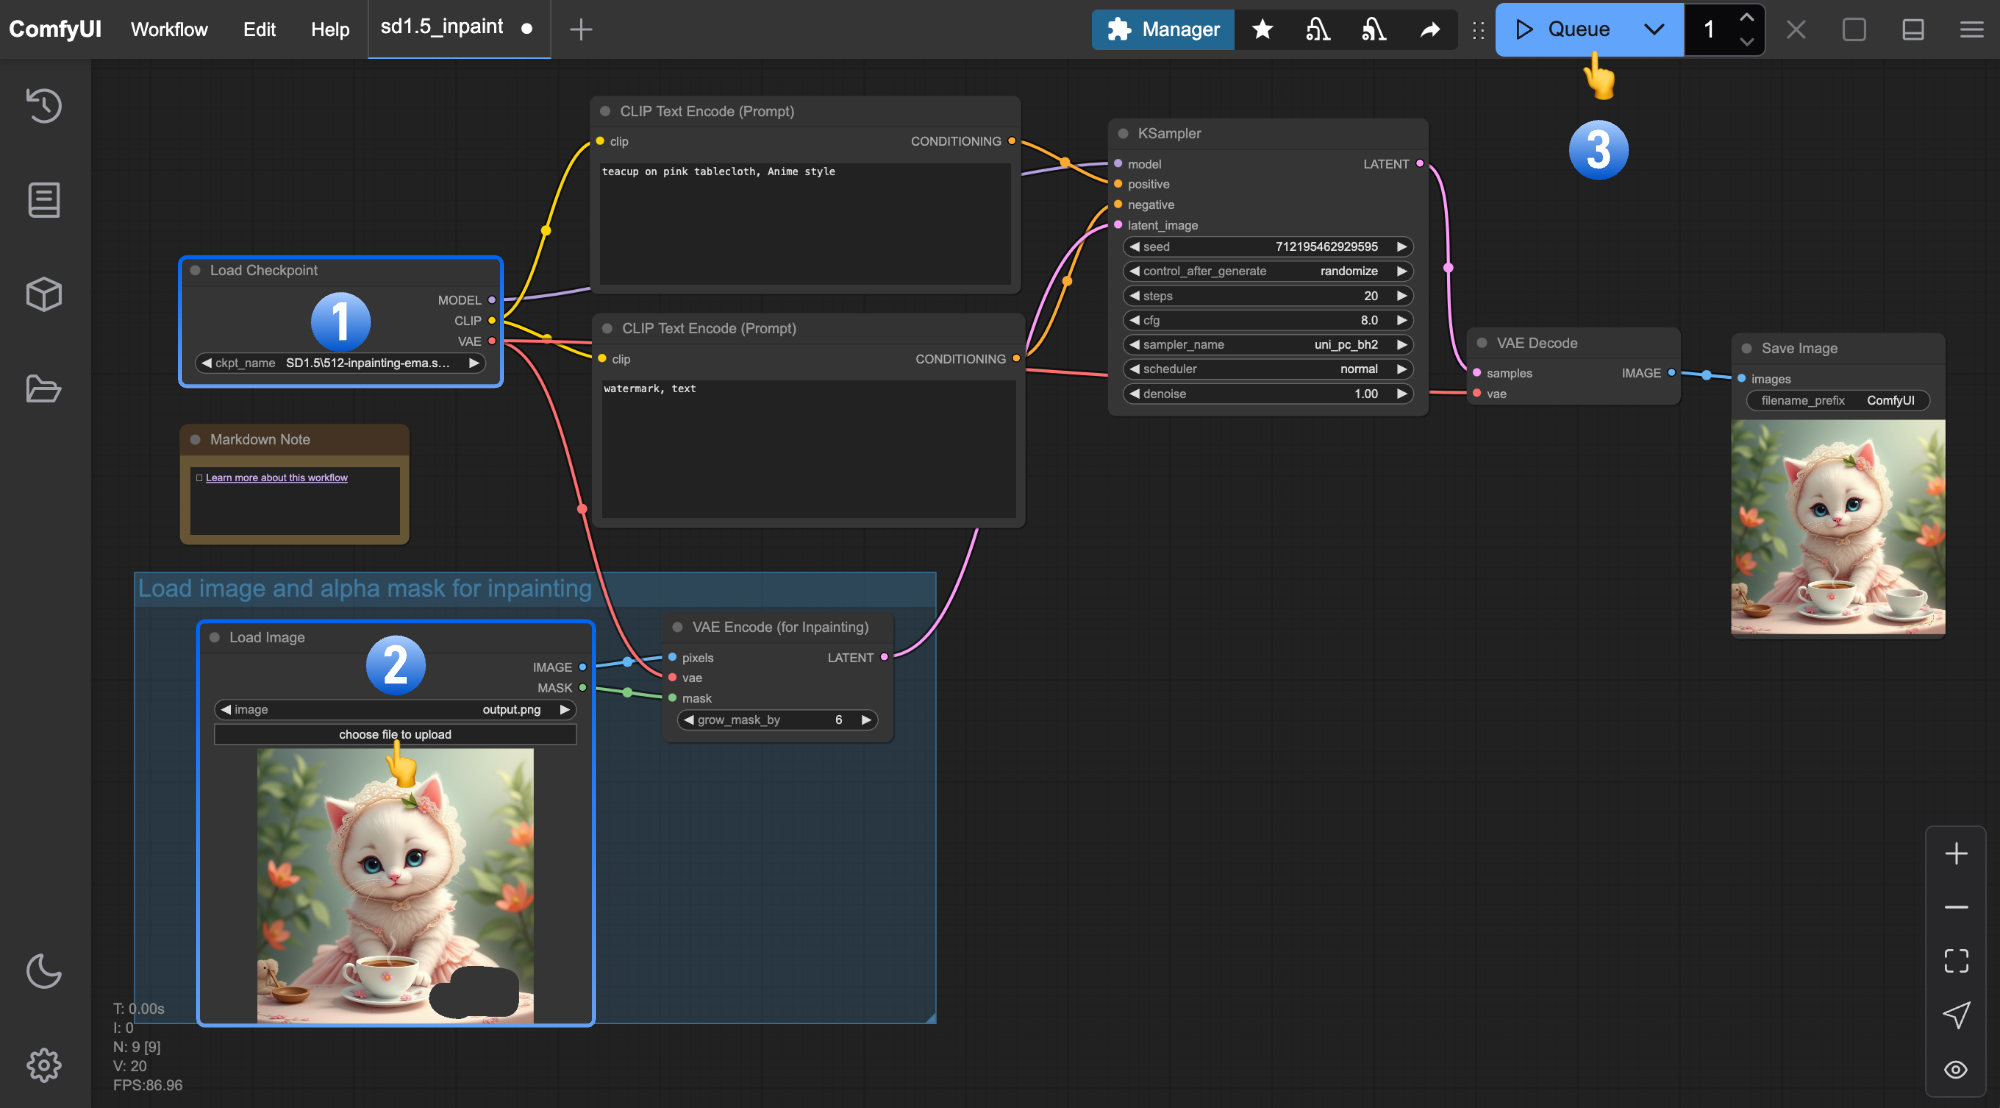
- Ensure
Load Checkpointloads512-inpainting-ema.safetensors - Upload the input image to the
Load Imagenode - Click
Queueor useCtrl + Enterto generate

- Modify positive and negative prompts with more specific descriptions
- Try multiple runs using different seeds in the
KSamplerfor different generation results - After learning about the mask editor in this tutorial, you can re-inpaint the generated results to achieve satisfactory outcomes.
alpha transparency channel (the area we want to edit),
so manual mask drawing isn’t necessary, you’ll often use the Mask Editor to create masks in practical applications.
Using the Mask Editor
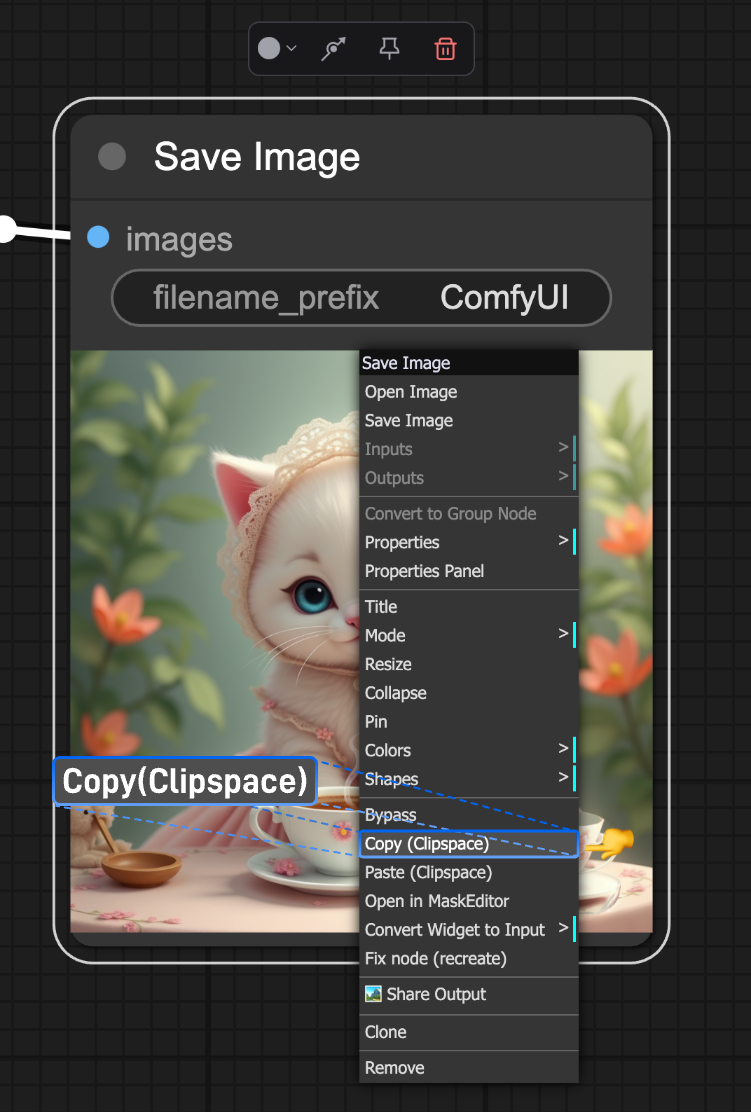
First right-click theSave Image node and select Copy(Clipspace):
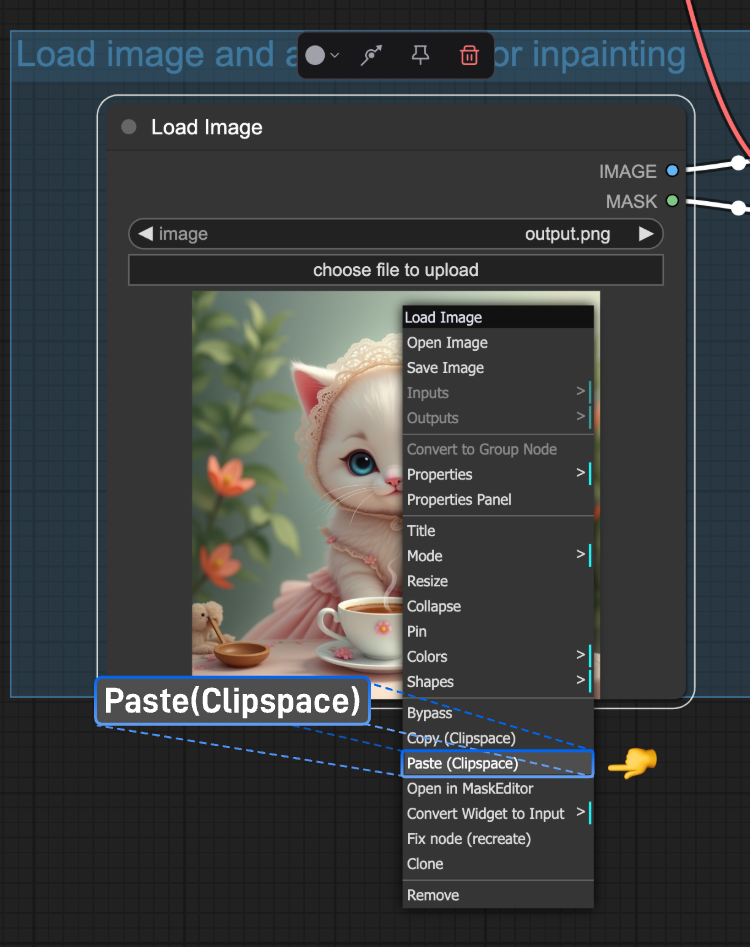
Paste(Clipspace):
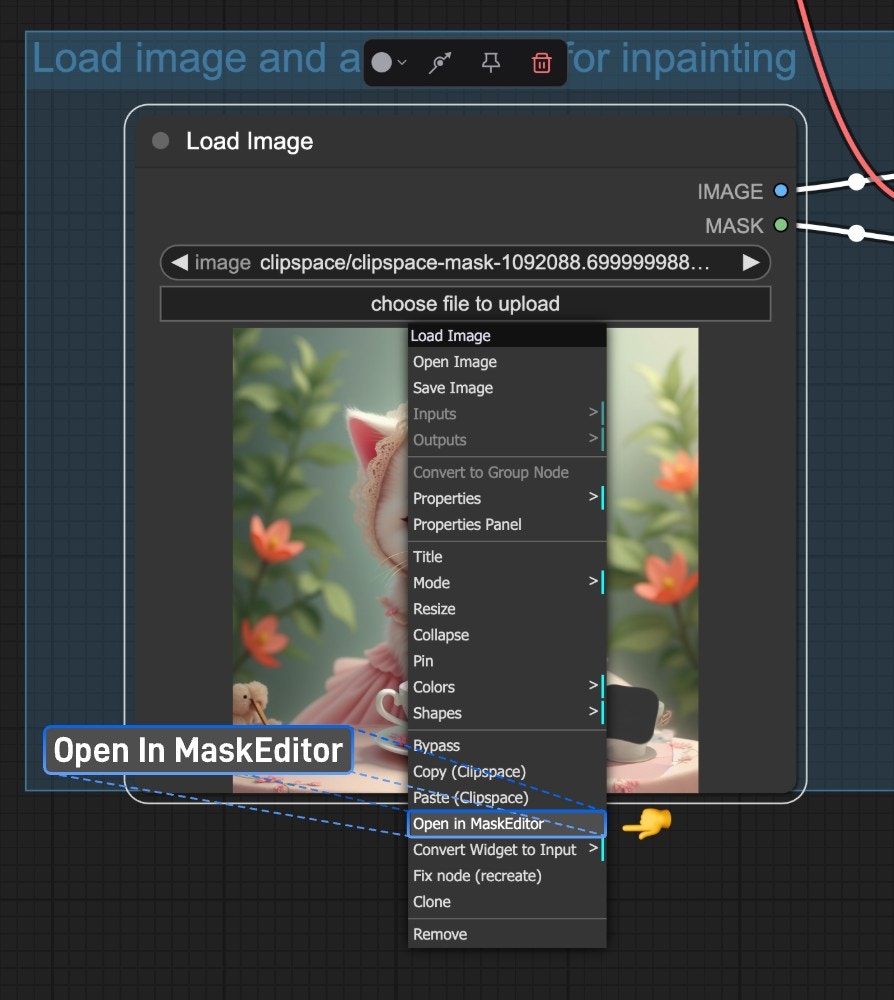
Open in MaskEditor:
- Adjust brush parameters on the right panel
- Use eraser to correct mistakes
- Click
Savewhen finished
VAE Encoder (for Inpainting) Node
Comparing this workflow with Text-to-Image and Image-to-Image, you’ll notice the main differences are in the VAE section’s conditional inputs. In this workflow, we use the VAE Encoder (for Inpainting) node, specifically designed for inpainting to help us better control the generation area and achieve better results.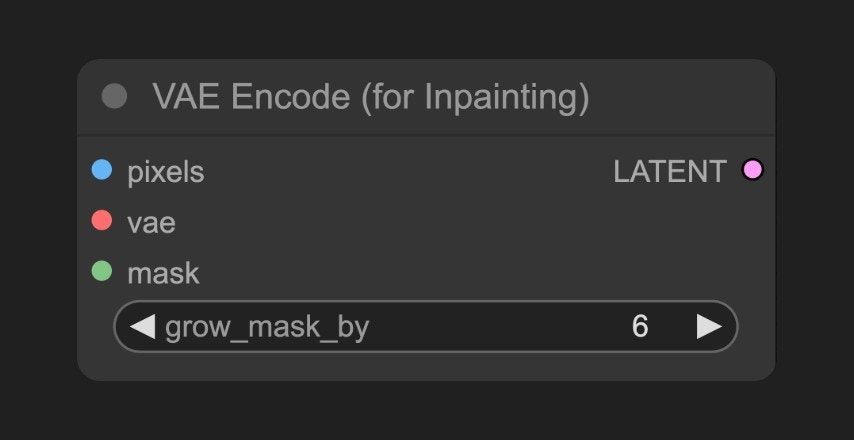
Output Types