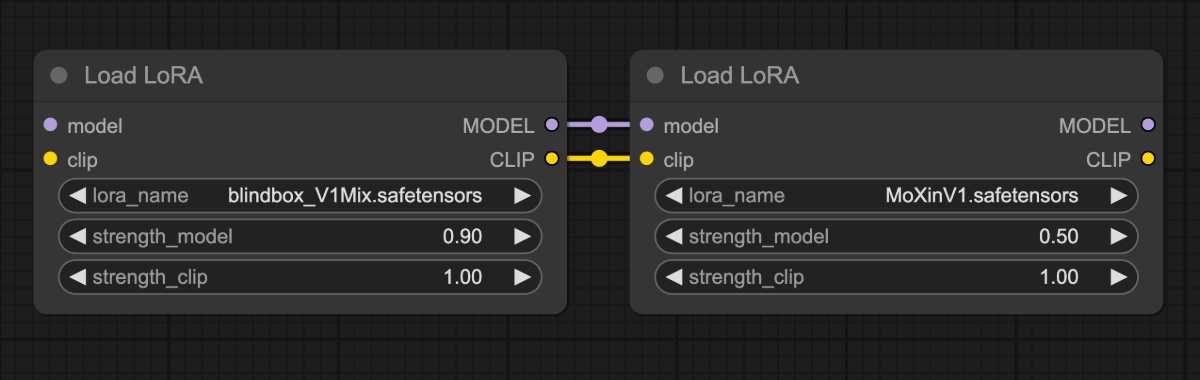
Load LoRA nodes to apply two LoRA models simultaneously: blindbox_V1Mix and MoXinV1.
The comparison below shows individual effects of these LoRAs using identical parameters:


Model Installation
Download the dreamshaper_8.safetensors file and put it in yourComfyUI/models/checkpoints folder.
Download the blindbox_V1Mix.safetensors file and put it in your ComfyUI/models/loras folder.
Download the MoXinV1.safetensors file and put it in your ComfyUI/models/loras folder.
Multi-LoRA Workflow
Download the image below and drag it into ComfyUI to load the workflow:
Complete the Workflow Step by Step
Follow the steps in the diagram below to ensure the workflow runs correctly.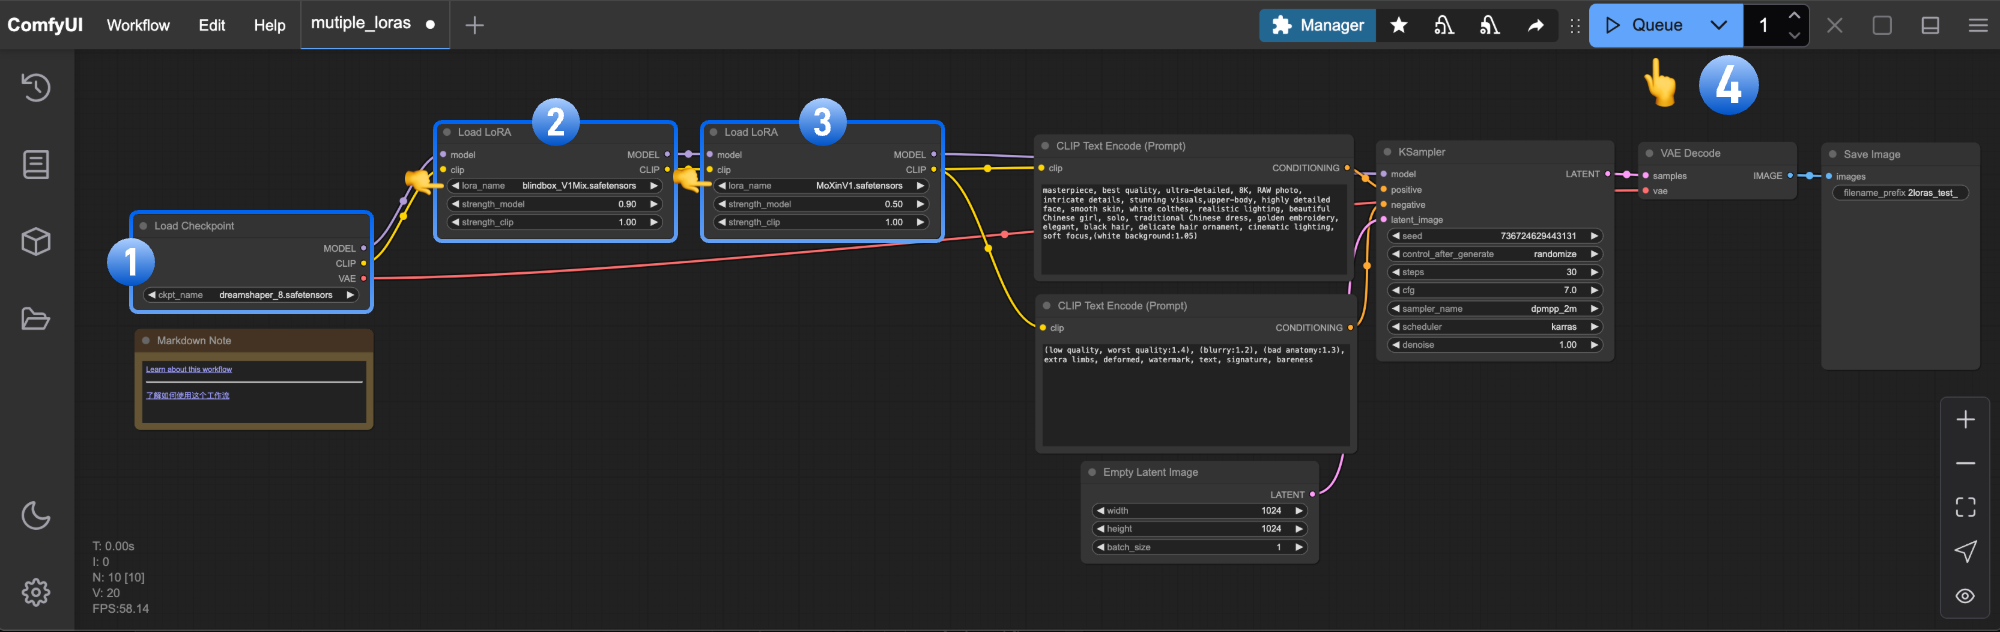
- Ensure
Load Checkpointloads dreamshaper_8.safetensors - Ensure first
Load LoRAloads blindbox_V1Mix.safetensors - Ensure second
Load LoRAloads MoXinV1.safetensors - Click
Queueor pressCtrl/Cmd + Enterto generate
Try It Yourself
- Adjust
strength_modelvalues in bothLoad LoRAnodes to control each LoRA’s influence - Explore CivitAI for additional LoRAs and create custom combinations