
ControlNet Image Preprocessing Information
Different types of ControlNet models typically require different types of reference images:
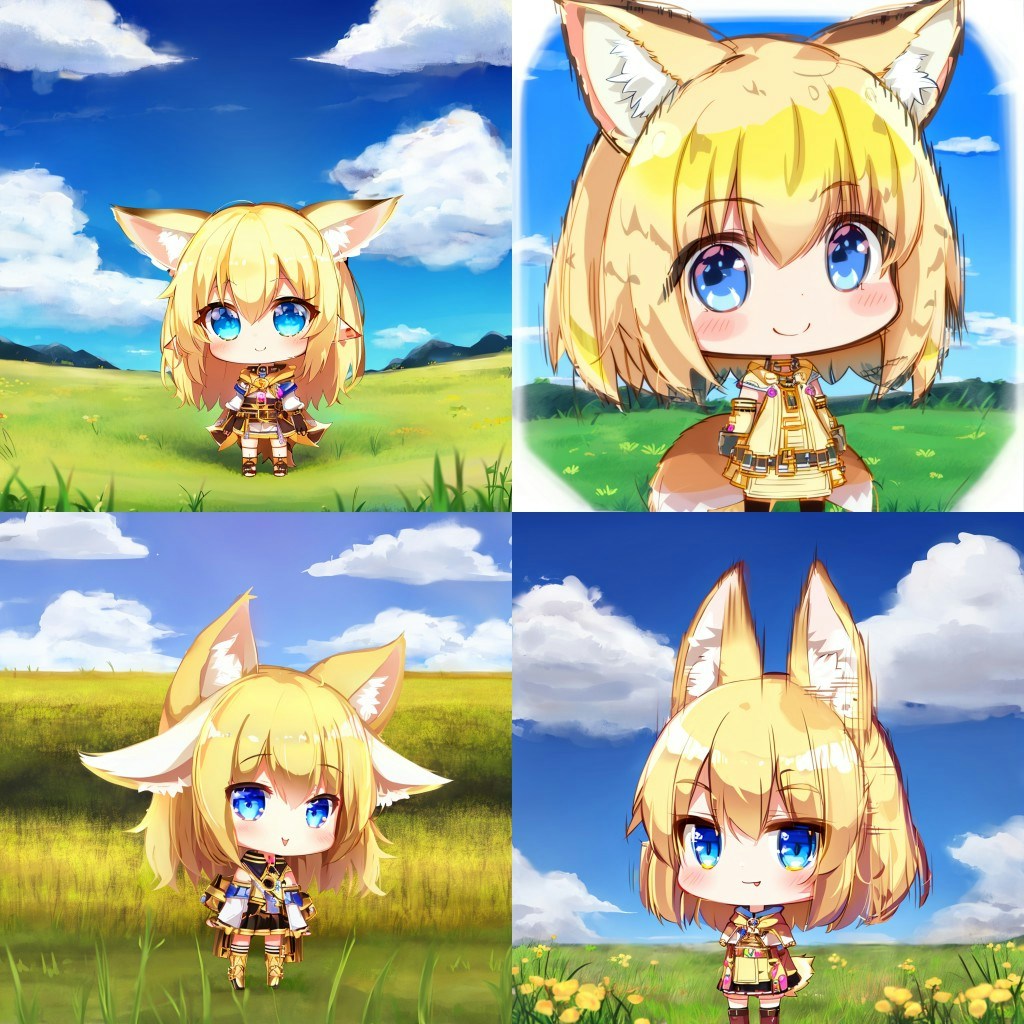
Image source: ComfyUI ControlNet auxSince the current Comfy Core nodes do not include all types of preprocessors, in the actual examples in this documentation, we will provide pre-processed images. However, in practical use, you may need to use custom nodes to preprocess images to meet the requirements of different ControlNet models. Below are some relevant custom nodes:
ComfyUI ControlNet Workflow Example Explanation
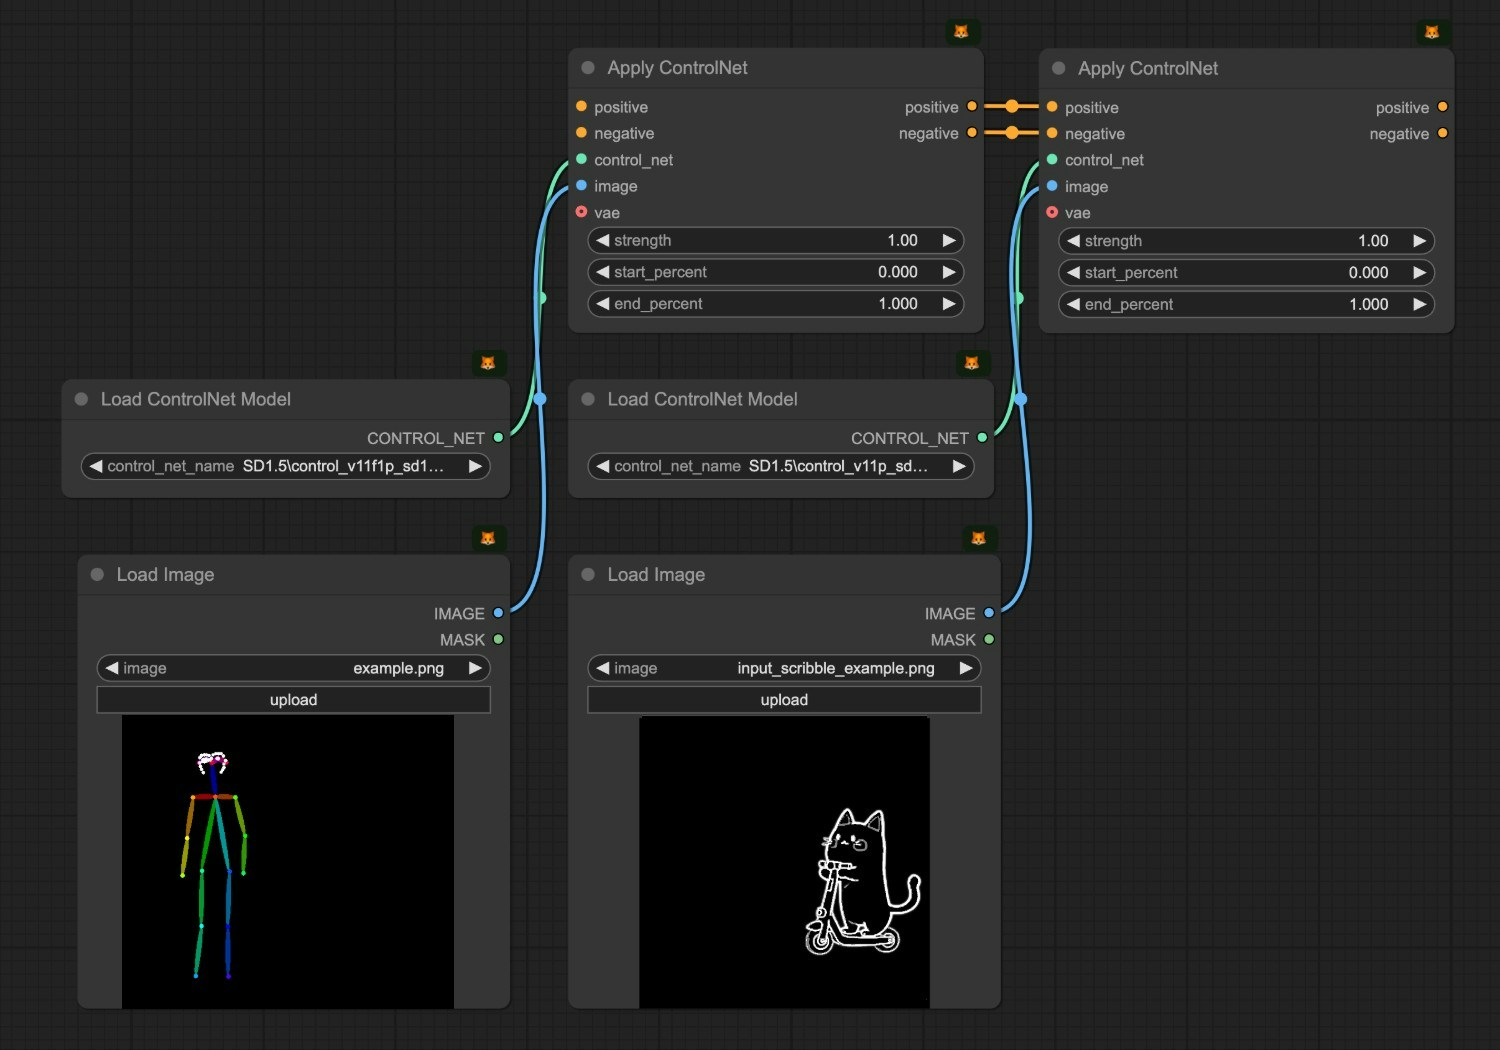
1. ControlNet Workflow Assets
Please download the workflow image below and drag it into ComfyUI to load the workflow:
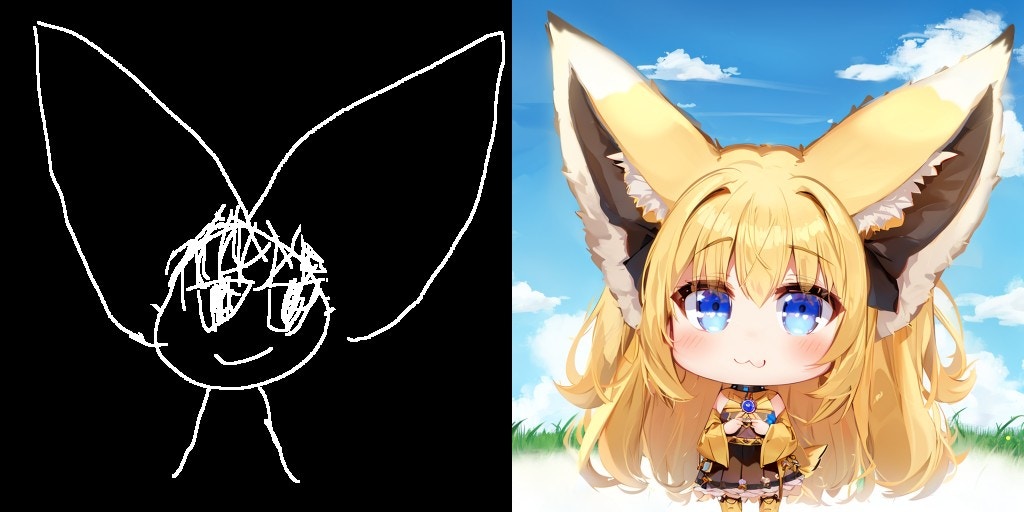
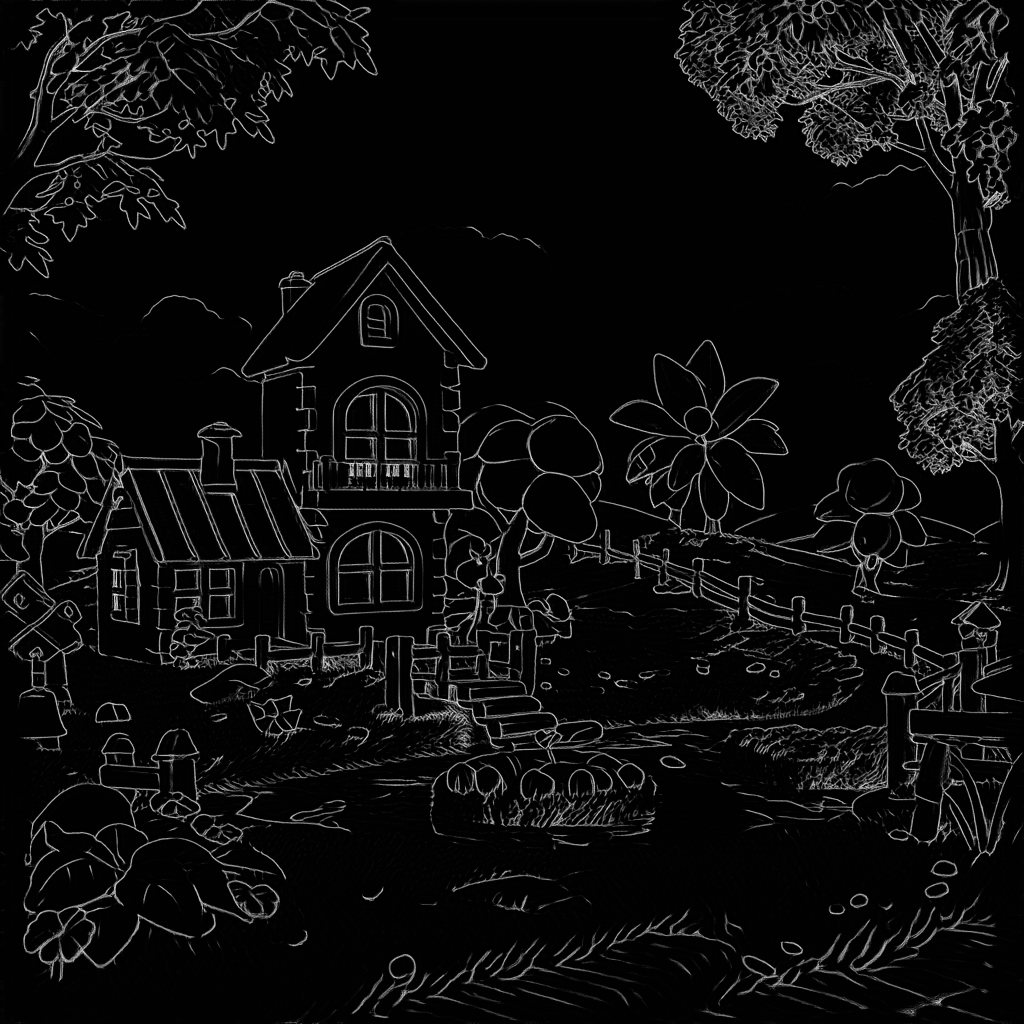
Please download the image below, which we will use as input:
2. Manual Model Installation
If your network cannot successfully complete the automatic download of the corresponding models, please try manually downloading the models below and placing them in the specified directories:
- dreamCreationVirtual3DECommerce_v10.safetensors
- vae-ft-mse-840000-ema-pruned.safetensors
- control_v11p_sd15_scribble_fp16.safetensors
In this example, you could also use the VAE model embedded in dreamCreationVirtual3DECommerce_v10.safetensors, but we’re following the model author’s recommendation to use a separate VAE model.
3. Step-by-Step Workflow Execution
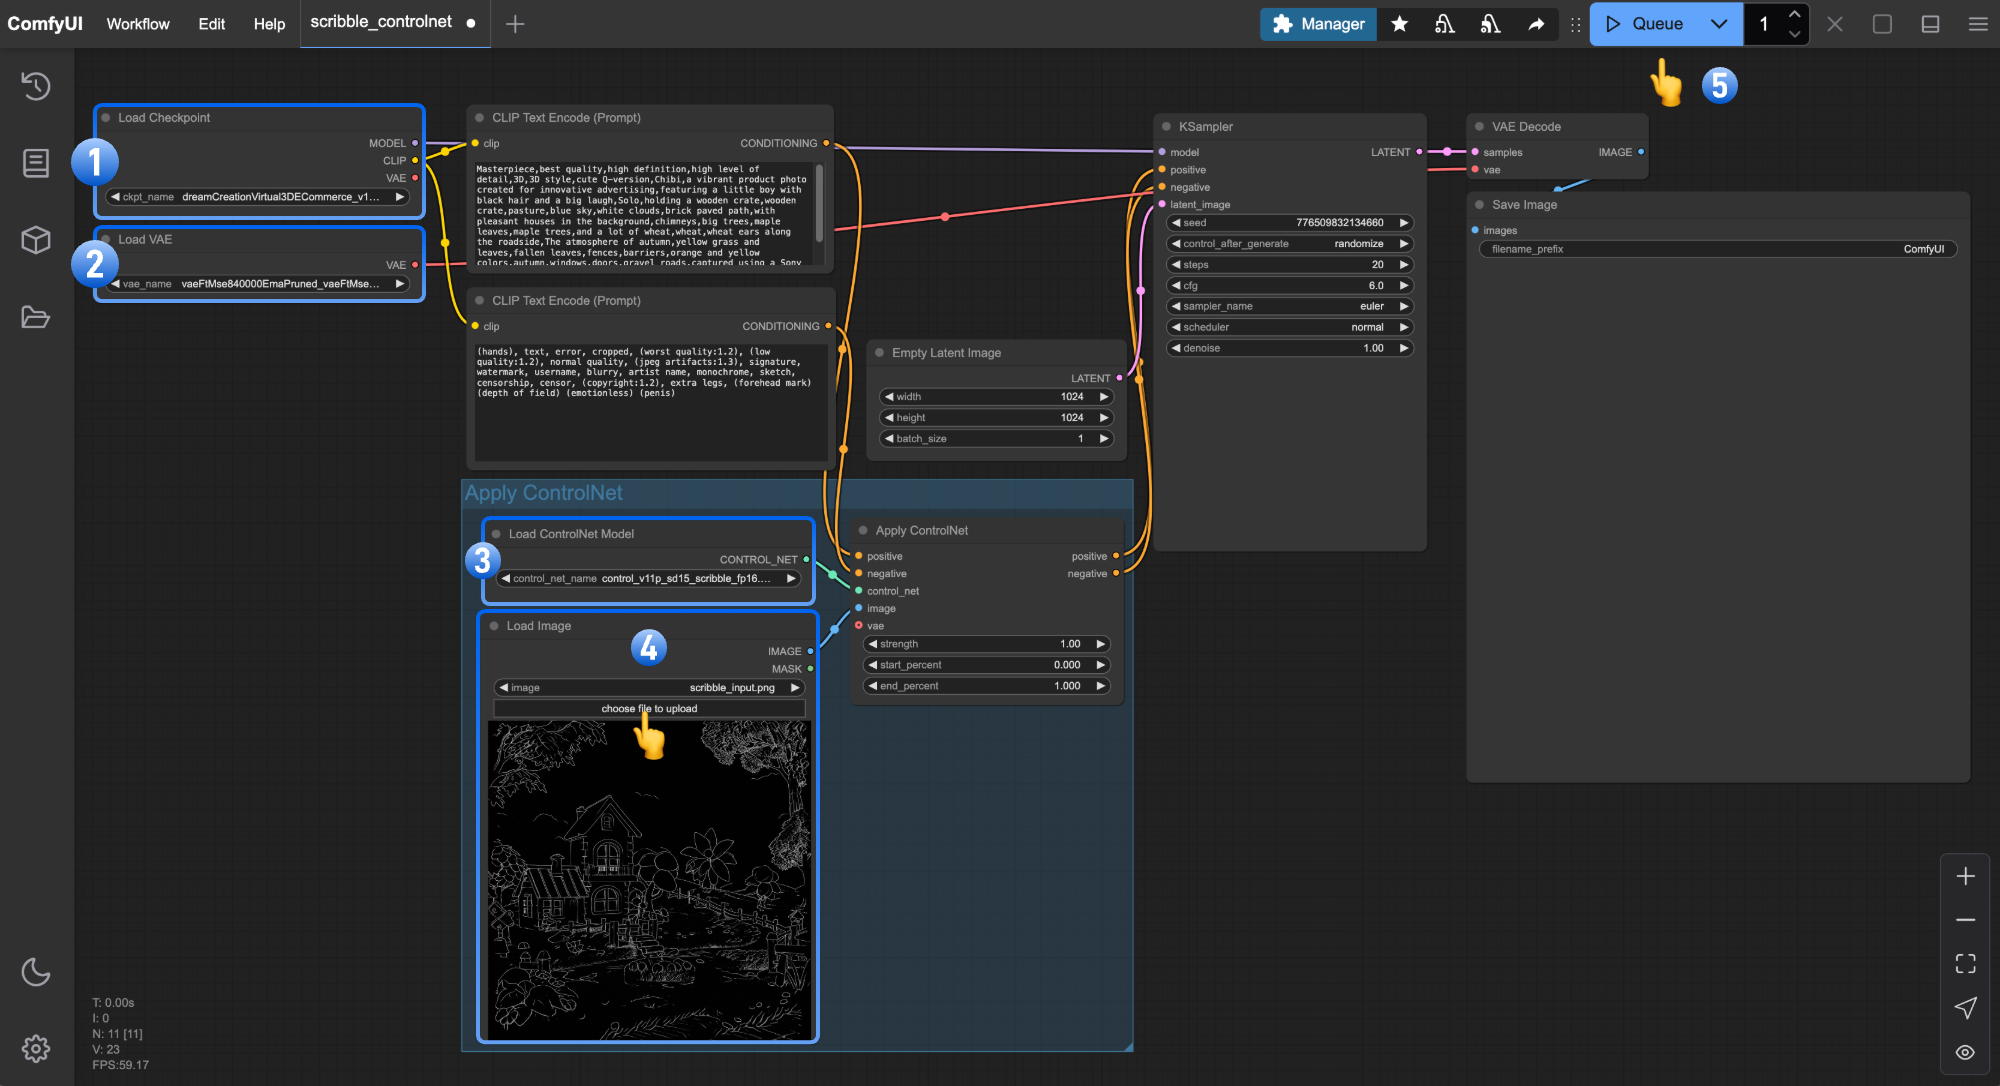
- Ensure that
Load Checkpointcan load dreamCreationVirtual3DECommerce_v10.safetensors - Ensure that
Load VAEcan load vae-ft-mse-840000-ema-pruned.safetensors - Click
Uploadin theLoad Imagenode to upload the input image provided earlier - Ensure that
Load ControlNetcan load control_v11p_sd15_scribble_fp16.safetensors - Click the
Queuebutton or use the shortcutCtrl(cmd) + Enterto execute the image generation
Related Node Explanations
Load ControlNet Node Explanation
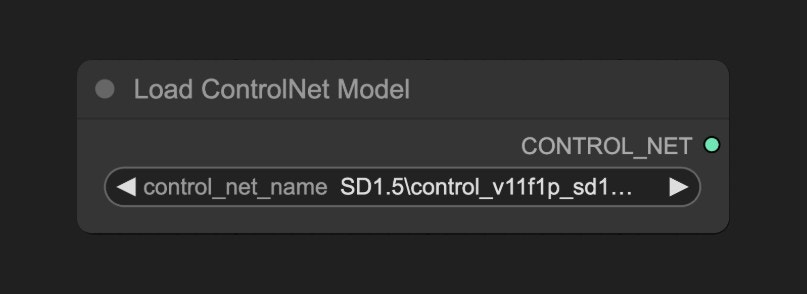
ComfyUI\models\controlnet will be detected by ComfyUI and can be loaded through this node.
Apply ControlNet Node Explanation
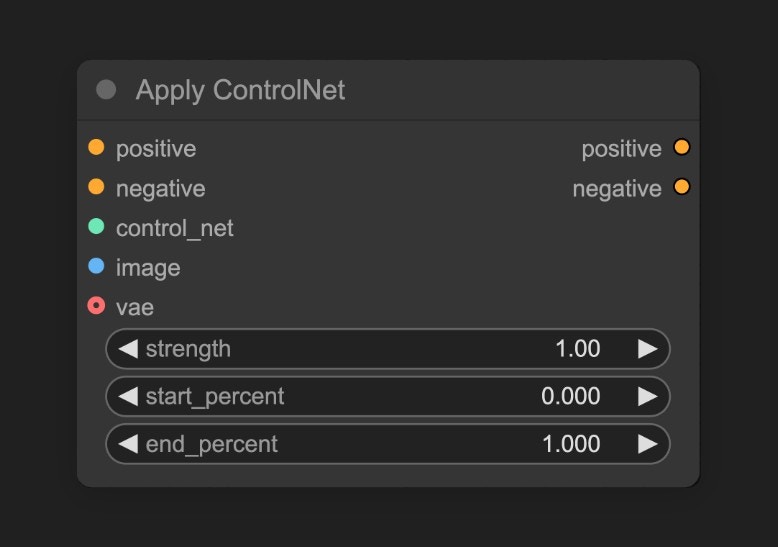
load controlnet and generates corresponding control conditions based on the input image.
Input Types
| Parameter Name | Function |
|---|---|
positive | Positive conditioning |
negative | Negative conditioning |
control_net | The ControlNet model to be applied |
image | Preprocessed image used as reference for ControlNet application |
vae | VAE model input |
strength | Strength of ControlNet application; higher values increase ControlNet’s influence on the generated image |
start_percent | Determines when to start applying ControlNet as a percentage; e.g., 0.2 means ControlNet guidance begins when 20% of diffusion is complete |
end_percent | Determines when to stop applying ControlNet as a percentage; e.g., 0.8 means ControlNet guidance stops when 80% of diffusion is complete |
| Parameter Name | Function |
|---|---|
positive | Positive conditioning data processed by ControlNet |
negative | Negative conditioning data processed by ControlNet |
You might see the 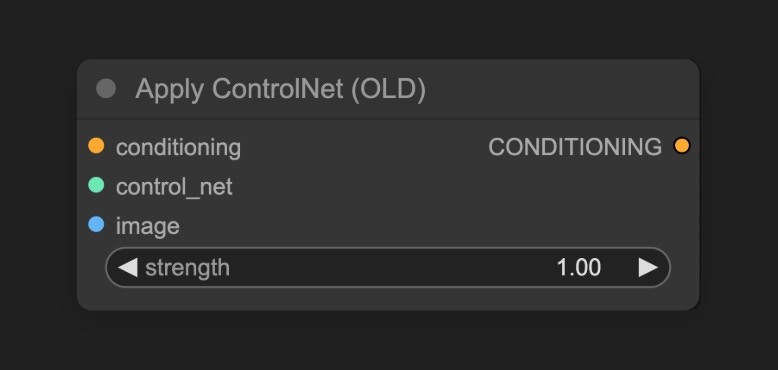
Apply ControlNet(Old) node in some early workflows, which is an early version of the ControlNet node. It is currently deprecated and not visible by default in search and node lists.Show deprecated nodes in search option. However, it’s recommended to use the new node.Start Your Exploration
- Try creating similar sketches, or even draw your own, and use ControlNet models to generate images to experience the benefits of ControlNet.
- Adjust the
Control Strengthparameter in the Apply ControlNet node to control the influence of the ControlNet model on the generated image. - Visit the ControlNet-v1-1_fp16_safetensors repository to download other types of ControlNet models and try using them to generate images.