ComfyUI custom node management
Learn how to install custom nodes through ManagerInstall nodes
1
Click the Manager button in the ComfyUI interface
Click the Manager button on the main menu (top bar).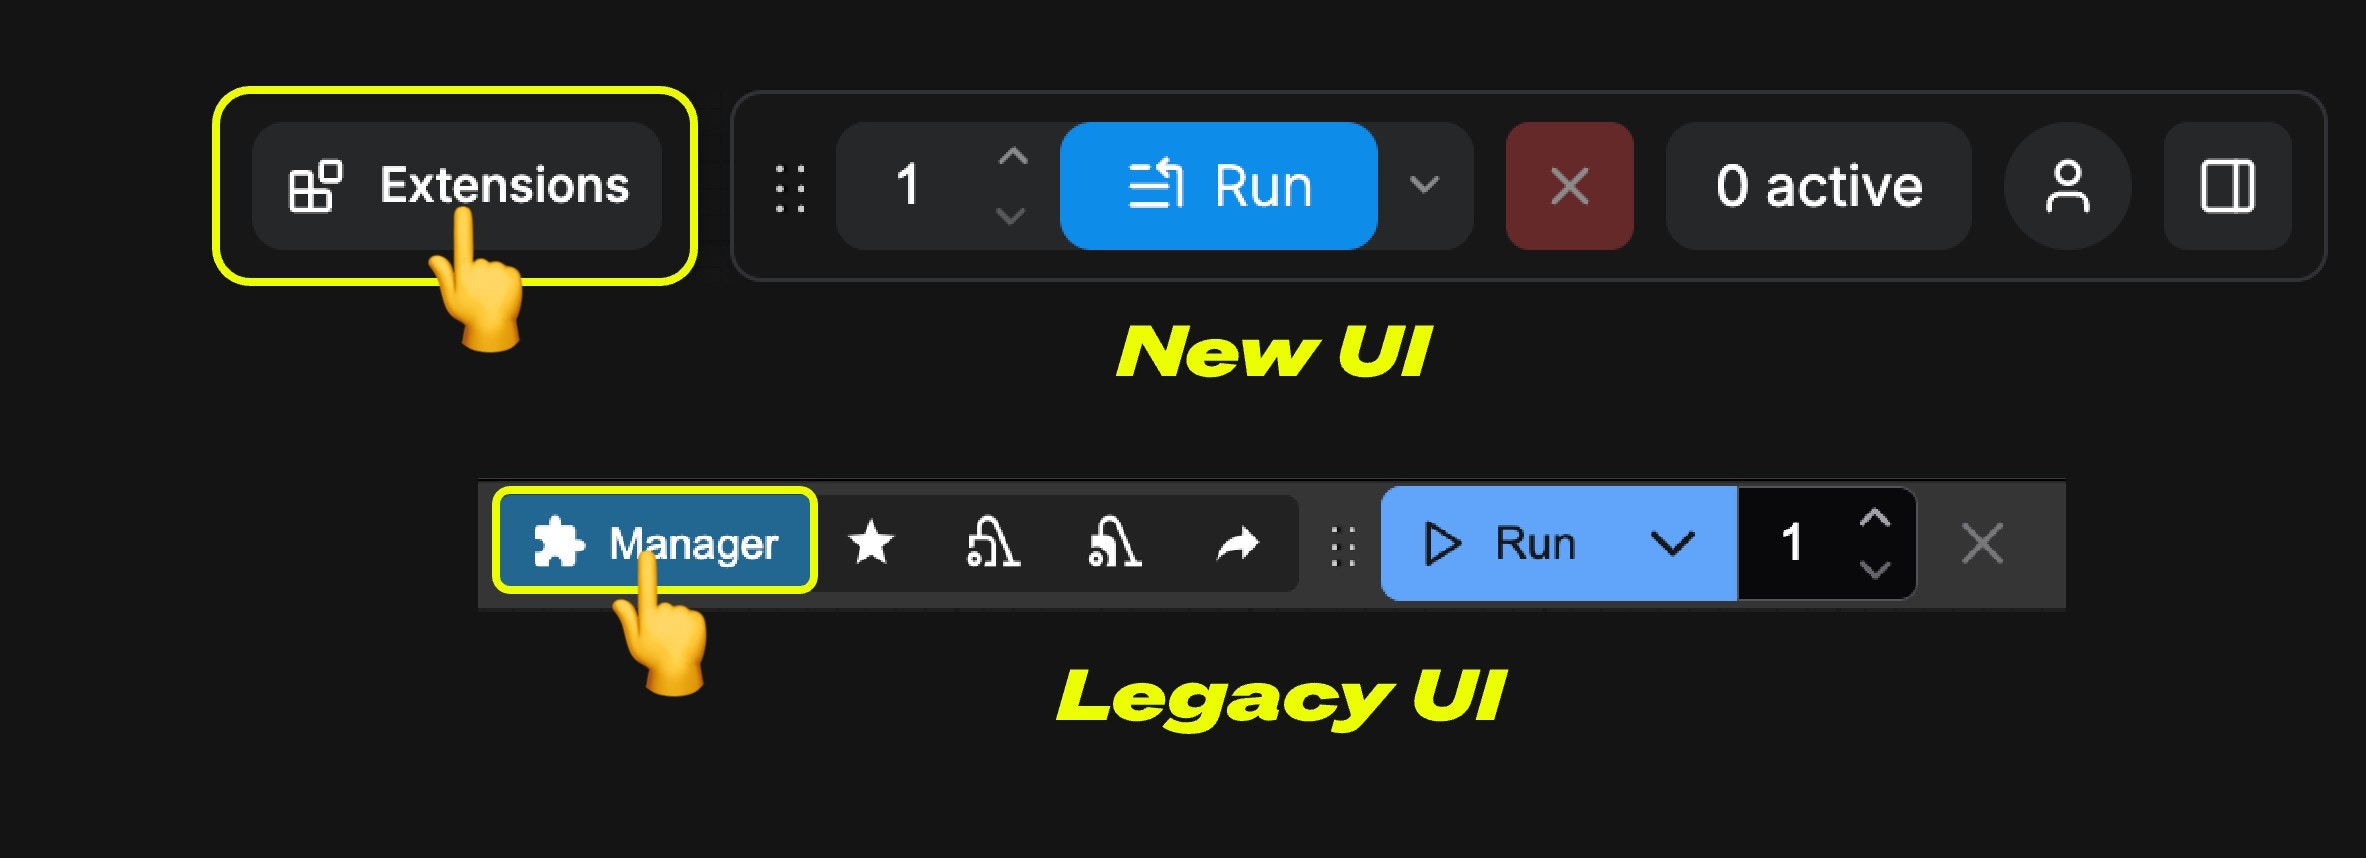
2
Select Install Nodes
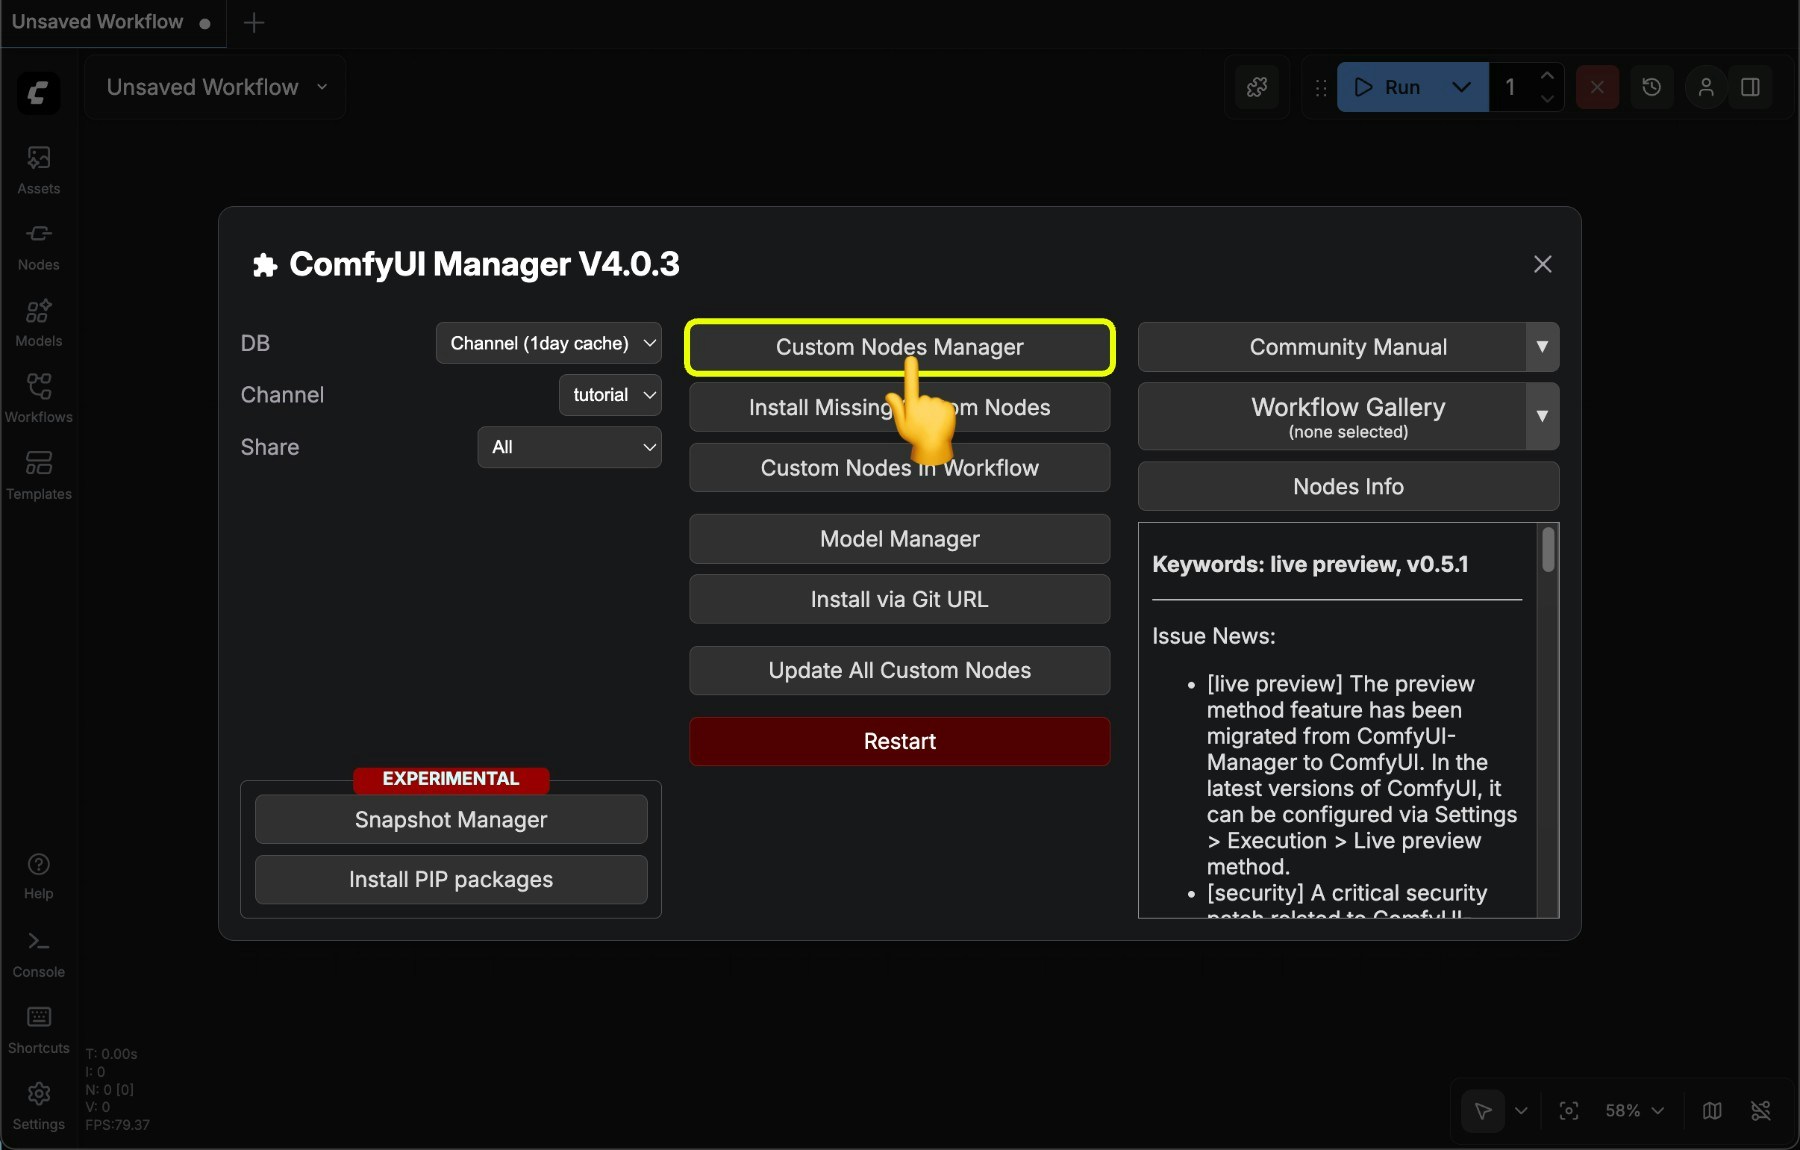
3
Browse or search for the node you want to install
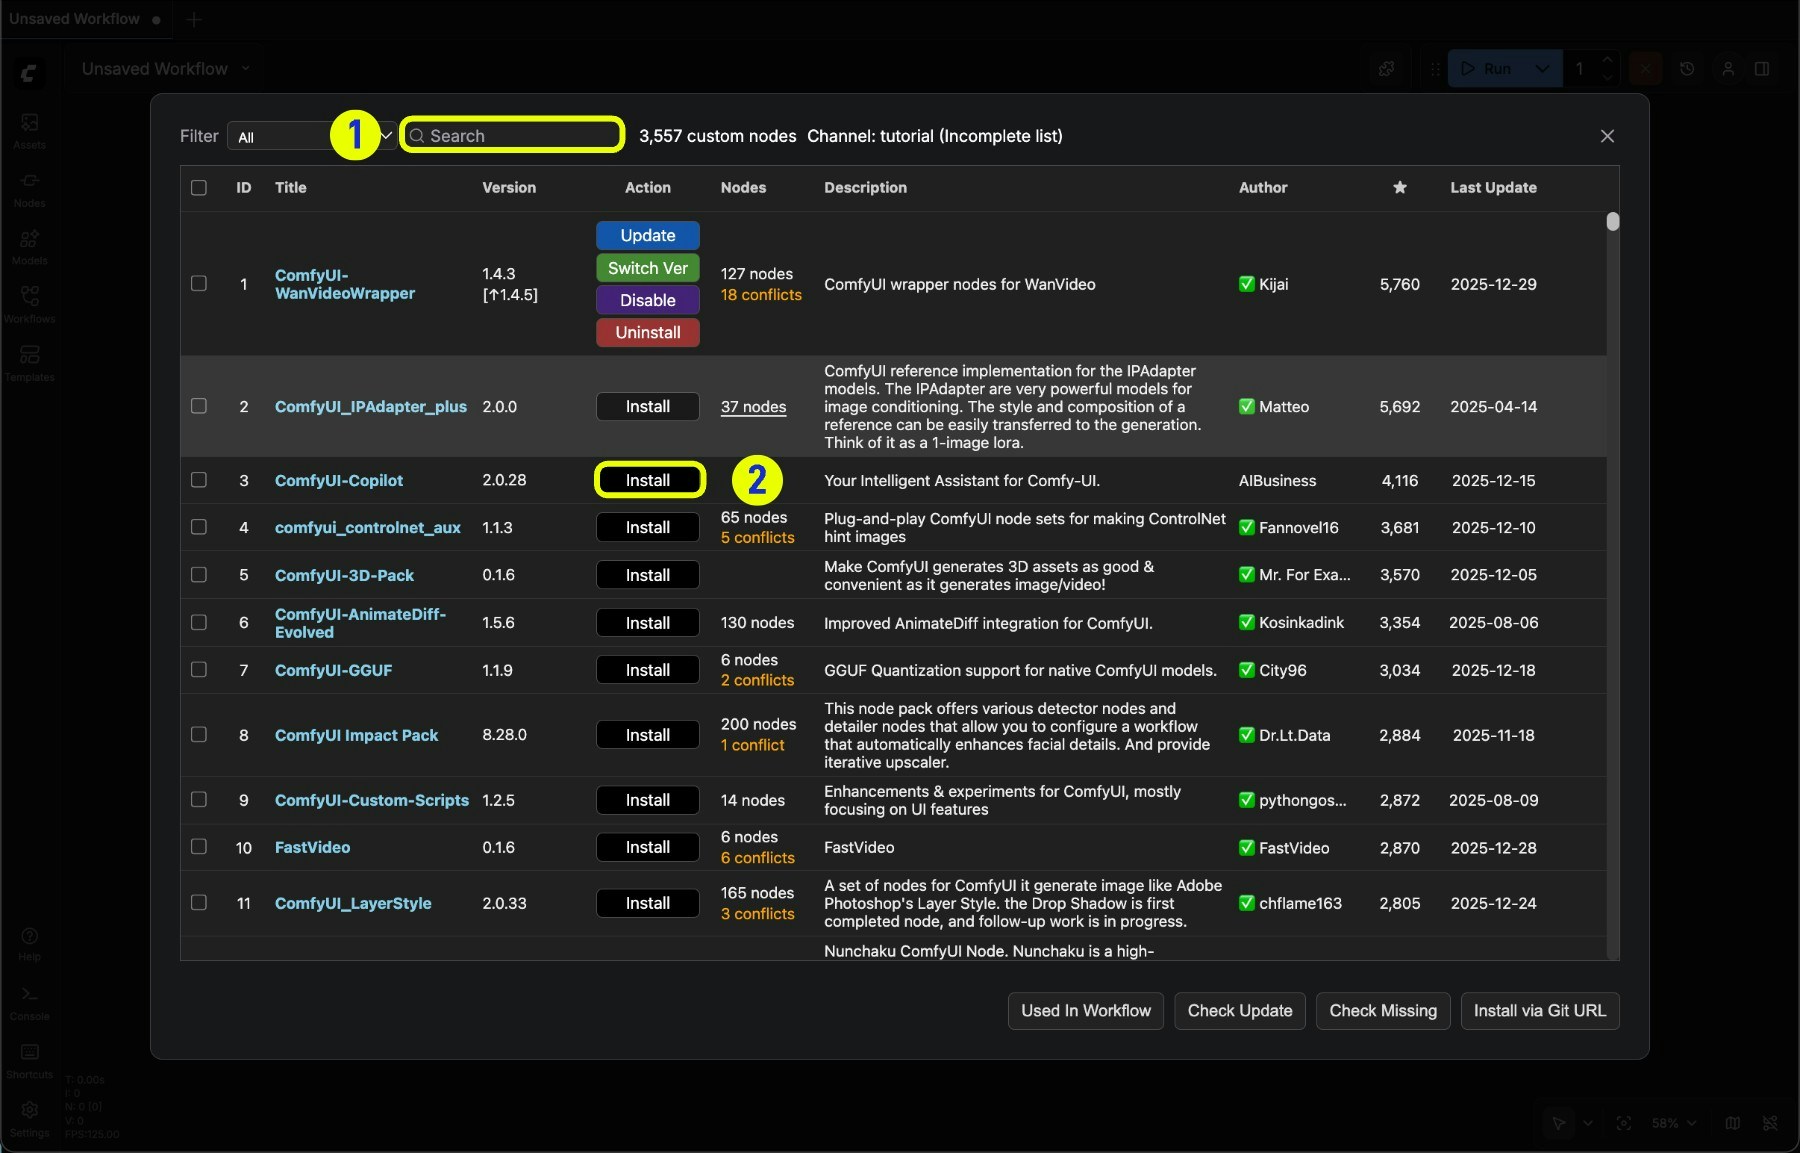
4
Click **Install** to install the node
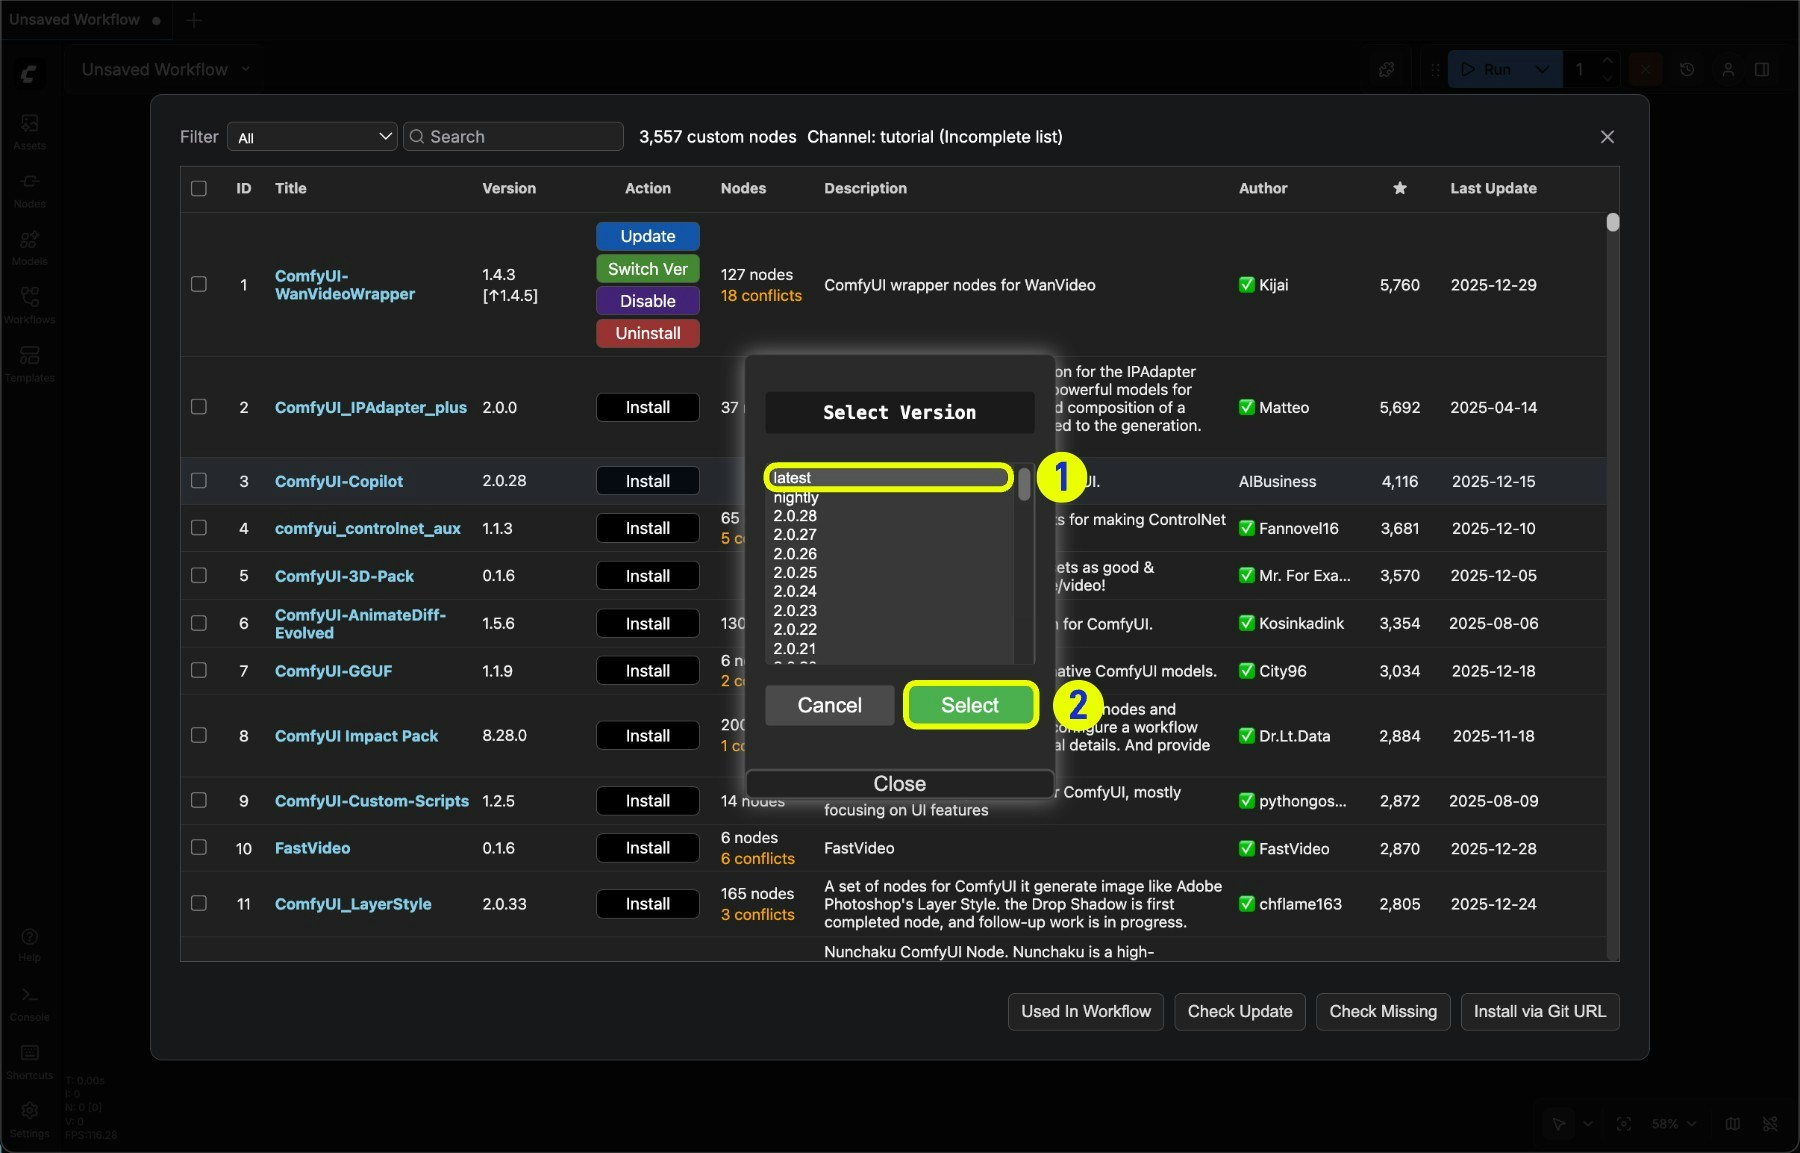
- Prefer latest version if available
- Click Select to install the node
- Version numbers with digits are versions published by authors to registry, equivalent to stable releases
- nightly is the latest version updated by authors to github, equivalent to development version, usually not security scanned, with unstable factors
5
Wait for dependency installation to complete, then restart ComfyUI
After clicking install, Manager will automatically complete dependency installation and prompt you to restart ComfyUI after installation is complete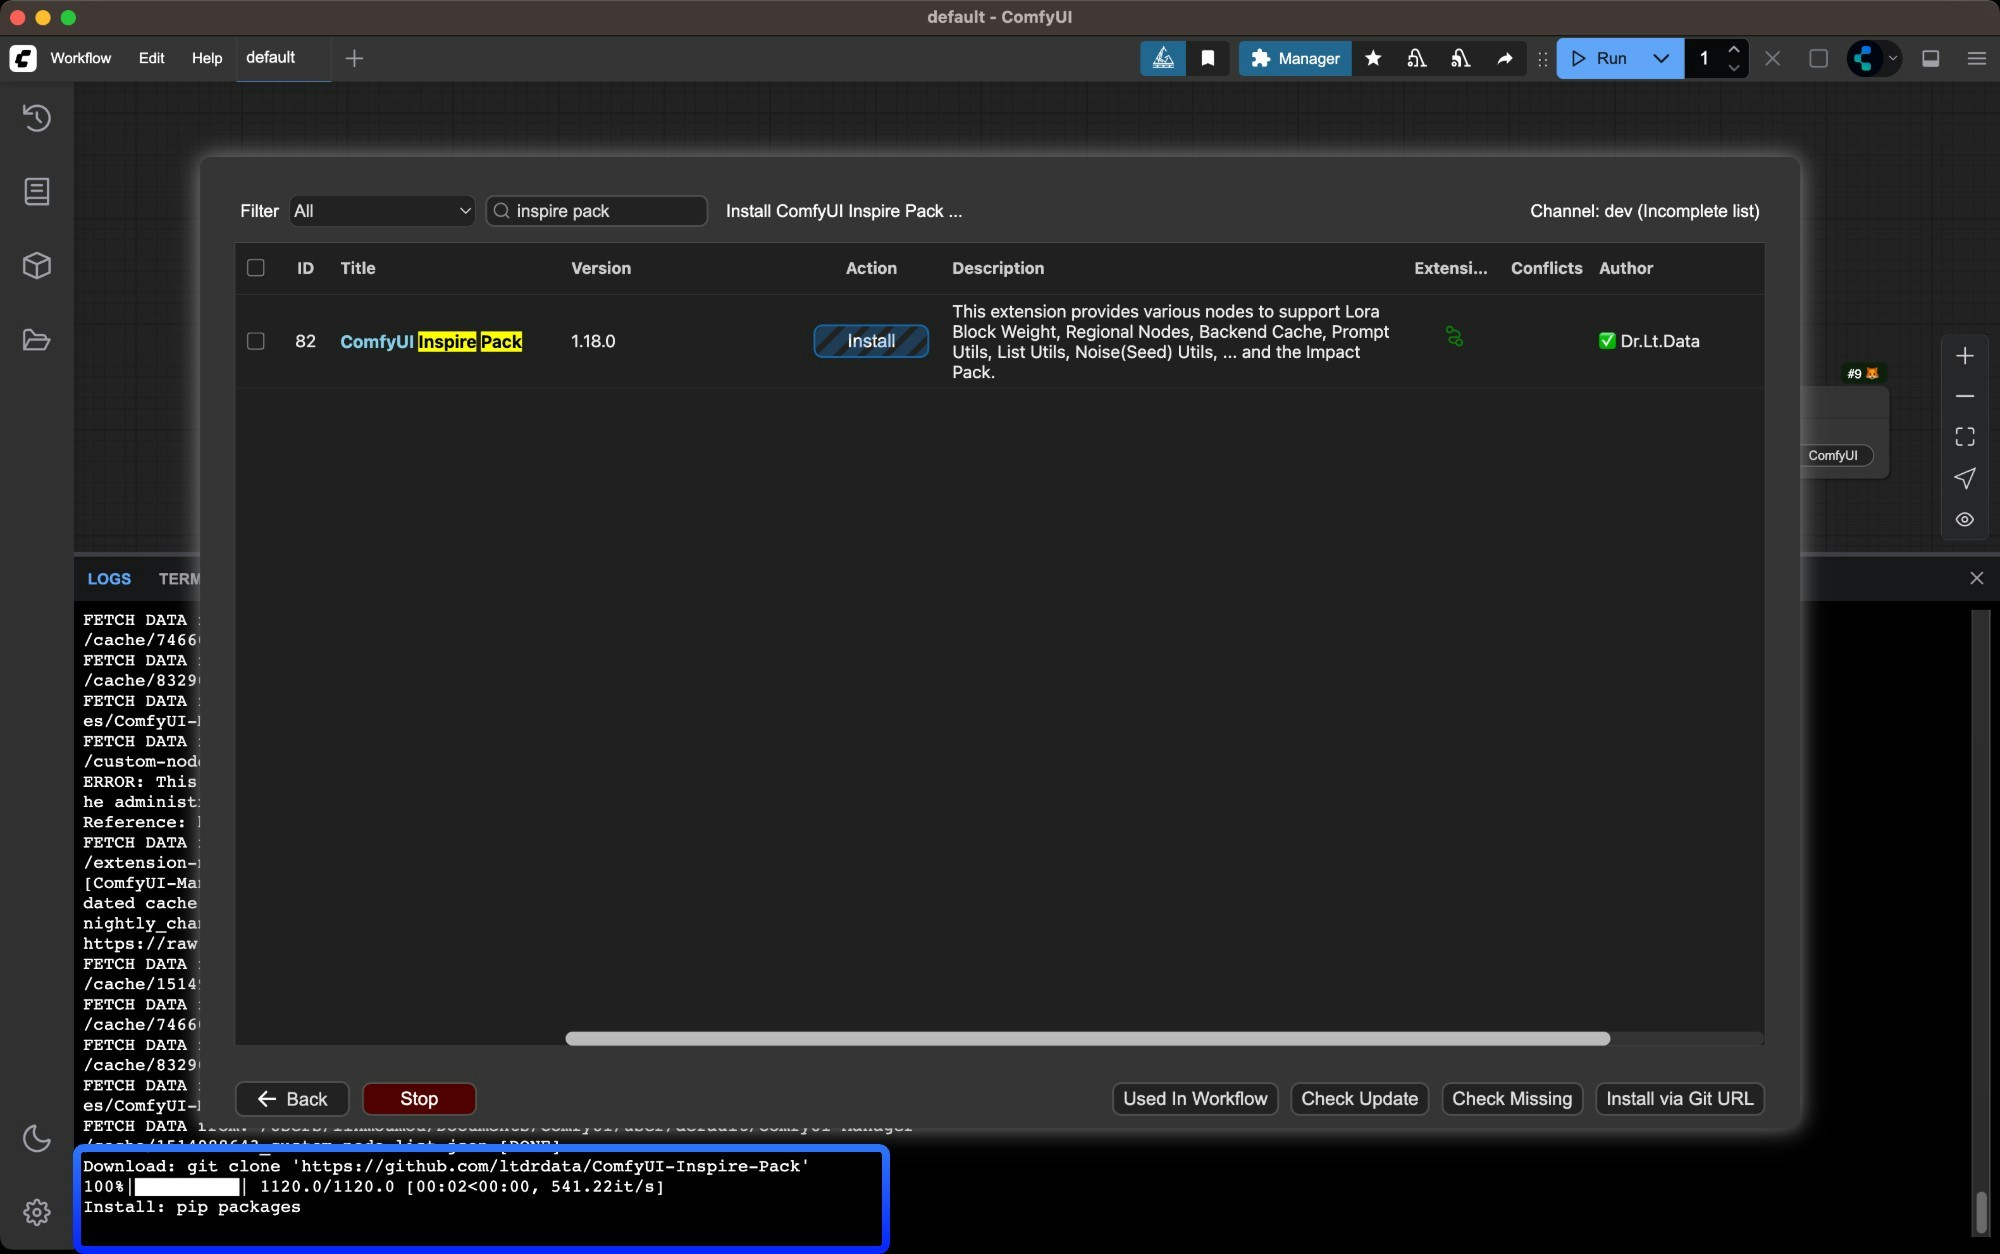
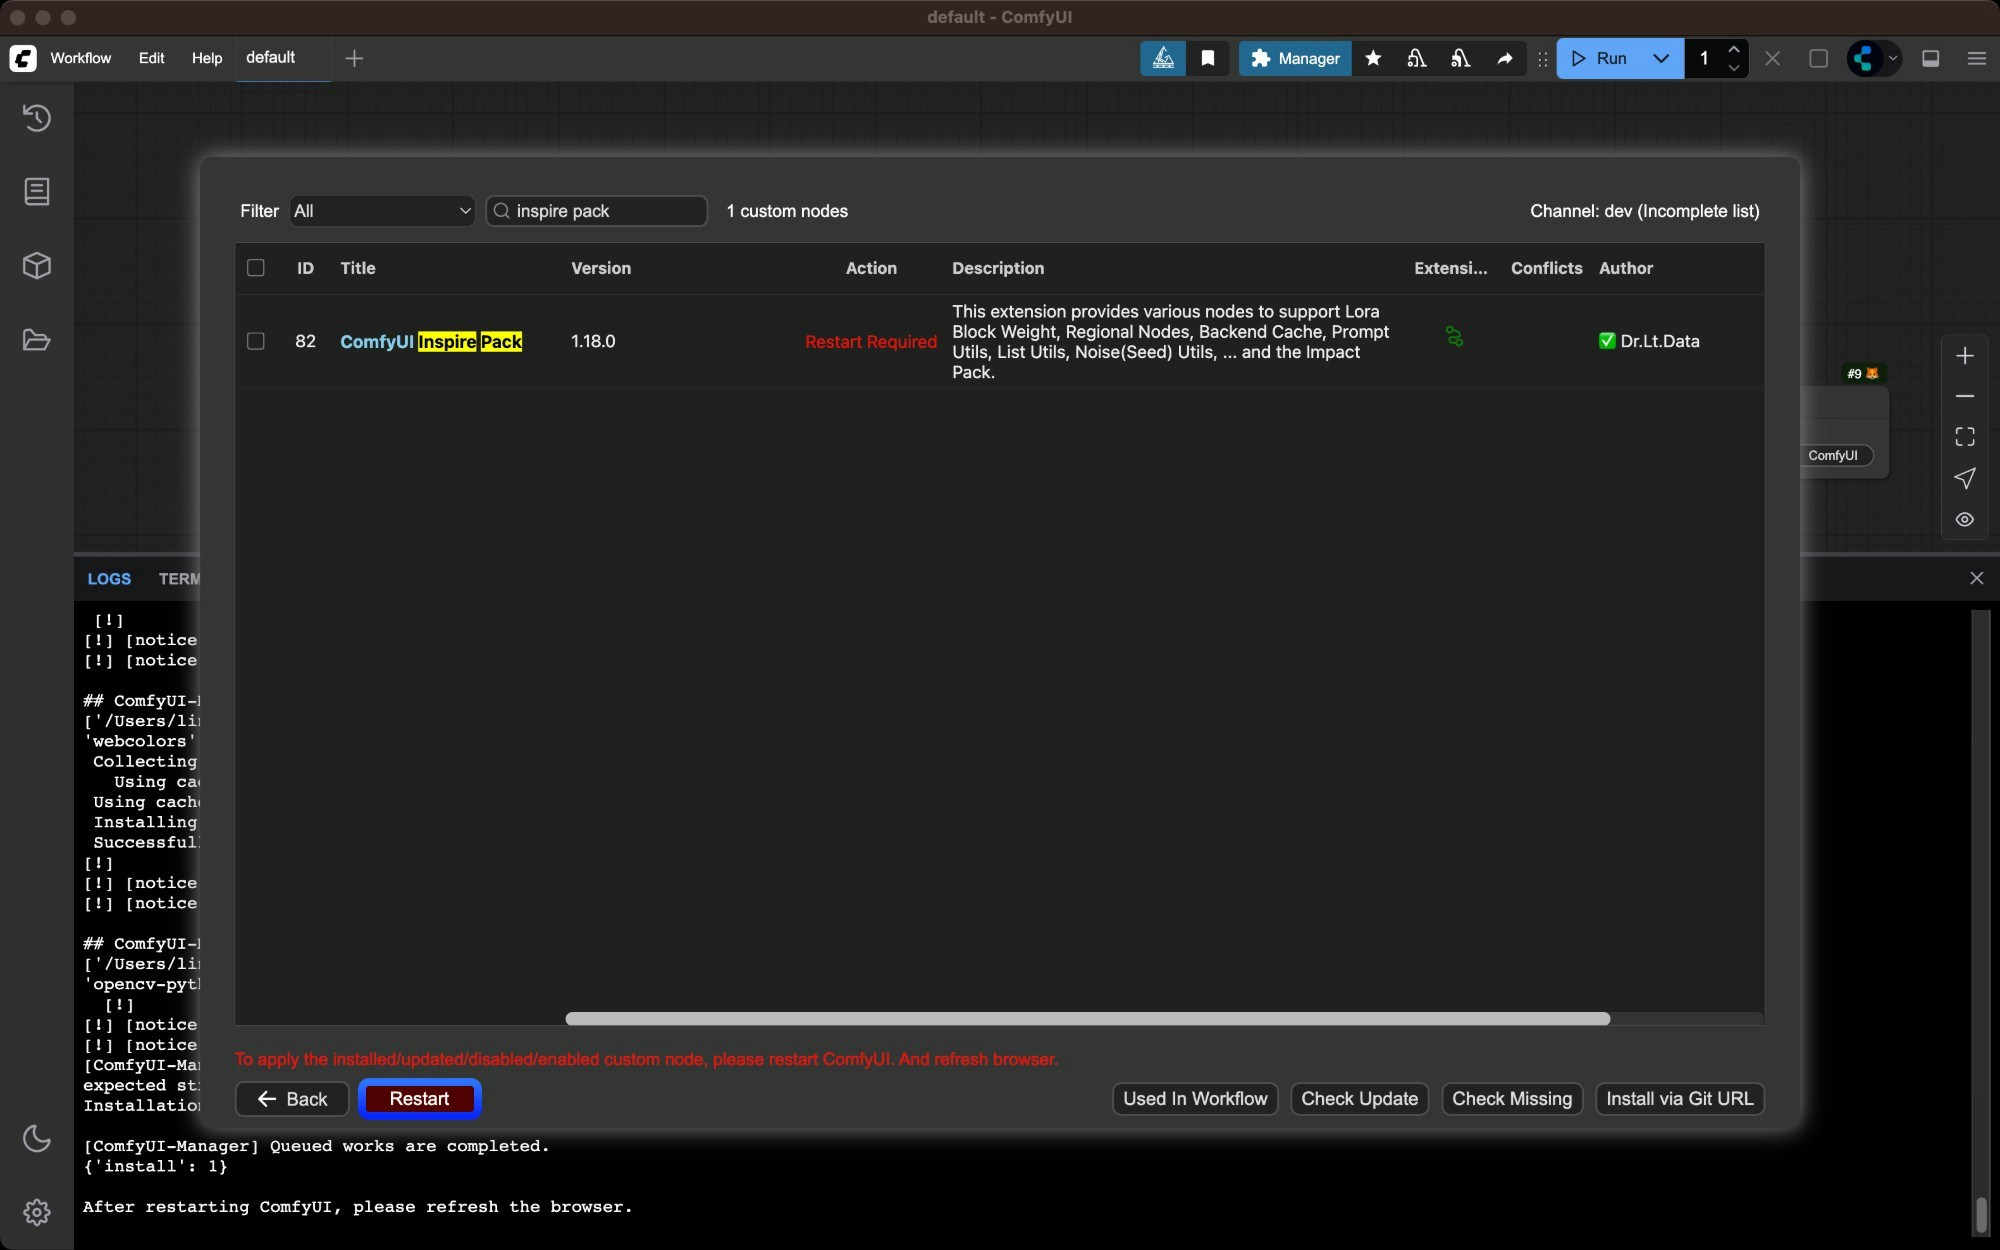
6
Check if the plugin was installed successfully
After restarting, check in ComfyUI Manager whether the corresponding plugin was installed successfully, and whether there are 
import failed error messagesInstall missing nodes
Missing nodes are a common situation when loading workflows. There are usually two types of missing nodes:- Core node missing: ComfyUI version is not the latest version, please refer to Update ComfyUI to update ComfyUI
- Custom node missing: Third-party custom nodes are missing, you can refer to this guide for installation
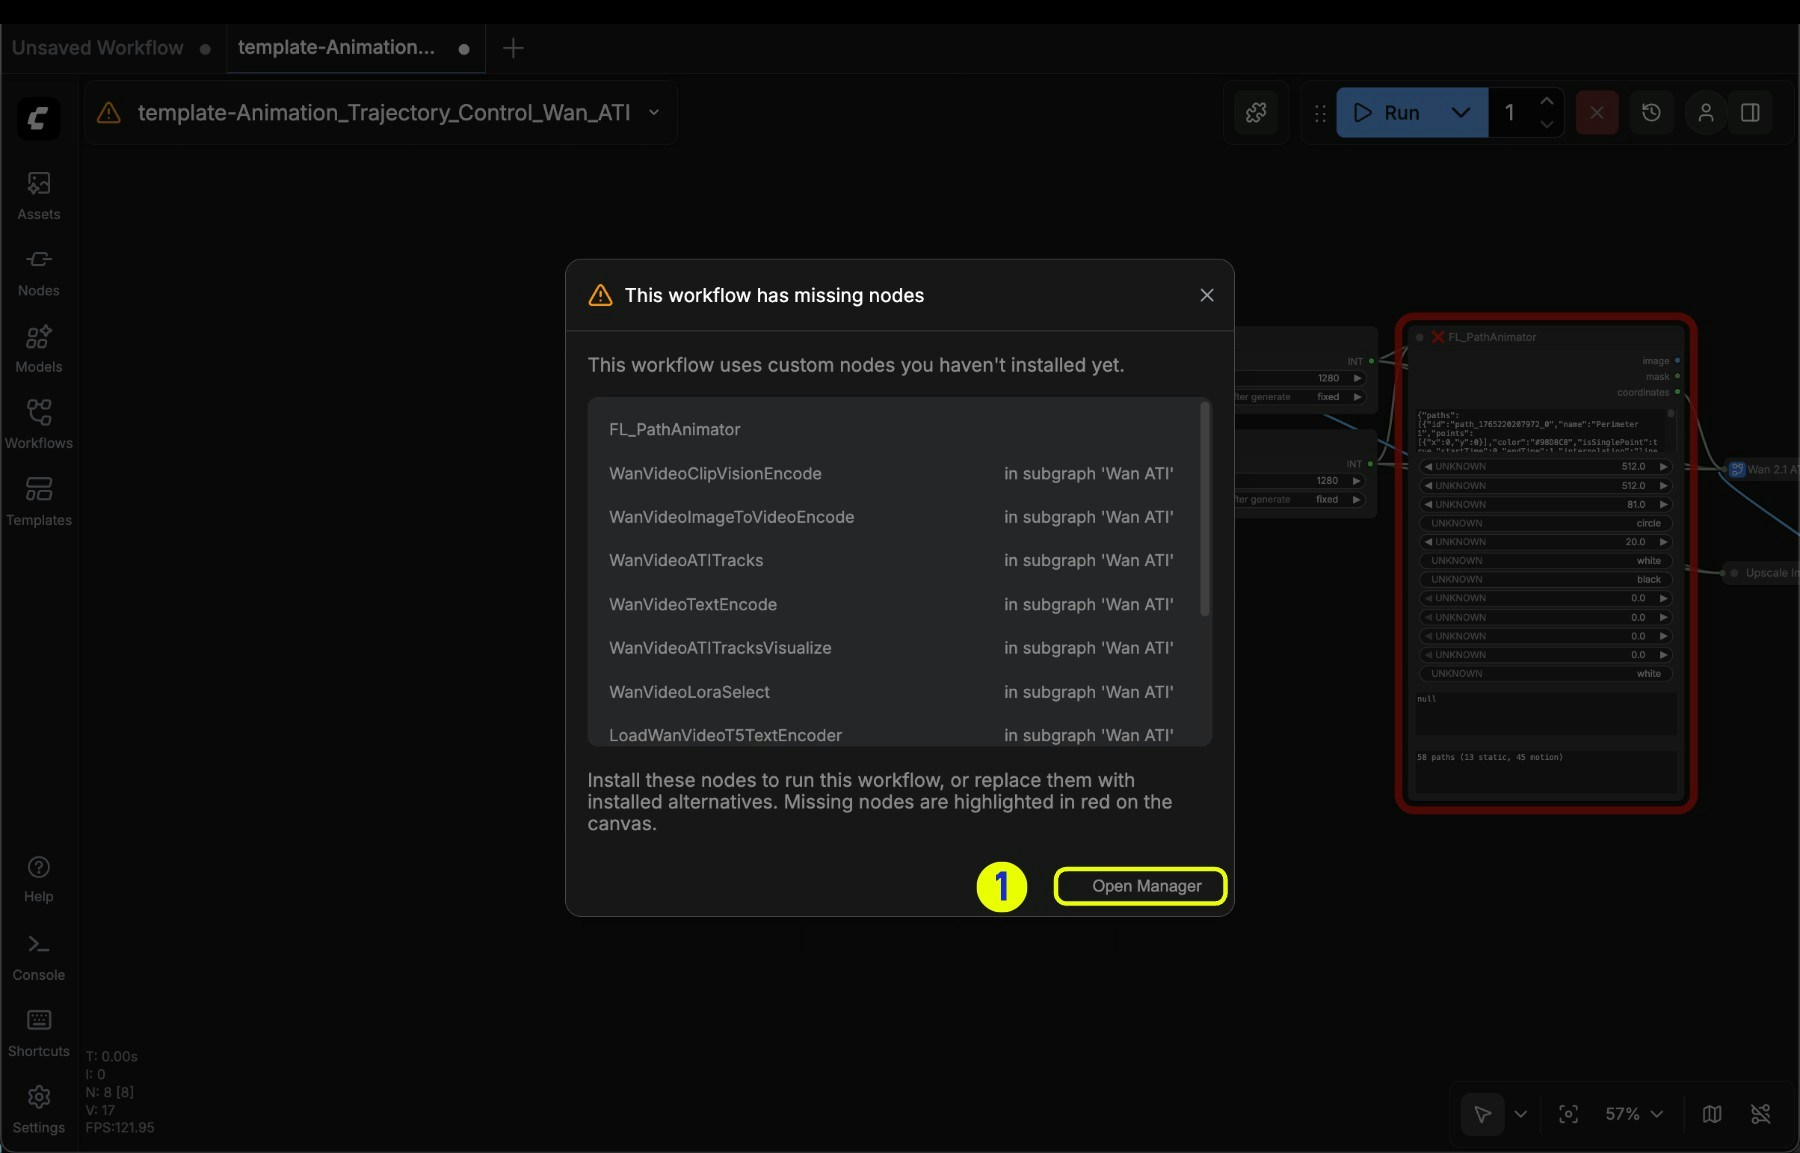
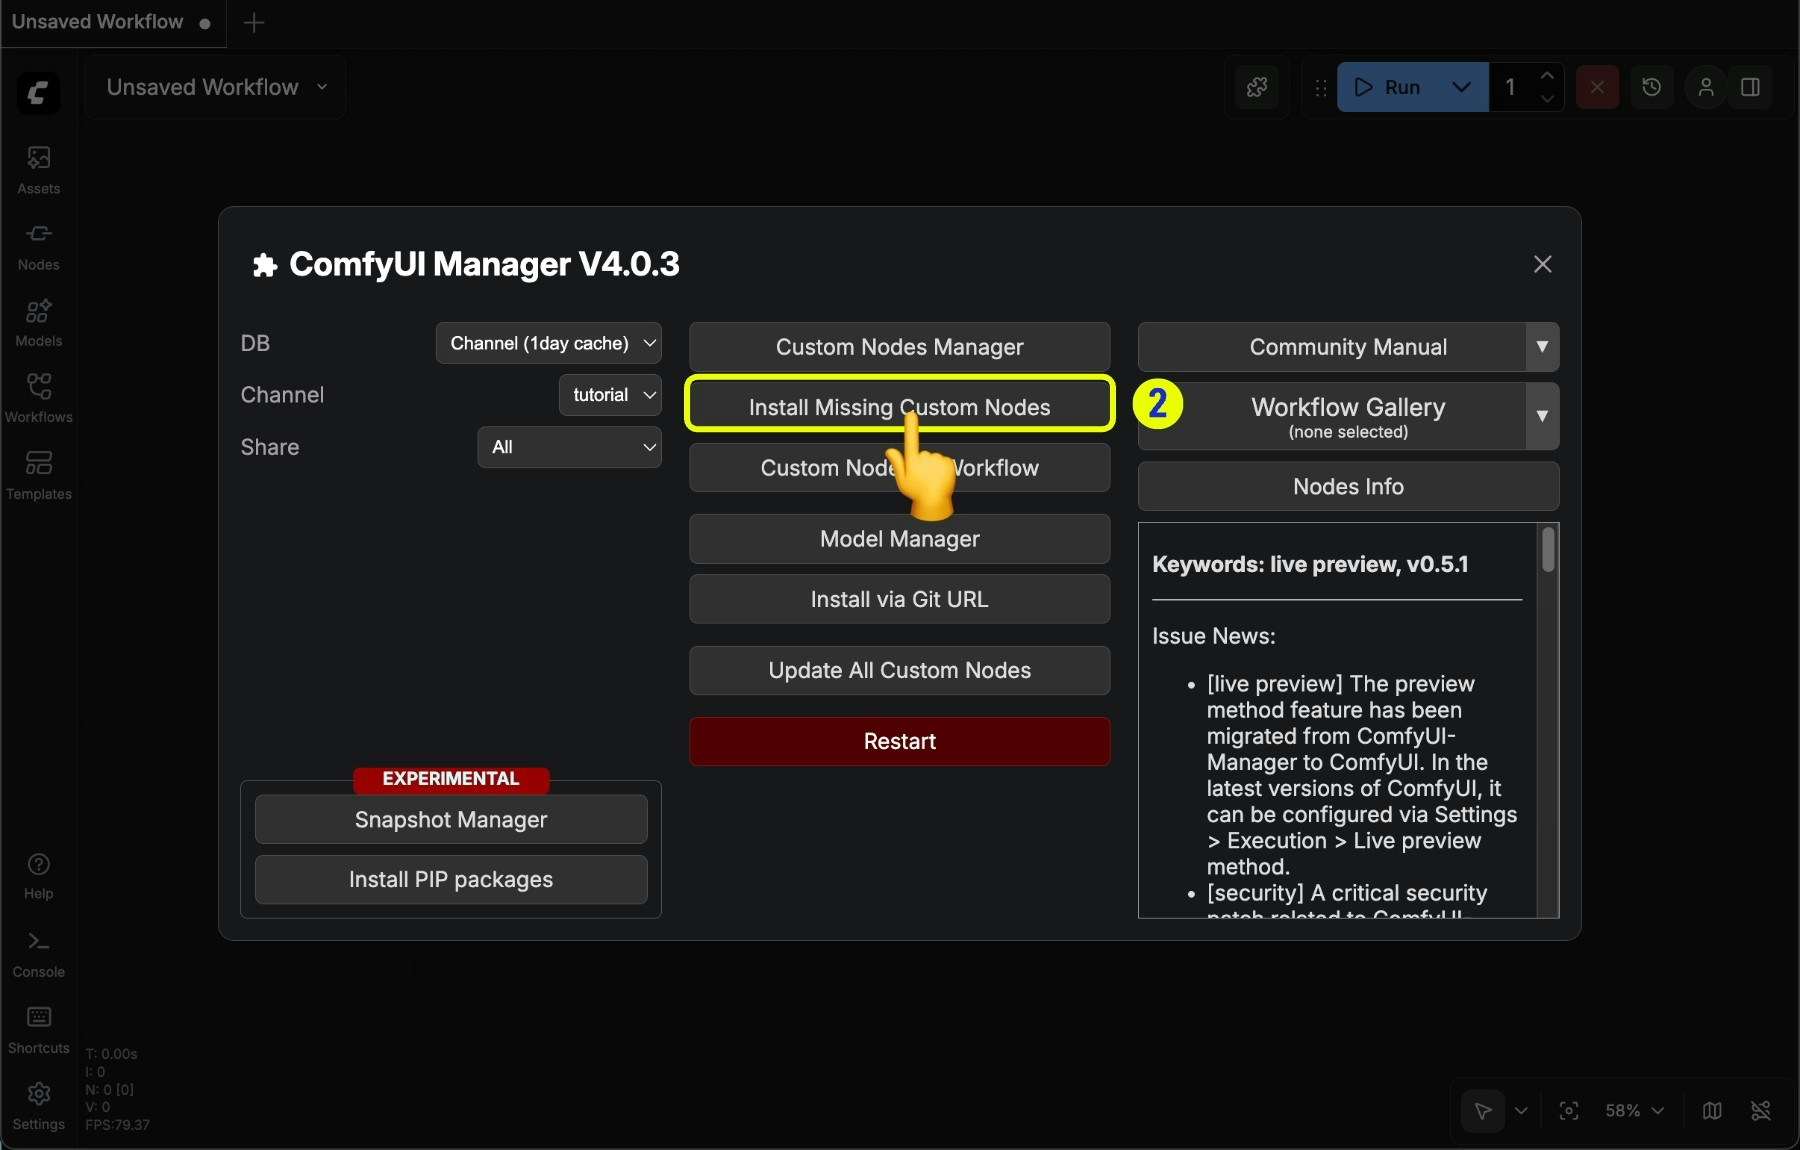
- Click Open Manager to activate the corresponding option
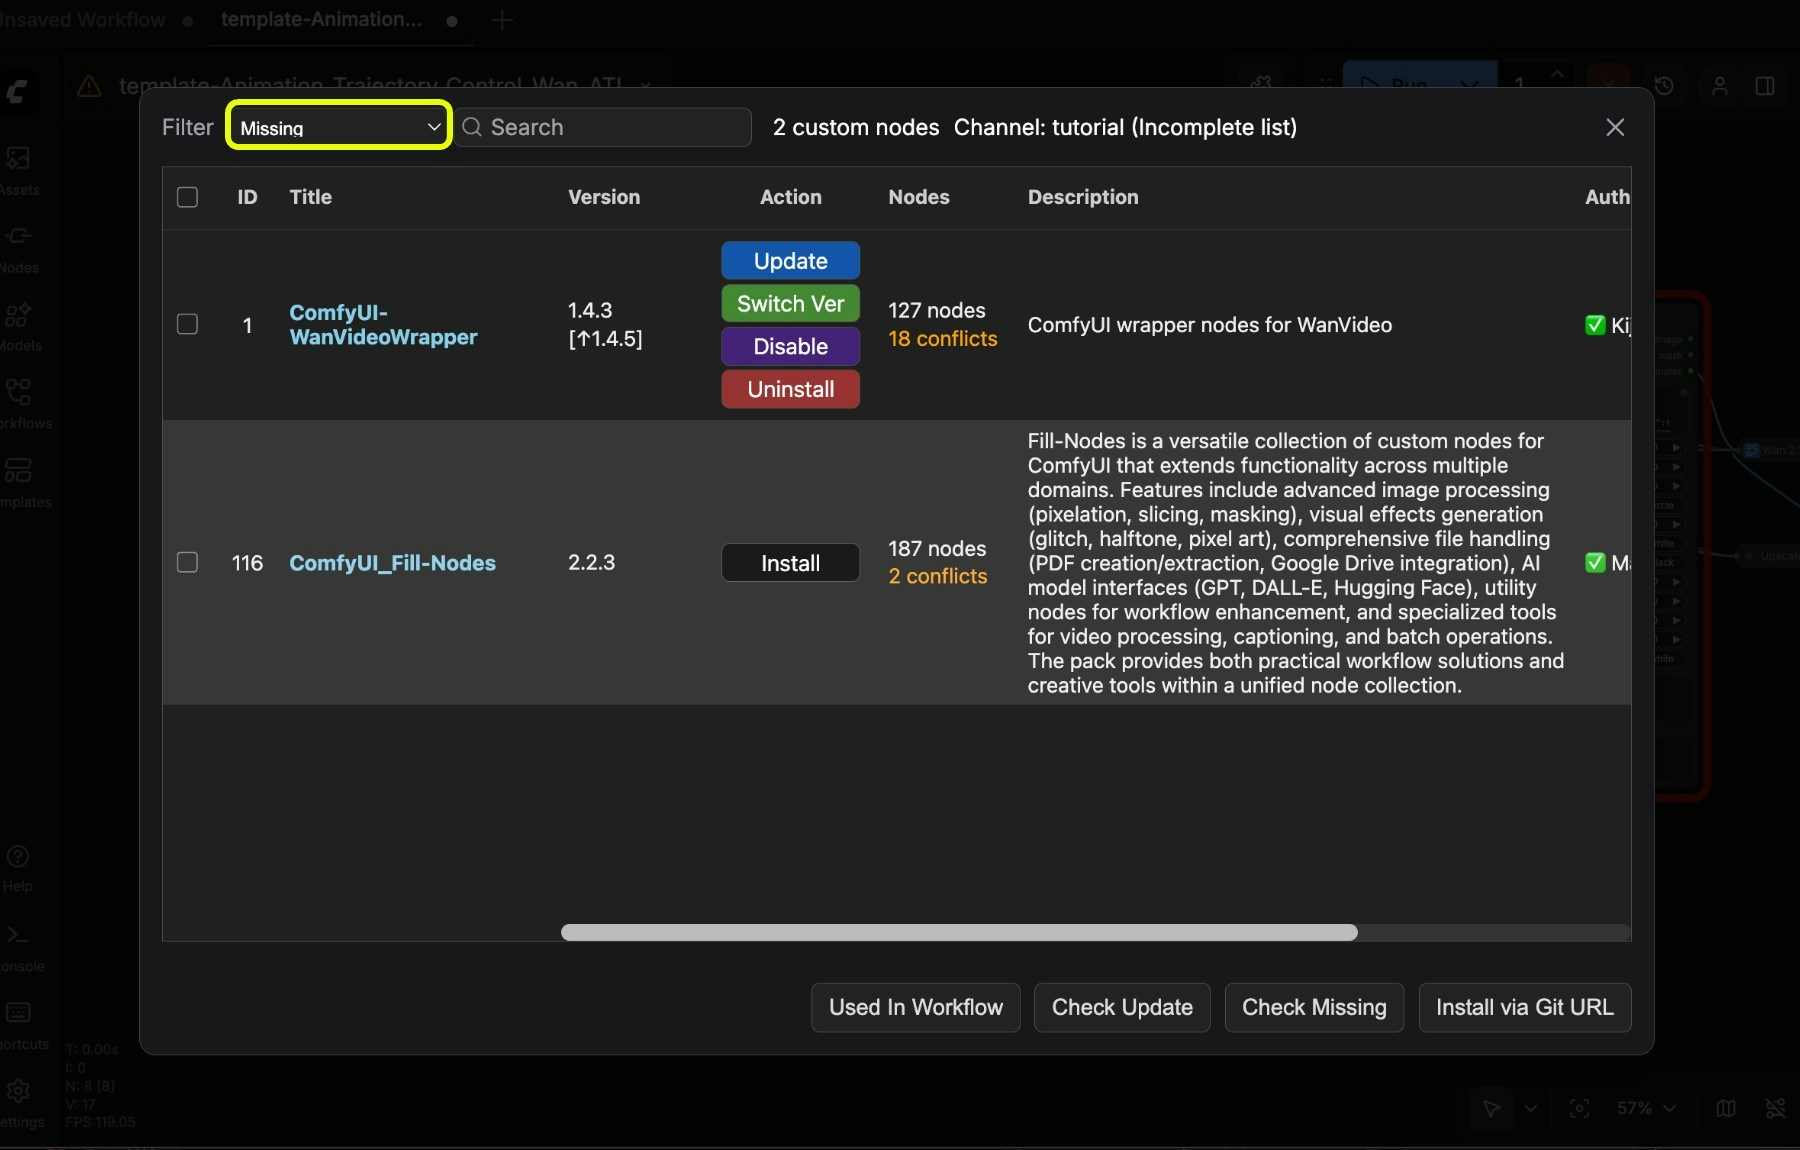
If you find that the missing nodes list cannot find the corresponding node, there are usually several situations:
- The corresponding node author has not submitted and registered the custom node to registry
- The corresponding node is not open source, it may be a restricted node from certain authors or limited platforms
- The original author changed the version and deleted the corresponding node
Update nodes
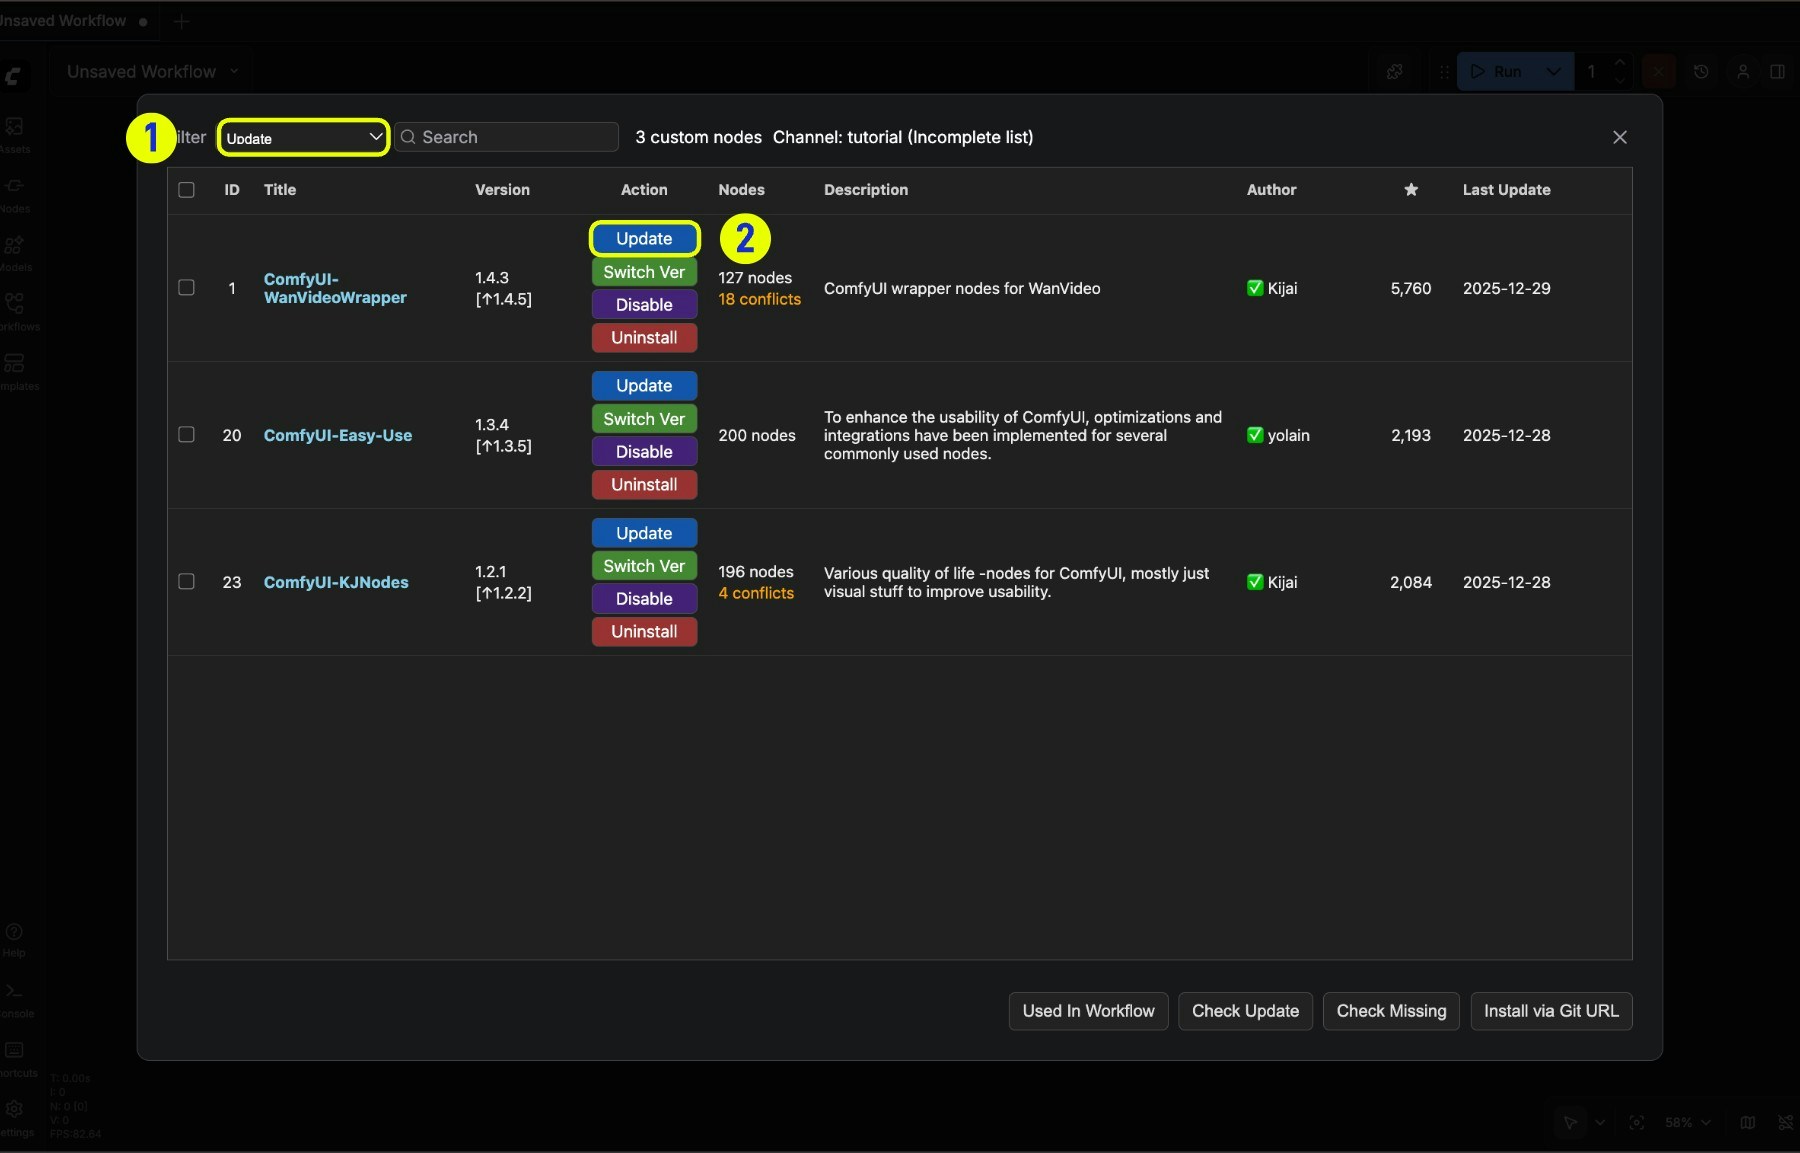
- Switch the filter to Update filter to filter nodes that can be updated in the current node list
- Click the Update button to update the node
Uninstall nodes
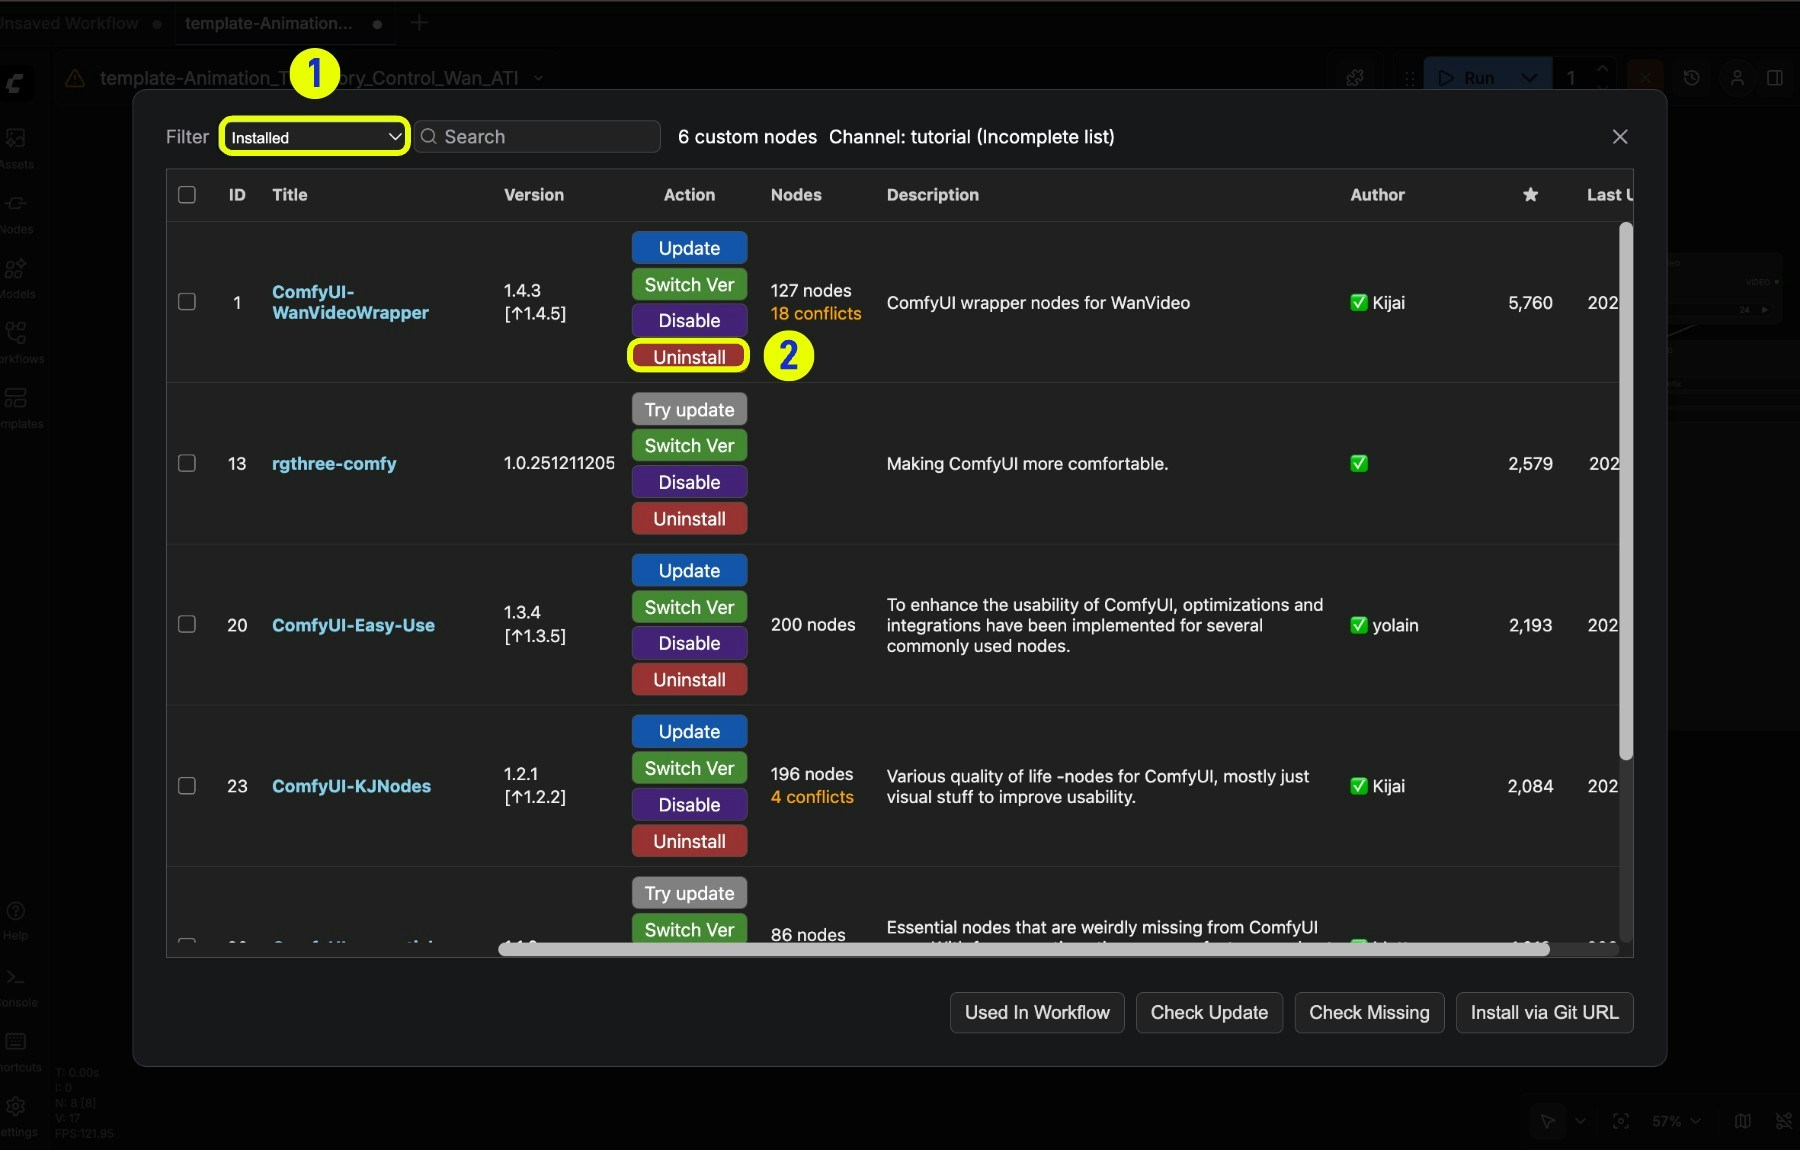
- Select the “Installed” filter in the node list to filter installed nodes in the current node list
- Right-click the corresponding node and select Uninstall to uninstall
Uninstalling the corresponding node will not remove the corresponding dependency installationFor other methods of installing plugins, please refer to the article below
Install custom nodes
Learn how to manually install custom nodes
Snapshot manager
Snapshots save your current installation status, allowing you to restore to a previous state.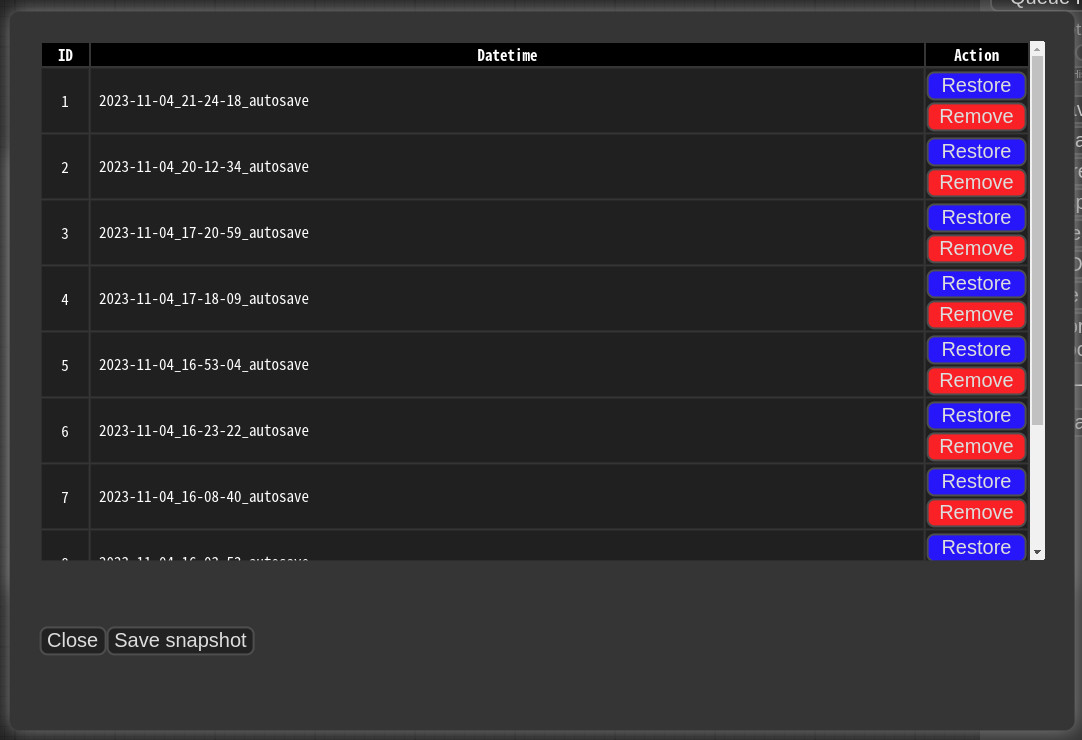 Snapshots are automatically saved when you press Save snapshot or use Update All. Snapshot files are stored in:
 <USER_DIRECTORY>/default/ComfyUI-Manager/snapshots
To restore: Open the Snapshot Manager, select a snapshot, and press Restore.
Restoration takes effect on the next ComfyUI startup. For custom nodes not managed by Git, snapshot support is incomplete.