- Text-to-model
- Image-to-model
- Multi-view model generation
- Rig model
- Retarget rigged model
To use the API nodes, you need to ensure that you are logged in properly and using a permitted network environment. Please refer to the API Nodes Overview section of the documentation to understand the specific requirements for using the API nodes.
- Portable or self deployed users
- Desktop or Cloud users
Make sure your ComfyUI is updated.Workflows in this guide can be found in the Workflow Templates.
If you can’t find them in the template, your ComfyUI may be outdated. (Desktop version’s update will delay sometime)If nodes are missing when loading a workflow, possible reasons:
- You are not using the latest ComfyUI version (Nightly version)
- Some nodes failed to import at startup
Text-to-Model Workflow
1. Workflow File Download
Download the file below and drag it into ComfyUI to load the corresponding workflow.Download Json Format Workflow File
2. Complete the Workflow Execution Step by Step
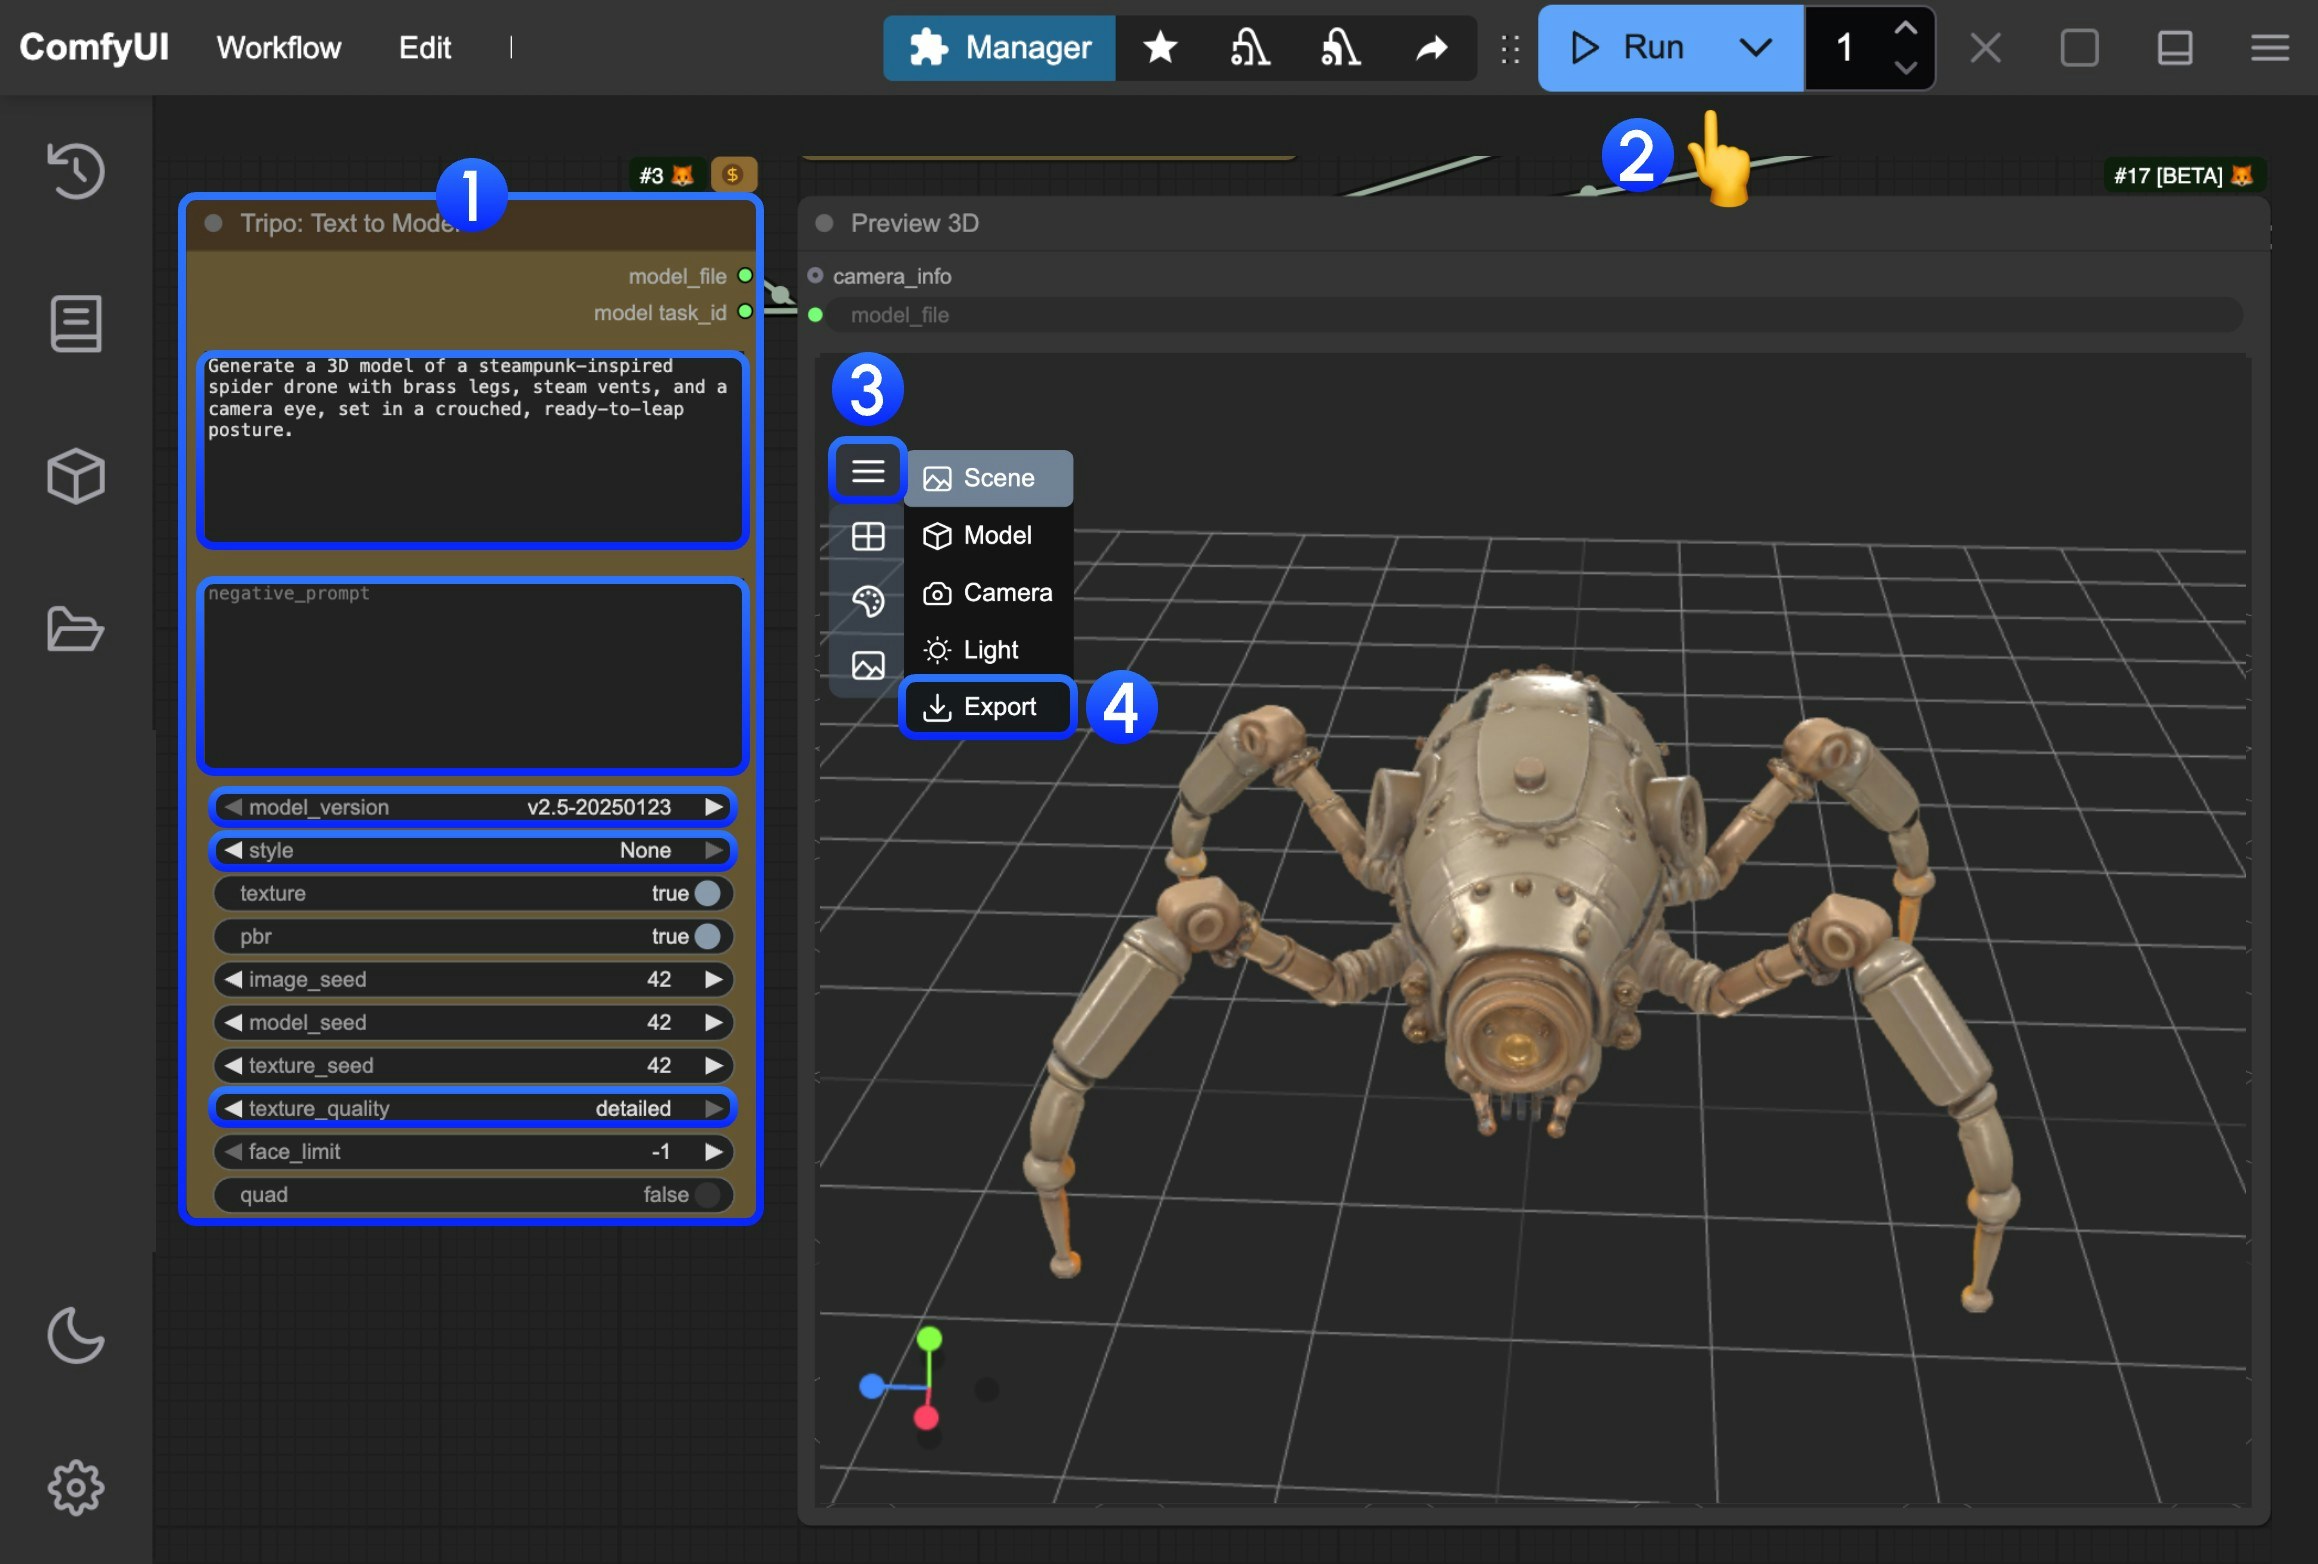
- In the
Tripo: Text to Modelnode, input your prompt in thepromptfield- model: You can select different models, currently only v1.4 model supports subsequent optimization with
Tripo: Refine Draft model - style: You can set different styles
- texture_quality: You can set different texture qualities
- model: You can select different models, currently only v1.4 model supports subsequent optimization with
- Click the
Runbutton, or use the shortcutCtrl(cmd) + Enterto execute model generation. After the workflow completes, the corresponding model will be automatically saved to theComfyUI/output/directory - In the
Preview 3Dnode, click to expand the menu - Select
Exportto directly export the corresponding model
Image-to-Model Workflow
1. Workflow File Download
Download the file below and drag it into ComfyUI to load the corresponding workflow.Download Json Format Workflow File
Download the image below as input image
2. Complete the Workflow Execution Step by Step
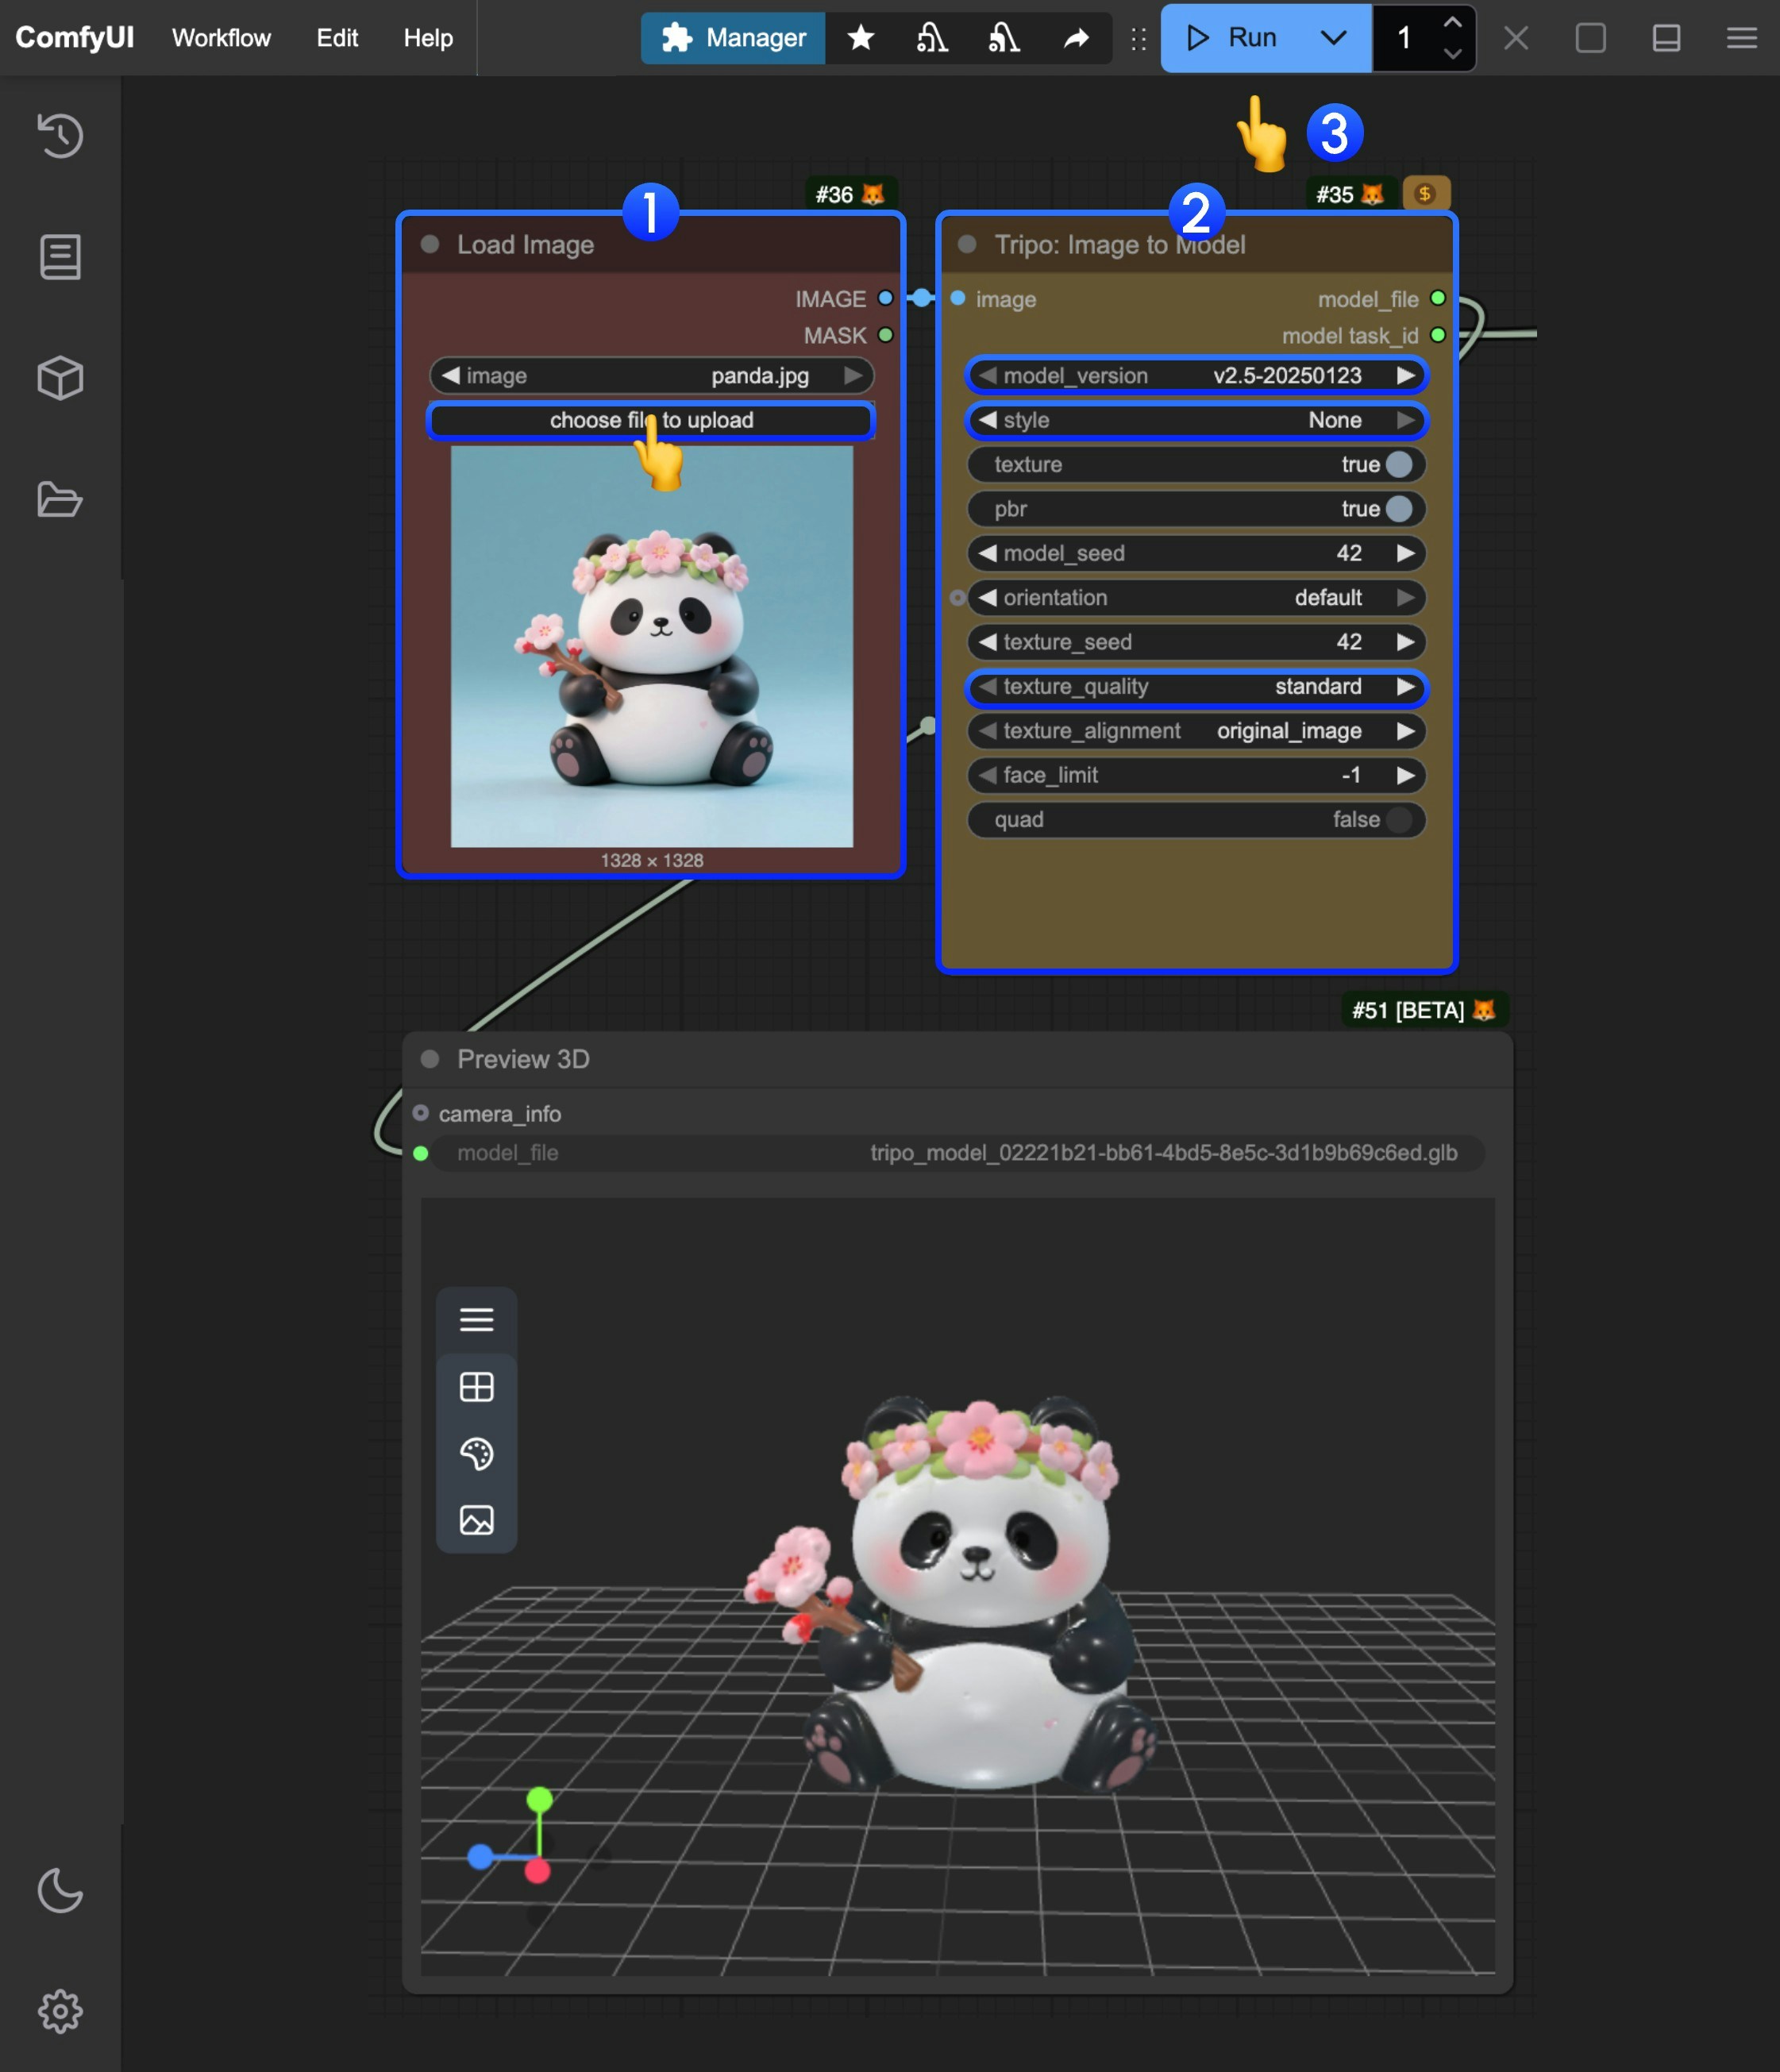
- In the
Load Imagenode, load the provided input image - In the
Tripo: Image to Modelnode, modify the corresponding parameter settings- model: You can select different models, currently only v1.4 model supports subsequent optimization with
Tripo: Refine Draft model - style: You can set different styles
- texture_quality: You can set different texture qualities
- model: You can select different models, currently only v1.4 model supports subsequent optimization with
- Click the
Runbutton, or use the shortcutCtrl(cmd) + Enterto execute model generation. After the workflow completes, the corresponding model will be automatically saved to theComfyUI/output/directory - For model download, please refer to the instructions in the text-to-model section
Multi-view Model Generation Workflow
1. Workflow File Download
Download the file below and drag it into ComfyUI to load the corresponding workflow.Download Json Format Workflow File
Download the images below as input images

2. Complete the Workflow Execution Step by Step
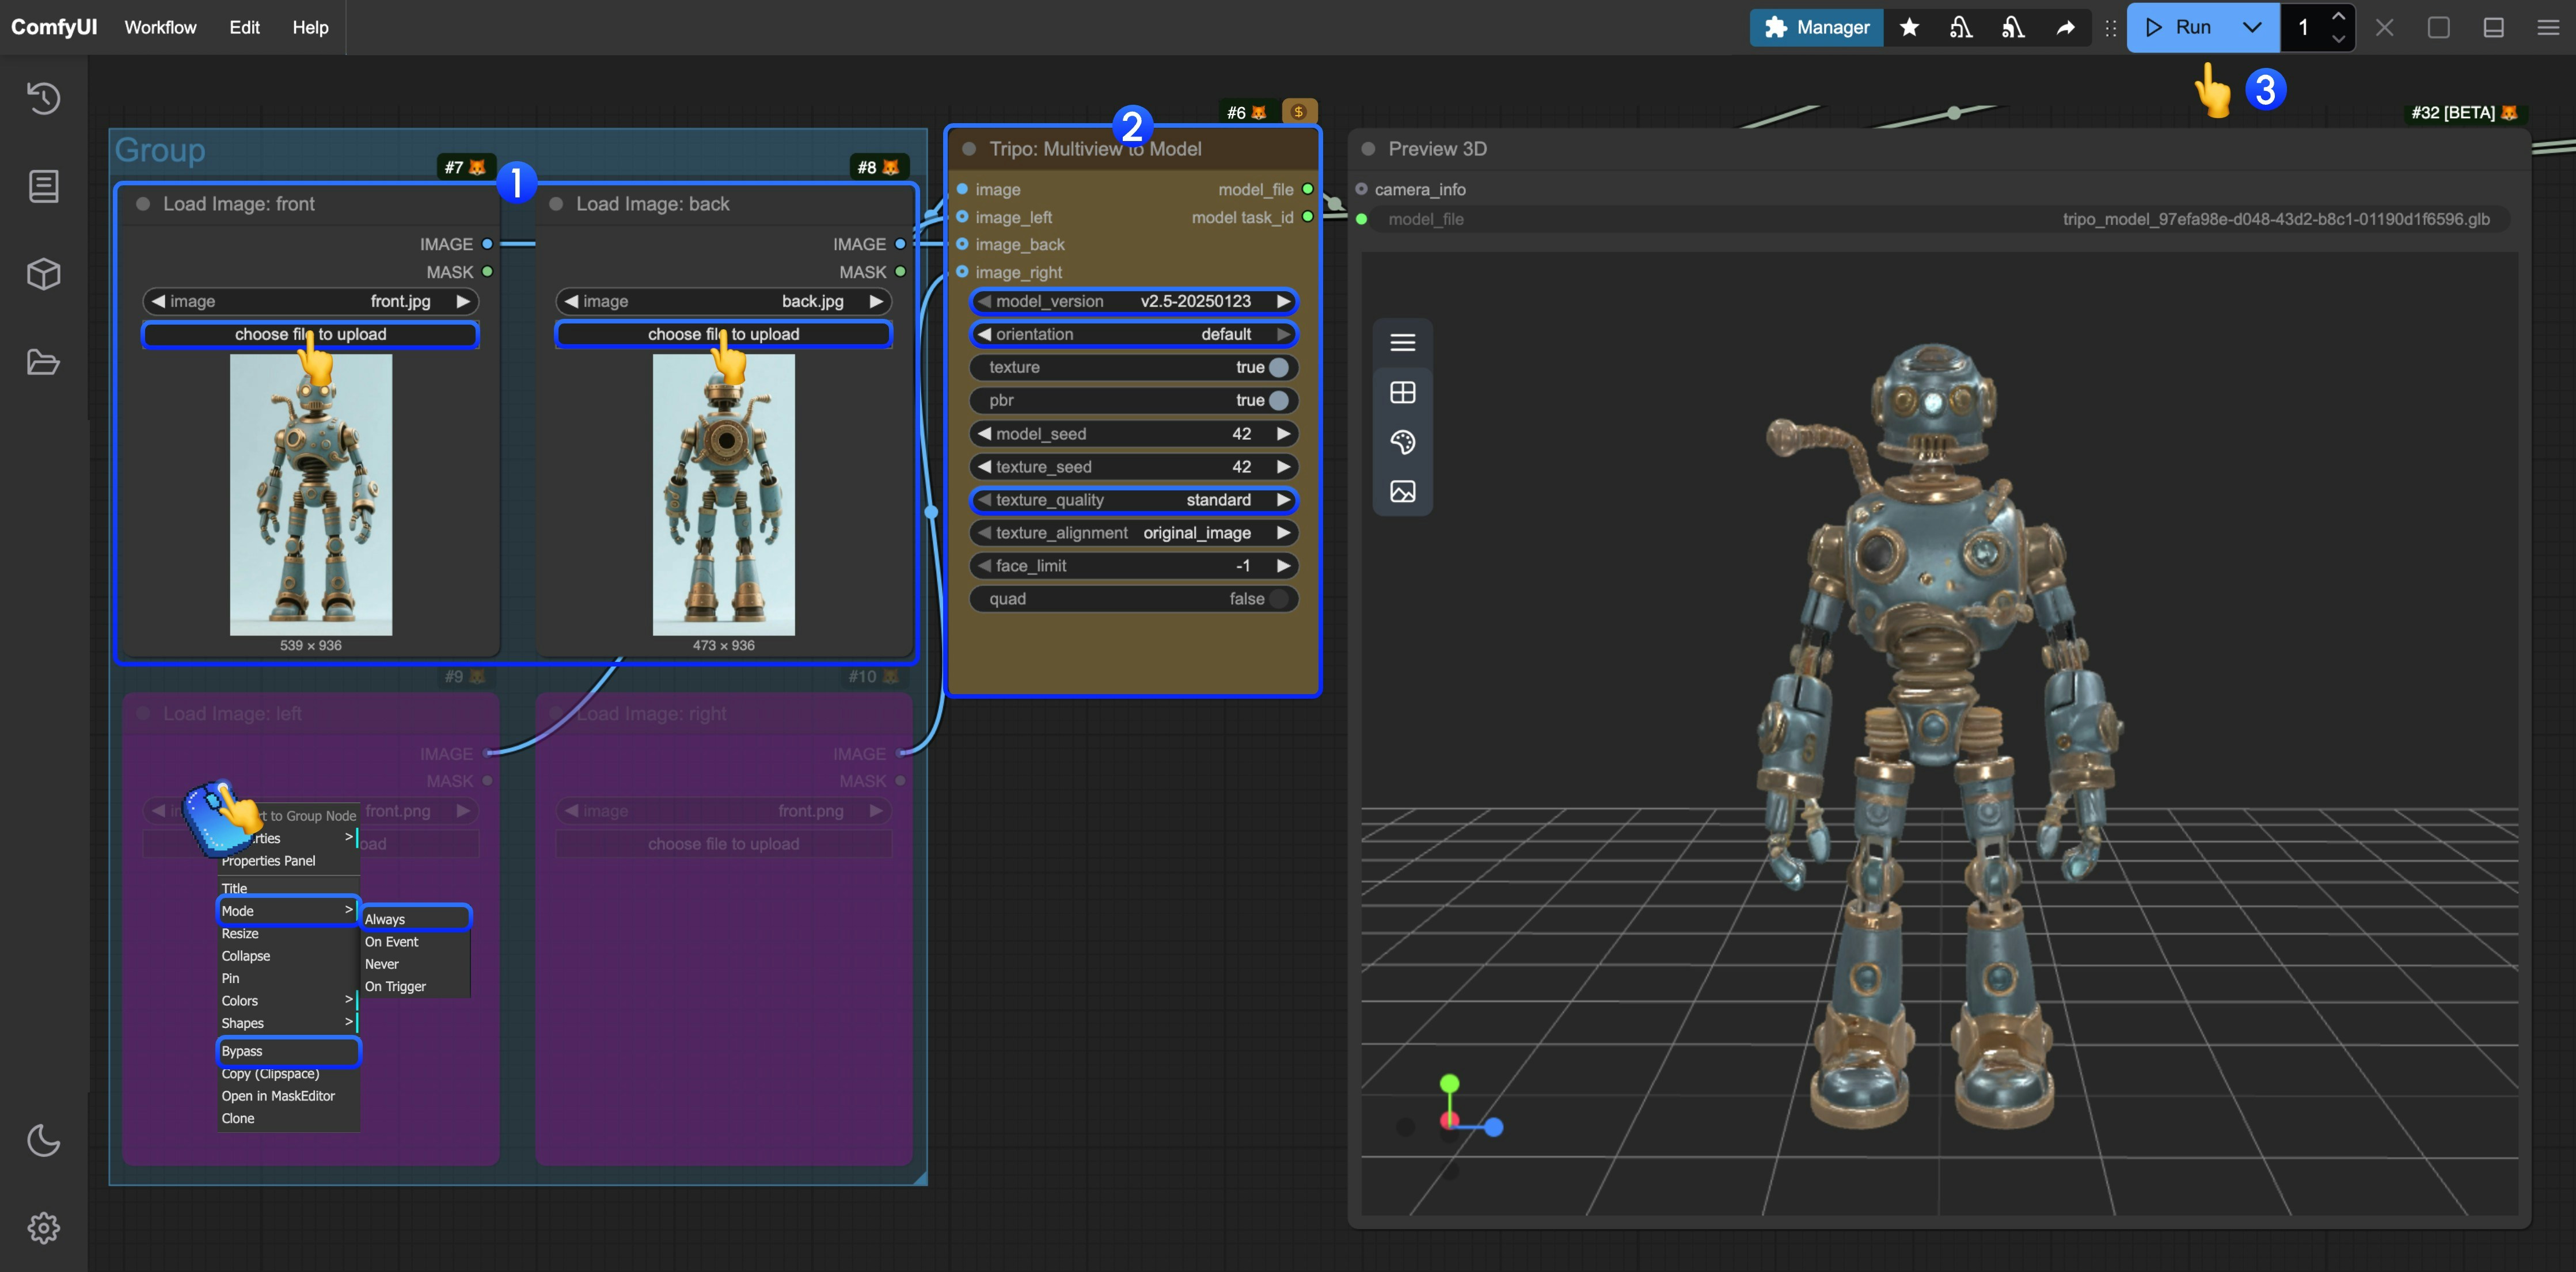
- In the
Load Imagenodes, load the provided input images respectively - In the
Tripo: Image to Modelnode, modify the corresponding parameter settings- model: You can select different models, currently only v1.4 model supports subsequent optimization with
Tripo: Refine Draft model - style: You can set different styles
- texture_quality: You can set different texture qualities
- model: You can select different models, currently only v1.4 model supports subsequent optimization with
- Click the
Runbutton, or use the shortcutCtrl(cmd) + Enterto execute model generation. After the workflow completes, the corresponding model will be automatically saved to theComfyUI/output/directory - For other view inputs, you can refer to the step diagram and set the corresponding node mode to
Alwaysto enable it - For model download, please refer to the instructions in the text-to-model section
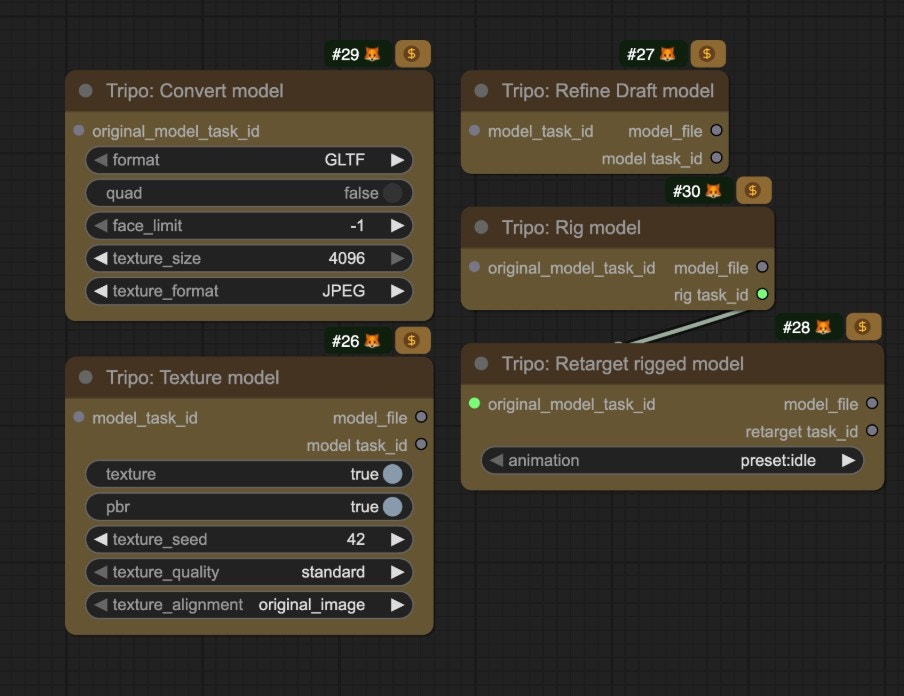
Subsequent Task Processing for the Same Task
Tripo’s corresponding nodes provide subsequent processing for the same task, you only need to input the correspondingmodel_task_id in the relevant nodes, and we have also provided the corresponding nodes in the relevant templates, you can also modify the corresponding node mode as needed to enable it