Access Comfy Cloud
Click here to access ComfyUI Cloud directly
What is Comfy Cloud?
ComfyUI Cloud is the cloud version of ComfyUI with the same features as the local version. Everything is pre-installed and ready to use.Key features
Zero setup
No installation required. All models and custom nodes are pre-installed and ready to use
Powerful GPUs
Run workflows fast on our powerful server GPUs without needing your own hardware
Always up-to-date
Automatically stays current with the latest ComfyUI releases and features
Access anywhere
Use ComfyUI from any device with an internet connection - no local installation needed
Cloud vs local
ComfyUI offers both an official cloud version, Comfy Cloud, and an open-source self-hosted version. If you have a powerful GPU, running ComfyUI locally is a great option. The cloud version, on the other hand, is an online service that’s ready to use instantly—simply open the URL, no installation or setup required.| Category | Comfy Cloud | Self-hosted (local ComfyUI) |
|---|---|---|
| Cost | Monthly Subscription | Free |
| GPU | Powerful Blackwell RTX 6000 Pros | Bring your own GPU |
| Technical Knowledge | No technical knowledge required. | While desktop and portable give you easy ways to get started, you’ll need to troubleshoot custom node installations and local installation issues. |
| Custom Nodes | Use pre-installed custom nodes and never worry about compatibility issues. | Install any custom node you want, but you’ll need to manage it yourself. |
| Models | Use pre-installed models. Import LoRA models from Civitai. Import models from Hugging Face (coming soon). | Use any models you want, but you’ll need to download them first. |
| Notable Differences | Easy to onboard your team | Works offline, infinitely customizable |
| Get started | Run ComfyUI Cloud | Install ComfyUI locally |
Pricing and subscription
Check pricing
View pricing and subscription options for Comfy Cloud
How to use ComfyUI Cloud
Using ComfyUI Cloud is essentially the same as using your local ComfyUI. If this is your first time using ComfyUI, here are some quick tips to get started: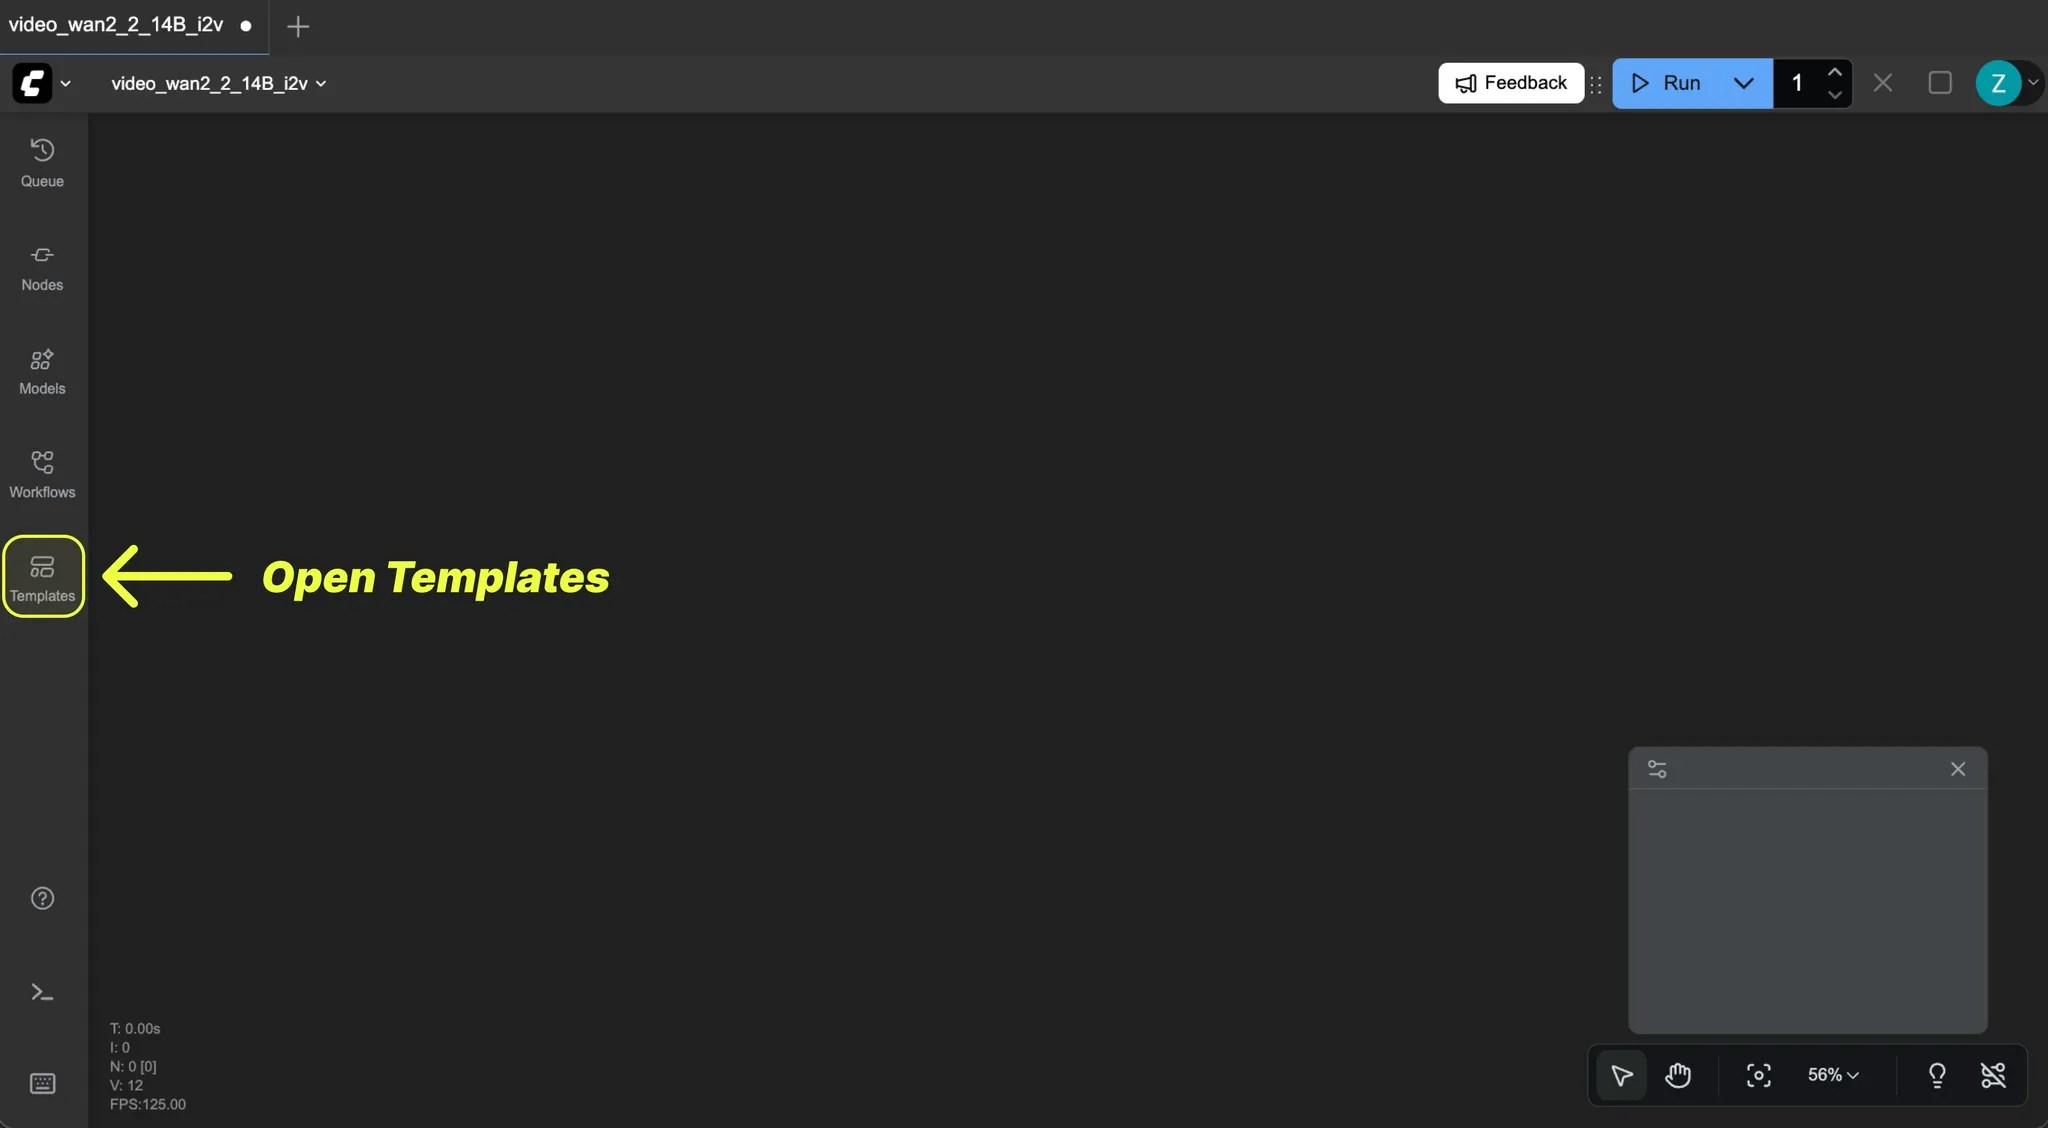

Update template inputs
- In the loaded workflow, since we have pre-installed all models in the cloud version, all templates are ready to run immediately after loading.
- If you need to make updates, you only need to provide image inputs or text prompts. Check the
Load Imagenode orCLIP Text Encodenode.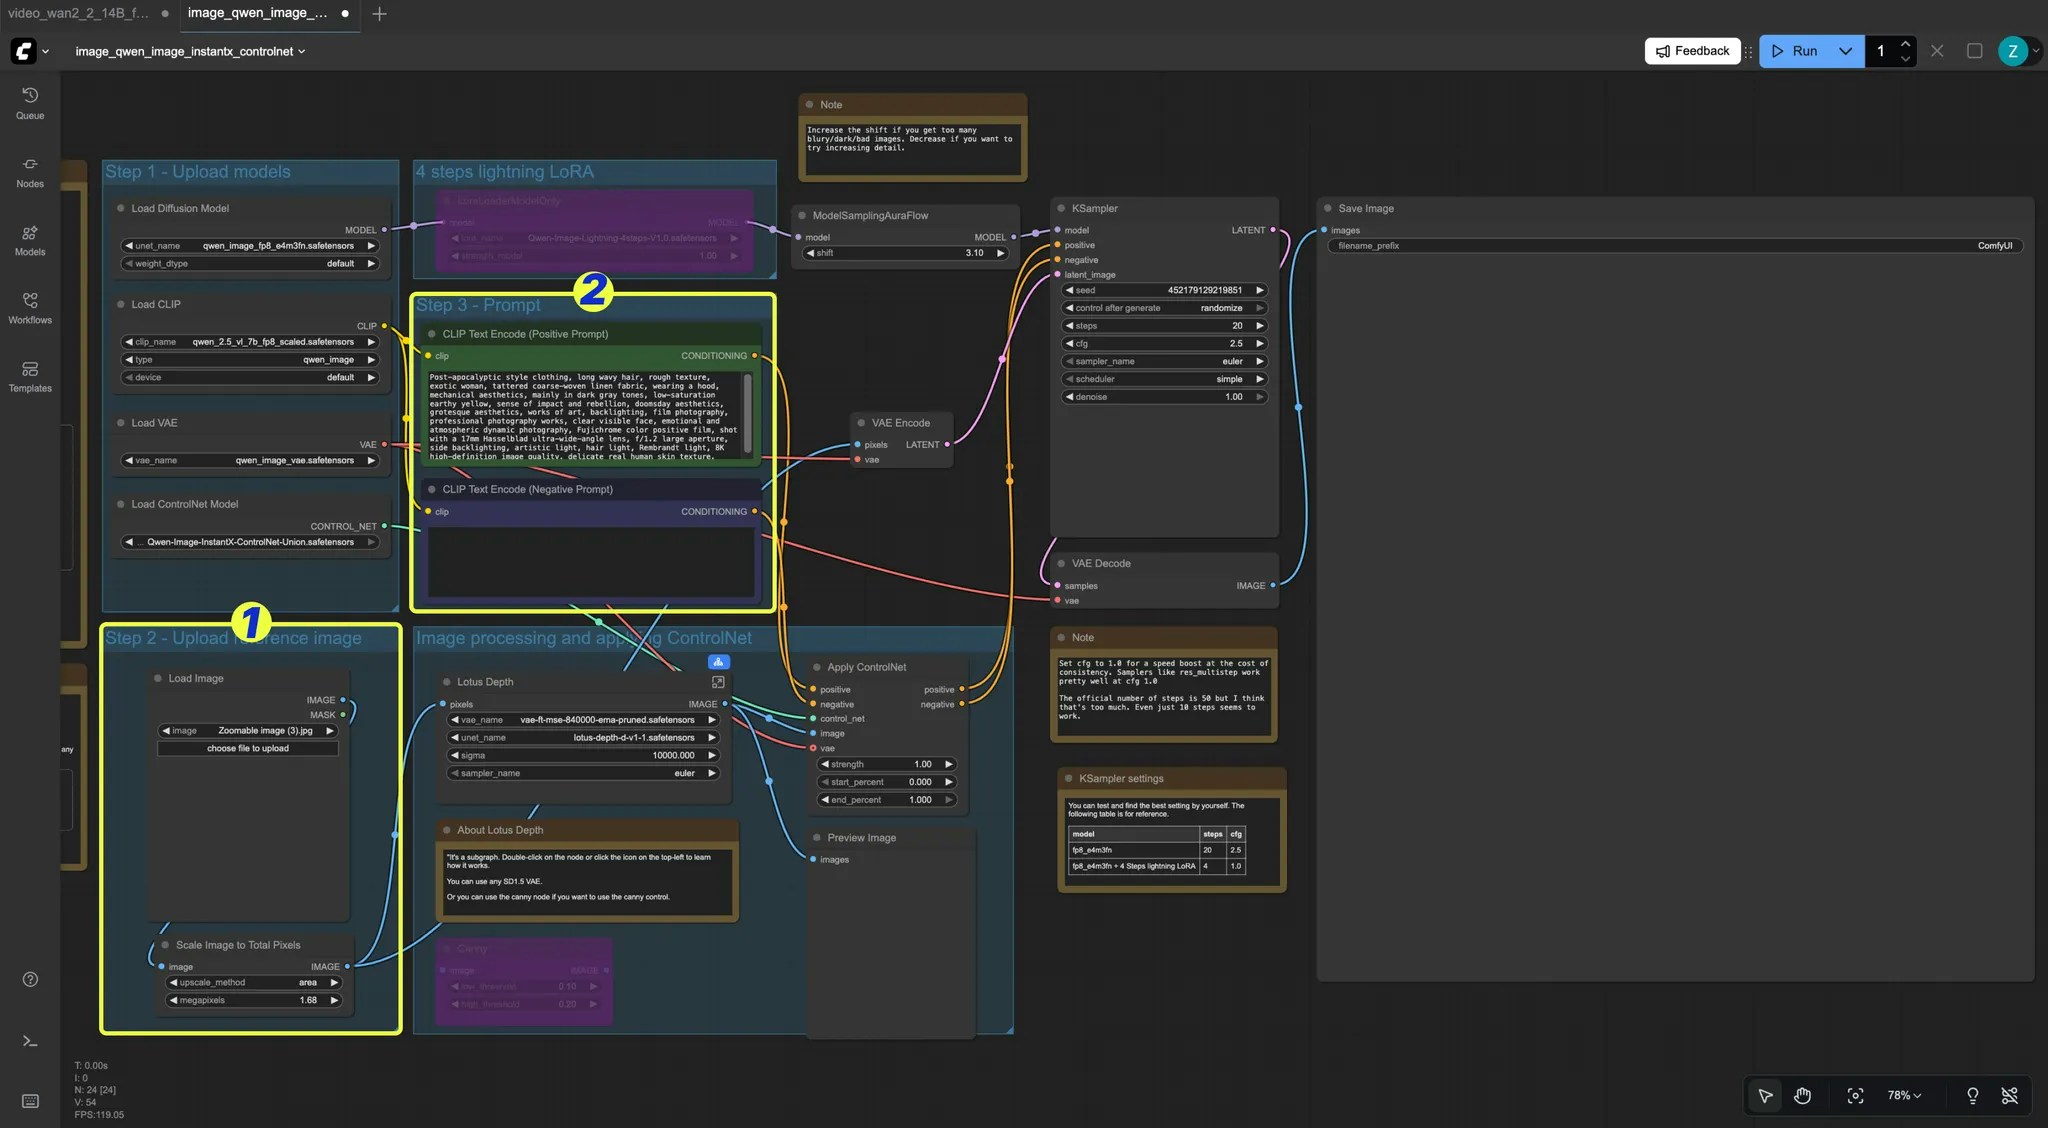
Run your workflow
If everything is correct, click the “Run” icon or use the shortcut “Ctrl + Enter” to run the workflow.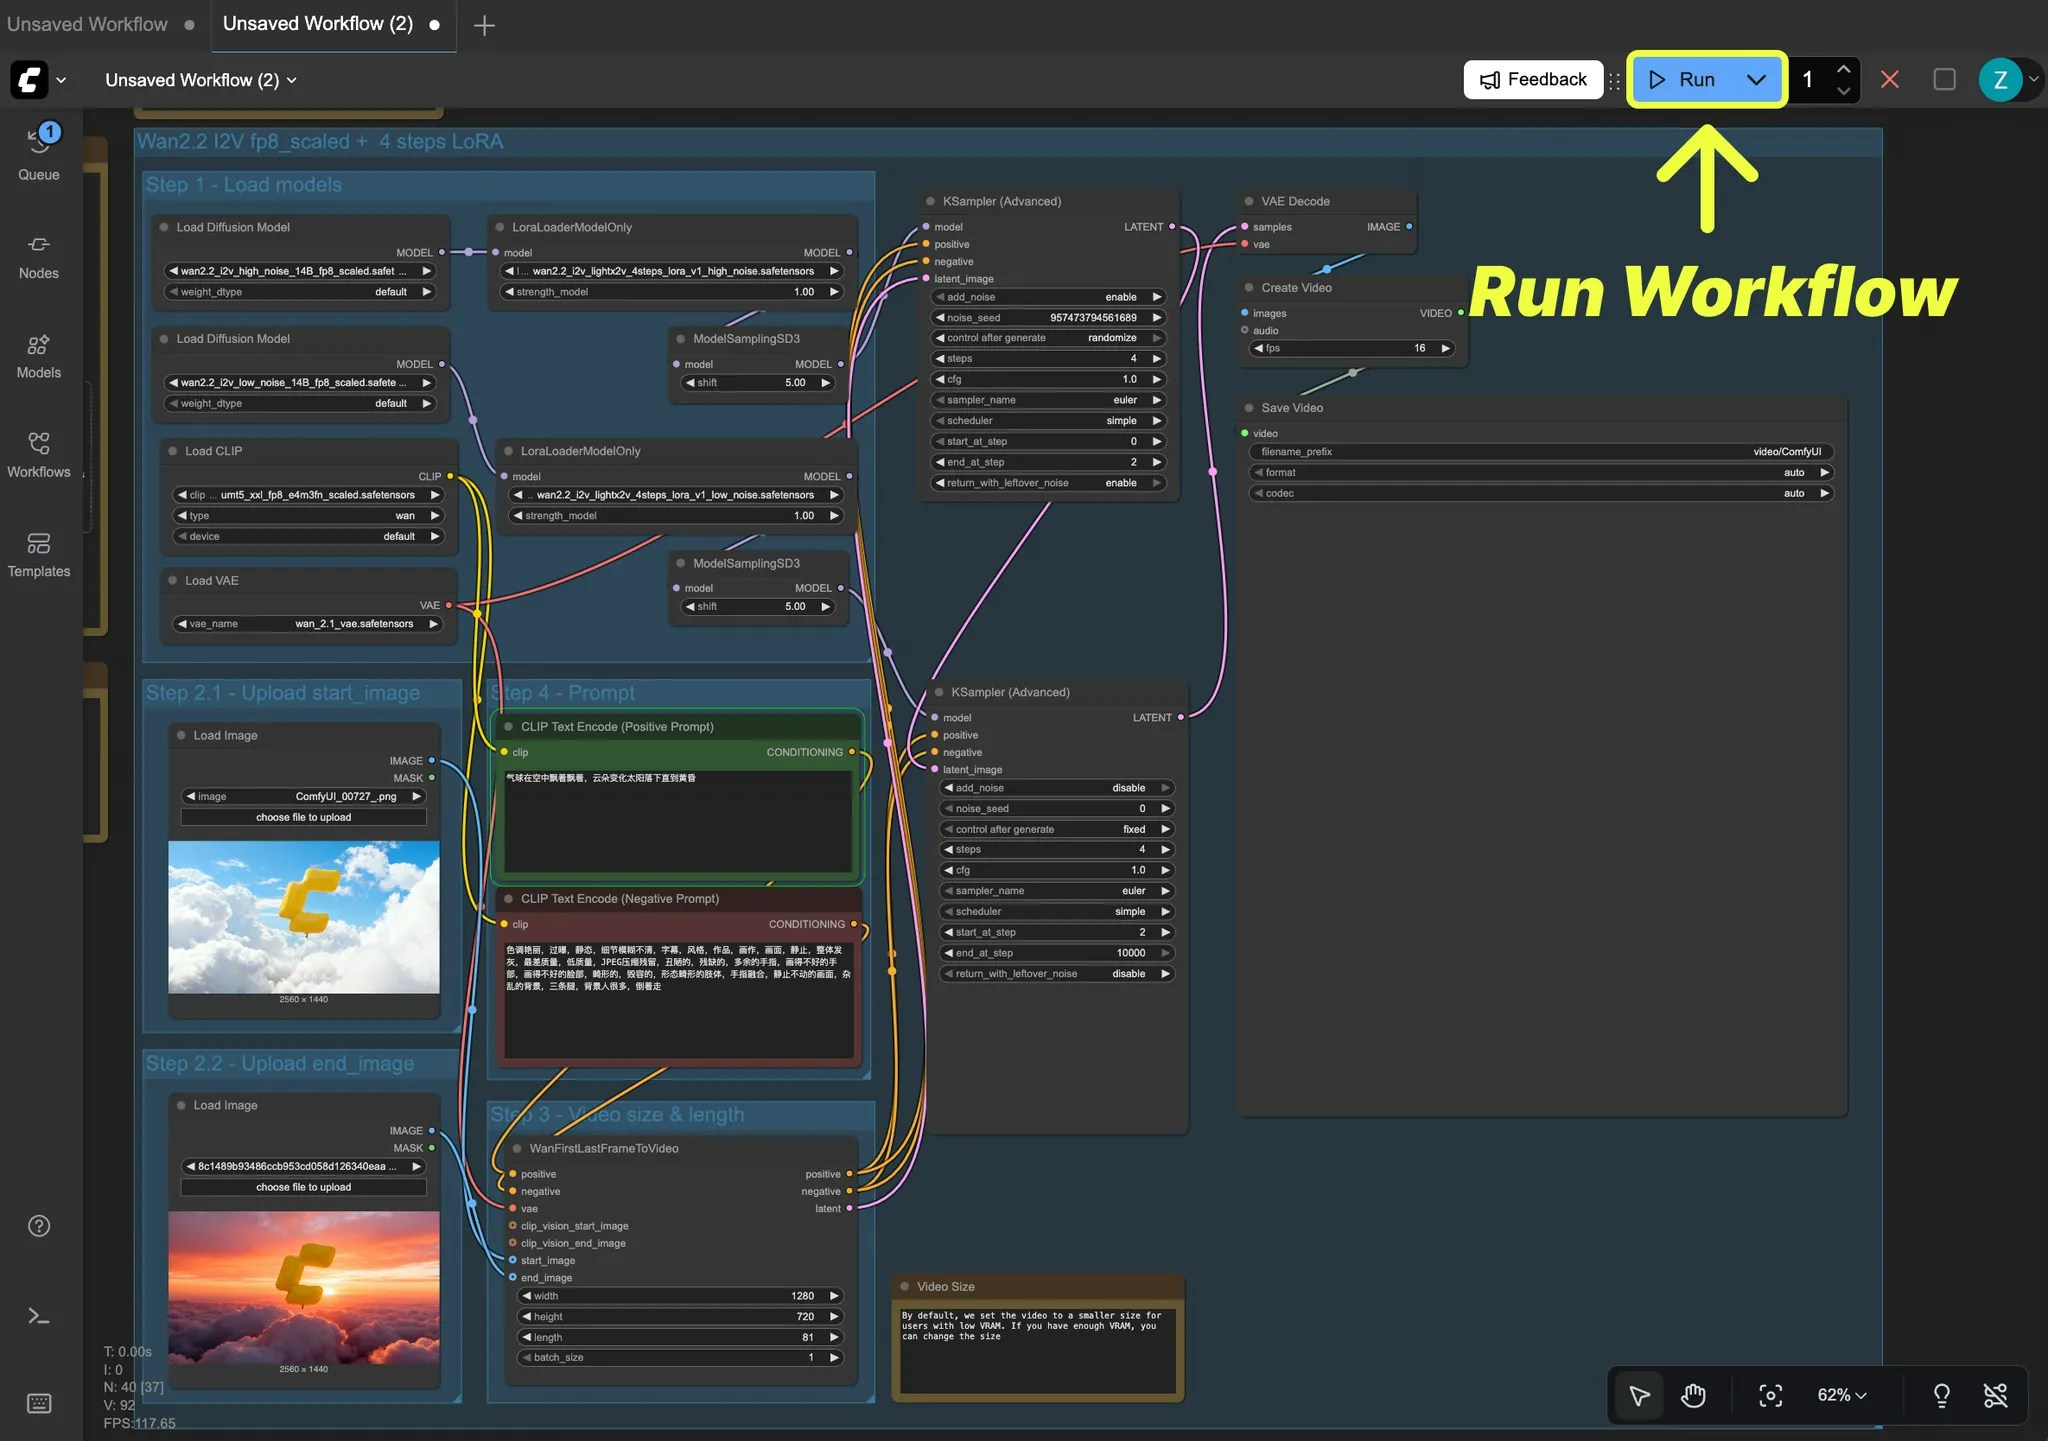
View output
After clicking run, our service will start allocating a machine for your workflow. You can check the execution status of the corresponding workflow in the queue panel.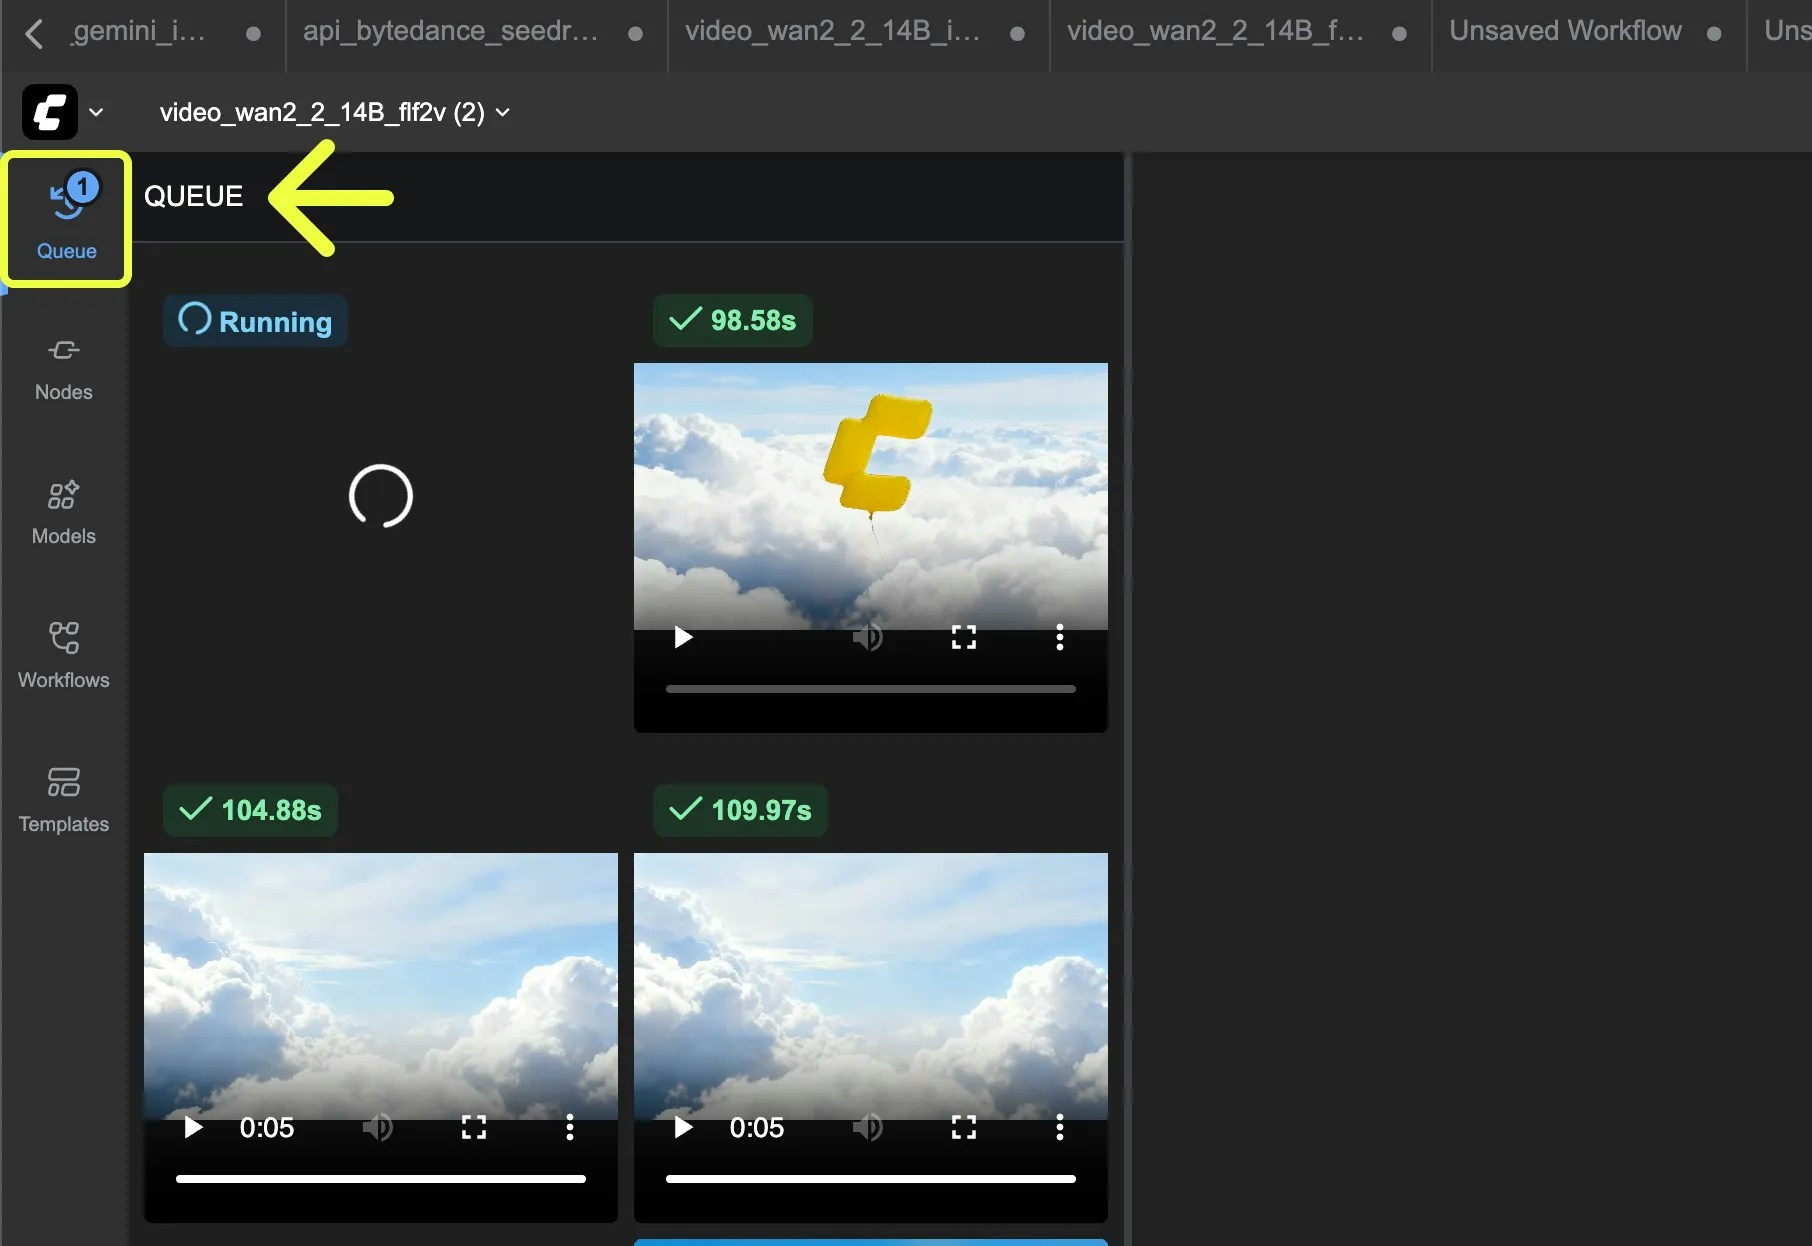
Save content locally
After the workflow execution is complete, you can save the generated content locally. Depending on the asset type, the save method is as follows:
- Save images
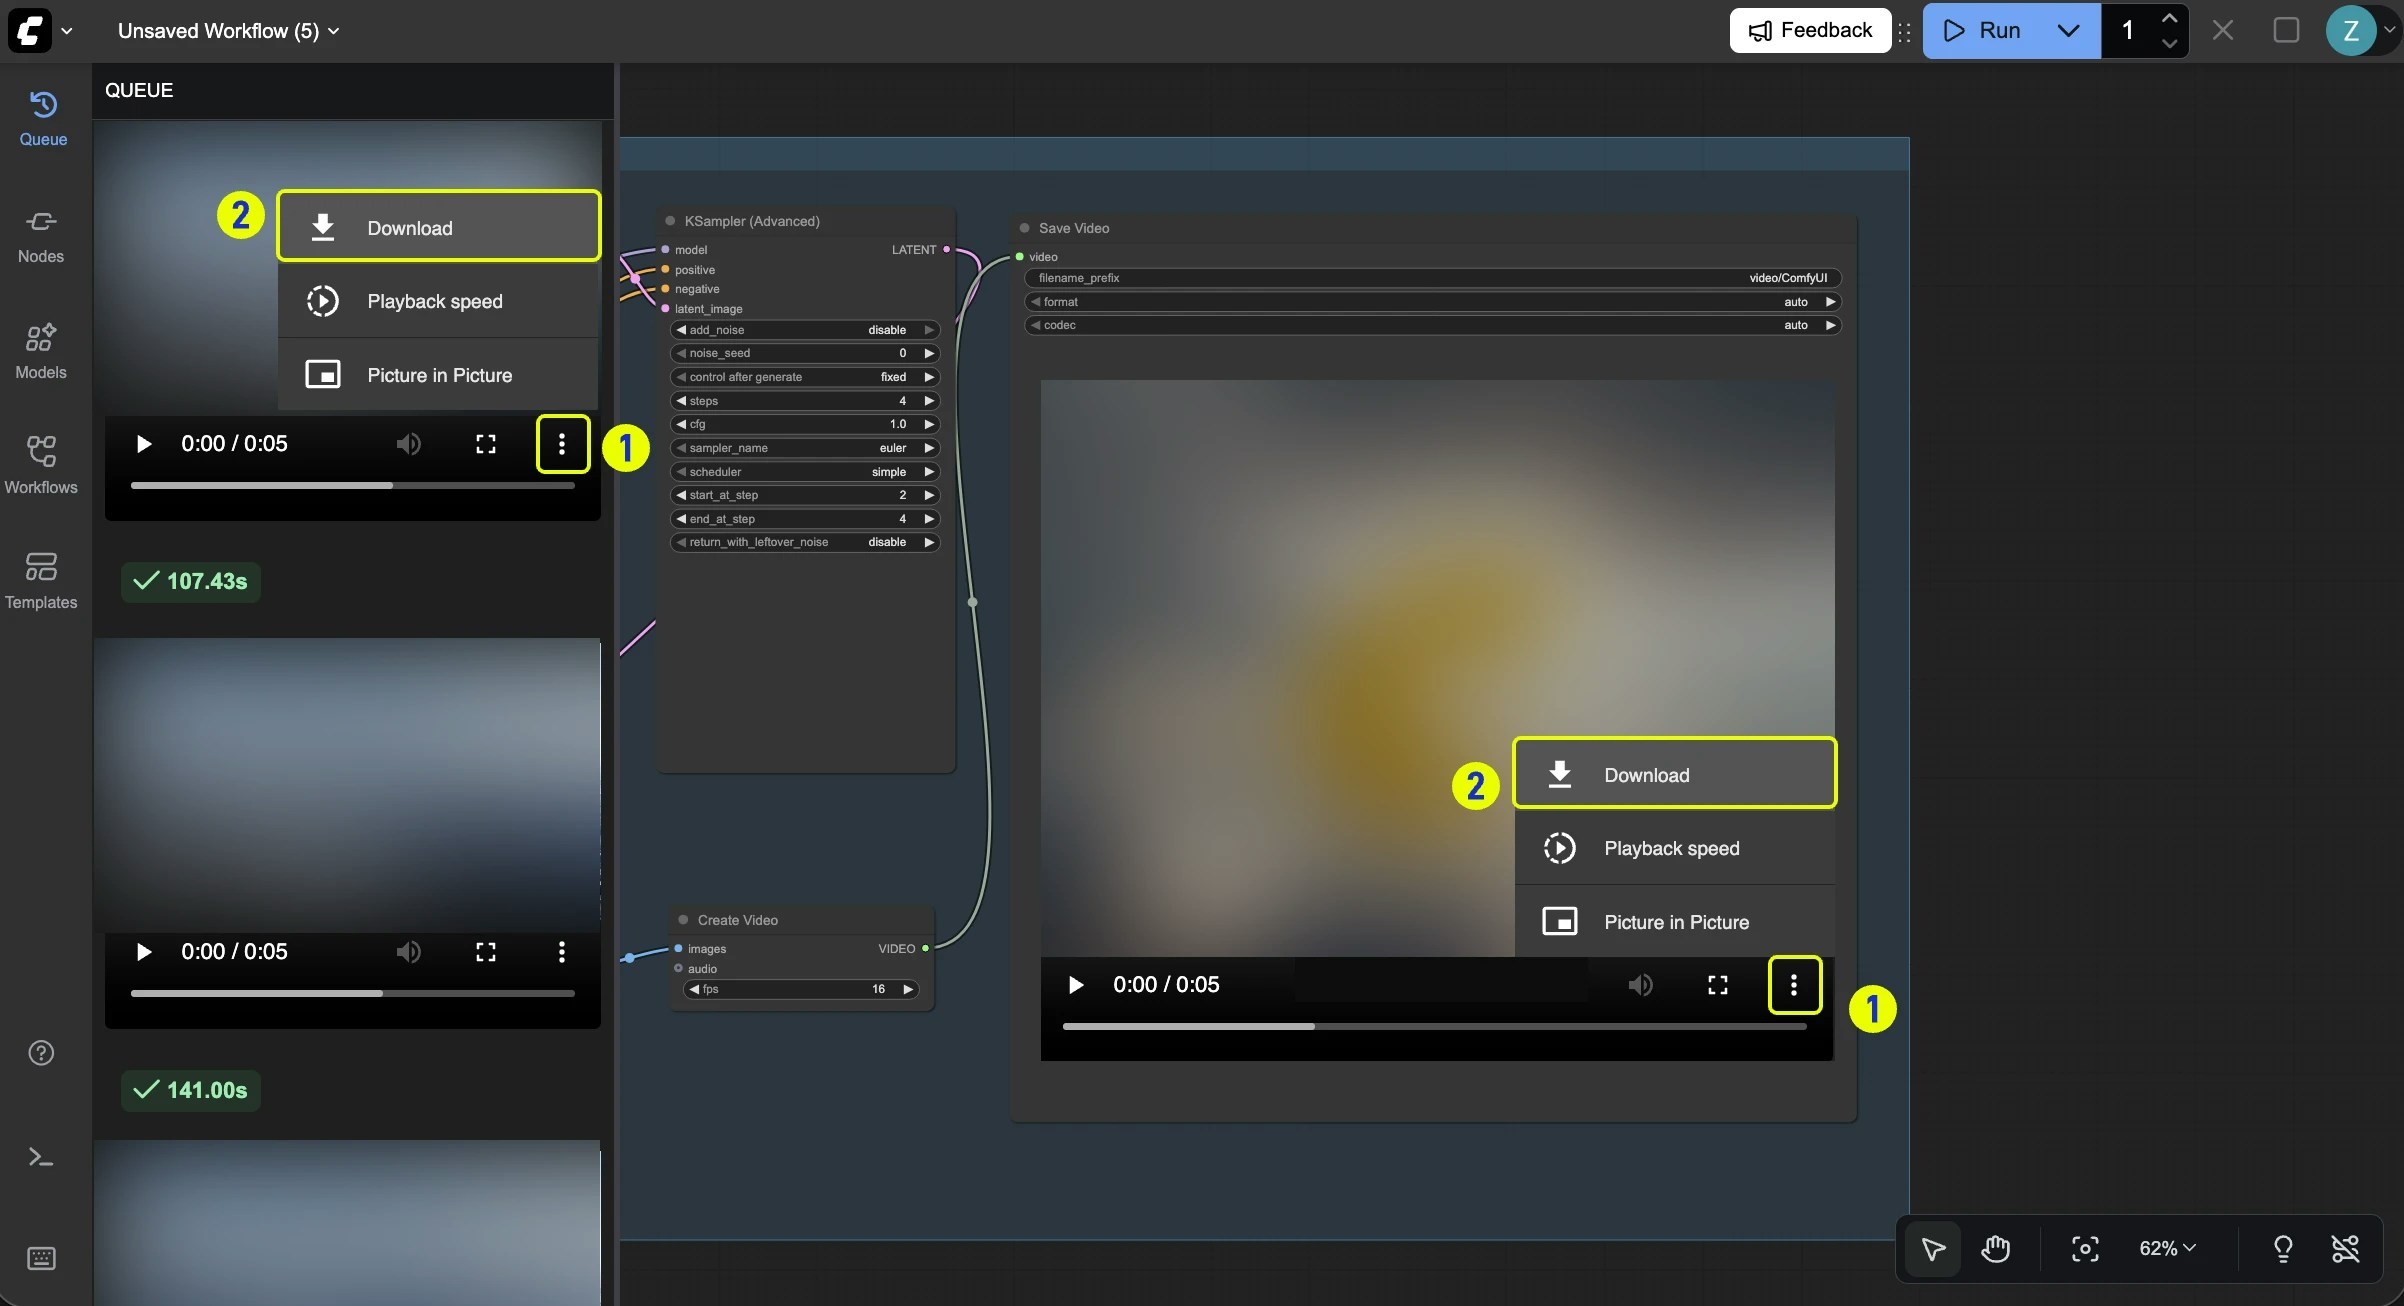
- Save videos
- Save audio
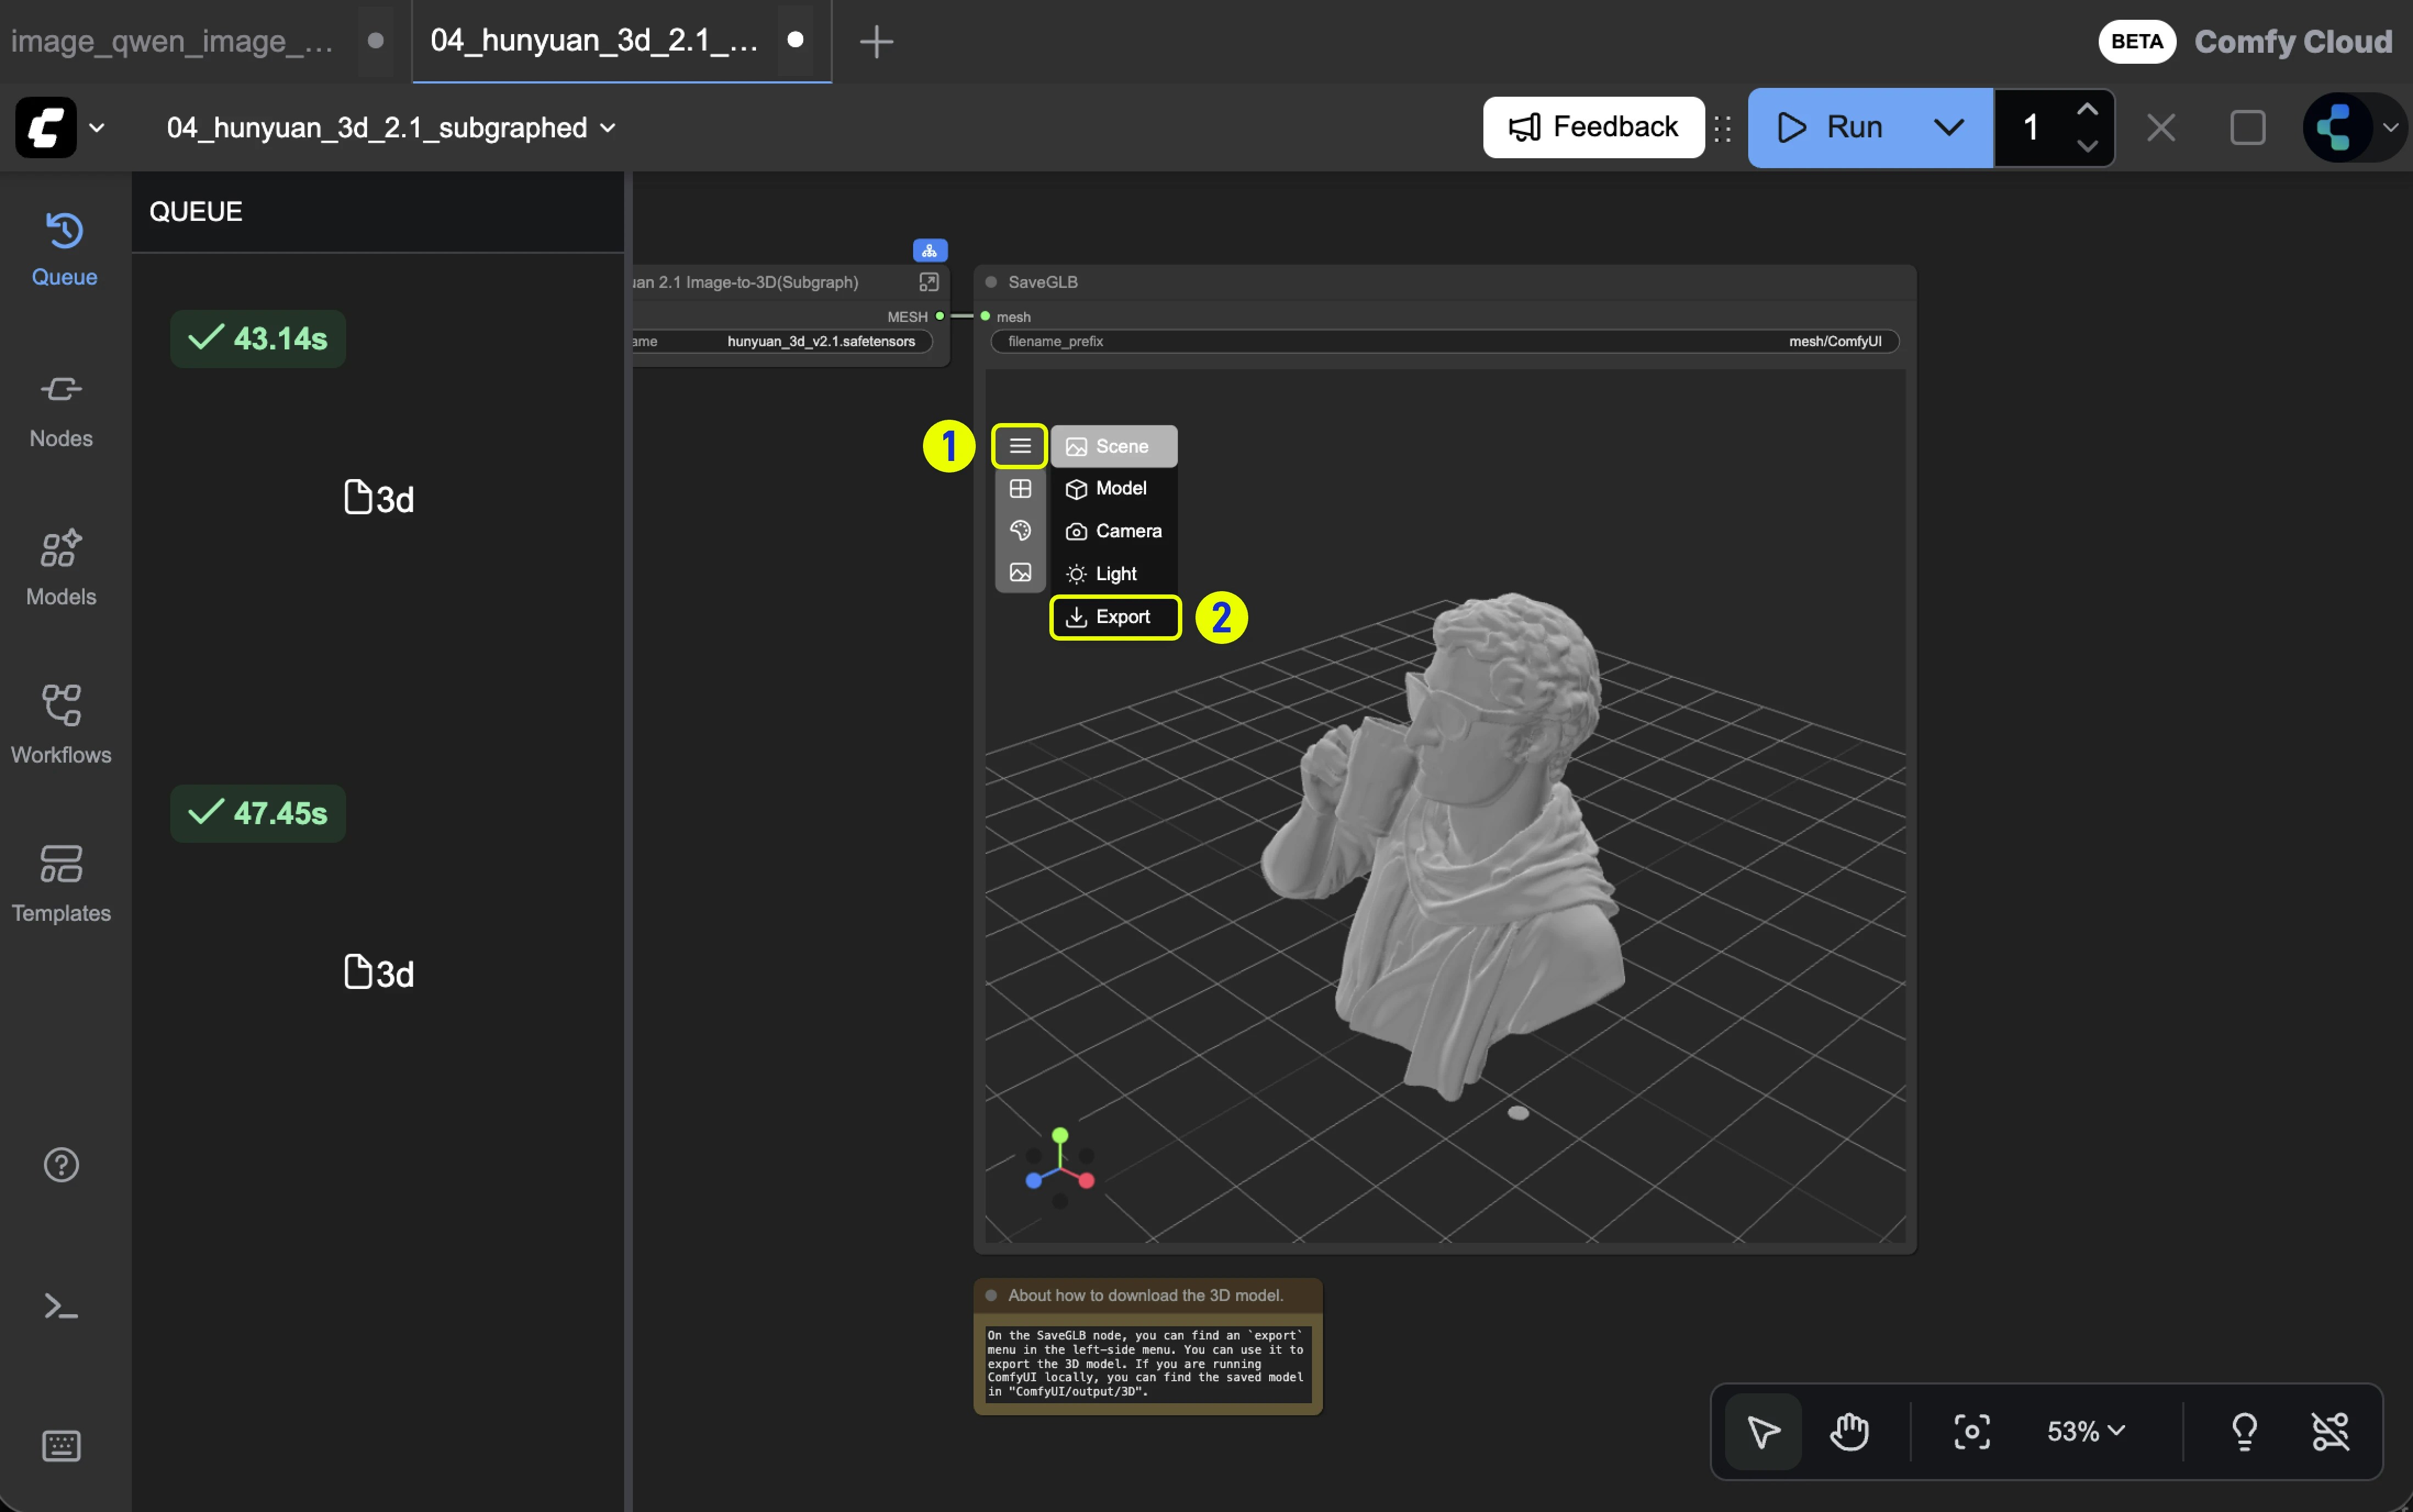
- Save 3D assets
In the queue panel or on the save image node, right-click on the generated image and select “Save image” to save the image locally.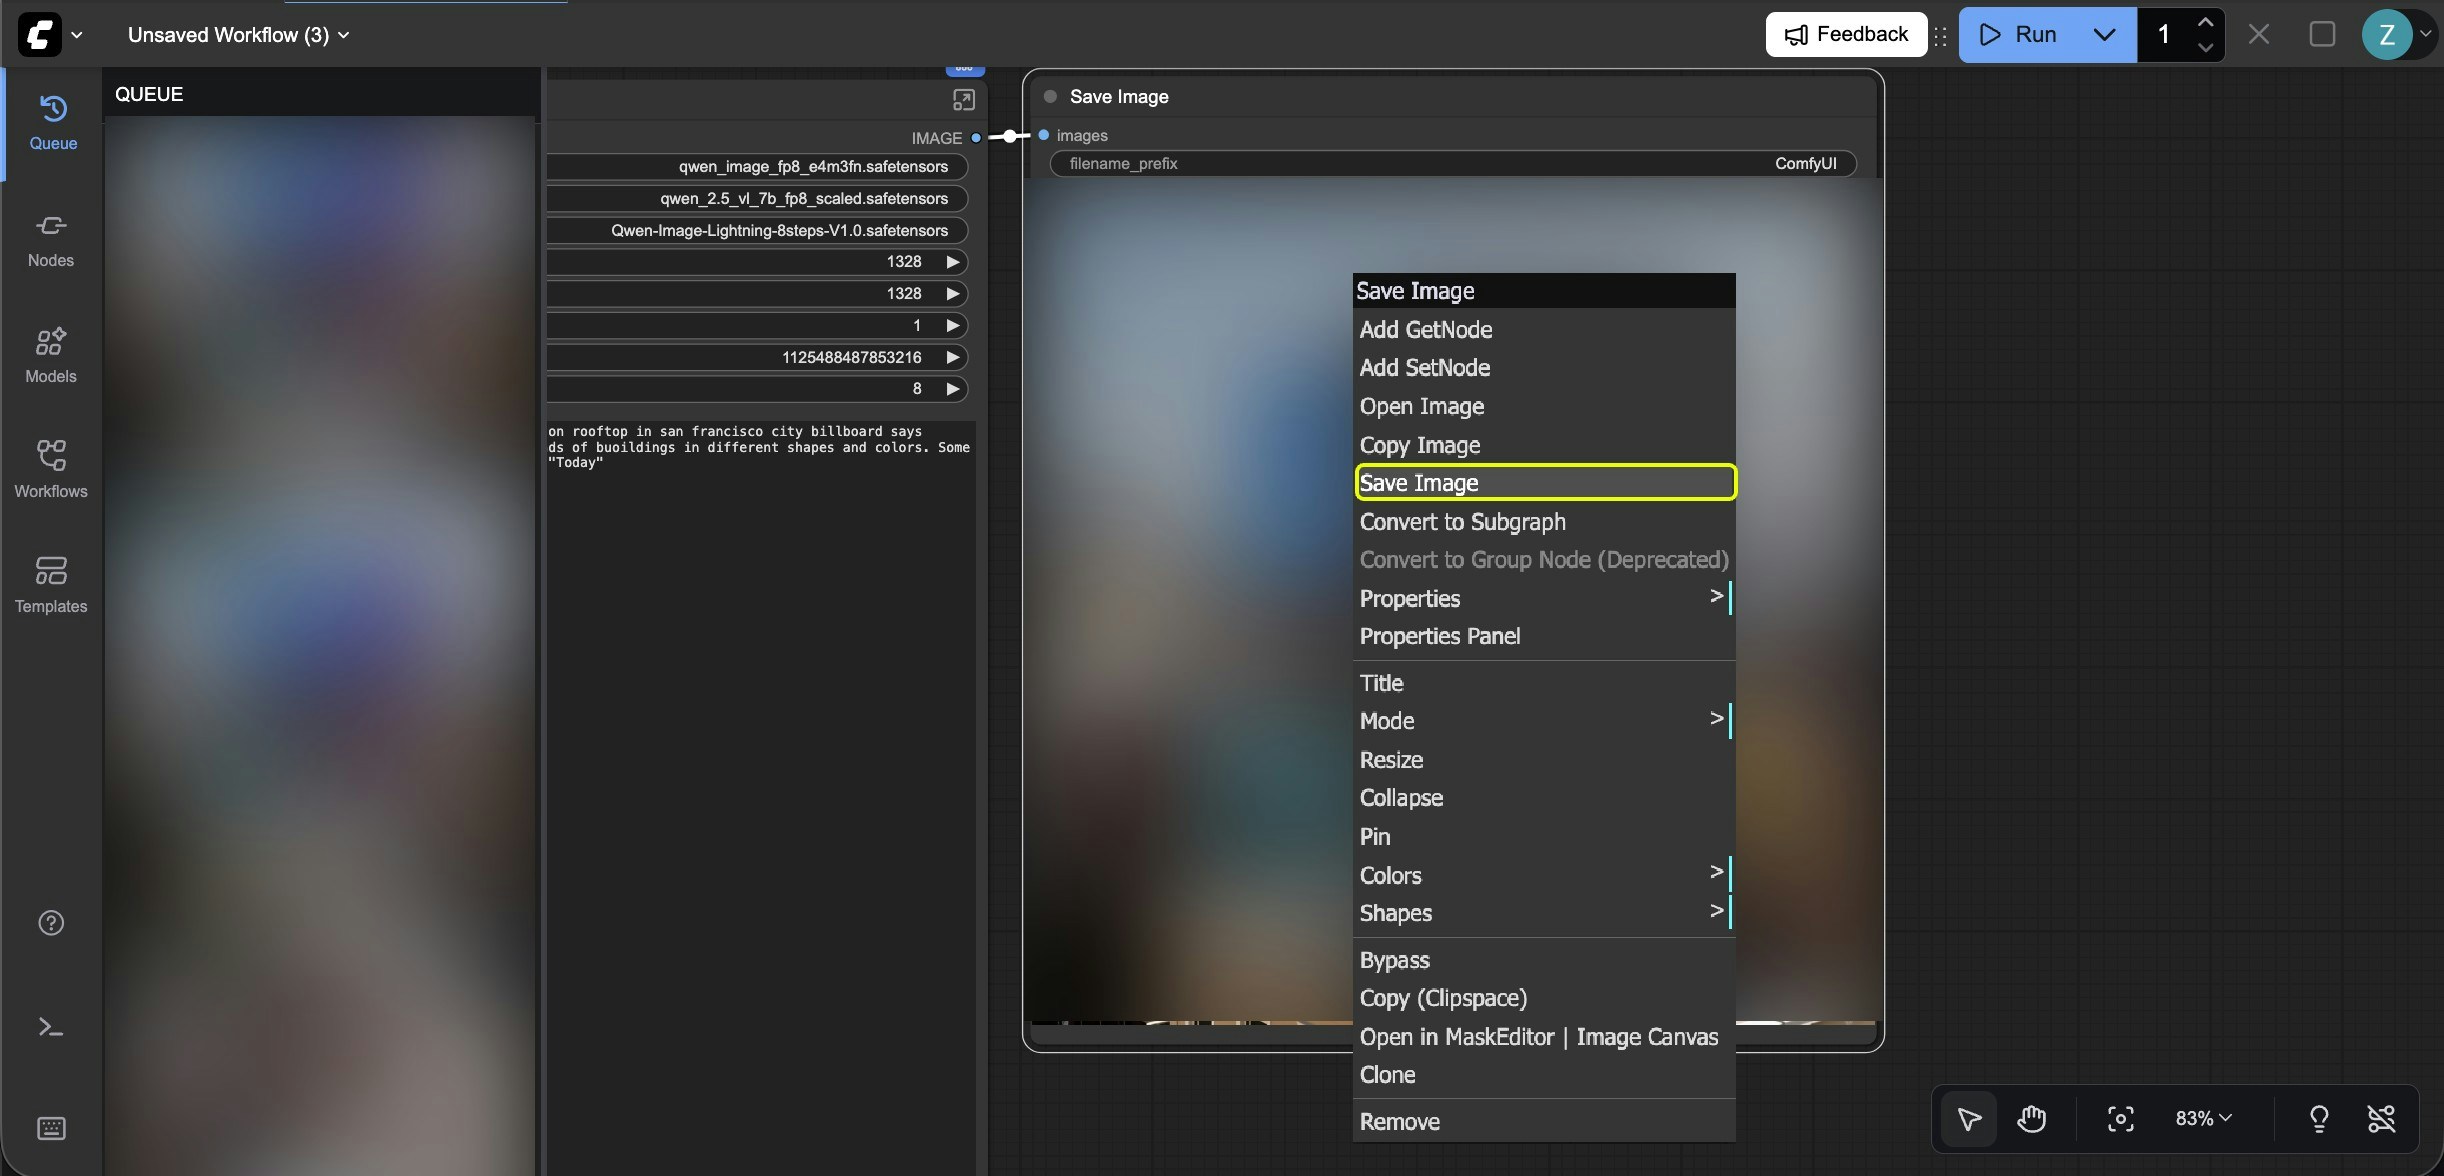

Feedback
If you have any thoughts, suggestions, or run into any issues, simply click the “Feedback” icon. This will directly send your feedback to us.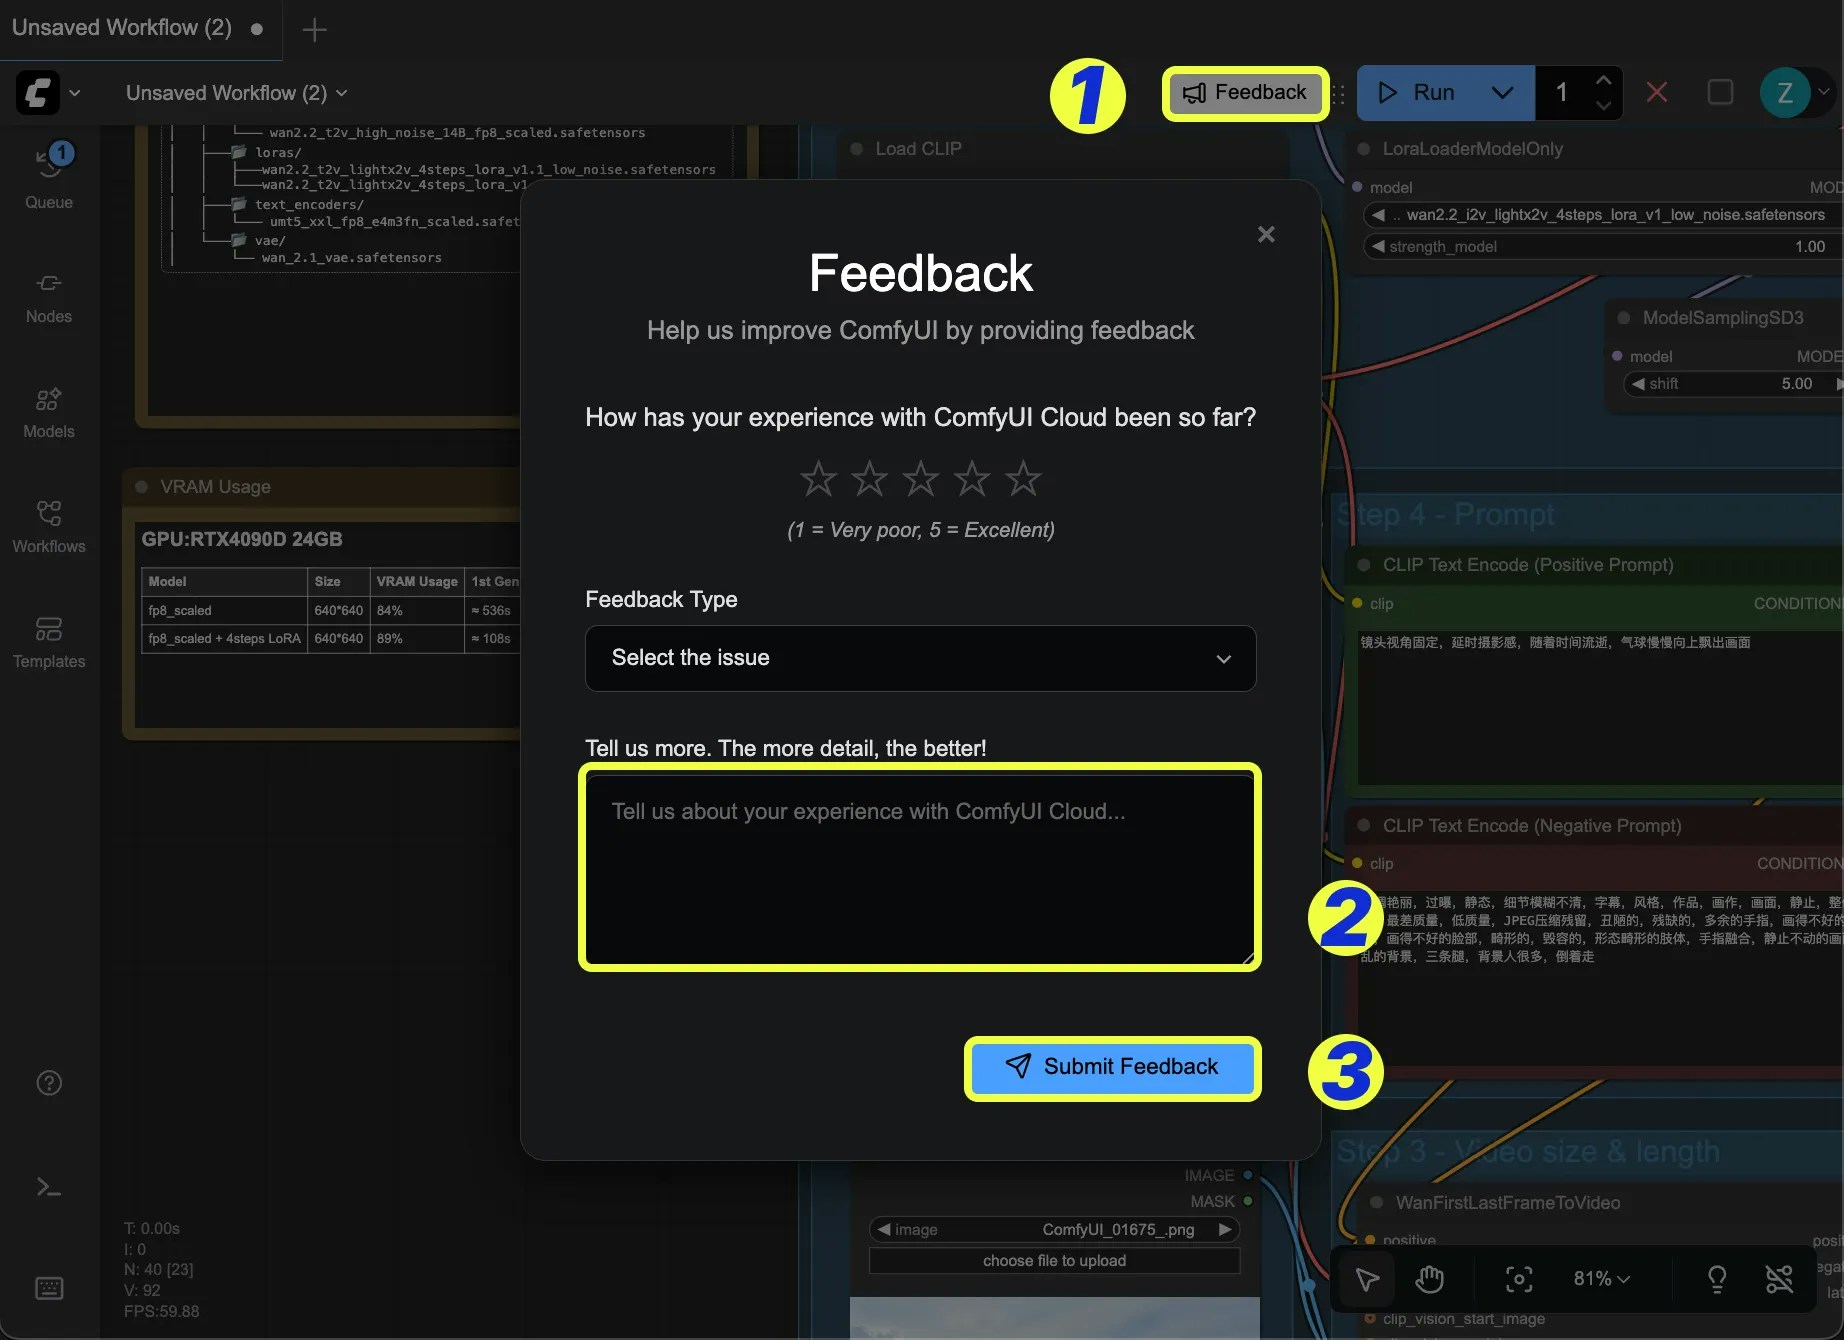
Frequently Asked Questions
View FAQs
View frequently asked questions and answers about Comfy Cloud, including pricing, features, limitations, and more
Next steps
Cloud API
Programmatically run workflows via the Cloud API
Tutorials
Explore tutorials to learn ComfyUI workflows
Support
Join our Discord community for help