About FLUX.1 Kontext Dev
FLUX.1 Kontext is a breakthrough multimodal image editing model from Black Forest Labs that supports simultaneous text and image input, intelligently understanding image context and performing precise editing. Its development version is an open-source diffusion transformer model with 12 billion parameters, featuring excellent context understanding and character consistency maintenance, ensuring that key elements such as character features and composition layout remain stable even after multiple iterative edits. It shares the same core capabilities as the FLUX.1 Kontext suite:- Character Consistency: Preserves unique elements in images across multiple scenes and environments, such as reference characters or objects in the image.
- Editing: Makes targeted modifications to specific elements in the image without affecting other parts.
- Style Reference: Generates novel scenes while preserving the unique style of the reference image according to text prompts.
- Interactive Speed: Minimal latency in image generation and editing.
Version Information
- [FLUX.1 Kontext [pro] - Commercial version, focused on rapid iterative editing
- FLUX.1 Kontext [max] - Experimental version with stronger prompt adherence
- FLUX.1 Kontext [dev] - Open source version (used in this tutorial), 12B parameters, mainly for research
Model Download
To run the workflows in this guide successfully, you first need to download the following model files. You can also directly get the model download links from the corresponding workflows, which already contain the model file download information. Diffusion Model VAE Text Encoder Model save locationFlux.1 Kontext Dev Workflow
Run on Comfy Cloud
This workflow uses theLoad Image(from output) node to load the image to be edited, making it more convenient for you to access the edited image for multiple rounds of editing.
1. Workflow and Input Image Download
Download the following files and drag them into ComfyUI to load the corresponding workflow Input Image

2. Complete the workflow step by step
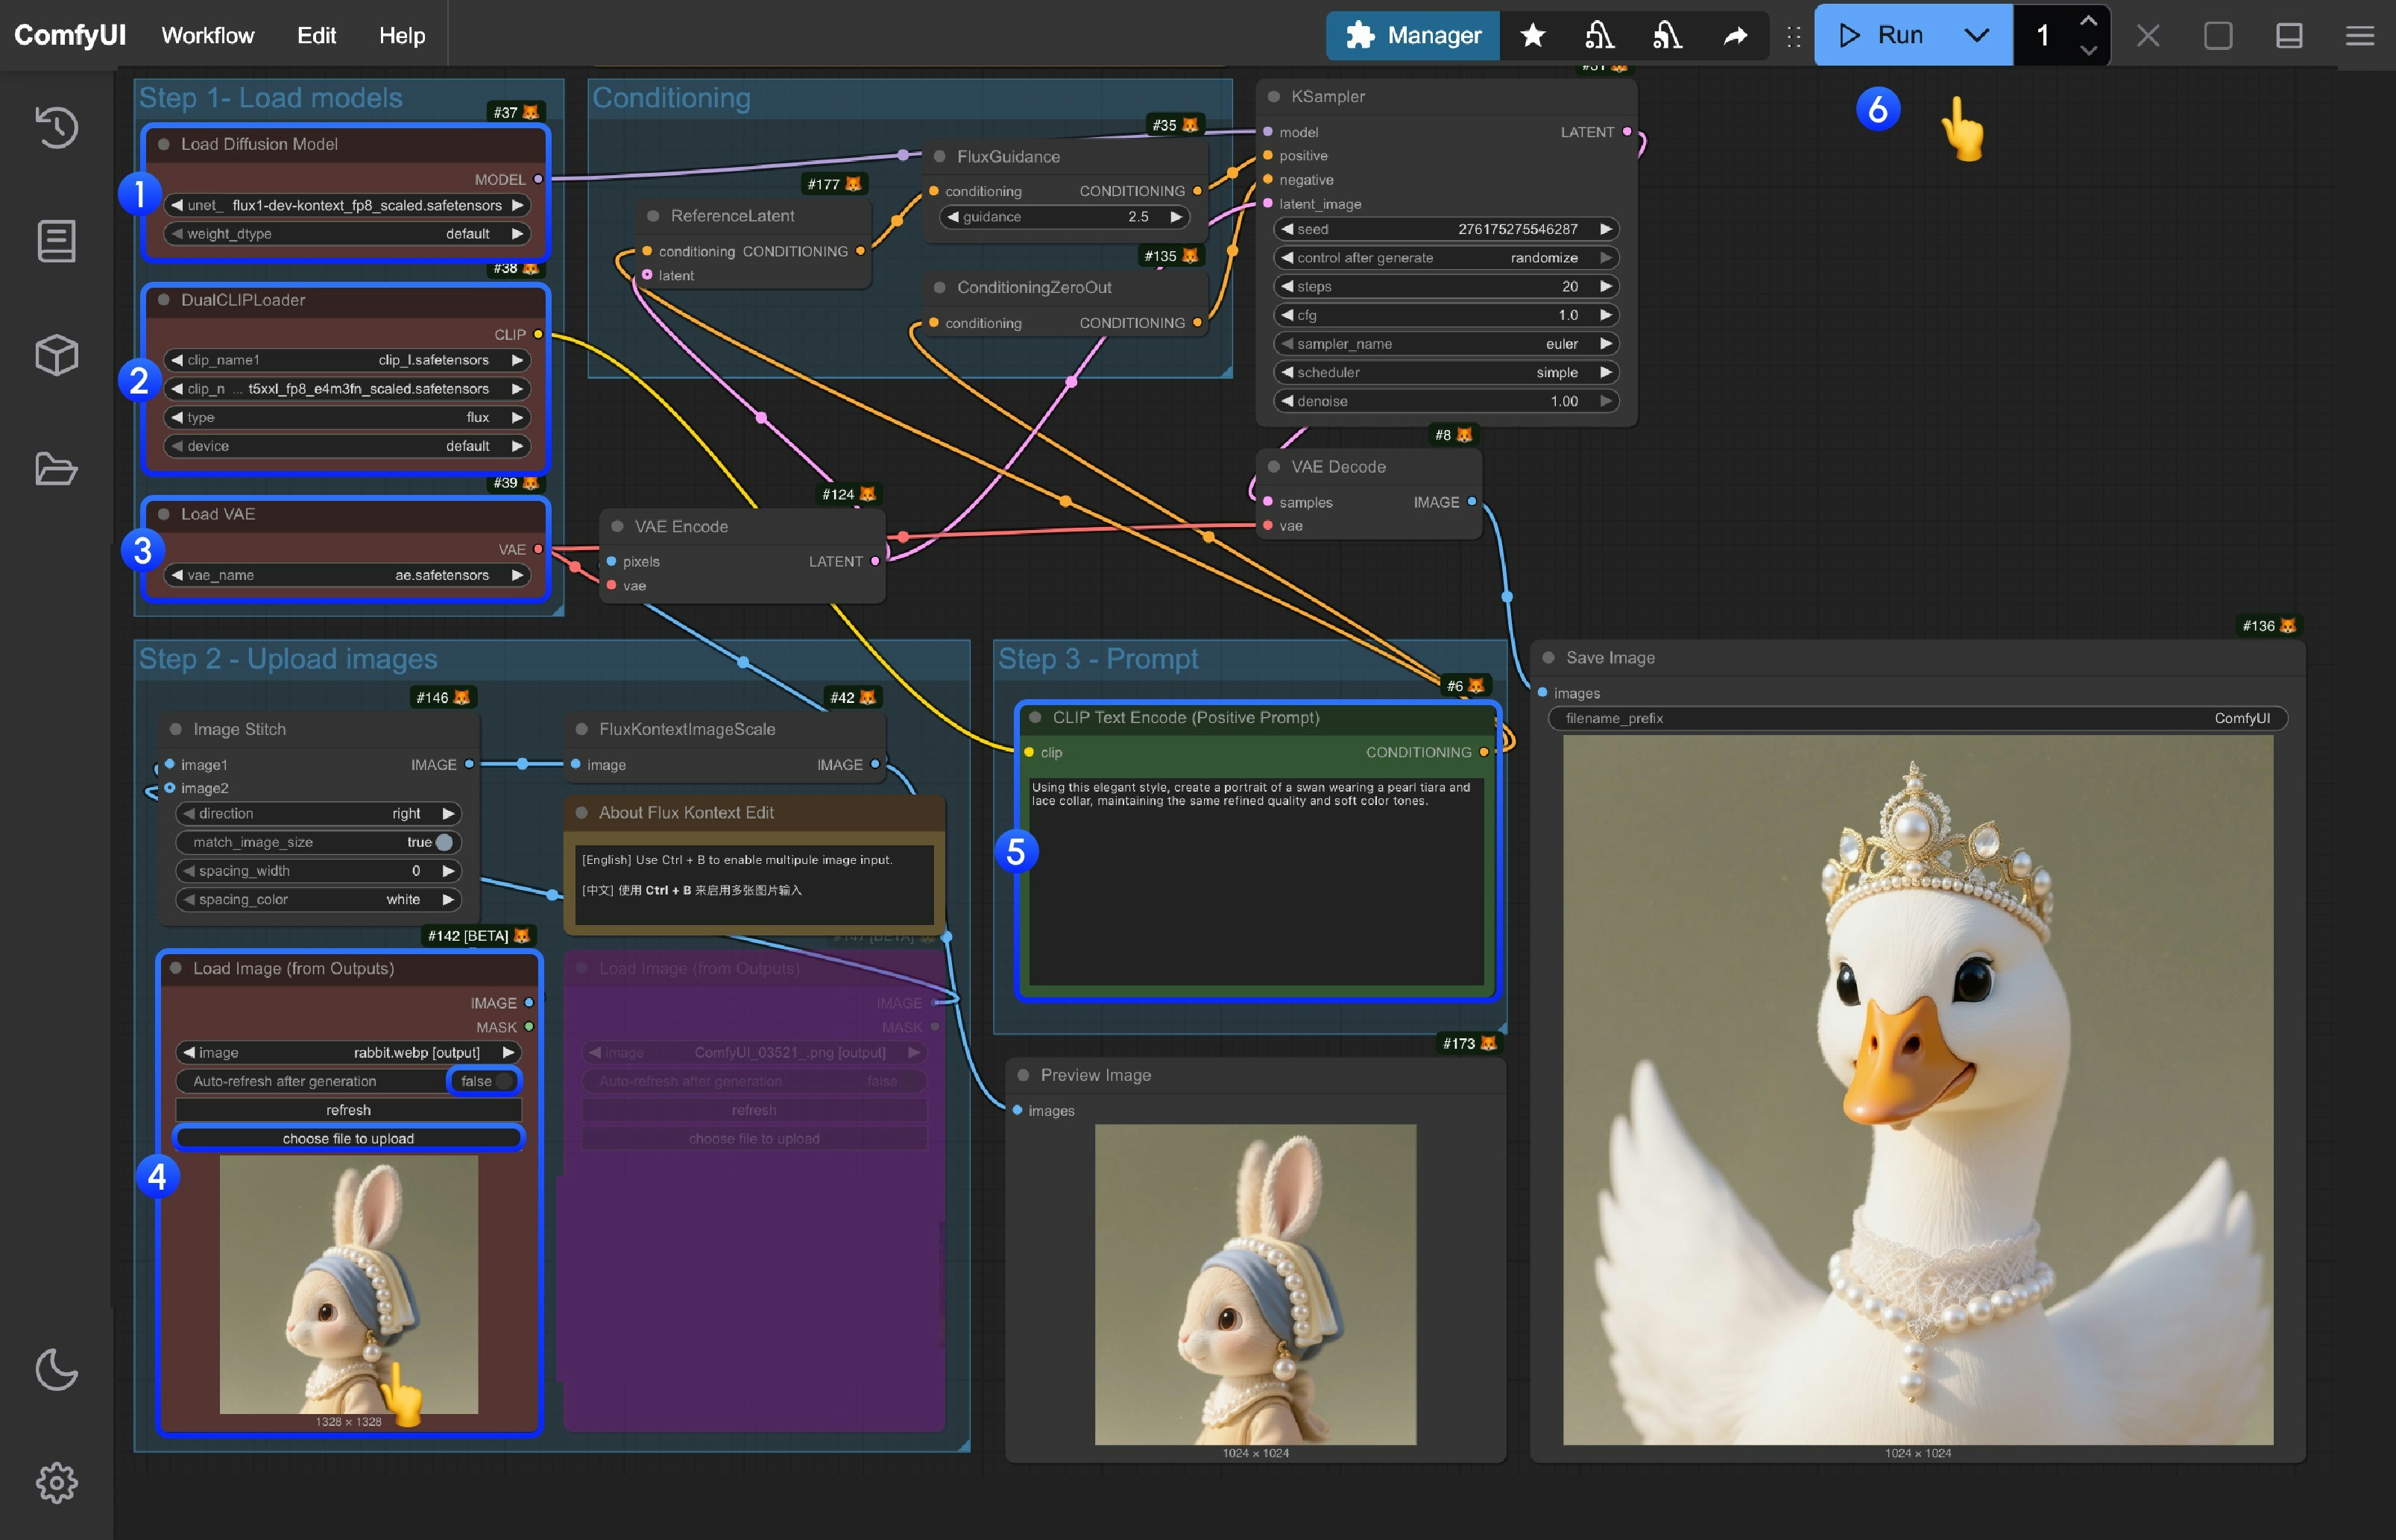
- In the
Load Diffusion Modelnode, load theflux1-dev-kontext_fp8_scaled.safetensorsmodel - In the
DualCLIP Loadnode, ensure thatclip_l.safetensorsandt5xxl_fp16.safetensorsort5xxl_fp8_e4m3fn_scaled.safetensorsare loaded - In the
Load VAEnode, ensure thatae.safetensorsmodel is loaded - In the
Load Image(from output)node, load the provided input image - In the
CLIP Text Encodenode, modify the prompts, only English is supported - Click the
Queuebutton, or use the shortcutCtrl(cmd) + Enterto run the workflow
Flux Kontext Prompt Techniques
1. Basic Modifications
- Simple and direct:
"Change the car color to red" - Maintain style:
"Change to daytime while maintaining the same style of the painting"
2. Style Transfer
Principles:- Clearly name style:
"Transform to Bauhaus art style" - Describe characteristics:
"Transform to oil painting with visible brushstrokes, thick paint texture" - Preserve composition:
"Change to Bauhaus style while maintaining the original composition"
3. Character Consistency
Framework:- Specific description:
"The woman with short black hair"instead of “she” - Preserve features:
"while maintaining the same facial features, hairstyle, and expression" - Step-by-step modifications: Change background first, then actions
4. Text Editing
- Use quotes:
"Replace 'joy' with 'BFL'" - Maintain format:
"Replace text while maintaining the same font style"
Common Problem Solutions
Character Changes Too Much
❌ Wrong:"Transform the person into a Viking"
✅ Correct: "Change the clothes to be a viking warrior while preserving facial features"
Composition Position Changes
❌ Wrong:"Put him on a beach"
✅ Correct: "Change the background to a beach while keeping the person in the exact same position, scale, and pose"
Style Application Inaccuracy
❌ Wrong:"Make it a sketch"
✅ Correct: "Convert to pencil sketch with natural graphite lines, cross-hatching, and visible paper texture"
Core Principles
- Be Specific and Clear - Use precise descriptions, avoid vague terms
- Step-by-step Editing - Break complex modifications into multiple simple steps
- Explicit Preservation - State what should remain unchanged
- Verb Selection - Use “change”, “replace” rather than “transform”
Best Practice Templates
Object Modification:"Change [object] to [new state], keep [content to preserve] unchanged"
Style Transfer:
"Transform to [specific style], while maintaining [composition/character/other] unchanged"
Background Replacement:
"Change the background to [new background], keep the subject in the exact same position and pose"
Text Editing:
"Replace '[original text]' with '[new text]', maintain the same font style"
Remember: The more specific, the better. Kontext excels at understanding detailed instructions and maintaining consistency.