Flux 1.1 Pro Ultra Image Node Documentation
Check the following documentation for detailed node parameter settings:
Flux 1.1 [pro] Text-to-Image Tutorial
1. Download Workflow File
Download and drag the following file into ComfyUI to load the workflow:
2. Complete the Workflow Steps
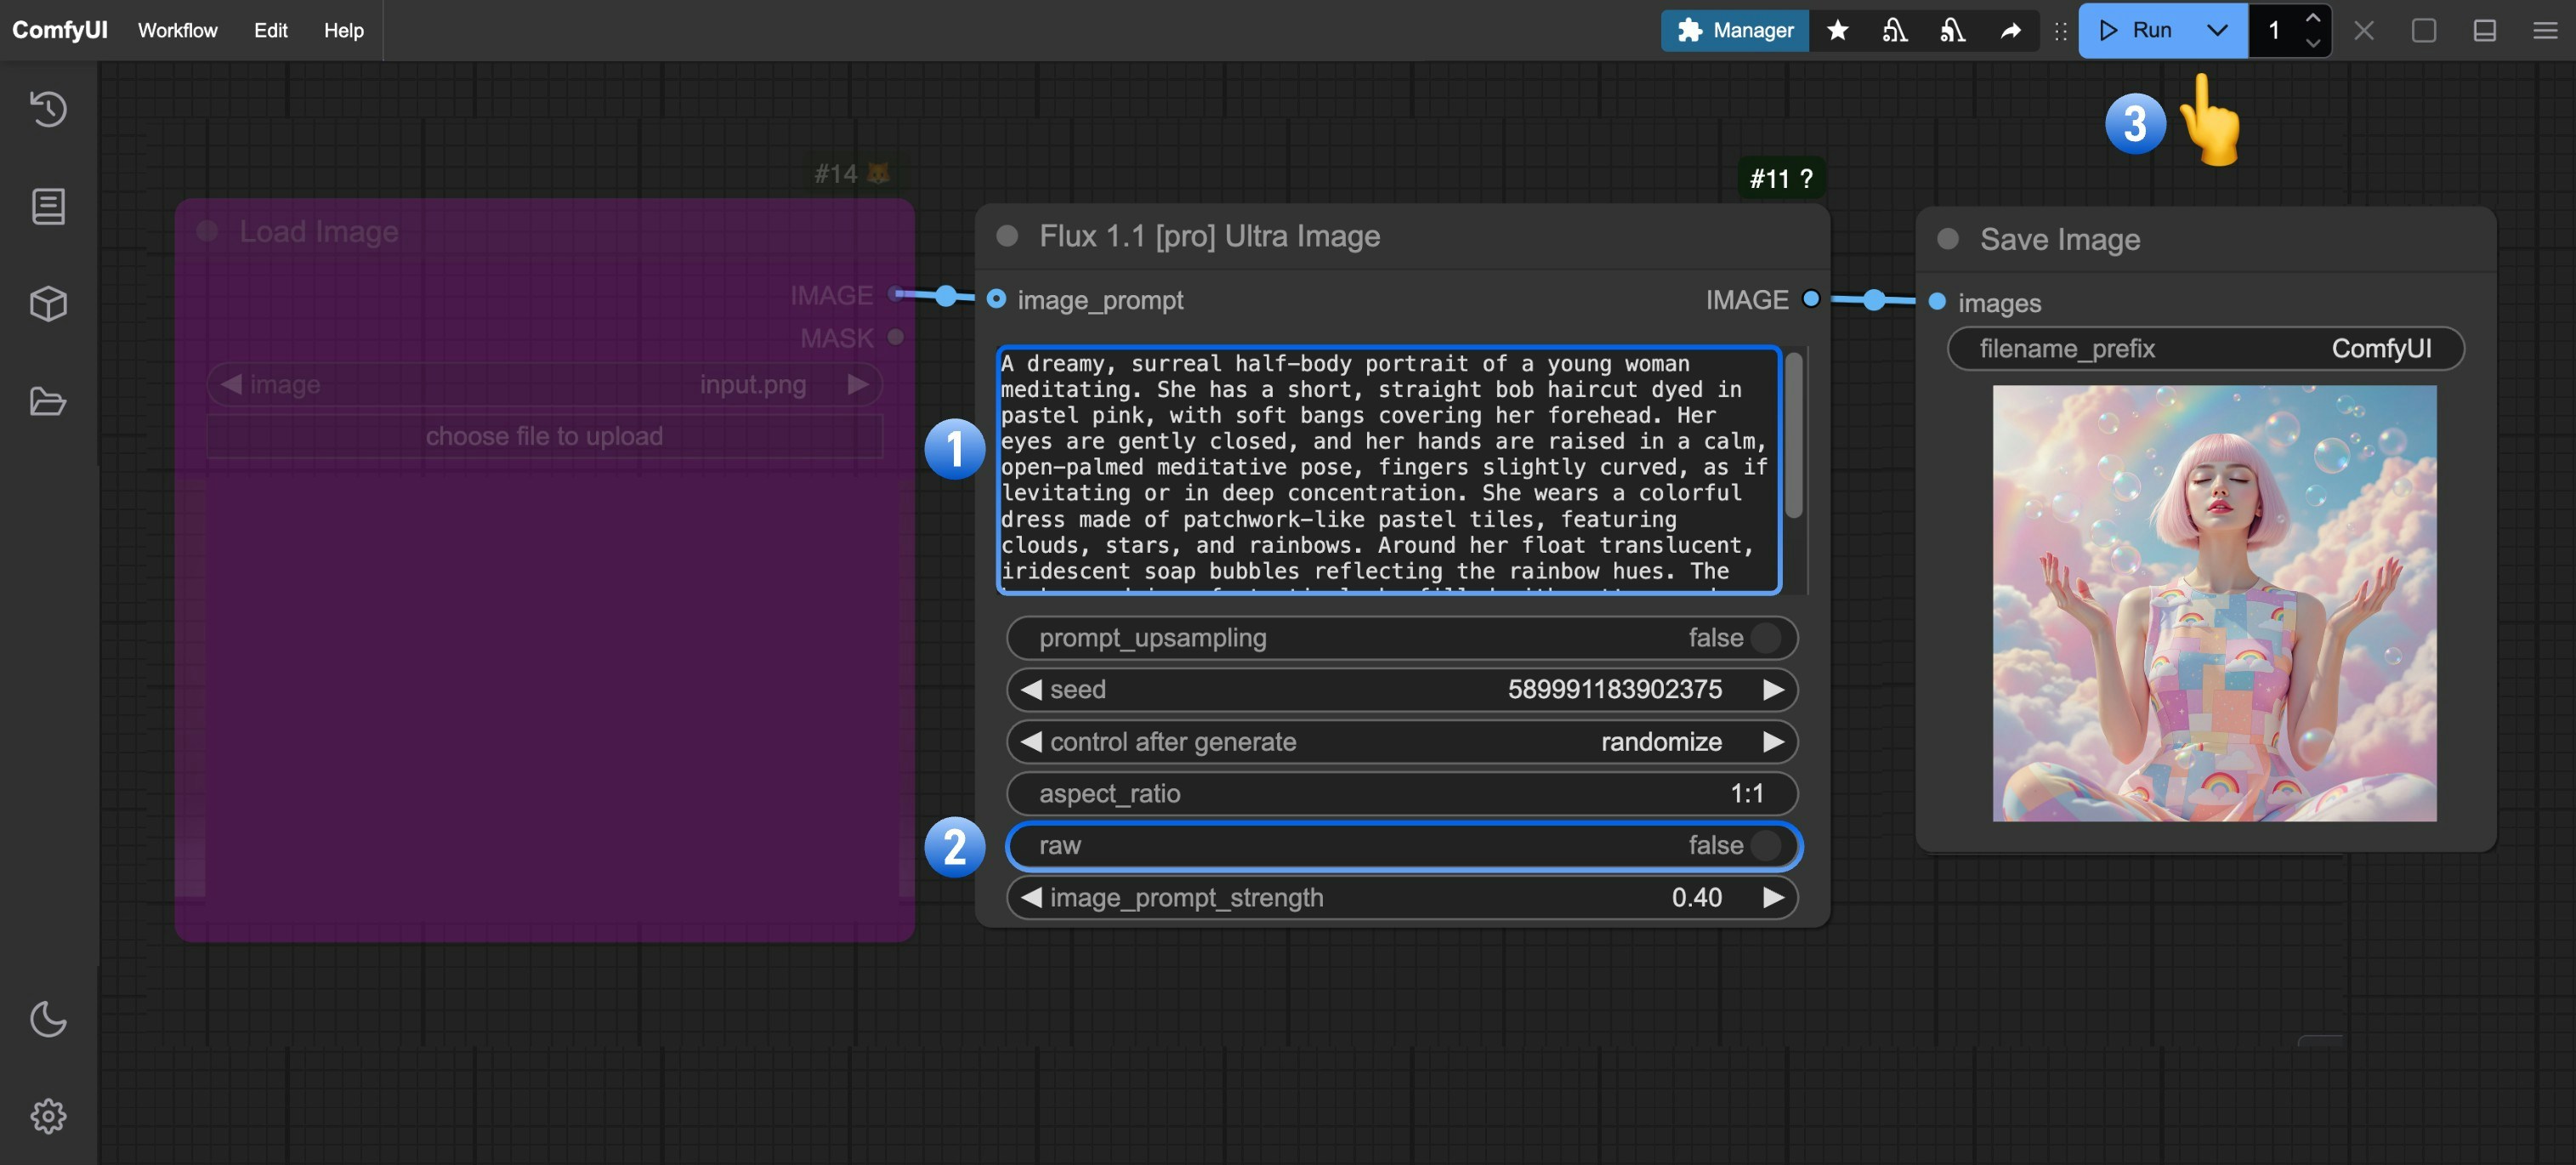
- (Optional) Modify the prompt in the
Flux 1.1 [pro] Ultra Imagenode - (Optional) Set
rawparameter tofalsefor more realistic output - Click
Runor use shortcutCtrl(cmd) + Enterto generate the image - After the API returns results, view the generated image in the
Save Imagenode. Images are saved to theComfyUI/output/directory
Flux 1.1[pro] Image-to-Image Tutorial
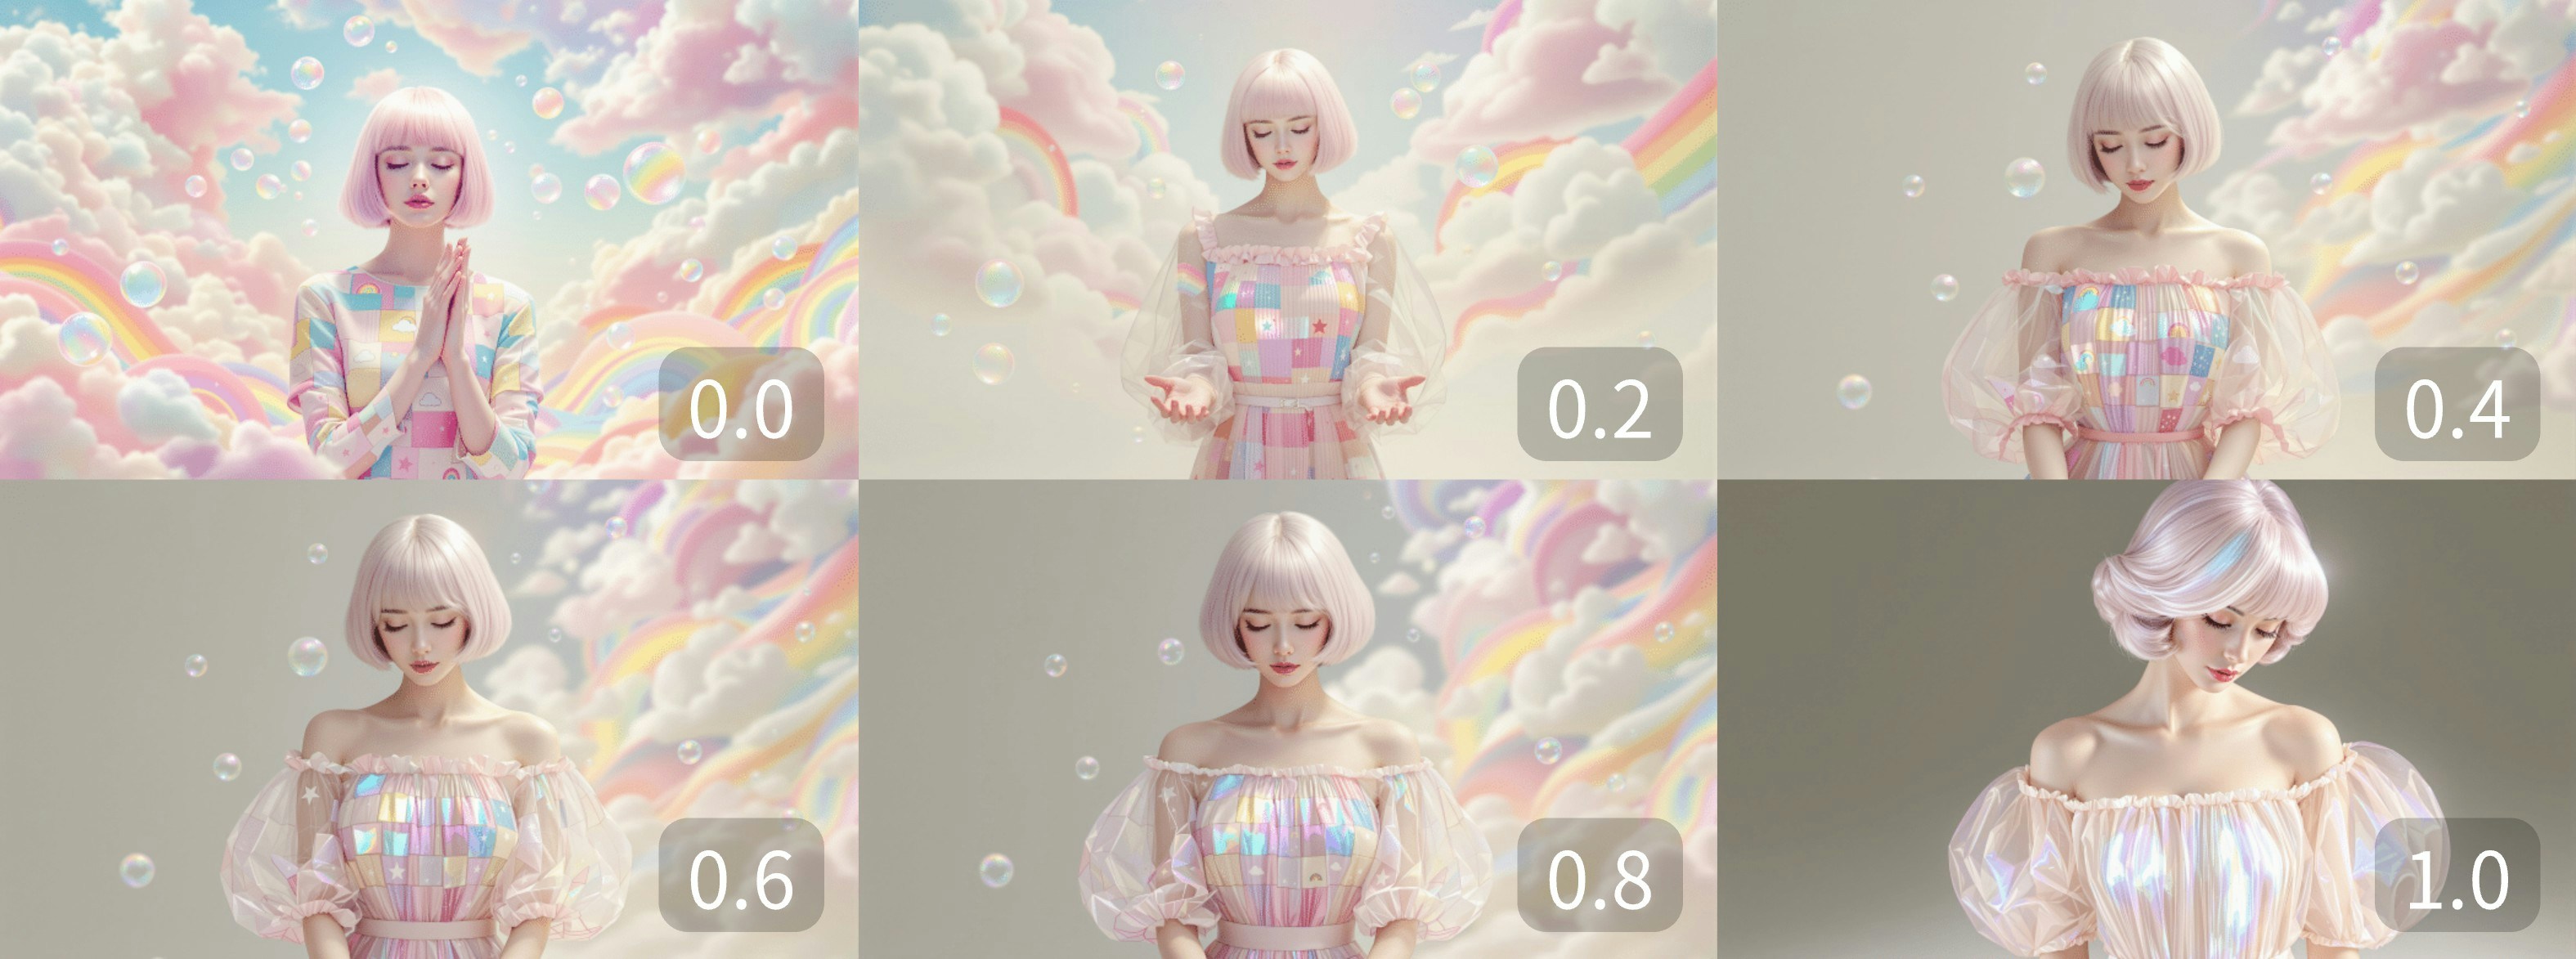
When adding animage_prompt to the node input, the output will blend features from the input image (Remix). The image_prompt_strength value affects the blend ratio: higher values make the output more similar to the input image.
1. Download Workflow File
Download and drag the following file into ComfyUI, or right-click the purple node in the Text-to-Image workflow and setmode to always to enable image_prompt input:
 We’ll use this image as input:

2. Complete the Workflow Steps
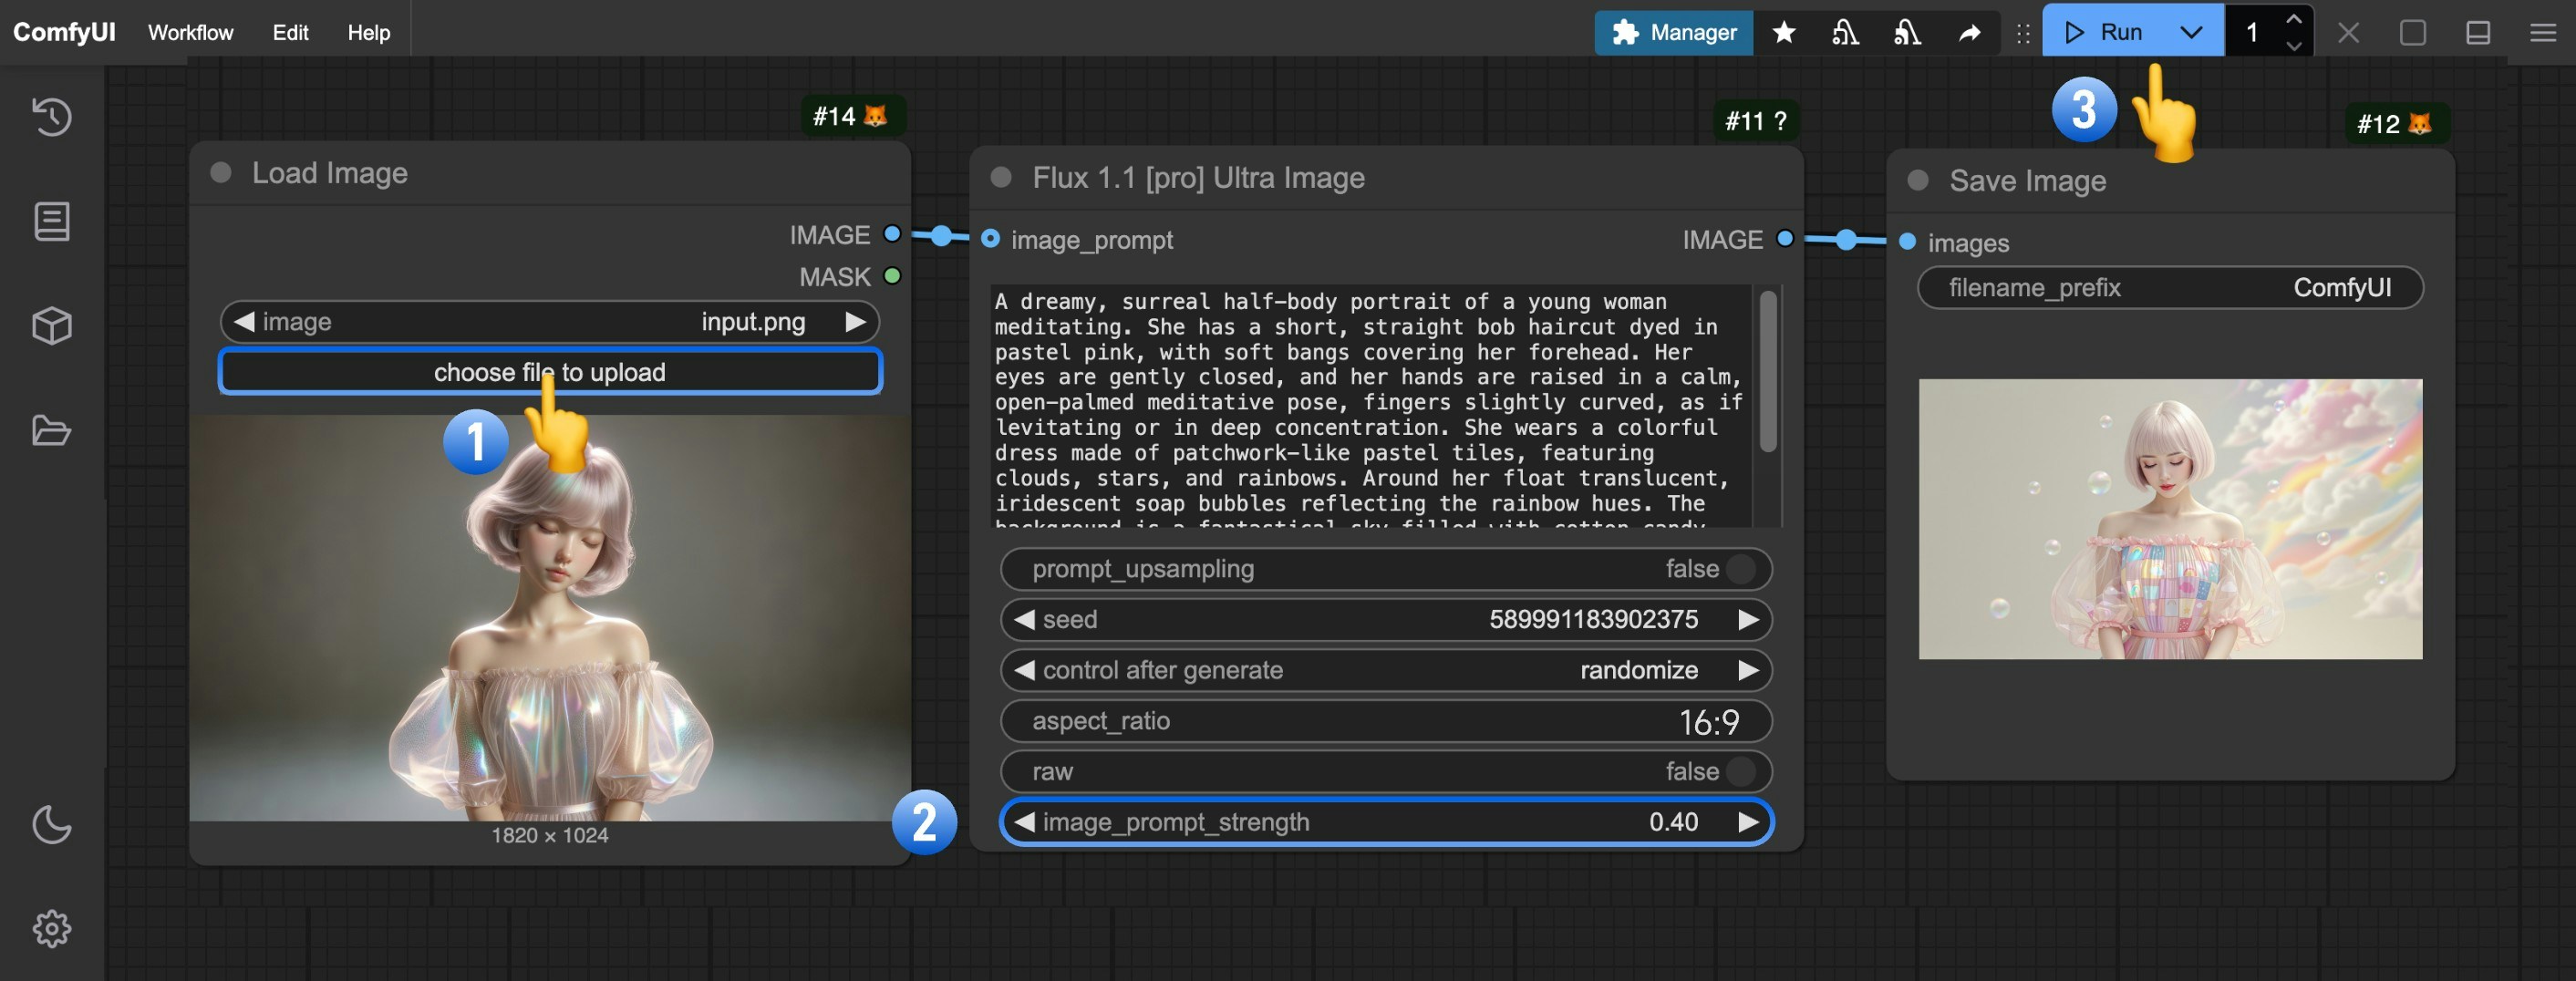
- Click Upload on the
Load Imagenode to upload your input image - (Optional) Adjust
image_prompt_strengthinFlux 1.1 [pro] Ultra Imageto change the blend ratio - Click
Runor use shortcutCtrl(cmd) + Enterto generate the image - After the API returns results, view the generated image in the
Save Imagenode. Images are saved to theComfyUI/output/directory
image_prompt_strength values: