

Moonvalley Text-to-Video Workflow
1. Download the Workflow File
Download the workflow file in JSON format
2. Follow the Steps to Run the Workflow
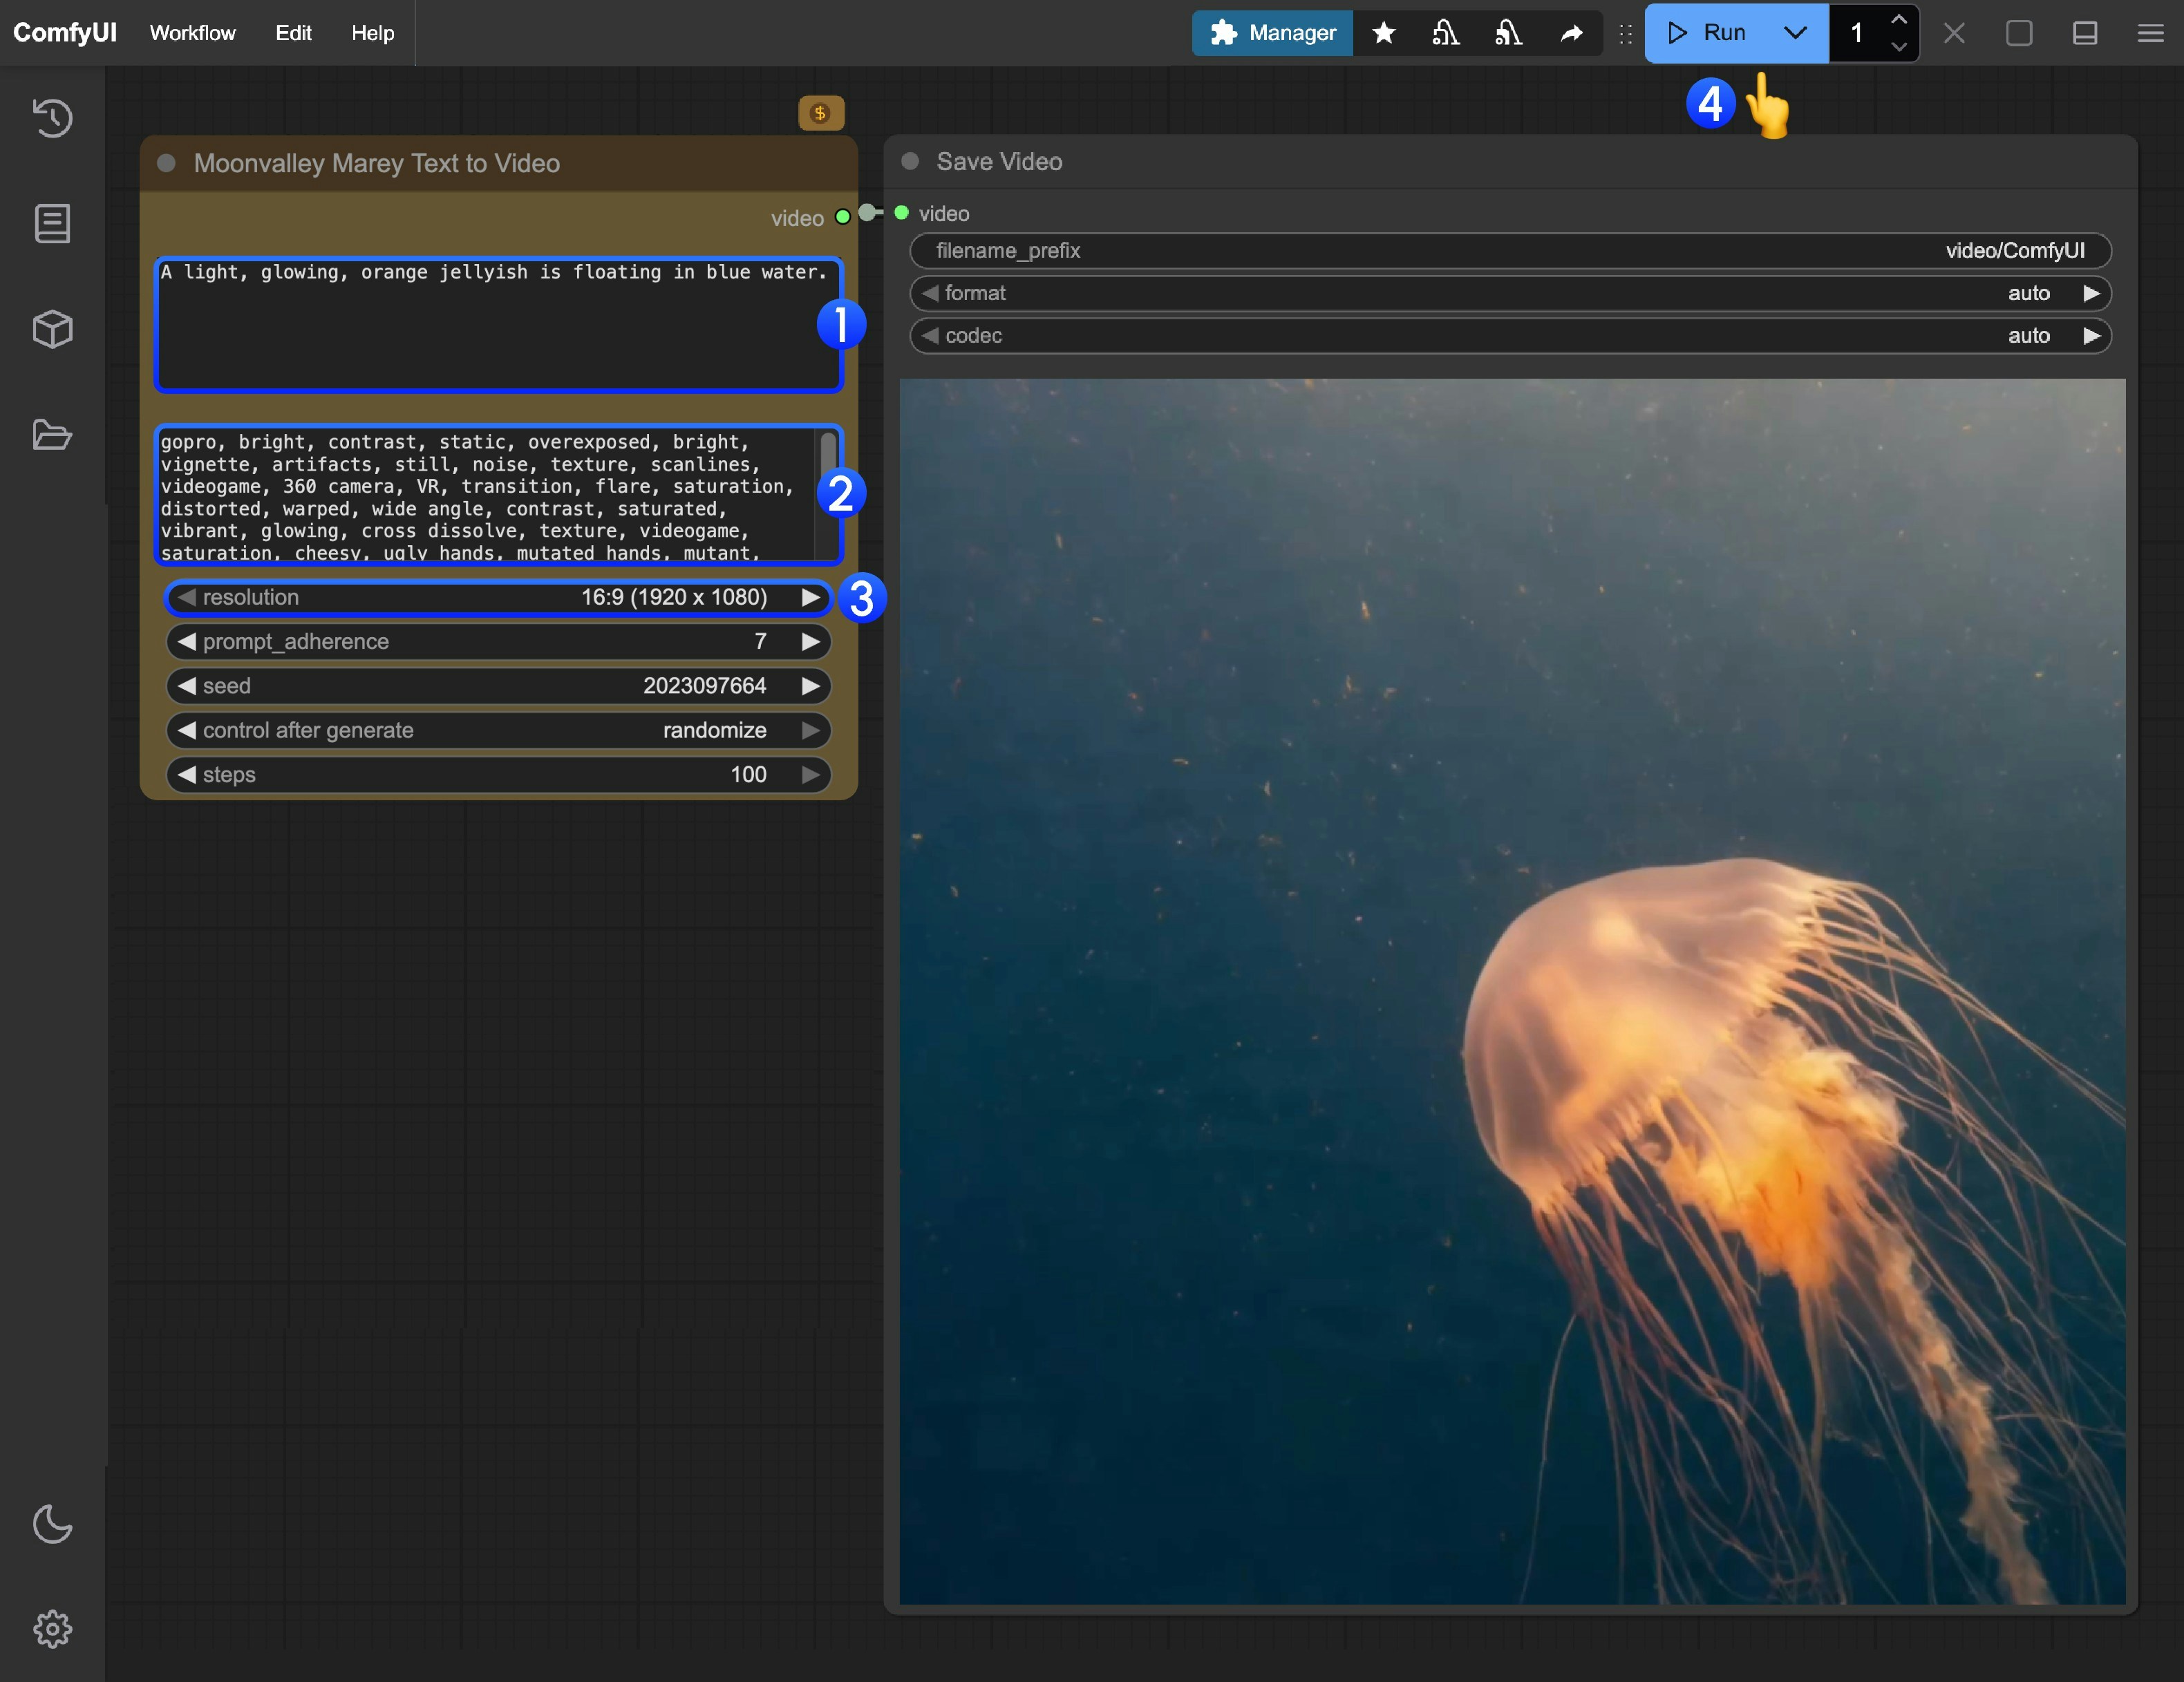
- Enter the positive prompt (content you want to appear in the video)
- Enter the negative prompt (content you do not want to appear in the video)
- Modify the video output resolution
- Click the
Runbutton, or use the shortcutCtrl(cmd) + Enterto start video generation - After the API returns the result, you can view the generated video in the
Save Videonode. The video will also be saved in theComfyUI/output/directory
Moonvalley Image-to-Video Workflow
1. Download the Workflow File
Download the workflow file in JSON format
Download the image below as the input image
2. Follow the Steps to Run the Workflow
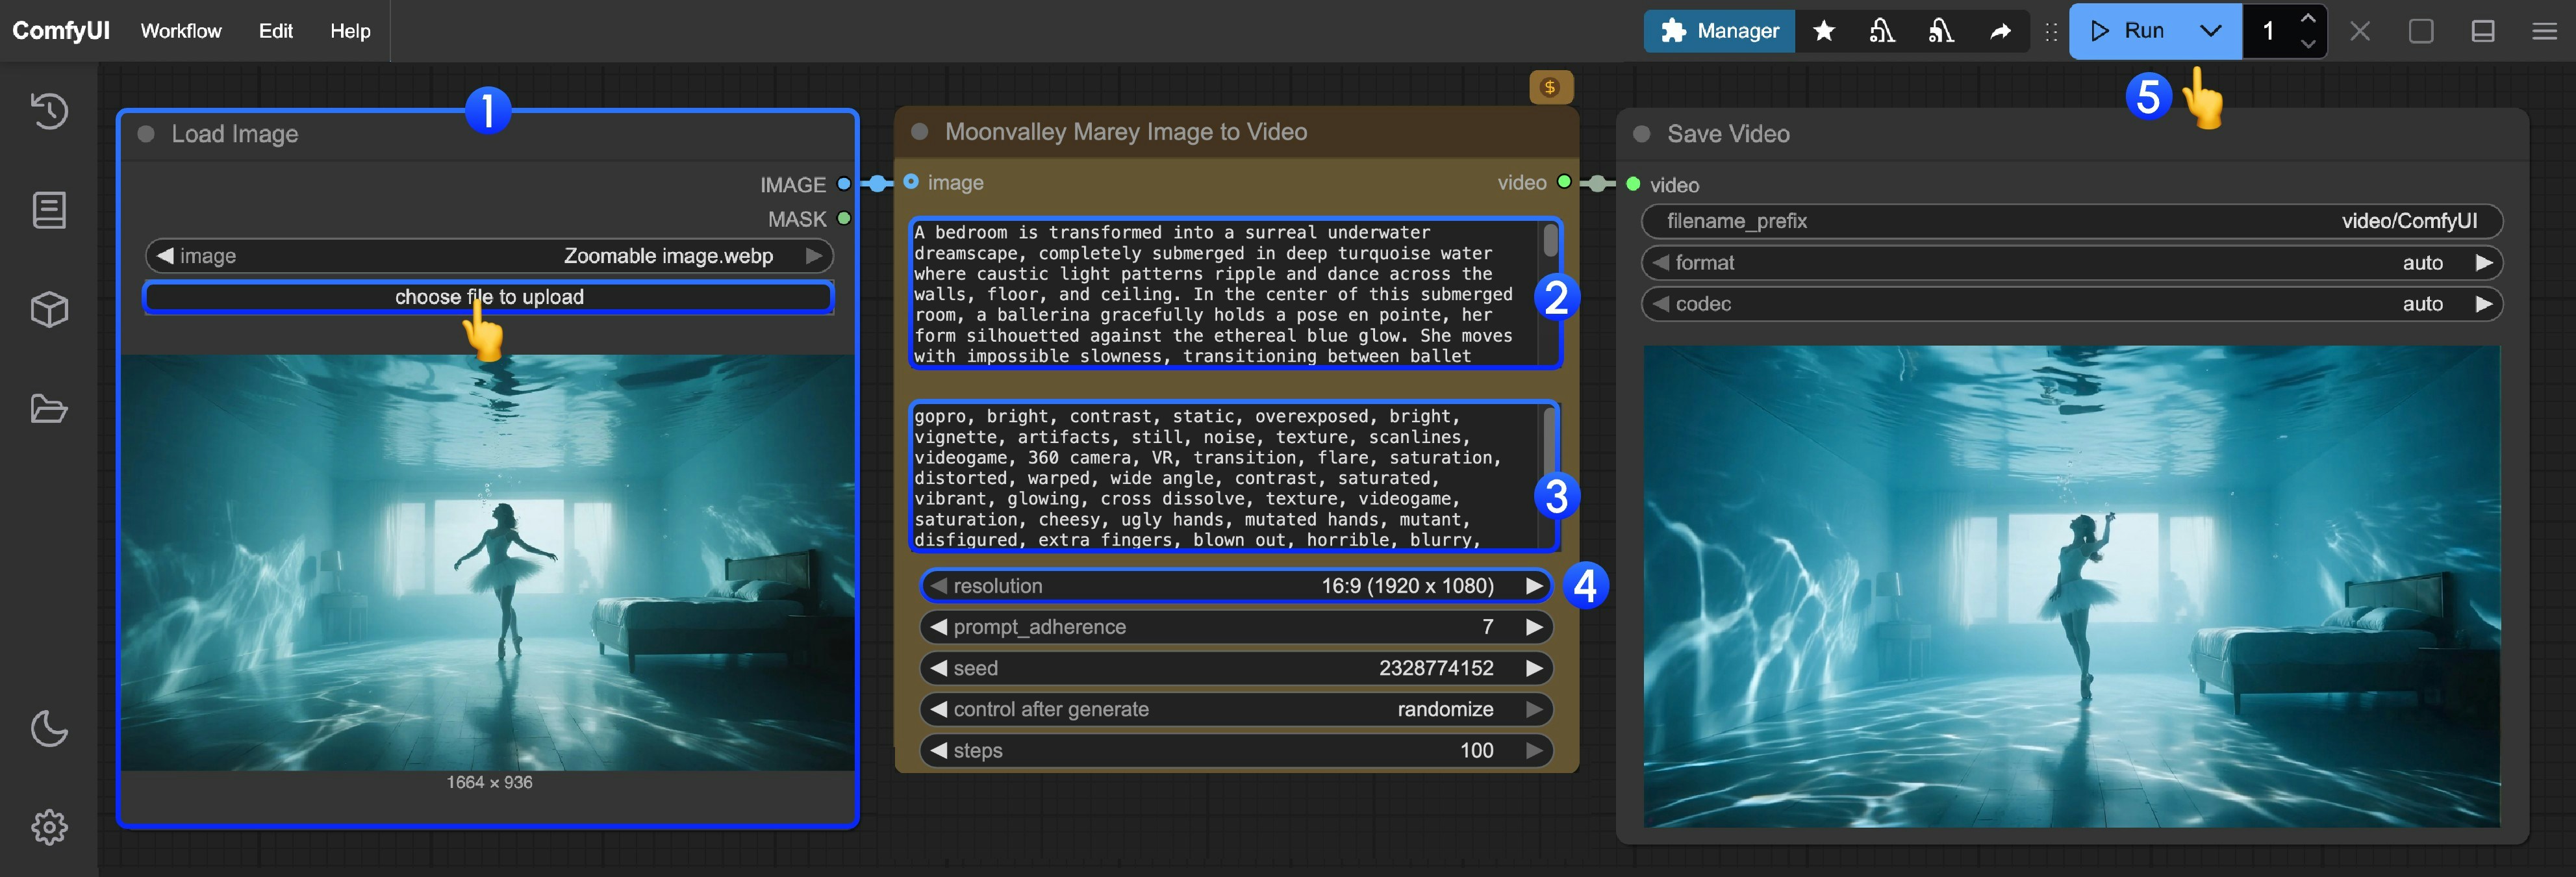
- Load the input image in the
Load Imagenode - Enter the positive prompt (content you want to appear in the video)
- Enter the negative prompt (content you do not want to appear in the video)
- Modify the video output resolution
- Click the
Runbutton, or use the shortcutCtrl(cmd) + Enterto start video generation - After the API returns the result, you can view the generated video in the
Save Videonode. The video will also be saved in theComfyUI/output/directory
Moonvalley Video-to-Video Workflow
TheMoonvalley Marey Video to Video node allows you to input a reference video for video re-drawing. You can use the reference video’s motion or character poses for video generation.
1. Download the Workflow File
Download the workflow file in JSON format
Download the video below as the input video:2. Follow the Steps to Run the Workflow
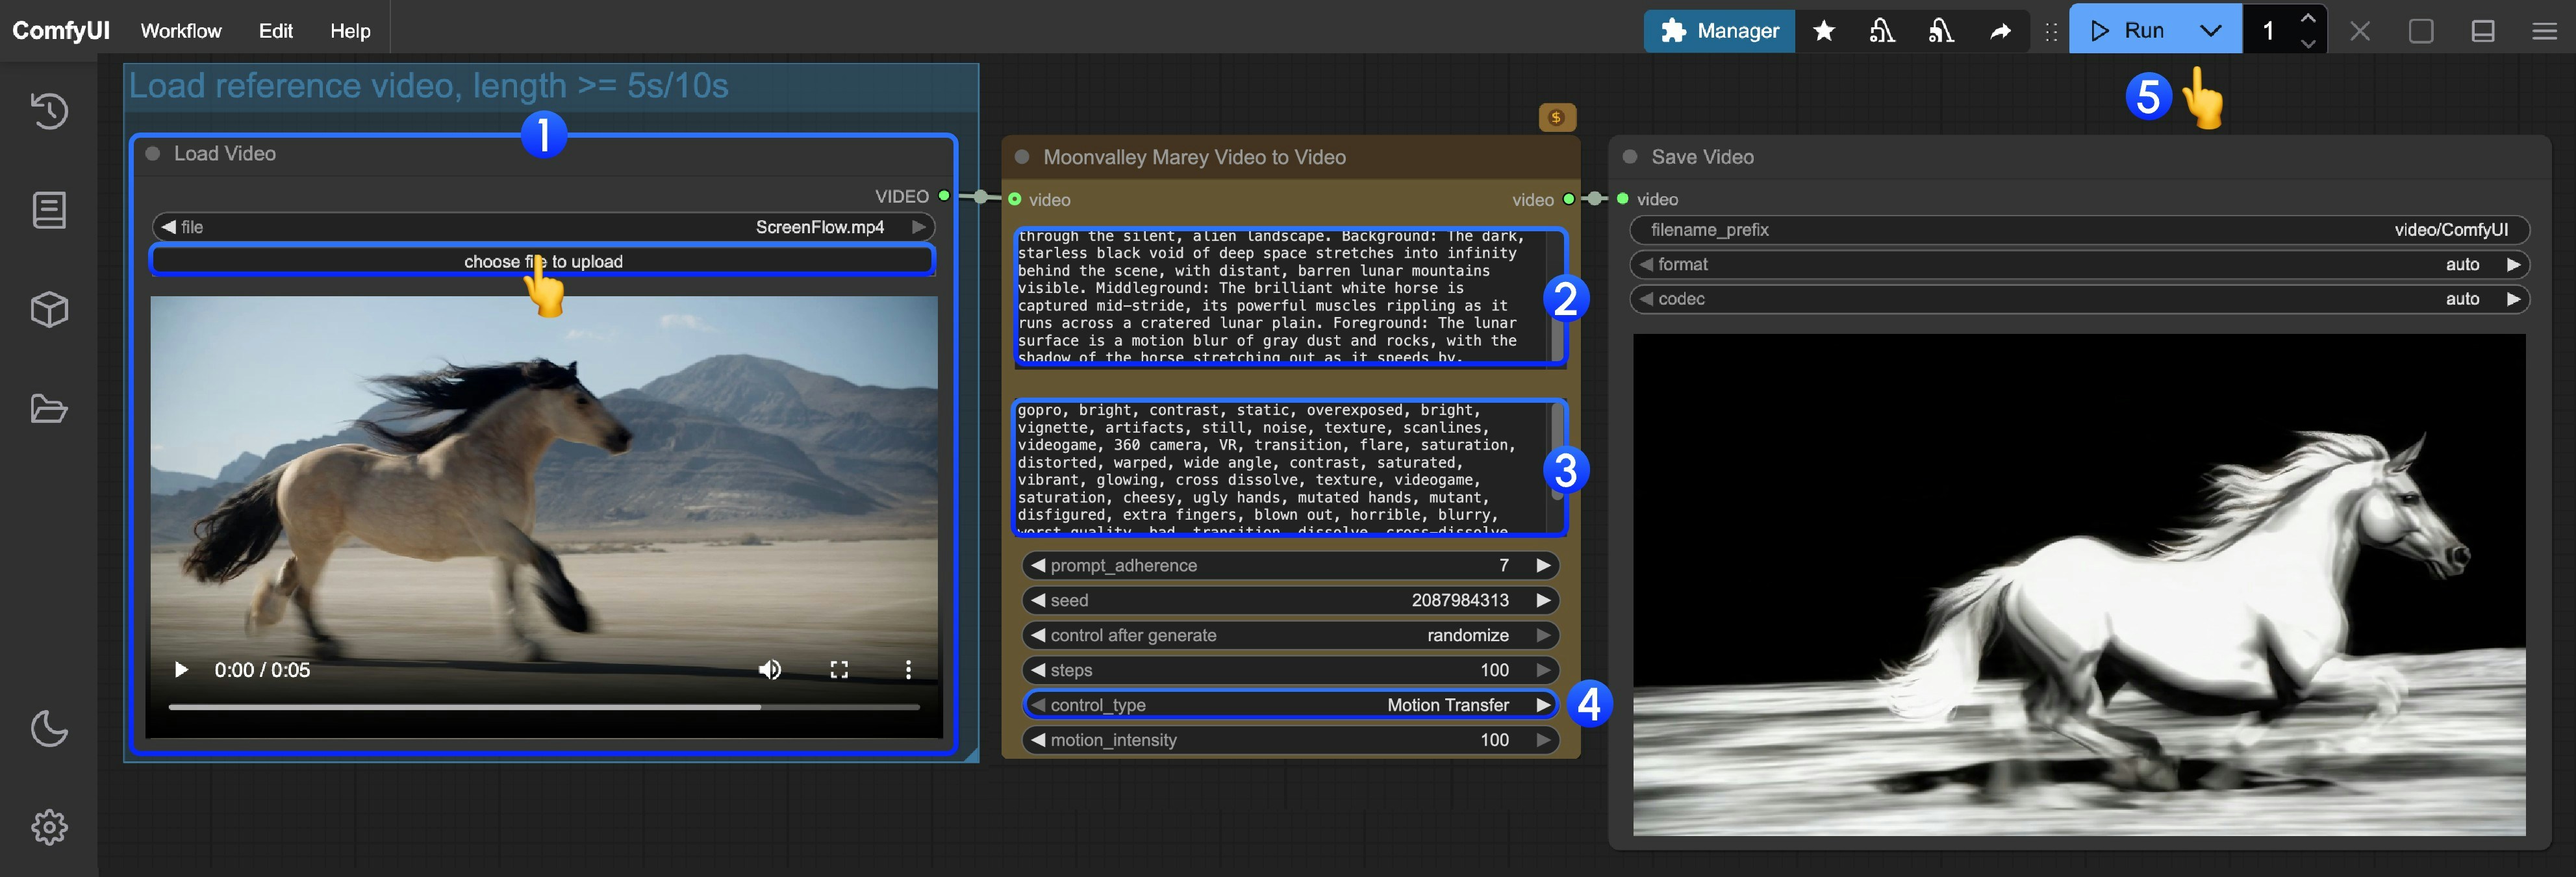
- Load the reference video (or your own material) in the
Load Videonode- If the final video duration is 5s, the input video must be longer than 5s
- If the final video duration is 10s, the input video must be longer than 10s
- Enter the positive prompt (content you want to appear in the video)
- Enter the negative prompt (content you do not want to appear in the video)
- Set the
control_typeparameter to choose the reference type for video re-drawingMotion Transfer: Generate based on the motion in the reference videoPose Transfer: Generate based on the character poses in the reference video
- Click the
Runbutton, or use the shortcutCtrl(cmd) + Enterto start video generation - After the API returns the result, you can view the generated video in the
Save Videonode. The video will also be saved in theComfyUI/output/directory