- Camera Motion Control: Supports various camera motion modes, including Pan Up, Pan Down, Pan Left, Pan Right, Zoom In, Zoom Out, and combinations thereof.
- High-Quality Video Generation: Based on the Wan2.2 architecture, it outputs cinematic-quality videos.
- 🤗Wan2.2-Fun-A14B-Control-Camera
- Code Repository: VideoX-Fun
Wan2.2 Fun Camera Control: Video Generation Workflow Example
The workflow provided includes two versions:- Using the Wan2.2-Lightning 4-step LoRA via lightx2v: This may result in reduced video dynamics but offers faster generation.
- The fp8_scaled version without the acceleration LoRA.
While the 4-step LoRA improves initial user experience, it may reduce video dynamism. By default, the accelerated LoRA version is enabled. To switch workflows, select the nodes and press Ctrl+B.
1. Workflow and Asset Download
Download the video or JSON file below and drag it into ComfyUI to load the corresponding workflow. The workflow will prompt you to download the models.Download JSON Workflow
Please download the image below, which we will use as input.
2. Model Links
The following models can be found in Wan_2.2_ComfyUI_Repackaged: Diffusion Model- wan2.2_fun_camera_high_noise_14B_fp8_scaled.safetensors
- wan2.2_fun_camera_low_noise_14B_fp8_scaled.safetensors
- wan2.2_i2v_lightx2v_4steps_lora_v1_high_noise.safetensors
- wan2.2_i2v_lightx2v_4steps_lora_v1_low_noise.safetensors
3. Complete the Workflow Step-by-Step
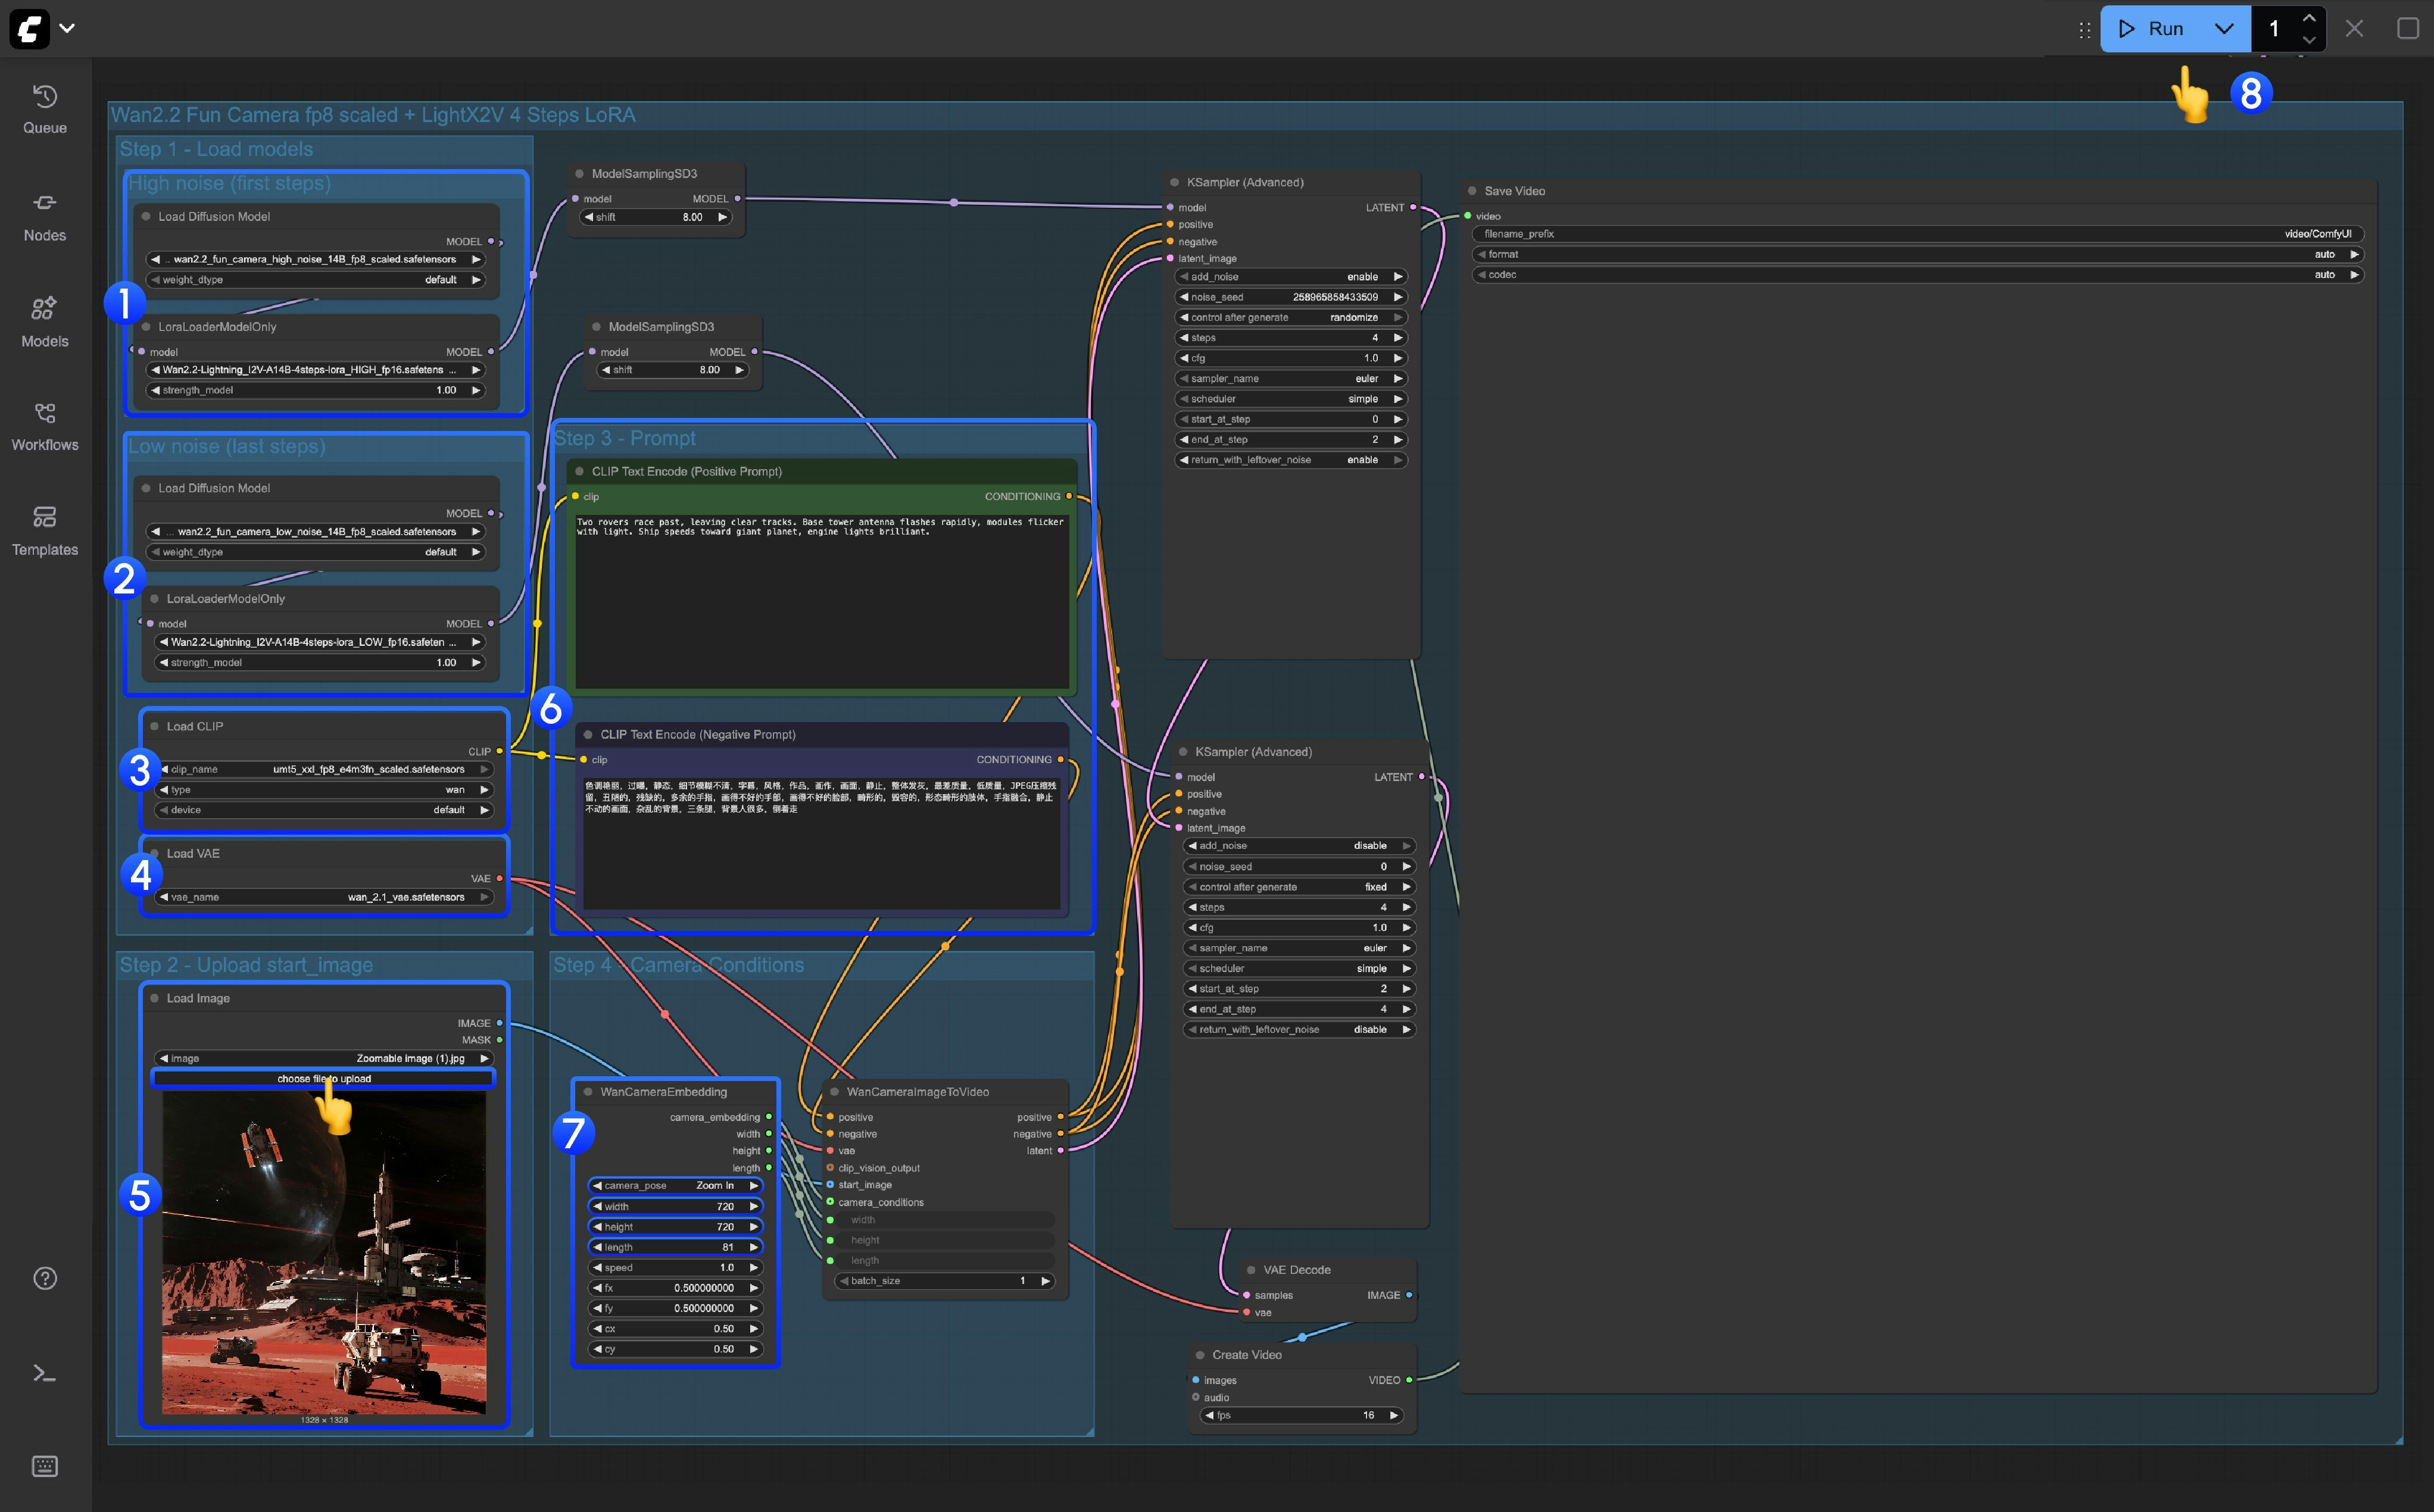
This workflow uses LoRA. Ensure the Diffusion model and LoRA are consistent; high noise and low noise models and LoRA must be paired accordingly.
- High noise model and LoRA loading
- Ensure the
Load Diffusion Modelnode loadswan2.2_fun_camera_high_noise_14B_fp8_scaled.safetensors - Ensure the
LoraLoaderModelOnlynode loadswan2.2_i2v_lightx2v_4steps_lora_v1_high_noise.safetensors
- Low noise model and LoRA loading
- Ensure the
Load Diffusion Modelnode loadswan2.2_fun_camera_low_noise_14B_fp8_scaled.safetensors - Ensure the
LoraLoaderModelOnlynode loadswan2.2_i2v_lightx2v_4steps_lora_v1_low_noise.safetensors
- Ensure the
Load CLIPnode loadsumt5_xxl_fp8_e4m3fn_scaled.safetensors - Ensure the
Load VAEnode loadswan_2.1_vae.safetensors - Upload the starting frame in the
Load Imagenode - Modify the Prompt (both Chinese and English are acceptable)
- Set camera control parameters in the
WanCameraEmbeddingnode:- Camera Motion: Select the camera motion type (Zoom In, Zoom Out, Pan Up, Pan Down, Pan Left, Pan Right, Static, etc.)
- Width/Height: Set video resolution
- Length: Set the number of video frames (default is 81 frames)
- Speed: Set video speed (default is 1.0)
- Click the
Runbutton or use the shortcutCtrl(cmd) + Enterto execute video generation