

Project Repository
ATI source code and documentation on GitHub
Online Trajectory Editing Tool
Visual tool to draw and edit motion trajectories on images
Key Features
- Unified Motion Control: Supports trajectory control for multiple motion types including objects, local regions, and camera movements.
- Interactive Trajectory Editor: Visual tool that allows users to freely draw and edit motion trajectories on images.
- Wan2.1 Compatible: Based on the official Wan2.1 implementation, compatible with environments and model structures.
- Rich Visualization Tools: Supports visualization of input trajectories, output videos, and trajectory overlays.
WAN ATI Trajectory Control Workflow Example
1. Workflow Download
Update your ComfyUI to the latest version, then download and drag the workflow file into ComfyUI, or find “Wan2.1 ATI” in the Template Library underWorkflow → Browse Templates → Video.

Run on Comfy Cloud
Open in Comfy Cloud
Download Workflow
Download JSON or search “Wan2.1 ATI” in Template Library
Input Image: video_wan_ati_input_image.jpg
Download the default input image, or use your own image as the starting frame.
2. Manual Model Installation
All models involved in this guide can be found here. Diffusion Model : Choose one version:Diffusion Model: Wan2_1-I2V-ATI-14B_fp8_e4m3fn.safetensors
Wan2.1 I2V ATI 14B diffusion model (fp8 precision). Place in
ComfyUI/models/diffusion_models/Text Encoder: umt5_xxl_fp16.safetensors
Full precision text encoder (higher quality, larger size). Place in
ComfyUI/models/text_encoders/Text Encoder: umt5_xxl_fp8_e4m3fn_scaled.safetensors
FP8 text encoder (lower VRAM usage). Place in
ComfyUI/models/text_encoders/VAE: wan_2.1_vae.safetensors
Wan2.1 VAE model. Place in
ComfyUI/models/vae/CLIP Vision: clip_vision_h.safetensors
CLIP Vision model for processing reference images. Place in
ComfyUI/models/clip_vision/3. Complete the Workflow Execution Step by Step
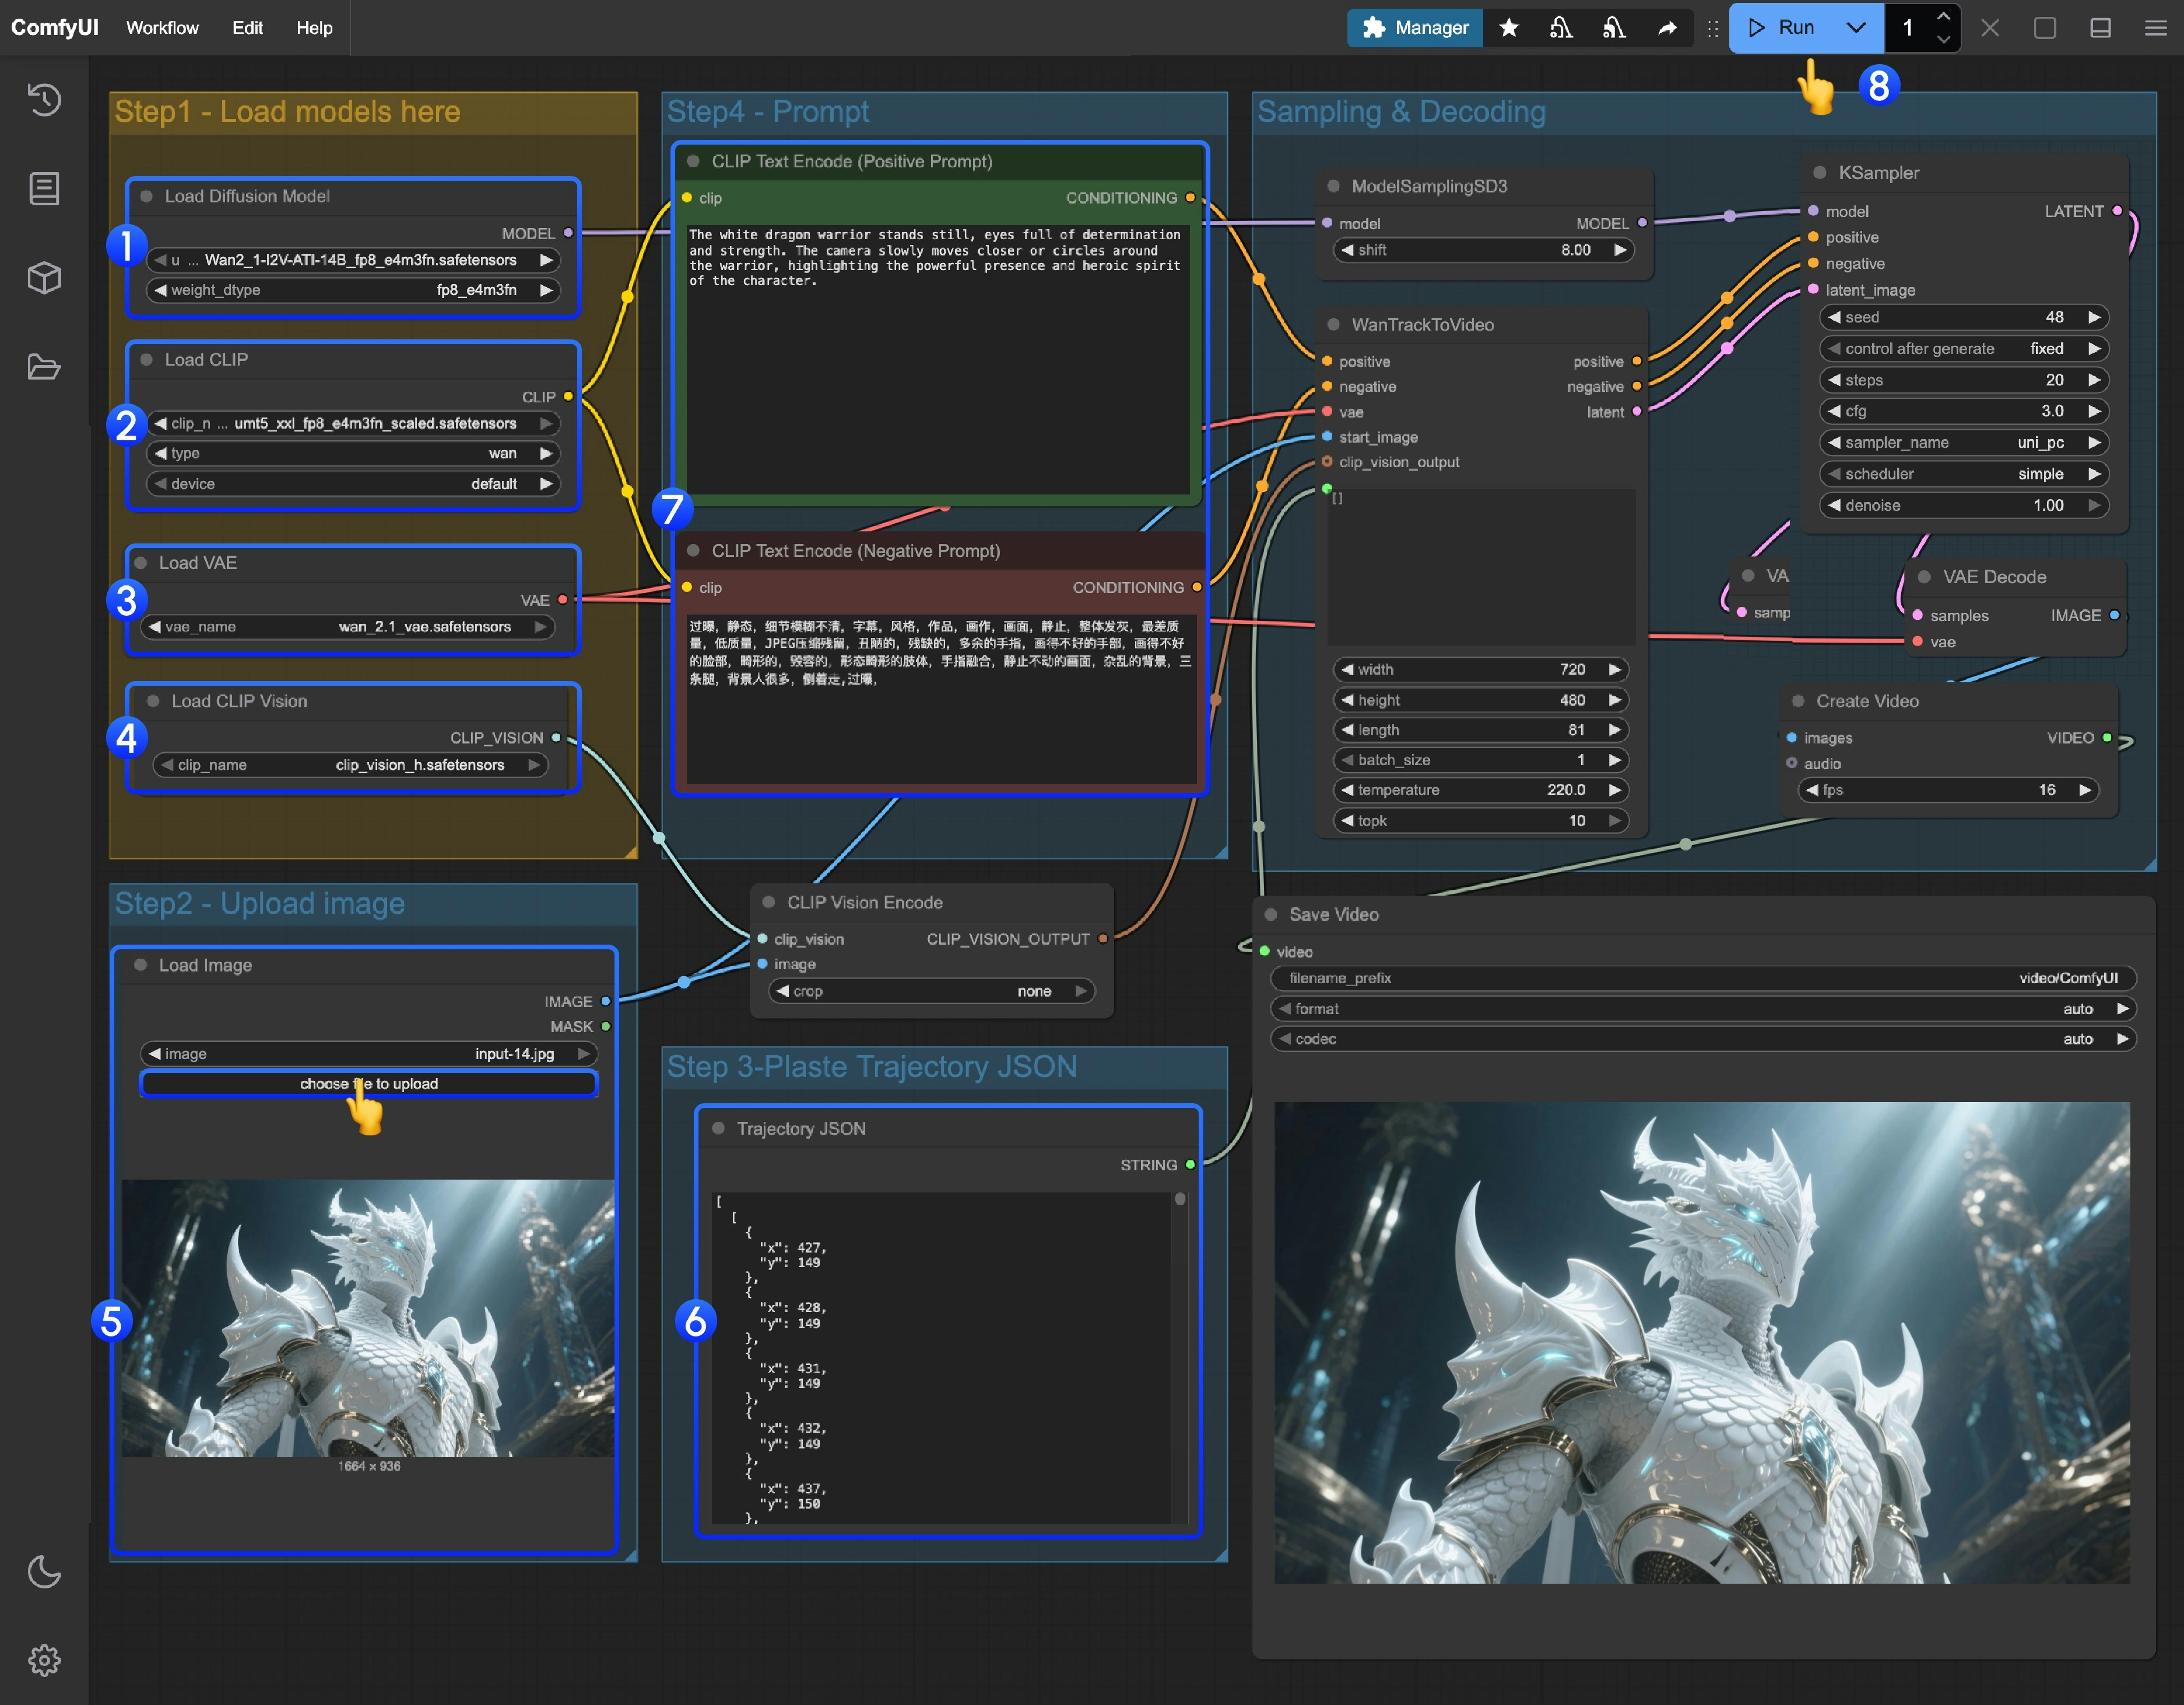
- Ensure the
Load Diffusion Modelnode has loaded theWan2_1-I2V-ATI-14B_fp8_e4m3fn.safetensorsmodel - Ensure the
Load CLIPnode has loaded theumt5_xxl_fp8_e4m3fn_scaled.safetensorsmodel - Ensure the
Load VAEnode has loaded thewan_2.1_vae.safetensorsmodel - Ensure the
Load CLIP Visionnode has loaded theclip_vision_h.safetensorsmodel - Upload the provided input image in the
Load Imagenode - Trajectory editing: Currently there is no corresponding trajectory editor in ComfyUI yet. You can use the following link to complete trajectory editing.
- If you need to modify the prompts (positive and negative), please make changes in the
CLIP Text Encodernode numbered5 - Click the
Runbutton, or use the shortcutCtrl(cmd) + Enterto execute video generation