- ComfyUI version:which build of ComfyUI is installed
- Custom nodes:every custom node with its version or commit hash
- pip packages:all Python packages installed in the environment
Accessing Snapshots
From any instance card, click the ⋮ menu (1) and select Restore Snapshot (2) to open the Snapshots tab directly.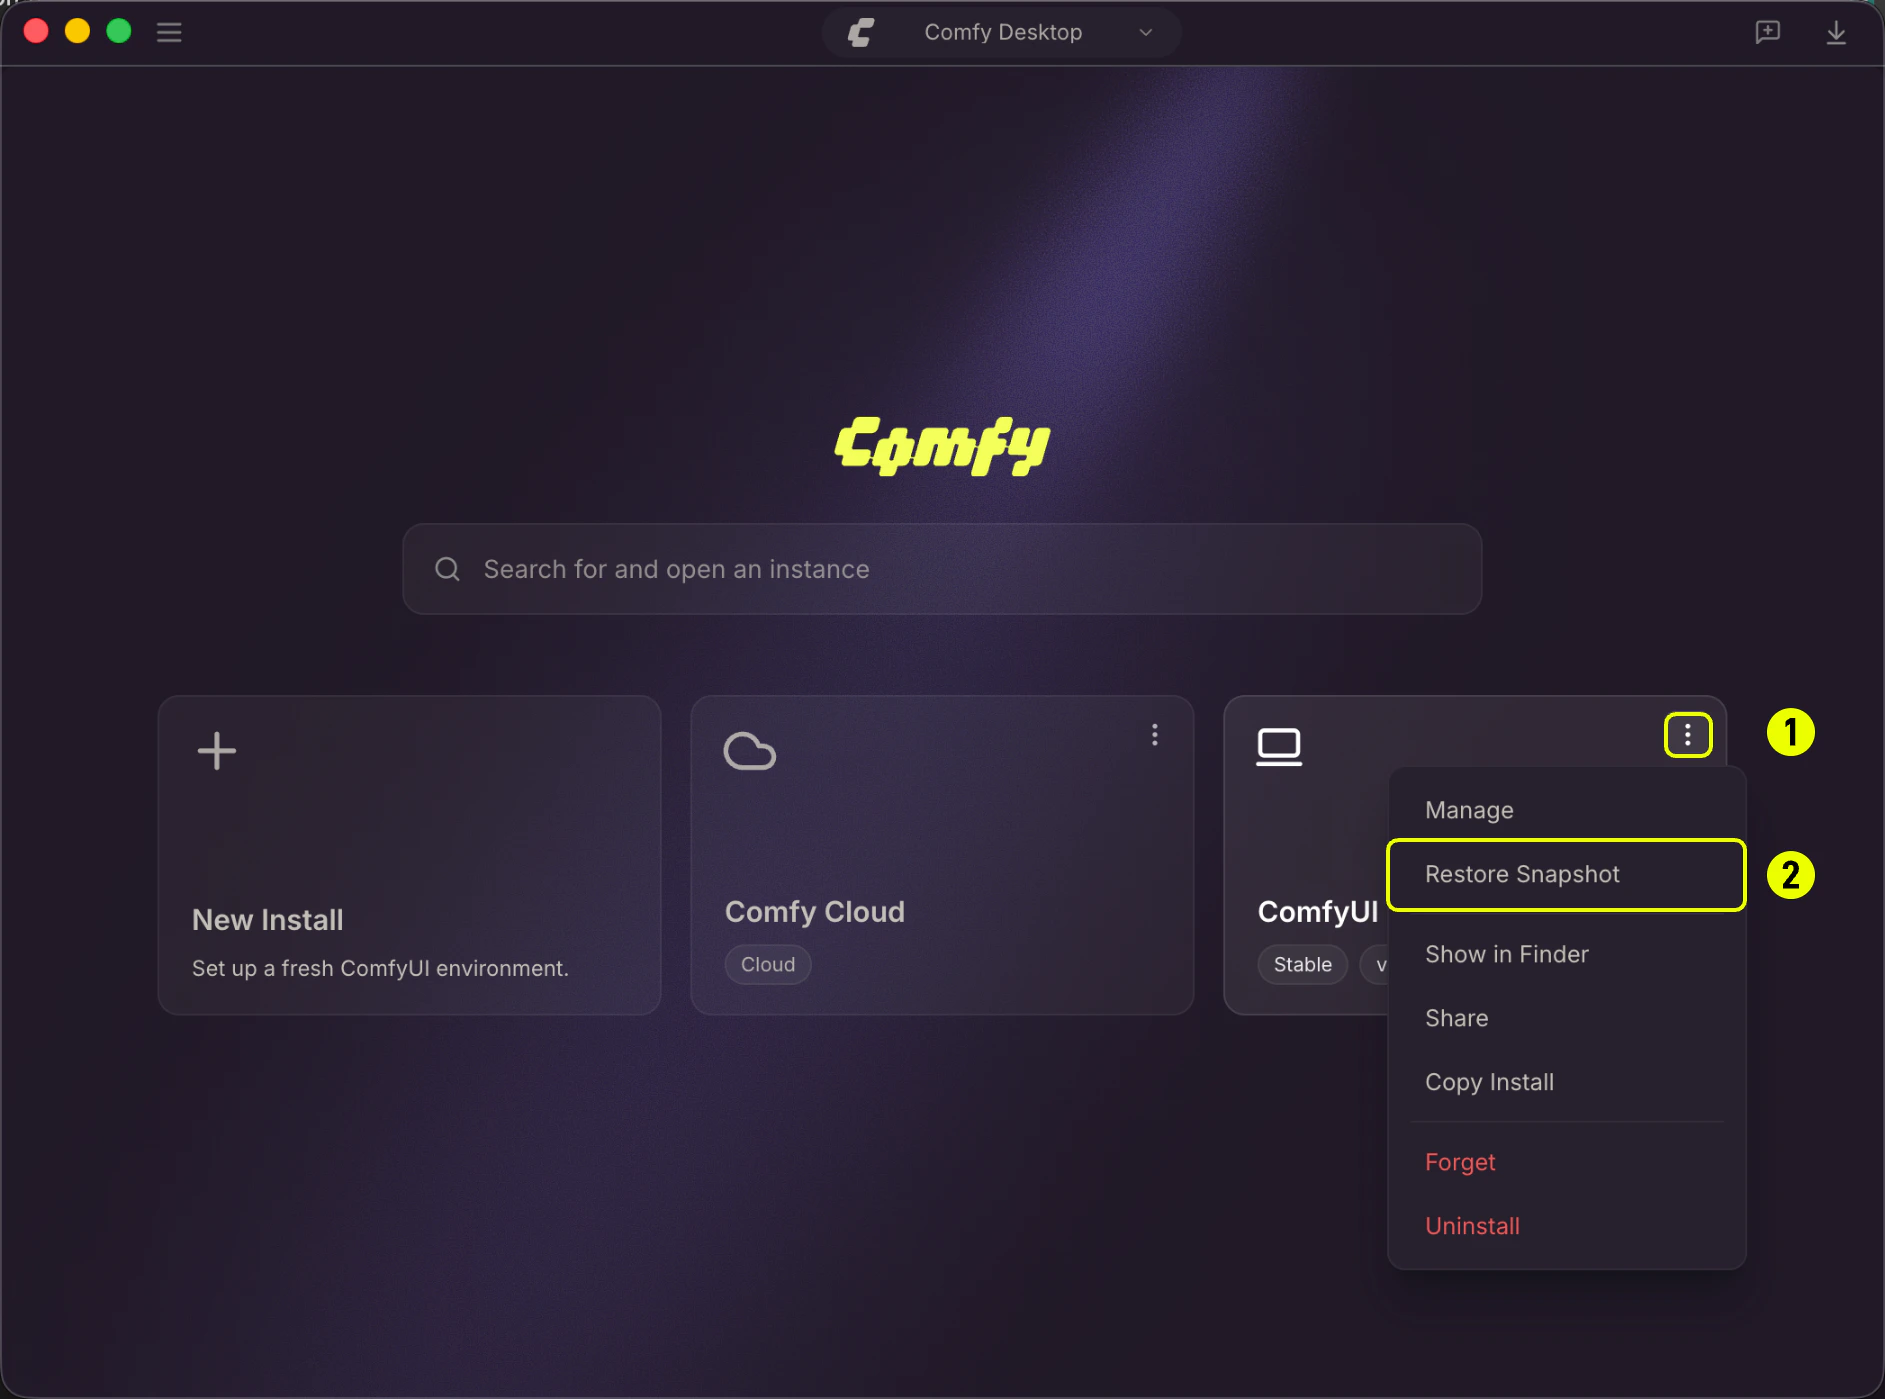
Snapshots Tab Overview
The Snapshots tab is your hub for managing all snapshot actions. The timeline shows snapshots for the instance, newest first. Key actions available:
- Selected instance: The instance whose snapshots are shown in the timeline.
- Snapshots tab: Currently active tab in the Manage panel.
- Import: Import a snapshot file exported by another user or instance.
- Export All: Export all snapshots for this instance as a single
.jsonfile. - Create Snapshot: Create a manual snapshot of the current instance state.
- Export: Export a single snapshot from the timeline.
- Delete: Delete a manual snapshot from the timeline. Restore: Restore the instance to a specific snapshot’s state.
Create a Manual Snapshot
Click Create Snapshot (5) in the Snapshots tab header. You can optionally add a label (e.g. “Before adding LCM LoRA”) to identify it later. The snapshot will capture:- Current ComfyUI Git commit
- All enabled custom nodes (git clone URL + commit, or CNR ID + version)
- All pip packages from
pip freeze
View Snapshot Details
Click on any snapshot card to expand its details. The inspector shows:- ComfyUI:Commit hash, base tag, and how many commits ahead of the release tag
- Custom Nodes:All recorded nodes with their type (git / CNR), URL, version/commit, and enabled status
- Pip Packages:Full list of recorded pip packages with pinned versions
- Diff vs Previous:Compare with the snapshot right before this one
- Diff vs Current:Compare with the instance’s current state
Restore from a Snapshot
- In the Snapshots tab, find the snapshot you want to restore.
- Click Restore:a preview shows the diff (what will change).
- Review the changes and click Confirm to begin the restore process.
- Check out the recorded ComfyUI version (Git commit)
- Install missing custom nodes, switch versions, and enable/disable nodes as needed
- Restore pip packages: install missing packages, upgrade/downgrade to the recorded version, and remove extras
- Run post-install scripts for any newly installed or version-switched custom nodes
post-restore snapshot so you can undo the restoration if needed.
Delete a Snapshot
Manual snapshots can be deleted individually. Click the ✕ button on any manual snapshot card. Auto-snapshots (boot, update, etc.) cannot be deleted individually; use Prune to clean them up in bulk.Create an Instance from a Snapshot File
If someone shares a snapshot file with you, you can use it to spin up a new ComfyUI instance with the exact same configuration.- Click the ☰ menu (1) in the top-left corner of the Chooser view and select Load Snapshot (2).

- Browse your file system and select the
.jsonsnapshot file.

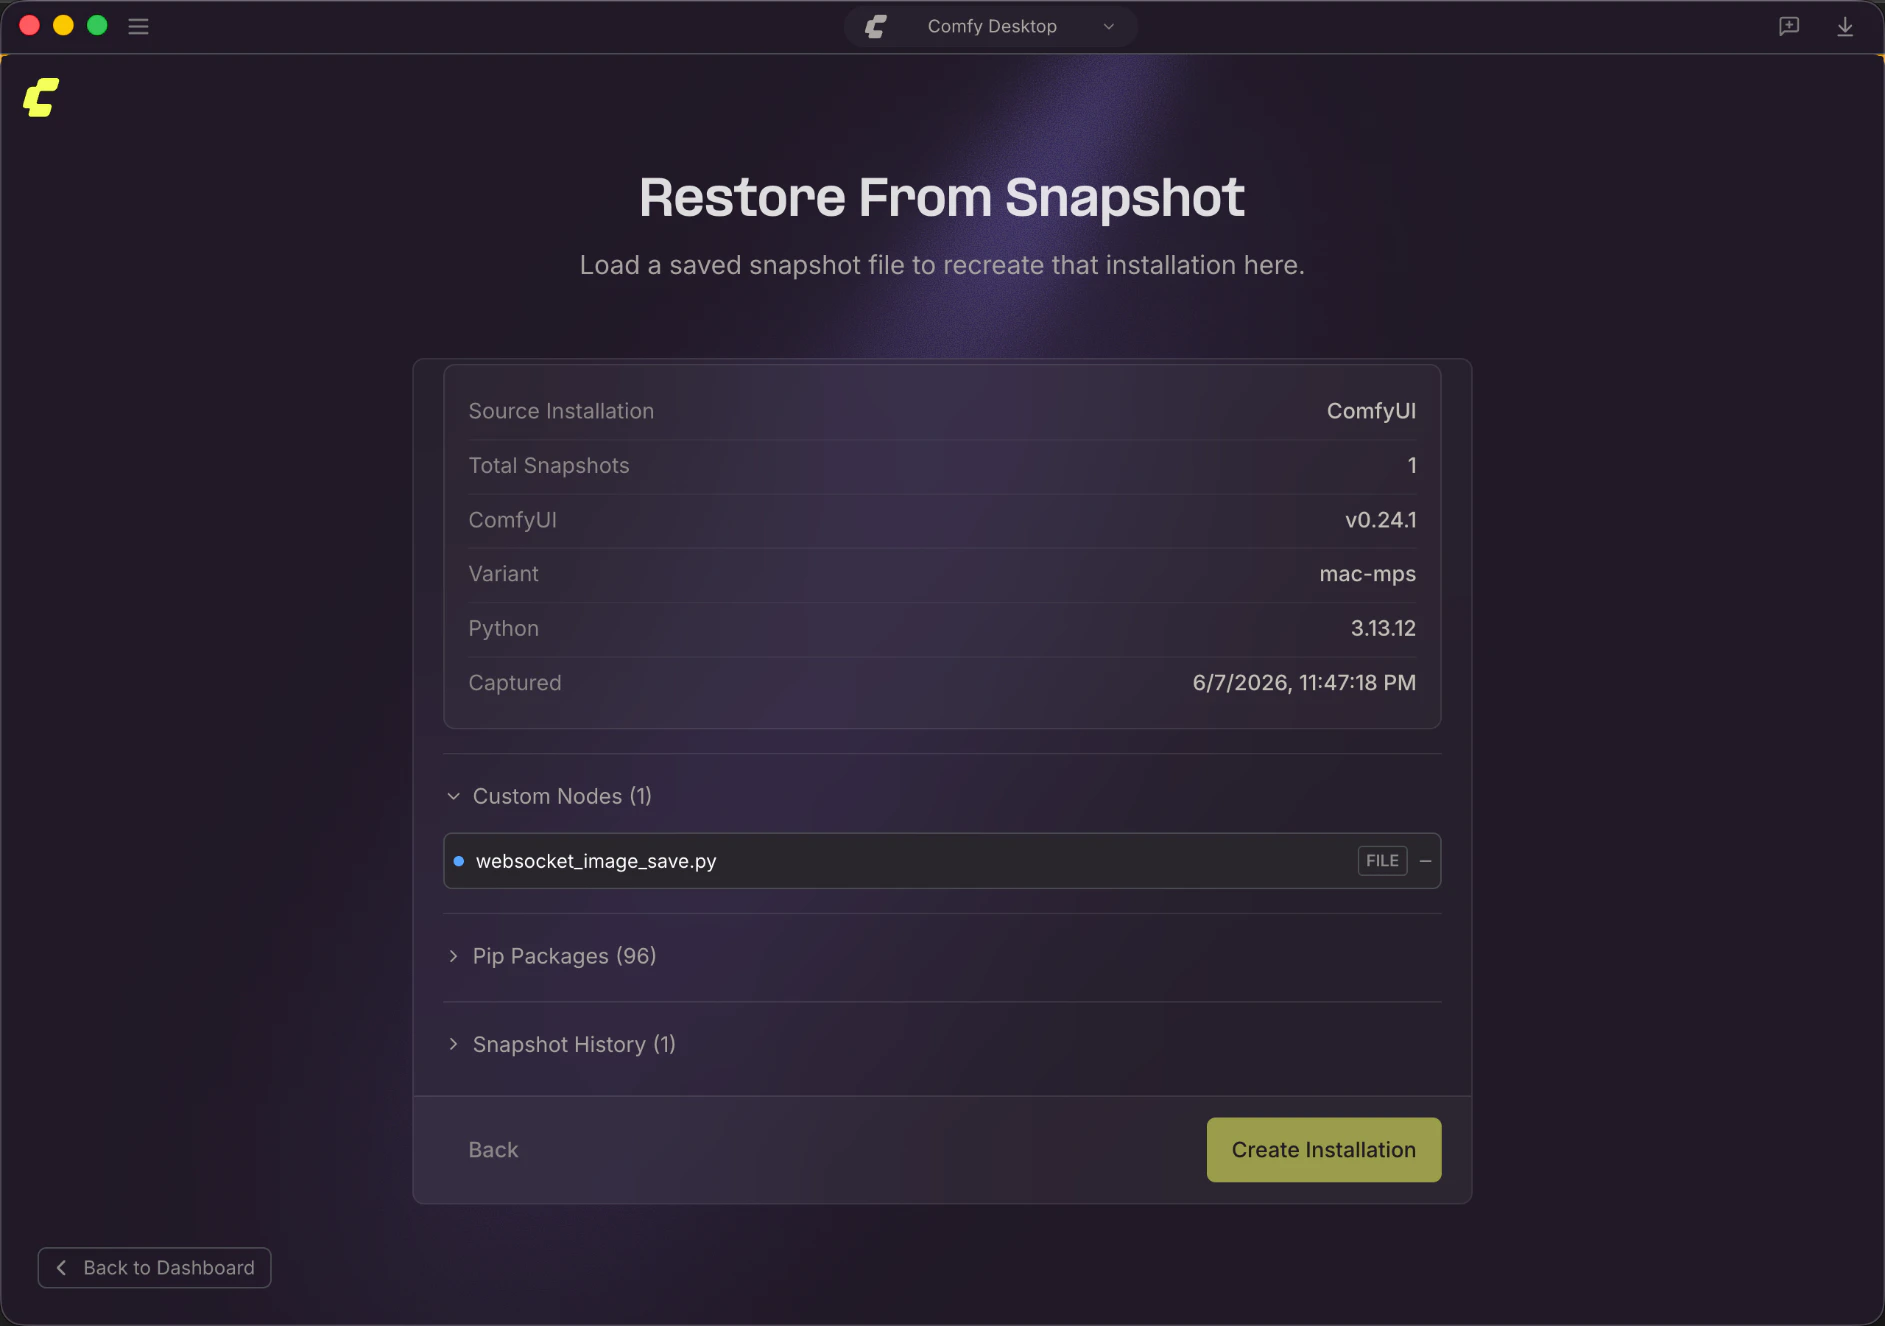
- A preview shows the snapshot contents: source instance name, ComfyUI version, custom nodes, and pip packages. Review the details, then click Create Installation to build a new instance from the snapshot.